


Likes
Comments
Share


Likes
72
Share


@Natrona
Follow
Week 11 July 16-22 hello friends and followers, welcome to week 11.
I started seeing trichomes last week on Gaia and Circe. I don't smell anything from them. Only cream caramel gives off any fragrance. After flushing for 3 weeks, I've reintroduced fertilizer. I am using 1/3 to 1/4 the recommended dosage. How do I know what is the correct range for ec and whether I've unlocked the nutritional bind.?
7/16 flushed each with 1 gallon of water.
7/17 flushed each with 1 gal
7/18 fertilized at reduced strength each got 3.5 liters. Tps1 15ml, cal mag 1 top, big bloom 6 tbsp, signal 2.5 ml. Pictures and video.
7/19 no water, tent cleaning day, vacuum, wipe up dried spills. Took the girls outside for a few hours.
7/20 reduced fertilizer in 2 gals Tps1 7.5 ml, signal 1.25ml. Each girl got only 2 liters today. There was very little run off only Gaia with EC .80, ppm 570. Their tent mate cream caramel is very sticky and fragrant.
This week has been very busy. I packed up more geneology albums and shipped to my sister. I found my some of grandmother's award winning photographs and awards, certificates and brass plaques. Until WWII women did not work outside the home. If they did, they were teachers, nurses or secretaries.
During the early 1920-40 she raised her son as a single mother and found work during the depression as an executive secretary.
Her family men were bankers and merchants so she had awareness of business practices. During her employ, she won an award of $2 for a human resource suggestion on the proper attire for women in the offices and women on the manufacturing lines.
She continued working until the 50s. Her family always had cameras . That's how i have so many pictures from 1900. But she immersed herself in photography once she retired.. So when my Dad was in post WWII Japan, he bought her a state of the art camera. I came across so many self photos. She was the queen of selfies. Interesting to see the fashions over the years. Let me know if you would like to see some fashion pics.
7/21 made cookies. See week 1 Natronas recipes. The almond flour cookie is the basic recipe for cookies. The r3cipe calls for chocolate chips but It is versatile in that you can add nuts, dried fruit, caramels etc. If you want to taste my cookies the way I make them, you have to chop Lindt 78% dark chocolate bars and use that instead of chips which are sweeter.This time I added macadamia nuts as well. Yummy.
7/22 light defoiliation , and no water or nutrients.

Processing
Likes
25
Share


@Master_weeda
Follow
Bonjour à tous les padawans et les maîtres jedis
Pour cette semaine 4 au jour 23 ma plante fais 17 centimètres et son sixième noeud apparaît je décide donc de pratiquer un LST sur ma plante.
Pour ce j'utilise du fil de fer galvanisé que je plante directement dans le substrat en faisant attention de ne pas endommagé les racines car n'oublions pas que ce qui pousse dessus pousse aussi dessous.
Jour 17 je pulvérise du une solution composé d'une cuillère à café de savon noir mou dilué dans un litre d'eau en prévention d'éventuels nuisibles.
Je corrige mon LST suivant la pousse de ma plante ...
Pour ma par c'est la manière dont je procède mais petit rappel de la technique du LST:
Quand commencer à appliquer la technique LST
De nombreux cultivateurs commencent la manipulation dés que les plantes possèdent entre 3 et 6 nœuds ou une paire de feuilles. Durant cette première étape de la croissance, le tronc encore flexible est pliable sans risque qu’il ne se casse, même si au fur et à mesure du développement de la plante il sera de plus en plus difficile de le plier. Nous pouvons continuer à guider la croissance des branches durant toute la culture, même durant la floraison, ce qui pour cette étape représente un grand avantage face à la taille, qui n’est pas du tout recommandé une fois que la formation des têtes commence, cela stressera en effet la plante, ce qui aura pour effet de retarder la récolte.
Comment appliquer la technique de guidage LST
Si nous sommes prudents, la flexibilité naturelle des fibres du cannabis permet de plier leur tronc et branches avec une relative facilitée, même durant la floraison des plantes.
En utilisant une corde fine, nous pouvons accrocher la pointe de la plante à la base du pot par exemple ou à un tuteur que nous aurons planté dans le substrat. Nous plierons le tronc avec précaution et nous le fixerons avec la corde, à partir de là, nous pouvons augmenter progressivement la tension de la corde, chaque jour un peu plus, jusqu’à obtenir la position souhaitée. Soyez attentif à la réaction de la plante, essayez de ne pas appliquer trop de pression sur la corde et rappelez-vous que la flexibilité des branches peut varier d’une plante à l’autre.
Pour obtenir de meilleurs résultats, il suffit de suivre quelques règles simples. Pour commencer, nous devons choisir une corde fine mais pas trop pour ne pas blesser les troncs au fur et à mesure qu’ils grandissent et qu’ils deviennent plus gros.
Nous pouvons utiliser des crochets en plastique souple ou de n’importe quelle autre matière flexible pour éviter d’endommager les plantes. Spécialement en intérieur, utiliser des cordons en plastique de couleur (voir les diaries de @Silky) est très pratique pour voir facilement les accroches et faciliter le travail au milieu du réseau formés par les cordes, les tuteurs, les mailles ou les supports que nous aurons dans la culture. Bien entendu, en culture extérieure et surtout en guerilla nous ferons juste le contraire et nous utiliserons des matériaux de couleur qui n’attirent pas l’attention pour que notre jardin reste discret.
Pour stresser les plantes au minimum, la mieux est de réaliser ces manipulations le soir ou juste après que les lampes en intérieur s’éteignent, ce qui leur permettra de se remettre durant la nuit. Normalement, le jour suivant nous pourrons observer comme les pointes des branches que nous avons pliées se dressent de nouveau vers le haut à la recherche d’une source de lumière.
Je combine un pincage d'Apex au LST cela me permettra d'avoir une canopé plus homogène donc une meilleure pénétration lumineuse et par conséquent un meilleur rendement.
Que la force soit avec vous💪


Likes
8
Share


@Drtomb
Follow
Start of Week 3
There was 5 inches of growth over the last 7 days. It is a total of 25inches now, when I started flower it was 16 inches. My guess is that it will get to around 32"
I have two sections of plants growing from the same feeding resivour. For the first time ever I've decided to do a mid grow flush.
I ran through 1-2gal of water on each 5 gal bucket. I use only perlite as medium so I figured that I wouldn't need much to flush. It all drained back to the main resivour and I disposed of it. I ran a 24hr cycle of straight PHed tallboy filtered tap water (160ppm) and then drained that again (340ppm).
I refilled the resivour with fresh nutes and PHed again (1100ppm)

Likes
10
Share


@mikheil007
Follow
Every day the whole plant iis getting heavier and the buds are growing bigger minute by minute...
Thank you Barney’s Farm for such a super quality of every your seed and produce!...

Likes
14
Share


@JamieKnolliver
Follow
Grüßt euch Freunde!
Wir sind nun am Ende der 4. Woche.
Einige Blätter verfärben sich Lila.
Habe in dieser Woche nicht viel getan, außer Wasser und Dünger zu geben.
Die PPOG entwickelt in der 4 Woche wirklich heftig Resin.
Sie sieht wirklich frosty aus, gefällt mir !☺️
Mir ist nun aufgefallen, dass die unteren Blätter alle die Spitzen nach unten neigen.
Man nennt das auch ‚Adlerkrallen‘ und ist auf einen Stickstoff Überschuss zurückzuführen.
Habe durch die Verfärbung der Blätter auf einen Mangel geschlossen, war vielleicht nicht die beste Idee mehr Bio Grow zuzuführen😂
Werde im laufe der 5 Woche keinen Bio Grow mehr verwenden und beobachten wie sich das entwickelt.
Euch allen eine gute Woche !💚


Likes
20
Share


@Bread_n_Buds
Follow
Time flies, we have arrived in a flash at day 16, it seems like the other day that the first young ladies were appearing on September 1st. "Do you remember.....nanannana Septermber"
She is the Runtz and among the Zamnesia strains she is a diamond tip. I have grown her in all versions and she has always been super, I can only advise you to try her. The two Runtz are growing very balanced, the internodal distance is medium and regular like the growth, we have no leaps or stretching, she is a very proportionate plant. She is also slightly, very but very slightly under fertilized because I went too slow. Follow the table, especially if you make the personalized one from Plagron, you can't go wrong.
--- feeding program - As I mentioned I was shy about fertilizing and the plants are slightly, very slightly faded, let's learn to notice these small signs and with the normal doses after two or three waterings we should be fine. You have to look at the plants guys.
- Power Roots - 1ml/l
- Alga Grow - 2 ml/l (instead of 4 ml/l I made this mistake)
- Pure Zym - 1 ml/l
- Sugar Royal - 1ml/l
- Vita Race - 0,5 ml/l
- The 100% Organic pack by Plagron can be found on Zamnesia at the link: https://www.zamnesia.io/it/11457-plagron-easy-pack-natural.html We are giving a lot of humidity with a humidifier and we oscillate between 65% and 70%.
// Strain Description // Guys, we have really reached a turning point! Our breeders have recreated one of the most sought-after strains by Californians: the very powerful and exquisitely delicious Runtz. This cross between Gelato and Zkittlez is everything you could want from a cannabis strain: tasty, powerful, balanced, productive and fast flowering. Buy the seeds and try it yourself!
- Get a seed of this fantastic strain --- https://www.zamnesia.io/it/6000-zamnesia-seeds-runtz-femminizzato.html
- Soil and Fertilizers entirely organic --- https://plagron.com/en buy on www.zamnesia.io
- Growbox and air sistem --- https://www.secretjardin.com/
- Light - Sp3000 - https://marshydro.eu/
- Music and sound --- I made my girls listen to 432hz frequencies and music from www.radionula.com
- Z --- You can find these seeds, much more from the world of cannabis, mushrooms and an incredible series of accessories and gadgets on the reference site not only mine but of many growers ---- https://www.zamnesia.io
Sound’n’Buds weekly with Gangstarr - “You Know my steez” from “Moment of truth” Album, go and listen!

Processing
Likes
4
Share


@Ledros
Follow
Day 29 (2020-06-07): Changed out reservoir (5.6 PH). Picked up some 3% H2O2 so added 3ml/gallon to help combat some of the growth I am getting. Also wiped down the outside of the fabric pots to kill the mold. Did some new LST and defoliation to even things out. CBD Crack is in pre-flower. The G14 might be a bit behind.
Day 30 (2020-06-08): Reservoir PH around 5.65. Removed a leaf or two and did some tucking.
Day 31 (2020-06-09): PH at 5.8. The G14 Blumat drip tube had gotten stuck in the dirt and was not dripping. Hand watered back to normal. Some slight LST adjustments to even things out and removed a few leaves.
Day 32 (2020-06-10): PH at 5.96. Yellow leaf tips on newer growth haven't really gotten any better. I am also noticing some other yellow and brown spotting on older leaves. I am not as worried about the spotting since it is likely related to previous PH fluctuation that has been taken care of but I am now wondering if the yellow tips are something new. Maybe the start of nutrient burn? I do not believe it is light related since I adjusted this a few days ago.
Day 33 (2020-06-11): After some helpful advice from the community I checked the calibration of my PH pen and found it off by about .5! This must have happened sometime in the last week or two but would explain the issues since as a result my PH was adjusted way to low (around 4.9 to 5). FIxed pen, flushed plants and changed out the reservoir. Hopefully things will get back on track. Also took the opportunity while I had the plants out to even out the LST and do some more defoliation.
Day 34 (2020-06-12): Things are looking OK. I am not sure if the yellow on the tips will go away but it is not getting worse. Reservoir PH is at 5.75.
Day 35 (2020-06-13): Res PH at 6.1 but slight smell. Probably will have to change out tomorrow. Things are looking good for the plants. G14 is definitely behind on flowering compared to the CBD.


Likes
3
Share


@RainerWinklerGrow
Follow
Harvested Around 220 Grams from 3 Plants, terps were there slightly, smoked fine, its alright, went with a differnent breeder after.
Likes
4
Share
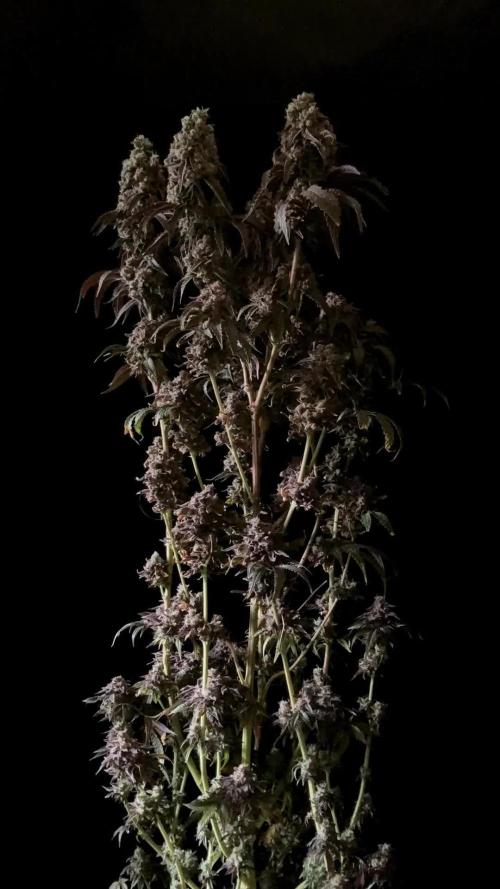

@deFharo
Follow
Bienvenidos cultivadores de marihuana! 🖐️ 👨🌾
- 21 semanas desde que puse la semilla a germinar! 🌱
- 18 semanas desde el trasplante a la maceta final.
- 17 semanas desde el primer corte apical
- 13 semanas desde que hice un segundo corte apical.
- 13 semanas desde el cambio a horario de floración a 12/12H.
- 12 semanas de floración... 🌼🌼🌼!
3M 🍋 Black Lemon
RIP
*08/09/25
†28/01/26
Tus parientes no te olvidan: Tangieland x Honey Mints
==========================
Hoy, después de pasar el día a la intemperie, como último deseo, he saqueado esta bonita planta.
Me ha dado pegajosos cogollos, muy densos y olorosos. Ahora, después de la manicura de las hojas, cuelgan delante del extractor de la carpa de cultivo, estarán ahí 3-4 días, para que pierdan rápidamente la humedad inicial, después los tendré unos días más en la malla de secado y por fin los meteré en botes de cristal durante un par de semanas y después comenzaré a fumar.
😁 HASTA LA PRÓXIMA. SALUD Y SALUDOS PARA TODOS!
=============================
BLACK LEMON FEM "Versión feminizada, con niveles de THC que alcanzan un impresionante 25-27% , esta variedad está diseñada para fumadores experimentados que buscan efectos potentes."
- Genética: Tangieland x Honey Mints
- 50% Sativa, 50% Índica
- Tiempo de Floración: 9 Semanas
- 450 - 500 G/M2
https://www.exoticseed.eu/products/black-lemon-fem
==============================

Likes
68
Share


@cRypto666
Follow
Freunde der Sonne :) KURZE INFO DER LETZTE EINTRAG HIER IST IMMER DER AKTUELLLSTE NACH DATUM NACH UNTEN SOLLTEN UNTEN SCROLLEN UM ZU VORHIERIGEN EINTR'GE ZU GELANGEN : <3 WEEED
wollte dir ein text drücken :) hab mich vertippt... aö ich bin heute eine Bewustseinsstufe beim Grown aufgestiegen ! Endlich kann man jetzt Täglich meine Real Talk oder Reaktion ViD/PIC anschauen. Absofort werde ich meinen GARTEN anderts wahr nehme wer rein schaut kann Exklusive Tipps für seinen Garten gebrauchen. Gerne bin ich für Fragen offen und ich helfe wenn ich kann fals nicht findet sich in der Gruppe immer jemand.
DER GRUND IST DAMIT ICH NACHVOLLZIEHEN KANN WAS ICH FALSCH GEMACHT HABE BZW UM WISSEN ZU MANIFESTIRE UND GEWISSE GEDANKENVERBINDUNGEN GESACHFFEN SIND. IM GRUNDE MEIN GROWTAGBUCH ICH TEILE MEINE GEDANKEN MIT EUCH GLEICHGESINNTEN UND WÜNSCHE ALLEN EINE ERFOLGREICHEN GROW brO
cRypto666
2 minutes ago
cRypto666
<LIEBE> BRUDER ICH LADE DIE VIDEOS UND BILDER NOCH HOCH UND ICH BIN MIR EIGENTLICH SICHER ES KÖNNTE DIR GEFALLEN VIEL SPAß
AUF QEEN SEED GIBTS WIRKLICH GUTE BLOGS MIT TOURTORIALS FÜR NEULINGE/ANFÄNGER .
Konnte mir so mein Verständnis und Grundlage die fürs grown wichtig ist gut lernen und Aneignen ! WIRKLICH VIELE UND GUTE INFOS !!
https://www.royalqueenseeds.de/blog-cannabis-anbau-c3
https://www.royalqueenseeds.de/blog-die-10-grossten-fehler-von-cannabiszuchtern-n86
es ist soweit heute beginnt Woche 1 ... BEVOR WIR STARTEN, WICHTIG WASCH DIR GRÜNDLICH DIE HÄNDE UND BENUTZE GUMMIHANDSCHUE BEIM ARBEITEN! SEHR WICHTIG!
Ich freue mich das ich heute wieder das Gärtnern begonnen habe und eine Hällfte der Samen in der Erde sind. Kennt ihr das Gefühl der Vollkomenheit wenn man sich im Garten beschäftigt ? Für mich ist das Therapie und für euch?
Ich spiele mit dem Gedanken anstatt Samen zu growen mir einfach eine Mutterpflanze Anschaffe um mir meine Stecklinge zu ziehen ! Dafür brauch ich aber noch ein anderes Zelt und eine Lampe. Die Mütterpflanze kann dann erst mal wachsen und ich kann nebenbei noch mal ein Durchgang mit Autos schaffen bevor die Steckis fertig sind. Wenn es soweit ist gebe ich euch bescheid wenn ich Samen und Setup bei mir stehen.
So jetzt aufs eigentliche zurück. Ich habe heute erst mal mein Setup geprüft und so gut wie möglich desinfiziert. Es ist verdammt wichtig das nach jedem Durchgang sauber gemacht wird also zb Zeltwände, Boden, Topfe, Boxen, Wasserbehälter. Habe ich gemacht und habe meine ersten Samen in Anzucht Erde gesetzt, befeuchtet, markieren und in die Box. Wände und Deckel mit zersteuber befeuchten und ab unter die Lampe. WICHTIG MACH DIE ERDE NICHT SO NASS ! DAS GEFÄLLT IHNEN NICHT SONDERN HALTE SIE AM BESTEN FEUCHT IN DEM DU ABEND / MORGEN EIN BISCHEN WÄSSERST!
ICH STELLE DIE LAMPE AUF CA 40 cm zum Boden ein bzw der Box. Ein gewisser abstand muss sein um die Fläche komplett zu Beleuchten. Da meine Lampe dimmbar ist muss sie nicht ganz oben hängeng sondern Kann näher an die Pflanzen ran und Stelle den Dimmer auf 20 %. Das reicht anfangs in dem Stadium völlig aus, muss aber dann später angepasst bzw hoch geschraubt werden!
Lüfter I läuft 24/7 und sorgt für optimale Bedinungen! WICHTIG
LAMPE 20/4 HELL/DUNKEL (REGLER STEHT AUF 20 % LICHTLEISTUNG)
DANN HABEN WIR ES EIGENTLICH SCHON GESCHAFFT UND ALLES RICHTIG GEMACHT!
Ich versuche schon so viel wie möglich von meiem Wissen an euch weiter zugeben bzw auf Papier zubringen, ist aber NICHT IMMER ZU 100% Möglich, da es einfach zu viele Informationen sind !
Bei fragen einfach fragen und die Comiunity hilft sicher !!!
KOMMT ZEIT KOMMT RAT ... ich hab 2 Monate Infos eingeholt und Produkte verglichen !
Auf Queen Royal Seeds gibt es gute Anfänger Tipps sogar teilweise mit Video. Mir hat das sehr geholfen mein Grundwissen aufzubauen.
BEVOR IHR DAS GÄRTNERN ANFANGEN KÖNNTE MACHT DIR GEDANKEN WO DEINEN GARTEN STEHEN KANN.
#1 AM BESTEN IHR HABT EIN GARTENZIMMER DER NUR ZUM GÄRTNERN BENUTZT WIRD IST DIE BESTE LÖSUNG DA DU DEINE UMGEBUNG VIEL LEICHTER SAUBERHALTEN KANNST
#2 DU KANNST DEIN GARTEN AUCH INS WOHN. BZW SCHLAFZIMMER STELLEN WENN DU KEINE MÖGLICHKEIT HAST EIN GARTENZIMMER ZU MACHEN. DAS IST NICHT DIE PERFEKTE UMGEBUNG ABER WENN DU ABLUFT RAUSLEITEN KANNST DANN MACH ES ! DU KANNST ES AUCH IN DEN RAUM STRÖMEN LASSEN MUSST DIR ABER BEWUST SEIN DAS ES EVTL DAS SCHIMMELN IM RAUM ANFÄNGT! IST MIR SCHON PASSIERT ! LEITE SIE WENN MÖGLICH AM BESTEN RAUS !
ACHTE DAS DARUF DAS DEINE LUFTFEUCHTIGKEIT UND TEMP KONSTANT BLEIBEN UND ES NICHT EINMAL ZU WARM UND EINEMAL ZU KALT... IHR WISST SCHON SORGE FÜR EINEN KONSTANTE UMGEBUNG IN DEINEM GARTEN. DIE WAHL DER SAMEN IST AUCH WICHTIG DA ES SORTEN GIBT DIE EINE WARME UMGEBUNG EINE KONSTANTE ODER EINE EHER KALTE UMGEBUNG. AM BESTEN IHR PASST EURE SAMEN EURER UMGEBUNG AN HEIST DU WOHNST IN EINEN LAND WO ES EHER WARM IST ALSO 25-30 ° C dann WÄHLE AUCH EINE PASSENDE SORTE AUS!
MEHR GIBTS ERST MAL NICHT ! BIS ZUM NÄCHSTEN MAL!
Likes
1
Share


@ChitownCannaChica
Follow
What can I saw? I did this plant dirty with the multiple plant dwc set up. Beautiful colors
Likes
14
Share


@SBCannabisCo
Follow
Enjoyed this run. Ready to harvest in about 1 and a half weeks, I actually have seeds in a couple of the plants. It happens, this is my first indoor grow so, need to get my hand on some new genetics


Likes
21
Share


@Papablob
Follow
26/10 ci elle pouvait murire vite maintenant sa m'arrangerai. Elle m'oblige a rester en 12/12 et c'est restrictif. 🤨
27/10 vite mais bien. 😉
29/10Je me doutais bien que l'humidité allait monté. 😕
31/10 elles deviennent carnivore pour halloween.😈 Enfin.. demain ou après demain elle a un rendez-vous avec le sécateur. 🤤
01/11 le capteur d'humidité est mort 😅 En attente d'un neuf, je mets l'humidité a vue de nez.😬
🤤 elle a l'air terriblement bonne.👌♥️♥️

Likes
6
Share


@Saltoa
Follow
Do you care about the flowers blooming.Do you have an intense smell in your nose