


Likes
Comments
Share


@Sider79
Follow
Pure distilled h20 for her last week ..It got pretty chunky over the last two weeks.



Likes
14
Share


@420lor
Follow
¡La fiesta verde está en su mejor momento! 🎉🌿 Con 27 días desde el cambio de fotoperiodo, mis Moby Dick de @kannabiaglobal están en su apogeo, bañadas por una humedad perfecta (40-45%) y abrazando un rango de temperaturas que las hace bailar entre 18 y 29°C. ¿El secreto de su éxito? Un cóctel nutritivo de Top Bloom, Top Candy y Top Bud, ¡la fórmula mágica para potenciar su crecimiento y sabor!
Hoy les he dado un mimo extra con un clareado de hojas, asegurándome de que cada cogollo reciba la luz que merece para brillar. Y ya están mostrando signos de resina, ¡una garantía de su potencia y calidad! Con la confiable luminaria PureLed de @thepurefactory guiándolas en su camino, estas semillas Moby Dick prometen una cosecha que hará las delicias de cualquier cultivador y amante del cannabis.

Likes
38
Share


@ATriggerman
Follow
Alles läuft ohne Probleme 😍
Erst am 08.04.24 gemerkt, dass die Lüfter nicht optimal eingestellt sind.
Eine Cam zu haben, zahlt sich aus.
Mutter und mein erster Grow in Deutschland 😁
Frosty Nightmare estimated day of Harvest around the 27th of may.
Gelato estimated day of harvest around the 25th of may.
Sleepy Joe estimated day of harvest around the 25th of may


Likes
37
Share


@Capo420
Follow
Awesome Week💚
Following some great discussions with more experienced growers, I really think we got things back on track!🚆
🙏 To Those Growmies!
I really raised the ppm this week we topped out around 630 PPM
This was in an attempt to balance out some nutrition issues.
I think the ladies have responded very well. 😃🌱💪
Raised the light up to 24in as well a few days later after seeing positive changes due to feeding regiment.
Started preflowering, showing pistols on all plants. Counting down these last 7-8 weeks when the ladies beauty comes out 🤩
Will update throughout the week with photos and videos.
Happy Growing!
🤙💚💪🌱😎🌱💪💚🤙
Likes
Comments
Share


Likes
4
Share


@NurseGreen23
Follow
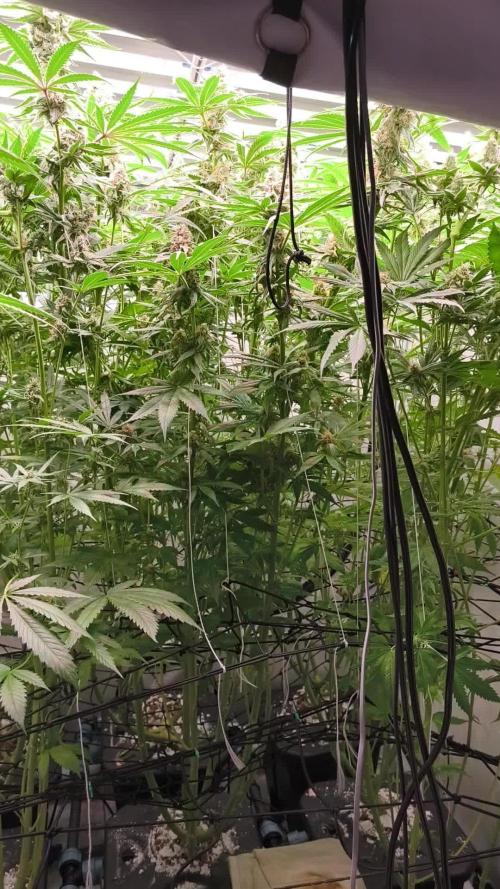
So we're a couple weeks into flower now. I finally got my hands on a ph meter. Our water has a ph of 7.8 but with nutrients comes down to high 6s. Runoff ph was 6.3ish. I'll keep an eye on it the next few feeds and see what happens. Had a couple weekends where I've been away and girl has dried out a bit between waterings but she's held up under the stress ok. LST has been reasonably successful for both my girls. Will see how yield compares to prev grow. Have just got my hands on some bud burst which I've started adding today.


Likes
2
Share

@HoneyBlunt42
Follow
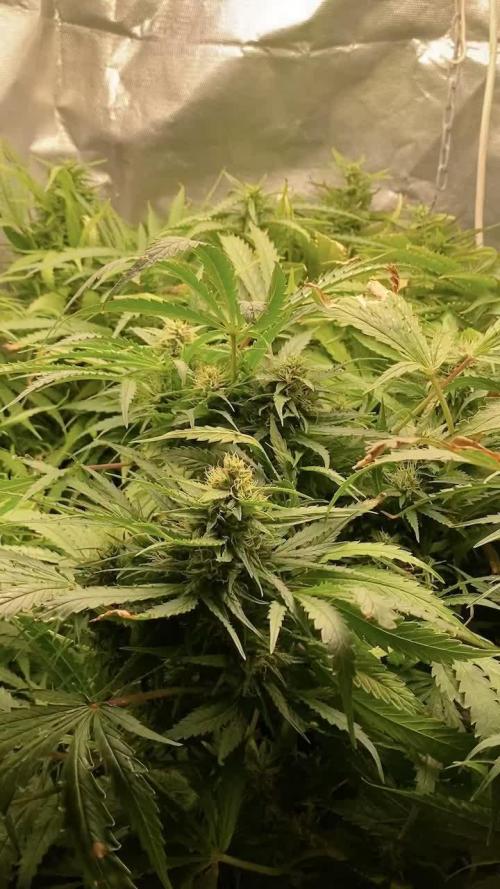
The buds are gradually swelling, and sugar has appeared. I water them daily with a solution containing CalMag and a pH of 6.5.
Every two weeks, I add a 1 g/l addition of Bio Enchancer. I noticed some pale leaves this week, so I gave them a small amount of a light solution of Hesi Bloom at 2.5 ml/l (half the amount used on the hydro).
At 15 weeks, the coco requires regular watering with an automatic waterer. Sometimes I manage to water two or three times a day, but more often I add a liter of the prepared solution to the pot once a day.


Likes
4
Share

@Chucky324
Follow
Hello. This is the end of week 8 and the beginning of week 9 of veg.
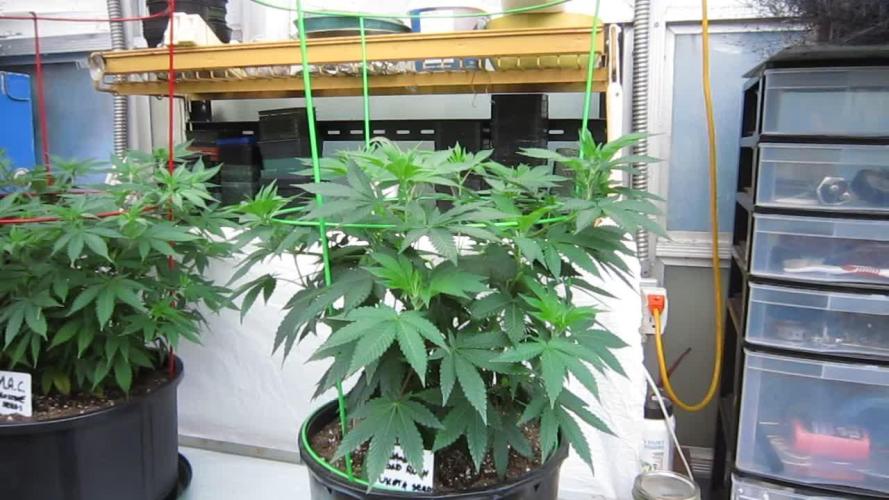
The plant is doing great. I did some repotting last week and got them into bigger pots.
Put in the tomato cage and pulled all the branches under the rung to spread it out.
When I repotted I sunk the root ball as low as I could to get the bottom branches to the top of the soil.
We are getting about 16.7 hours light, on the 48th latitude N, now, with it going to almost 18 hours, by Equinox, about June 21.
OK. Keep Growing Straight.
Chuck.
Likes
80
Share


@Roberts
Follow
The clone turned out great. Awesome smell, heavy frosty buds. Smells just like the mother plant she originated from. I did capture the light green pigment mutation, and she grew great overall. This clone did Awesome. Thank you Pure Instinto, Medic Grow, and Spider Farmer. 🤜🏻🤛🏻🌱🌱🌱
Thank you grow diaries community for the 👇likes👇, follows, comments, and subscriptions on my YouTube channel👇. ❄️🌱🍻
Happy Growing 🌱🌱🌱
https://youtube.com/channel/UCAhN7yRzWLpcaRHhMIQ7X4g

Likes
12
Share


@GREENPHOENIX6262
Follow
Fastbuds - Mimosa (2x) 08/27
Coming into week 4 Veg, User error stunted them lightly but things seem back on track.
Exhale 365 C02 bag introduced last week to setup for early flower.
No signs of concern or any deficiencies.
Early flowering has begun
*Mid-Week Update* *08/30*
Both plants have recovered nicely, and placed under trellis net.
Introduced NPK Phosphate
Purged Pure Blend Pro Grow
*End of week recap*
Flowering has begun
Stopped veg nute feed
Introduced Raw NPK Phosphorus and Potassium
Likes
42
Share


@MadeInGermany
Follow
Info:
Unfortunately, I had to find out that my account is used for fake pages in social media.
I am only active here on growdiaries.
I am not on facebook instagram twitter etc All accounts except this one are fake.
Harvest day 69
since the time
change to 12/12 hrs.
Hey guys :-)
Finally the time has come .
The lady was harvested.
After the trichomes have been checked (70% milky 30% amber) as always, it was left in complete darkness for 48 hours before it was neatly trimmed by hand.
After trimming, she was put back in the drying tent on nets.
There they are allowed to dry for the next 8-12 days at 62% humidity before they are put into the jar to ferment with 62% boveda packs.
After about 4-6 weeks in the jar I will swap the 62% boveda pack for a 58% boveda pack where it can be ready for another 4-6 weeks to enjoy :-).
As always, the remains of the leaves are used to make Ice o Lator and oil.
Of course, as always, there is a final update during the fermentation process.
Until then, I wish you all a lot of fun with this update.
Stay healthy 🙏🏻 and let it grow 👍.
You can buy This Strain at :
www.Zamnesia.com
☝️🏼☝️🏼☝️🏼☝️🏼☝️🏼☝️🏼
Strain
Gelato clone from mother (Zamnesia )
☝️
Genetics: Wedding Cake x Gelato x Gelato 33
Vega lamp:
2 x Todogrow Led
Quantum Board 100 W
💡
Bloom Lamp :
2 x Todogrow Led
Cxb 3590 COB 3500 K 205W
💡💡☝️🏼
Soil :
Canna Coco Professional +
☝️🏼
Fertilizer:
Green House Powder Feeding
☝️🏼🌱
Water:
Osmosis water mixed with normal water (24 hours stale that the chlorine evaporates) to 0.2 EC. Add Cal / Mag to 0.4 Ec Ph with Organic Ph - to 5.5 - 5.8 .
Likes
5
Share


@Samsemilla
Follow
Die Blüten werden schön schwer und bunt.
Das Wetter stellt sie auf die Probe und fordert Opfer.
Likes
32
Share


@Selkot
Follow
my best harvest to date 🙂
I got 196g dry and cured, of which 85g for the biggest one, the one with only 3 colas; no popcorn bud, and a good general density.
A nice smell, not too strong, but it lasts a long time 😏
I took the 85g of the big one + 90g of leaves (from my numerous haircuts) for a second bubble hash experiment (see vid)
this time I reached a ratio of 7.1%, so not huge, but so good and powerful 🤩
Likes
47
Share


@GMSgrows
Follow
This is the girl's final week. The wife will be happy the stink is coming to an end. Will be stripping off all the useless leaves at this point, getting them ready for a quick trim. The ppm in the planters is down under 200 ppm now
Kannabia genetics made these easy to grow. I had no problems growing these 3 different strains out. They all flourished except for 2 of the smaller ladies. They were a little overfed as I treat all girls in the tent with equal amounts of everything. Those girls still did well, just not as well as their bigger sisters. The Kritical will be coming down first as most of the pistols have oranged over and the trichs are clouded over.
The Super OG will be the next to come down. The buds on these girls are so hard I think you could knock someone out, if you through it at someone's head lol....
The Hellfire OG will be the last to come down as their still throwing pistols. Mostly still white and gaining more weight.
I gave 3 of the seeds to my bud and he grew his out under cmh lighting. Plants stayed much more compact and he just finished his trimming. Under the HID the plants get much larger and buds twice the size. I gave him the same feed my girls got through his entire grow, mixed and ready for him, so it was mostly lighting that made the difference. My climate controls are also much better, but he is very happy with the amount he trimmed from each plant. Grade A looking weed for sure....
Thanks for the looks and like my frinds. 🙏
Likes
15
Share


@JeyGanesha
Follow
Iniziò seconda settimana ,sé tutto procede più che bene...da questa settimana inizierò a darGli anche un pochino di Ph perfecto 😉💪👍..........
Oggi all'11 °giorno ho tagliato via 2 foglie perché ho trovato delle macchie di ruggine su 2 foglie......
Likes
1
Share


@MN-Frozen420
Follow
Day 49
about as high as its gonna get. starting to fill out buds. nice stacking.
Likes
2
Share


@LoganatorDude
Follow
I know they look rough. It’s just because I didn’t want to feed them too much in those little pots, now they are getting established into bigger pots with a lot more food!


Likes
5
Share


@Hack8d
Follow
Girls start from left Pineapple#1 - WhiteW#1 - WhiteW#2 - Pineapple#2.
59 days after germination. Change feeding Pineapple E. /Big Bud for Overdrive/. White Widow still on Big but but on the next week I wanna change as well. Watering cycle /Feeding - Feeding - only water - Feeding - Feeding - only water/. I wonder about flushing Pineapple on the next week. White widow I will keep longer. I'm really enjoy of Mars Hydro sp250 and mix of two nutrients company. Bought WhiteWidow need more time but can't wait for result. Pineapple start smelly nice. I wanna cure longer for better somke, maby 5-6 month. For the next sezon I really need second Sp250.

