




Likes
1
Share


@Slackerbucks
Follow
I purchased these seeds along with 100+ others (individual seeds, not packs) in late 2006 and early 2007 by sending Western Union money orders to the UK in birthday cards along with my seed order. My only recourse was crossing my fingers and hoping that my seeds would eventually arrive. What I found was that the “Buy it Now” option on Seedbay turned out to be pretty reliable. They used to have a Nirvana 4 pack deal for a very reasonable price ($50, I think). European seed producers at the time were very guarded with the lineage in their crosses, but the common thought was that Nirvana was taking known elite Dutch cultivars of the time and breeding them with a Skunk #1 male and producing ‘knock offs’. AK-48 was AK-47xSk1, Blue Mystic = Blueberry x Sk1, Bubblicious = Bubble GumxSk1, Jock Horror = Jack x Sk1. The point being, there ended up being a lot of variation in packs, but also some keepers were there to be found. I did some growing at that time, but ended up buying a ton of seeds that I never used. As a daily user for almost 30 years now, self sufficiency made/makes a lot of sense. A couple years ago I decided to get back into growing my own herb after being disappointed and underwhelmed with the quality of flower from the dispensaries.

Likes
27
Share


@Basementganja
Follow
New Aeroponics "root rain" mist cloner! Holds 2 gallons of water. I added 8 Tsp of CloneX clone/seedling nutrient. PH was 6.0-6.5ish, good enough!
These clones inside got zapped pretty hard one day, because I forgot to plug in the water pump one time after playing with it hehehe... Some didn't make it, but most survived!
every other plant was watered with just de-chlorinated tap water, for re-hydration.
#4 has been selected as the winning pheno! The mother plant had her home upgraded to a 2gal pot.
The root ball was not so bound, due to her receiving a root-prune not too long ago, she was re-potted back into a solo cup.
I pruned the bottom of the root mass off with a light pinch, and potted her into her new 2gallon home!

Likes
5
Share


@SurSideCrew
Follow
Baklava de The Plug Seeds es un cruce de Wedding Cake X Gelato. Hay varios Phenos (3) el mejor para mi gusto es bastante púrpura y de gran rendimiento. Soporta bien altas cargas de fertilizante como además las altas temperaturas de verano. Con el frío tiende a cambiar el color a negro/purpura con tonos de verde lima y rojizos cobres. Terpenos que recuerdan a una bolleria o panadería, toques dulces, mantequilla, frutos secos, canela, miel y el pheno Gelato sale mas a crema dulce terrosa. Hay un pheno que es bastante mas Kush y Gassy! Altos contenidos en THC y muy buenos resultados para hacer extracciones.


Likes
7
Share


@Ferenc
Follow
No more fertilization, nice bushy plant.... She needs a bit more time minimum 2 weeks but it can be 3 also. All good just being flushed and waiting for the perfect moment to be harvested. Nice one. :)
Processing
Likes
10
Share


@Loudcloud514
Follow
After a bit of a leaf defoliation on day 34 of flower girls did not stress at all. flowers are hard and dense not fluffy at all even in the middle of trellis the buds are hard .now for week 6/7 I will cut out the magnifical from there I will be heading to week 8 using just ph'd water and nature's candy and week 9/10 for the final flush I will use just ph'd water

Processing
Likes
62
Share


@OwlGang_Uk
Follow
Happy 1 Month To My Girls (Inserts Celebration Emojis)
I’m Very Proud Of The 1st Month’s Progress These Girls Has Really Exceeded My Expectations.
I’m Very Proud Of The Of The Purple Power If You Go Back To Week 1 You Will See That She Started Off The Slowest But She Is Now The Tallest In The Pack Standing At 21 Inches (that’s without adding the few cm I covered with soil) She Has Also Shown Signs Of Purple In Her Bud Development (Favourite Color) Can’t Wait To See Them, You Go Girl!
I’m Also Proud Of The Gorilla Glu (12 inches) Stardawg (17 inches) And Girls Scout Cookies (16 inches) Development, They Are My Favorite Buds Here In The UK. They Are Very Bushy & Branchy And Their Stems Are Very Thick. They Have The 3 Main Pillars To Accommodate BIG Buds.
Happy Growing Everyone. #OwlGang #AGrowingEmpire


Likes
14
Share


@BudBrewerz
Follow
The sherbet is looking healthy and strong , nice green leafs. I still did not pot her out into a bigger pot, I had planned on doing this the week that passed, but it didn't happen just yet. I did some pulling on some of the toppen branches though to get them a little more even in height. I will get her into the new bigger pot very soon. And spots are opening up in the blooming closet, so as soon as I get this Tent-X controller online , she will probably be moving out to the blooming closet
Likes
120
Share


@DogDoctorOfficial
Follow
Week 9 (Week 1 of flowering) has been a jaw-dropping experience in my Tropical Tangie Ninja Run. Our girl is absolutely killing it! Her luscious green foliage is a sight to behold, and my Lego Ninja buddies are always on point, making sure everything is in order.
The excitement escalated as I spotted those little preflowers showing up towards the end of the week. I have a strong hunch that she's going to turn into a flowering monster during the first two weeks! <3 <3 <3
To support this explosive flowering growth, I made some savvy moves in my nutrient game. I decided to switch from my root booster to the fruit booster. Why, you ask? Well, my Tangie is transitioning her focus from root development to bud production. So, it's like shifting gears to give her exactly what she needs to create those magnificent flowers!
But that's not all. I also added some P-booster to my nutrient mix. You might wonder why? It's because this little ninja booster is packed with phosphorus, the secret ingredient that stimulates robust flower formation. We want those buds to be big, dense, and super potent! <3 <3
With a canopy as lush as this, I'm already contemplating a potential defoliation around day 21 of flowering. It's like planning my ninja strategy in advance! But let's keep that for the next update hehe.
As for her TDS numbers, they might not seem massive at 230, but remember, I'm using those amazing Aptus All-in-One Pellets mixed with the soil. Her main NPK is already packed in there, and these boosters are just giving her that extra ninja kick!
With room temperatures at 28.9°C and a humidity level of 62%, the conditions are perfect for our Tangie to thrive. I can't contain my excitement for this epic ninja run!
I'm deeply grateful for your unwavering support and the wonderful products from Aptus Holland that have played a crucial role in this journey. You all make this adventure truly special, and I'm thrilled to have you by my side, also of corse a huge SHOUT OUT to Dutch Passion for this incredible oportunity and for the amazing genetics they create and release to the world <3<3<3
Stay tuned for the next update, where we'll witness the true transformation of our Tangie into a flowering ninja goddess! <3 <3 <3
As always thank you all for stopping by, for the love and for it all , this journey of mine wold just not be the same without you guys, the love and support is very much appreciated and i fell honored and blessed with you all in my life<3 <3 <3
#aptus #aptusplanttech #aptusgang #aptusfamily #aptustrueplantscience #inbalancewithnature #trueplantscience #dutchpassion #dogdoctorofficial #legoninjago #growerslove
With true love comes happiness <3 <3 <3 Always believe in your self and always do things expecting nothing and with an open heart , be a giver and the universe will give back to you in ways you could not even imagine so <3 <3 <3
Friendly reminder all you see here is pure research and for educational purposes only
<3 <3 <3 Growers Love To you All <3 <3 <3
🌿

Likes
84
Share


Likes
5
Share


@soupthefruitdude
Follow
An Tag 80
nach 48h Licht und 48h Dunkelheit habe ich sie jetzt zum trocknen aufgehängt.


Likes
6
Share


@MadeInGermany
Follow
Flowering day 15
since time change
to 12 / 12 h
Hey guys :-)
This week the ladies developed beautifully 👍.
The stretch has started very strongly :-) .
Watering was done twice this week with 1.2 l (see table above for nutrients).
The heating mat does exactly what it is supposed to do, you can see that the ladies are doing perfectly again 😃.
Fresh osmosis water was mixed with tap water in a 100 liter tank so that I would have enough stale water for the coming week 👍.
Otherwise everything was cleaned and checked.
During the check, I noticed that after spraying neem oil 3 times, there were still a few damn trips to see.
I have ordered nematodes for leaf and substrate against tripse.
Then they should finally be gone again 🙏🏻
have fun and stay healthy 💚
👇🏼👇🏼👇🏼👇🏼👇🏼👇🏼👇🏼👇🏼👇🏼👇🏼👇🏼👇🏼
You can buy this Nutrients at :
https://greenbuzzliquids.com/en/shop/
With the discount code: Made_in_Germany you get a discount of 15% on all products from an order value of 100 euros.
👇🏼👇🏼👇🏼👇🏼👇🏼👇🏼👇🏼👇🏼👇🏼👇🏼👇🏼👇🏼
You can buy this strain at :
Clearwater Seeds
Water 💧 💧💧
Osmosis water mixed with normal water (24 hours stale that the chlorine evaporates) to 0.2 EC. Add Cal / Mag to 0.4 Ec Ph with Organic Ph - to 5.8 - 6.5
MadeInGermany

Likes
Comments
Share

@Franco123
Follow
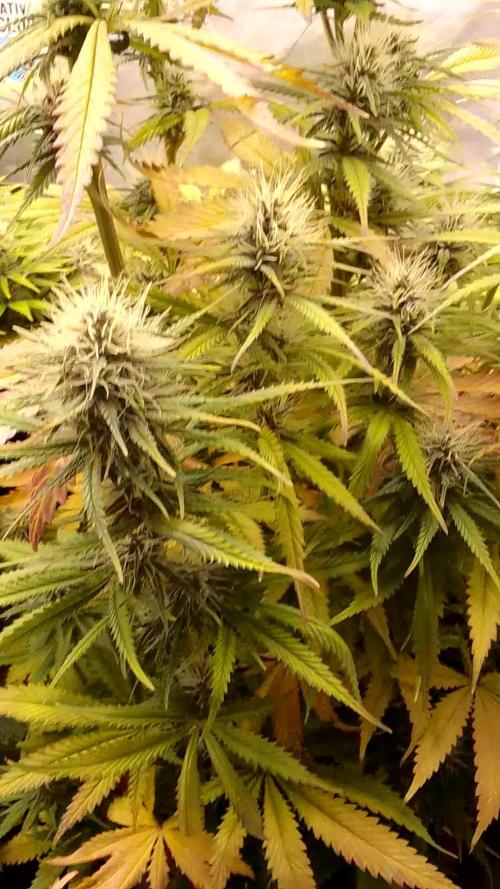
the plants grow and flower peacefully, the only thing that is leaving me a little strange is that the flowers do not turn purple unlike the others that have the same cutting reversed as the father but the two of them are s1 therefore self-hypolinating but the purple gene seems to have been passed down only to the mixed progeny and not to her
Likes
5
Share


@TTerpz
Follow
Start of week 14 (hopefully the last)
Fed with water 5/15/25
Fed with nutrients: 5/17/25
Likes
6
Share


@eldruida_lamota
Follow
Que pasa familia, vamos con la tercera semana de vida de estas Papaya sherbet feminizada de fastbuds.
Vamos al lío, de las 3 plantas, me quedaré con 2 por espacio, siempre pongo alguna semilla de más por si no abriese alguna por no perder ese hueco del indoor.
También se trasplantaron a su maceta definitiva, en este caso de 7 litros.
El ph se controla en 6.2 , la temperatura la tenemos entre 20/22 grados y la humedad ronda el 50%.
Hasta aquí todo, Buenos humos 💨💨💨
Likes
24
Share


@m0use
Follow
***Sponsored Grow*** = Medic || https://medicgrow.com || Grow = ***Sponsored Grow***
Ok big update this week, I finally edited the footage of the lights and got their unboxing photos processed, this took way longer then expected and should have been done on germination or week 1 entry but better late then never. You can really see how the lights shine in comparison to my older ones. The brightness of the leds is next level and I can use their V1 spectrum from seed to harvest. Its a great balance of red and blue in a full spectrum light. The medic grow mini sun 2 is a all purpose light that I can see myself getting lots of use out of in the future. Plus they fit in my tent just as snug as my last ones and that's a big thing for me, I don't like dim corners. I am using the lights at 80% dim level. this will be raised to 100% when they enter flower :D First time useing lights I can dim. they also have an onboard timer attached to them, I will be playing aorund with this to see if its something I want to use in the coming weeks, I all ready have all the external timers so I can see how this is a useful tool for anyone starting off without them.
On top of all this I also transplanted my plants into their final pots. they went from a .7-.8L to a 2gal or 7.5L, all the root balls on the plants where perfect, nice white roots, maybe a bit compacted for the size and might explain why I am having some issues with them but healthy none the less. I think they will not start to grow a bit better and I will see less issues moving forward. I still have yet to get a new PH pen but I am blindly guessing the PH by adding 2 drops of phosphoric acid ph down per 1gal of feed solution. it seems to be working out just fine.
Till next week.
***Sponsored Grow***
Official Website:
https://medicgrow.com/
+
https://www.emeraldtriangleseeds.co.uk/
Facebook:
https://www.facebook.com/medicgrowled
+
https://www.facebook.com/OriginalETS/
Twitter:
https://twitter.com/medicgrow
+
https://twitter.com/emeraldseeds
Instagram:
https://www.instagram.com/medicgrow420/
+
https://www.instagram.com/emeraldtriangleseeds/
YouTube:
https://www.youtube.com/channel/UCNmiY4F9z94u-8eGj7R1CSQ
Growdiaries:
https://growdiaries.com/grower/medicgrowled
https://growdiaries.com/grow-lights/medic-grow
+
https://growdiaries.com/grower/emeraldtriangleseeds
https://growdiaries.com/seedbank/emerald-triangle-seeds

Likes
12
Share


@Coman
Follow
Harvest is coming closer but not yet. No amber trichomes yet.
Still drinking 3.4L/48 h.
Nice smell, some how hypnotizing, but not that strong. Maybe filter is doing the job.
Did some defoliation 2 days ago, light on the 2 ladys behind, and little stronger on the one in the front, cause I think she’s not fare from ripening.


Likes
17
Share

@TrickzGrowz
Follow
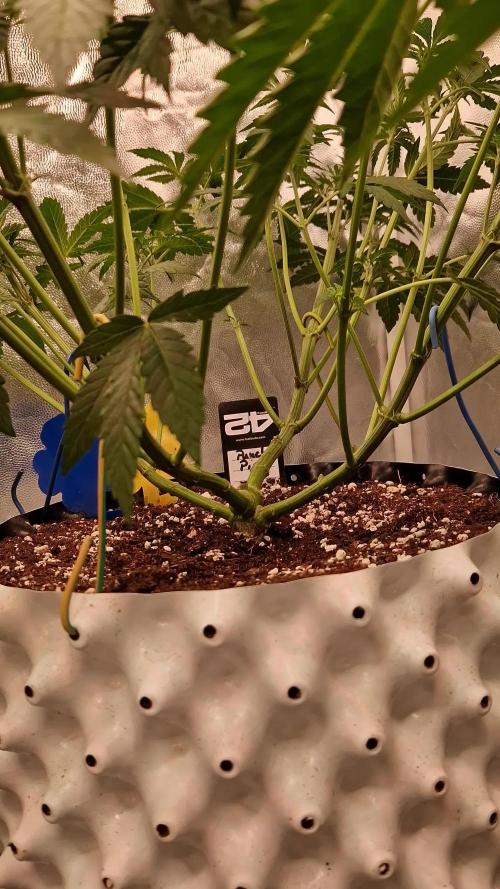
Die Punch Pie beginnt langsam mit dem Stretch. Sehr viele Triebe die sich ausgebildet haben. Ich bin mega zufrieden.
Likes
170
Share


@Master_weeda
Follow
Bonjour à tous les padawans et maîtres jedis jour84 arrosage avec 25 centilitres d'eau ph6.3
Jour87 arrosage avec 30 centilitres d'eau ph6.3
Jour88 pratique de la techniques du tronc fendu (videos explicatives) et arrosage avec 20 centilitres d'eau ph6.3
COMMENT FENDRE LES TIGES DE VOTRE PLANT DE CANNABIS
Pour fendre les tiges de votre plant de cannabis, il vous faudra :
Une lame propre et aiguisée (une lame de cutter fonctionne bien)
Un mètre ruban
Une ficelle ou un adhésif pour marquer les coupures que vous ferez le long de la tige
Un crayon, une baguette ou une brochette pour séparer la tige une fois fendue
1. Tout d'abord, commencez par mesurer la partie de la tige que vous allez fendre. Il faut faire une incision d'environ 10–20 cm juste sous la branche la plus basse de votre plant. Utilisez un ruban adhésif ou de la ficelle pour marquer le début et la fin de l'incision.
2. Ensuite, prenez votre lame et faites une incision en travers de la tige, en commençant par le haut. Attention à faire une coupe propre, jusqu'au centre de la tige.
3. Utilisez votre lame pour tailler en descendant vers le bas, jusqu'à la marque inférieure de la mesure que vous avez prise auparavant. Essayez de tailler aussi droit que possible. Une fois que vous avez atteint votre marque du bas, laissez la lame au centre de la tige, puis utilisez un crayon/baguette/brochette pour ouvrir la partie coupée, puis sortez votre lame.
QUEL EST LE MEILLEUR MOMENT POUR FENDRE LES TIGES ?
Il existe de nombreuses théories sur le meilleur moment pour passer votre tige au couteau, mais la plupart des cultivateurs suggèrent de le faire à la dernière semaine de floraison. Même si certains cultivateurs recommandent de le faire dans les 3 derniers jours avant la récolte, nous recommandons de le faire un peu plus tôt (7–10 jours avant la récolte).
QUELS SONT LES RISQUES À FENDRE LES TIGES ?
Fendre les tiges est une technique à stress élevé très agressive que nous ne recommandons qu'aux cultivateurs expérimentés. Nous ne recommandons également pas de fendre les tiges sur les variétés à autofloraison, car cela peut être bien trop intense pour elles.
FENDRE LES TIGES, ÇA MARCHE VRAIMENT ?
Il existe un solide ensemble de cultivateurs expérimentés qui déclarent que le fait de fendre les tiges peut produire de bons résultats. Malheureusement, peu de données qualitatives le prouvent. Cependant, il semble que la fente des tiges soit originaire des Pays-Bas, où elle est pratiquée par des cultivateurs néerlandais experts depuis les années 1970.