


Likes
Comments
Share


@Minuteman_Organics
Follow
Another boring week in flower. One of the indigo childs is fading to yellow. Checked the trichomes and I'm starting to see some ambers. Will probably wait till 7.5 week. The rest of the indigos will probably go 8-8.5 weeks.
The medipak needs a lot more time. Not a resinous as I would have liked to see at this point. But I have a feeling that it might be my fault with not providing them proper environment for a sativa. I also suspect there might have been a fungal issue from the medipak tent as one suddenly died. Classic fusarium. We shall see with the others.

Likes
4
Share


@QixxGrows
Follow
Day22: As said in Week3, I will not keep this perspective for the whole grow, as it doesn't really show the size of the plant. But it gives a nice view of how to top leaves grow :) The flashes that you see in the video is the humidifier. It pumps out vapour every hour for 15mins. So basically a quarter of each second of the video will be when the humidifier runs.
Day23: I changed it, as I wanted to see the size as well.
Day24 - Day28: Happy, healthy growth.

Likes
12
Share


@ScrogFreak
Follow
A lot more happening this week! As shown in the pics, and as suspected, I have a manganese deficiency. I've been keeping my pH level at 6.2 in coco, manganese is taken up best by the plant below 6.0 pH. Dropping my ph level to 5.8 pH, and flushing with lower pH, hopefully it will solve the issue over the course of a few days.
I made a new frame for a SCROG, with a "custom bend" in the CPVC pipe on both ends. The bend will allow me to take advantage of the slack material in the sides of my 4x4 tent. I'd previously taken 4" out of all the upright poles to shorten the tent so it would fit in the room due to low ceilings, meaning I had extra slack in my tent walls. The bend in the net frame pushes the sides of the tent out to 5 foot wide. My first SCROG net was a 6" mesh from Amazon, immediately knew I wanted a smaller mesh. Next time around I built my own with a 4" mesh and used the 4" for several grows. This time I decided to go with an even smaller, 3" mesh, and already I like it better. I don't really see myself going much smaller than 3" mesh though. It seems to work well, and any smaller and it may be too tight trying to work the plant through the opening sometimes, which if not careful, will damage the plant.
I usually use a & gal cloth pot, grow off rules stated we 0had to use a 5 gal pot. Seeing as I only had 7 gal on hand, I was stuck picking up a Root Farm 5 gal cloth pot locally, as you can see, the roots didn't really stay contained, nor did they "air prune", i had to tear them off before installing the net above.
On the last day of week 6 I finally got my net installed, and the plant SCROGged. I should have put the net in place a week or two earlier, it would have been easier to manipulate the plant, however the plant will still have a week to recover. I tie the net in place above the plant, and slowly lower it down, as I bend and super crop the main stalk over parallel to the net, and work all the branches underneath and spread them out. As the plant grows I'll continue to push branches back down through the net and moving them out to the next hole. This will greatly increase yields by allowing light to more bud sites, keeping all buds the same height and thus the same distance from the light. small budsites on a vertical branch, will transform into their own cola once the branch is laid on its side. Instead of a Christmas tree type of plant, with one large main cola, and smaller and smaller buds as you move further down the plant, you end up with a bunch of colas that are all close to the same size, and more importantly, the same level of maturity. The SCROG method, combined with super cropping, and defoliation has greatly increased my yields.
As the plant is getting worked into the net, I'll defoliate where necessary, ie a huge fan leaf covering bud sites, however for the next several weeks I'll be defoliating so mush every night or two, systematically trimming off all fan leaves, and stripping everything below the net, and any small bud sites that wont produce well. Usually by the time I'm half way through the flower stage there are no big fan leaves left to be found. It helps with light penetration, which results in a higher quality, higher quantity yield, as well as airflow, which will help prevent White Powdery Mildew and other molds etc. Once a fan leaf is 14 days old, its ability to photosynthesize light, starts to degrade. Once it reaches a certain point, the leaf drains more energy from the plant, than it's giving the plant. My best yields have been from heavily defoliated plants, my last grow I couldn't physically defoliate quite as heavily as usual, and I ended up about 25-30% less bud than expected

Likes
43
Share
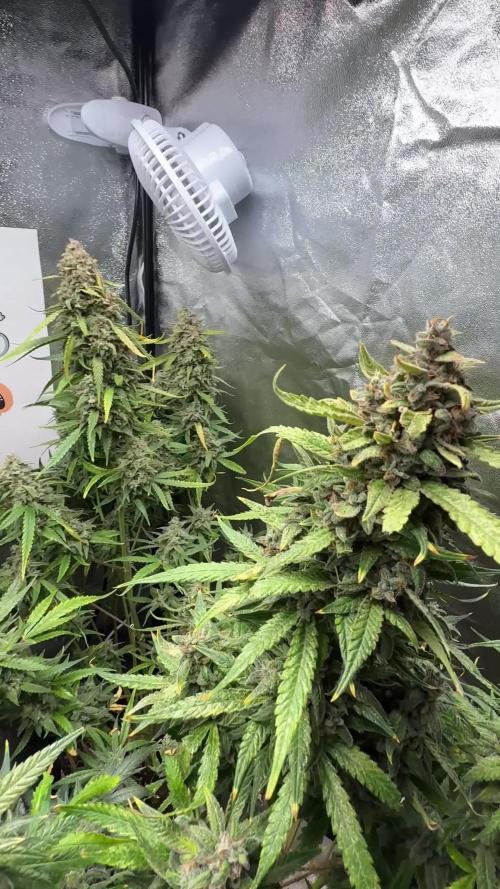

@GrowerMario
Follow
Thanks to @MedicGrow and @Fast_Buds rastlinu ešte čaká dôkladný curing a potom to príde ?


Likes
44
Share


@Silverback_Guerilla
Follow
11/2:
I flushed all 4 of them with 8 gallons each of warm water and liquidsoil. Won't be long now....👍
11/5:
I put them in the dark....harvest tomorrow!
11/6:
Harvested and washed all 4 of them. They are hanging to dry and smell great!

Likes
4
Share


@Guerillafarm
Follow
Die Sour-Diesel könnte am Zwittern sein ich bin mir aber nicht sicher und werde noch eine Woche abwarten.
Purple-Queen geht es gut sie blüht aber die Seitentriebe werden wohl klein bleiben.

Likes
15
Share


@Ctsbestsmoke
Follow
They are really starting to show off there growth the runt has flew past what I thought she would be by this post. The one I topped is the one that’s the furthest in she’s stretching already and the others are still in veg . They are coming out beautifully though. The grow ace system is doing what it’s suppose to with no problems. Can’t wait to see what these ladies produce for me.
Likes
10
Share


@Raizativa
Follow
Semana 4:
Riego 400ml
1ml calmag
1ml Bio Grow
1ml Bio Heaven
0.5 Micorrizas colectivo
Se realizó LST

Likes
226
Share


@Kitties_and_Colas
Follow
~_~_~_~_~_~_~_~_~_~_~_~_~_~_~_~_~_~_~_~_~_~_~_~_~_~_~_~_~_~_~_~_~_~_~_~_~_~_~_~_~_~_~_~_~_~_~_~_~_~_~_~_~_~_~_~_~_~_~_~_~_~_~_~_~_~_~_~_~_~_~_~_~_~_~_~_~_~_~_~_~_~_~_
08/21/21:
🐱 Week 6 is here!! The new growth is coming in a little limey, we insist on reusing Promix so PH is always a bit of a rollercoaster lol.. no sweat, usually a gallon each PH'd to 5.5 with 5ml/gal N solution will get them back to baseline..we seem to have the same issue with most plants grown in our basement during summer, I'm sure the super high humidity and
low evaporation rate has something to do with it... if they don't come around after the adjustment, they'll spend some time under the HIDs, this always straightens them out..we topped the mainline for the last time today
for 8 mains per side, as well as another full round of toppings on the x2 LST plants... thanks for reading if you made it this far and happy growing everyone!!! ❤️🐱💡🌱
~_~_~_~_~_~_~_~_~_~_~_~_~_~_~_~_~_~_~_~_~_~_~_~_~_~_~_~_~_~_~_~_~_~_~_~_~_~_~_~_~_~_~_~_~_~_~_~_~_~_~_~_~_~_~_~_~_~_~_~_~_~_~_~_~_~_~_~_~_~_~_~_~_~_~_~_~_~_~_~_~_~_~_
8/22/21
🐱 Quick update, the mainlined plant is showing signs of calcium deficiency which is odd, with our routine we almost never have Calcium or magnesium issues..its really only noticeable under the florescent lights on this one but we'll have to make changes.. they all have plenty of calcium in their media so I'm wondering if the PH has gone screwy in that pot.. we reuse promix which gets really acidic sometimes and we add lime to buffer this but we guess a lot and may not have used enough (or waited long enough)..I know when our media gets around 5-5.5 calcium deficiency is a huge issue..ill add a little more calcium to be sure and will try using water PH'd higher (6.5-7) and see if this helps anything. Thanks again for reading growmies!!
~_~_~_~_~_~_~_~_~_~_~_~_~_~_~_~_~_~_~_~_~_~_~_~_~_~_~_~_~_~_~_~_~_~_~_~_~_~_~_~_~_~_~_~_~_~_~_~_~_~_~_~_~_~_~_~_~_~_~_~_~_~_~_~_~_~_~_~_~_~_~_~_~_~_~_~_~_~_~_~_~_~_~_

Likes
247
Share


@PremiumBudsEU
Follow
Dear Growmies 😎😎
In flowering week 7 and 8 i reduce bio grow to 2 ml/l but increase bio bloom and topmax to 4 ml/l to harden the buds, especially with sativa-heavy or sativa varieties that need a flowering time of 10 weeks, in this time they need the most phosphorus and calmag.
So I'll leave it as it is for the next 2 weeks.
The buds continue to swell , the girls continue to shine 😀
so far so good 😎
Thx for all the love and support my friends and growers family 🙏💚

Likes
7
Share


@sunshinegroww
Follow
All went good this week ,she starting to pack up some weight now ,quite tall so far ,this week ive up the feed to 900ppm so watch this space ,i think i have finished with defoliation too as i have a dehumidifier in the tent now to keep steady 45-50% humidity
Likes
7
Share


@HookahCli
Follow
d71
Se han cosechado 3 plantas de las 8, se han regado 3 que están mas avanzadas con kleanse y las 2 KOK que van más atrasadas en la floración, se les ha regado como la semana anterior nos quedan 5 plantas, pronto quedarán menos hasta terminar con este seguimiento.
He cosechado KOK1, luego LK y para terminar con el día KAK3, han sacado buen cogollo central, la LK esta super dura y se siente pesada., se ha pesado en húmedo, cuando se seque todo añadiré información sobre la cosecha de LK. KOK y KAK me esperaré hasta cosecharlas todas.
d74
Se han regado con igual, con Kleanse las que estan por terminar y las dos KOK que van mas lentas con TricoPlus, SugaRush y EnzymBoom.
Processing
Likes
31
Share


@LockDownGrow
Follow
Ok so this week I did a defoliation and a tigh down too the netting , I really was not planning on doing such a big defoliation but the leafs became thick and dense and there was almost no light penitration down too the lower branches of the plant , so she is opened right up now and the humidity and temperature has dropped loads and the air is moving alot better around the leaves and branches , I will not take anything more off her now , I have also added Cal mag too the nutrients for this week only , she is well into pre flower now but the stretch has not yet started so I figured it's no or never too defoliate and tigh them down ,
I am very happy with them so far and being new too all this it's all very exciting ,
Thanks for looking :)
Likes
75
Share


@Smoking_Joe_Frazier
Follow
Flowering Week 23: The Great Defoliation & Purple Hints
Update: 17.08.2025 | Day 163
Hey Growmies,
Week 23 was all about the snip-snip – gave both ladies a serious haircut and opened up them tight spaces. Airflow’s king now, and these girls are breathing easy. Here’s the wrap:
Durban Poison – Cleaned & Gleaming
After that defoliation, she’s standing tall like a proper little tree – clean stems, no clutter, just good light and air all through her core. The buds are frosting up with pistils that’s turning a soft, shy purple. Real pretty. Smell’s picking up too – still subtle, kinda old-school. Not like these new genetic gas-monsters. If I had to call it something? Flowery. Earthy-flowery. Simple. Honest.
Blueberry – Tall, Late & Mysterious
This girl’s still reaching – almost 2.20m now, though only three mains broke the 2m mark. Rest is hanging around 1.80m. Buds are forming slooow, pistils are shy. She’s blooming on her own damn schedule – way behind Durban. Started sexing at the same time, but now it’s like Durban’s sprinting and Blueberry’s strolling. Starting to sweat a little… if she’s too late, mold might sneak in when the autumn damp hits. We’ll see. Fingers crossed.
What’s Next?
Wait...
Catch y’all next week. Stay easy.
– Smoking_Joe_Frazier

Likes
50
Share


@Mr_Motalovah
Follow
Hello growers and tokers! 👋 👩🌾 🧑🌾.🔥💨
There has been much change this week!!
First there was a big defoliation done, I cleaned the bottom of the plants.
All the growth that wouldn't amount to anything because the light doesn't penetrate that low.
Also took off the biggest fan leaves to give more room for light.
Then finally switched to 12/12..
After just 36 hours after the defoliation there was a major change.
New growth everywhere, colas started stretching upwards fast.
By far the tallest girls in the tent. Her colas are stacking up nice and tight if she keeps that up we'll have some nice dense colas. 😁
Great reaction to the defoliation and 12/12 switch.
I'm still watering every other day, After the defoliation I watered with only Enzymes 2ml/L to clean the roots a bit then started with the nutrientes again.
I dropped the amount of grow nutrients from 3ml/L to 1ml/L and started adding bloom nutrientes 2ml/L for now.
I'll slowly be upping the bloom nutrientes and after week 2 I'll no longer add grow nutrients.
That's it for this week. Stay tuned to see how they flower.
Stay safe!
Likes
42
Share


@MrJoint
Follow
✌️🎃 Thank you for checking my cultivation.
🌰 #1 and #2 (31/05) #3 (02/06)
💪 #1 survived
🔥 #2 died burned
⚰️ #3 didn't complete germination
☘️ I wasn't very lucky with the wedding cake. I don't think they like much nutrient - Buffering on coconut EC 0.6
Likes
61
Share


@Esoteric_growing
Follow
They have stretched a lot more than I anticipated for the first week of 12/12. Very happy so far and have about 19 cuts ready to test the strain in coco in my spare two grow chambers. I have numbered all the cuts in relation to which plant they came off so I will be keeping only the best two out of the 5 plants.
Very happy with the growth structure so far, I normally top and train or scrog my canopies but want to just let them go to see their natural growth structure. In the next 5-12 days I will swap out the metal halide for my sodium bulb depending on how much they stretch.
Processing
Likes
43
Share


@DaSofaSurfer
Follow
-mom-
So I had a tiny problem with my plant (the mom). pests. this is the problem I have with soil. tiny little cuntz. I don't know their name. tbh not interested. I've had them before. they suck the sap from leaves leaving tiny lighter spots (check vid if interested)
so I gave an aggressive foliar spray. then I watched a movie, smoked some bowls and fell asleep before washing residue. the lights came on and before I was even awake the light was burning spots on my leaves.
I was kinda bummed out. it's not serious, I know she will recover so I wasn't too worried but one never likes to see plants with problems. to me personally the eyesore physically hurts. plus this could have been avoided so it annoys even more.
the good news is no more pests. I can't see them and the new leaves don't have the tell tale sign these suckers leave. all good
today I went to water her and first pistils. I was kinda expecting that to happen since days are getting shorter (13.5 hours of wich only about 3 are DIRECT sunlight) but I was also hoping she would hold off for another week at least since I still don't have real estate for her under the lights. I'mma hold off 4 or 5 days and put her and her clones under the light so they can flower out in style. nature calls one must oblige.
Besides I don't like when plants flower and reveg and reflower. all kinds of weirdness happens, messes up their structure.
-clones-
I cut 2 clones and stuck 'em in same 3" rockwool cube. I had never done so but I only had room for the one pot. I did so because I only had 4 weeks to veg something out to replace the ak47 that flowered and I dripped off in the woods (didn't abandoned her, I still go and cater to her needs every 3 days) so I needed a plant fast and thought two plants in one pot would dramatically save veg time and I might just make it) my idea was to simulate a mainline but each clone would be half of a traditional mainline shooting 4 tops each. unfortunately one of the clones rooted much quicker and it screwed up the simmetry I was after. Now I'm thinking maybe one side will have 6 tops and the other 4. I'm pushing it a bit hopefully I won't regret this decision since I'm very limited in the grow space I have. one has to be resourceful in dealing with such problem.
Apart from that clones are doing great. vigorous growth and just beautiful foliage. in 2 or 3 days I'll step them up into a new home. a 20 liter fabric pot. can't wait to see her flowers and experience the aroma she has to offer.
I'm really looking forward to growing this strain.
LETS GROWWWW !!! 💪👨🚒👊

Likes
15
Share


@IsseyBukkake
Follow
We have made it to day 42! 31/12/20
All the girls have started flowering now!
I'm super keen to see them start to thicken up.
Feeding as usual, nothings changed.
Update - day 46 04/01/21
I'm a little concerned about the 2 runts that were laggin behind the rest, all of a sudden theyve decided they want to take up most of the room in the tent.
I've never grown autos so big..
I was contemplating putting the runts outside but it's just going to make more problems as my outdoors are under attack from some kind of bug.
I will keep the diary updated on the runts, other than that the other girls are doing just great, flowering is really coming along.
Thanks for stopping by!
