


Likes
Comments
Share





Likes
2
Share


@KeemBboomin
Follow
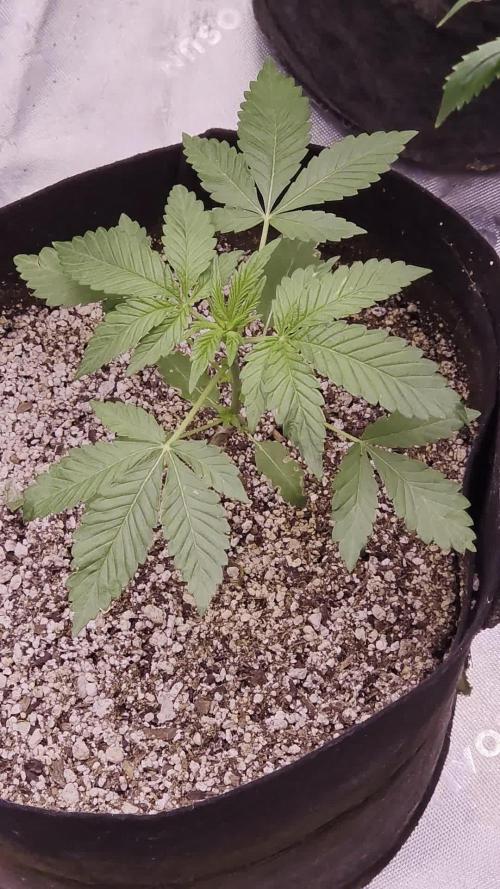
So where I live we had a really bad storm it had knocked out my power for a full 24 hrs so I had to give them some extra attention to insure there was no mold or any pest with no fan rotation. Then I also had to put them back on there proper timer to get things back on a roll so far so good they still look and smell amazing wish me luck
Likes
65
Share


@Deranged420
Follow
Day 57 - See Below
#1 - Gave 17oz of water and rotated, tricomes still looked a bit clear ....
#2 - Gave 32oz of tap water (not pictured sorry).... Rotated....
Day 58 - See Below
#1 - Gave 6oz of water and rotated....
#2 Gave 17oz of tap water and rotated....
Day 59 - See Below
#1 - Gave 17oz water, rotated and moved some leaves down by hand.
#2 - Whatever. lol
Day 60 - See Below
#1 - Left alone but rotated, checked tricomes and seems she needs a bit longer but I am having a hard time with my damn tools to check tricomes...
#2 - Gave 17oz of tap water, not worth taking a photo of...
Day 61 - See Below
#1 - 17oz of water and rotated
#2 - 30oz tap water and whoooo.
Day 62 - See Below
#1 - Raised Light to 15", clipped all big leaves, hope I didn't fuck up... I want to harvest in 1-2 days I think...
#2 - Nothing, leaving alone...
Day 63 - See below
#1 - Gave 18oz of molasses juice @ 1tsp per 36oz. Spritzed leaves with water.
#2 - Whatever

Likes
22
Share


@CrazyFlowers07
Follow
Hola a todos aqui estamos en la tercera semana y este finde empiezo ya el low strees training !! Vamos a ver como cambia estructura la planta

Likes
50
Share


@00110001001001111O
Follow
Room setup rundown, examples of bud, et al in pictures...
Seedlings/Clones lights - Viparspectra XS1500.
Vege lights - Mars Hydro FC-4800
Flower Lights - 650w 3400K 1900umol/s PAR, (3) 226w DIY 2900K 630umol/s PAR (678w and 1890umol/s),
Substrate - 50/50 sphagnum peat moss and vermiculite in 5-gallon pots
Climate Control - Luckily, the lights, winter and normal furnace use all equate to a decent temperature, though a bit on colder side in in vege phase, sadly. Humidifier is needed early and later a dehumidifier is needed when canopy develops. I only grow in the winter months.
Irrigation - do not use the emitters in this diary. They suck a big fat dick to skip a line to suck a bigger dick. Use the pressure compensating type. https://growdiaries.com/diaries/232811-strawberry-cookies-og-r1-cherry-diesel-bbgs-ego-epg-ebg-grow-journal-by-001100010010011110/week/1366923 -- use something similar to those. They come in different shapes, too.
Basic process
The little light takes care of seedlings in 2.5" wide seedling pots until first up-pot. The 1-gallon pots fit well under the FC4800 in a 4x4 tent until day 21 after sprout. I plant 150% or more of what i need, so i can kill the weak without concern. The goal is for every plant that makes it to the 5-gallon up-pot being capable of producing a minimum of 160 grams with a maximum of a 35-40 day vegetative phase.
Third up-pot is into 5-gallon nursery pots and now under the 3 DIY lights and the 650W light in the big tent for a couple more weeks of vege. An irrigation system in the big tent saves a lot of time. One scrog for training and another for support, just in case. Reverting back to a more systematic approach to canopy composition moving forward. About 2.3 colas per sq ft and 8 primary colas per plant.
Yields were similar when over-crowding and being less systematic, but the proportion of less dense nugs is greater and trim time is needlessly elevated because of that fact. I was very controlling about this the first couple years but got away from it for far too long at this point.
Drying / Curing - Into mesh racks for 9 days. I wet trim and cut down to similarly sized buds for even drying. Temps are controlled around 68F and RH is set to 60%. Then into some 5-gallon buckets with gamma seal lids and (3) 2-way 67g boveda humidipaks (58% or 62%) in each bucket - 1 at bottom, 2 at top. Temp/RH probe confirms that they hold the RH steady at 60-63%.
Cost - 0.33 cents (USD) per gram produced. This includes an accelerated depreciation expense for all equipment used, fertilizer, water, electricity for all equipment used, new filters and other yearly purchases - bti, ph strips, sticky traps, etc. I'm a finance guy, so these numbers are comprehensively accurate and purposely err slightly on high side of cost. The only facet not included is the cost of my labor.


Likes
20
Share


@Bertoxxulous
Follow
Hey folks, I'm finally back at it again. It took me a while for a couple of reasons:
1) I usually only grow in the winter.
2) I completely revamped my grow room after the issues I ran into with the last setup.
3) It took me a while to brainstorm exactly what I wanted to do.
I bought these seeds from D.C. Seeds and was very pleased with the experience. I'm very happy to give business to a fellow American and Veteran. I've only ever purchased seeds from the UK in the past and that experience has been "dodgy" to say the least (not the vendors fault, but the transit).
I've only ever grown photo's, but chose to go with all auto's moving forward. After calculating the intensity of my current light, with it being on a 20/4 rotation I'm very close to hitting 40 moles per day, at least directly under the light. It doesn't quite cover my 2' x 5' trellis. I'll eventually upgrade my light, but auto's should get me the best bang for my buck with this light. Also, I spent a pretty penny building this new grow room. The other obvious reason for growing auto's is their shorter seed to harvest time. I've got a small grow area, and never plan on expanding. Theoretically, auto's will allow me to produce the most out of my room.
A few things about my grow room:
1) I lined the whole closet with 1/2" plywood and put that piece of ply the air intake/outtake/power as the divider between each side of the closet
2) The grow room itself has ply on all wall surfaces so I could mount stuff to it and paint it
3) The other side of the closet is my storage/prep/power distribution/etc. area. Maybe I'll take a pic one of these days
4) My last grow my carbon filter/fan was venting into the other side of the closet. This created a headache for a number of reasons. I tapped a 4" hole through the floor and am now venting into my crawl space below the house.
5) I moved to bubbleponics to speed up my grows even more. I will be removing the drip system once the roots hit the water in the res.
6) The larger res. will hopefully make my life much easier. Late in the last grow I could only fit 3 gallons of water in the bucket and that sucker was pounding down at least a gallon a day. That required too much micro-managing for me (both ph and refills).
7) I no longer have a fixed trellis with chicken wire. The trellis is held in place by dowels that I can pull out by hand. The short sides of the trellis have hinges on the bottom, so I can fold it and pull it out easy-mode. Lastly, I'll be using string for the trellis so come harvest all I have to do is cut the string instead of dealing with trying not to destroy buds pulling them through chicken wire (it takes forever).
8) I built a light diffuser on the other side of the air intake
9) My res. is on a motorcycle lift I'm using a drill to move up and down
I have now started using Jack's as my primary nutes. They tell you the full break-down of each macro and micro nute, giving me more control and understanding. I think House & Garden is a good product, but when stuff goes bad it's more difficult to troubleshoot when you have no idea what each piece of their full lineup contains. I'm assuming it's kind of a proprietary type thing, which I understand, but knowledge is power. I am still using their Drip Clean (while the bubbler is going) and Roots Excelurator Silver, both excellent products. I'm still using Hydroguard, and will FOREVER. I'm a true believer now of why Hydroguard is necessary for any hydro application, IMO. I also purchased water soluble fulvic acid, but have decided not to use it for this grow....or at least while the bubbler is going (I'll elaborate below).
Ok...now that all that is out of the way....
I really wanted to use my well water instead of R/O to make my life easier. Soooo....I filled up my res., and put two seeds in the system immediately. Nothing happened after 1 1/2 weeks. I finally opened up the cubes and saw that the beans had popped, but it looked like maybe I drowned them, or they ddin't grow straight up or something. For round two, I didn't change the water out, and decided to soak the beans for 24 hours in R/O water first. I had the exact same problem. I'm still not really sure what happend, but I suspect it was the well water. My PPMs were sitting at ~500 with the well water, which was probably too spicy for the beans just starting. Also, my well water is questionable (even though it's at 165ppm), but I won't elaborate further....it's a long ass story and I've spent an absurd amount of money on it. Lastly, I did put the Fulvic acid in, and it was very messy. I really want to avoid having to clean my res. Once the roots get big it will be a real pain in the ass to clean. I'm leaning towards not using the Fulvic acid this grow just to see how things go.
I had 10 beans total of the Sour Apple and have already ruined 4. So here's hoping third times the charm.
So, I went back to my tried and true method:
0) R/O water for everything. Ditching the well water idea.
1) Soak beans in R/O water for 24 hours
2) Paper towel method between plates on a heating mat
3) Once the roots pop, I place them pointed down in the hole of the rockwool cube
4) Hand water once a day by dipping the cube in the pre-mix of 1/4 strength Jack's and everything else I've listed above. This put my PPMs at 300...a way more reasonable value for starts.
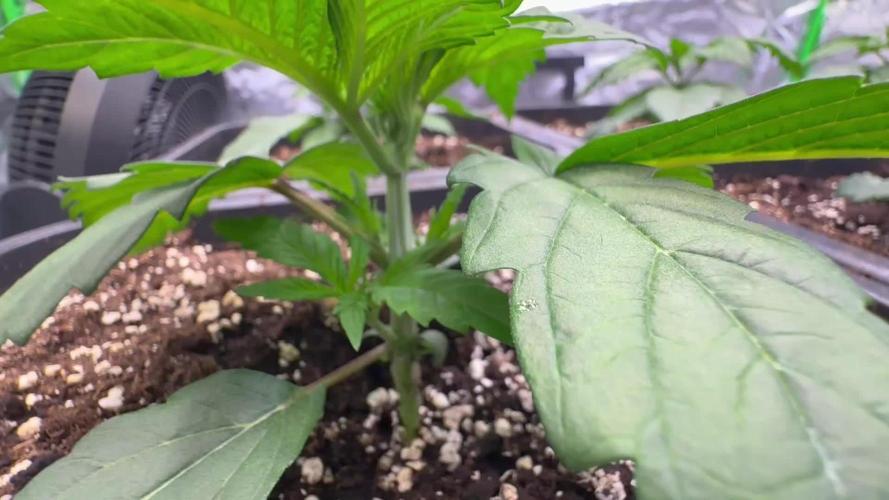
It's been exactly 7 days since I followed the above. It's probably hard to see but the cotyledons came up, and multiple roots have come out the bottom of the cubes....way faster than I've ever seen since I started growing. That means even though I'm doing my old process this already shaved at least a week off of when I'd normally put it in my bucket in the past.

Likes
5
Share


Likes
Comments
Share

@SolitudeCorners
Follow
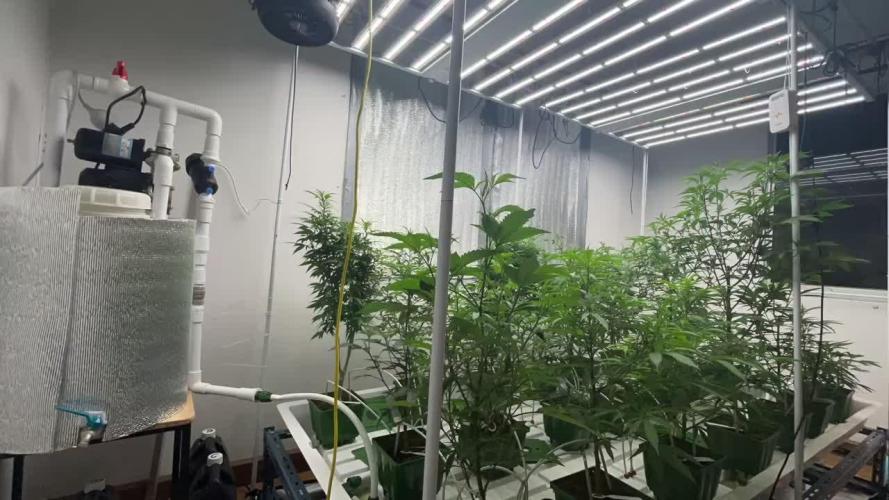
Week 3 Flower (Bloom Week 3) – Daily Tasks
Evening (Lights On)
Check environment (temp 24–27°C, RH 55–60%).
Inspect leaves and buds for pests, mold, or deficiencies.
Water/feed (depending on medium): balanced bloom nutrients with slightly higher P and K.
Ensure good airflow (oscillating fans).
Adjust plant training (light defoliation if leaves block bud sites).
Check for early signs of stretch finishing.
Evening (Before Lights Off)
Ensure irrigation is not too late in the cycle to avoid wet medium during dark period.
👉 In Week 3 bloom, the plants are finishing their stretch and starting to put more energy into forming bud sites.
Main job is: Setting Scrog net 2layers ,Control environment (VPD, airflow) ,Support the plant with bloom nutrients.


Likes
257
Share


@Bloombuster
Follow
the Best of the tasty 😇👌
Интересный путь к урожаю, я очень доволен результатом и эффектом от урожая! Спасибо команде GD за возможность общаться и обмениваться информацией с другими гроверами, за конкурсы и продвижение идеи фермерства! Очень благодарен всем кто читал мой дневник и меня поддерживал! Урожай за 7 недель цветения - 167 грамм соцветий.
Спасибо, Delicious Seeds - достойные результаты, хорошая генетика. : 1:😇👊 Всем удачи! 👋😇

Likes
21
Share


@Bud_Lee
Follow
Full feed el caudillo organic. Esperando a que seque el substrato para cosechar✂️✂️🤪🙏

Likes
40
Share


@Totogrowuk
Follow
In flush now for a couple of weeks and then I’ll start to harvest.
They all really stink 🤩


Likes
4
Share


@Growin_Ish
Follow
Day 56
Adjusting the trellis, I broke a branch, right at the stem. It was under the main and not receiving much light anyway, so...
Also did a deep defoliation on NYD3. Got rid of anything that won't produce keepers. Trying to finish strong (14 days left).💪🏾💪🏾
Day 58
One leaf on each plant was discolored. No major fade yet. Each have a distinct smell. #2 smells like old school refer. It gives a real nostalgic 80s vibe. #3 smells like pine and Bengal. Watered top and bottom, with just a bit of CalMag.
Day 60
48oz of pH 6.8 water. 1 or 2 leaves showing small amount of yellow, but nothing resembling fade. The canopy is green green, like she can go another month. A few of the nugs are impressive, but could be better if I had defoliated better. 60% of the bud sites are small and roughly 40 to 50% dense (assuming 100% is rock hard).
Water, tucking, and plucking for the remainder.
Day 62
It's a 70 day strain and with 8 days to go, there is no fade. Frustrating since I am over cooking my other plant for the sake of these two. They haven't done anything in over a week. Maybe that last heavy defoliation stunted them. So sad. Buying a jewelers loop tomorrow to check trichomes. The only other thing that could be delaying the fade is that I top dressed them both with Terp Tea Bloom. Maybe that top per gallon is hot and takes more than 2 weeks to be used up. I'm going to flush it tonight. Not even sure I should care about pH because I want it locked out from nutrient uptake. They just shouldn't be this dark green at this stage.🙄☹️😕😤
Ok so I pulled off the trellis net and LST ties, defoliated some more, and flushed both with 1 gallon each of distilled water. Added a little 3% peroxide to NYD3.
Day 63
I figured it out. I made compost tea for NYD#1 to address a suspected deficiency. I gave these two some of it, and they didn't need it. It was half way thru flower. I followed that by top dressing with the new nutes. Lesson learned. What's good for the goose is NOT good for the gander.
Likes
15
Share


@AdamCajda
Follow
we are finally geting closer to the end, had some minor over feeding issues but quickly sorted so pretty much no damage just few leaves have some signs of burns, nothing drastic
one more week of normal feeding and then I will add pK 13/14 for a week and finally 2 weeks flushing
I bought humidifier but It doesn't really do much work. Humidity is still around 50% so i hope good airflow will be anough to avoid any mould

Processing
Likes
5
Share


@FlyHighhh
Follow
Gestart met de scrogg ik heb 2 planten die nog wat klein zijn maar dat groeid wel bij 😏De komende tijd lekker vakjes vullen met toppen 😉😉

Likes
18
Share


@The_Lonely_Farmer
Follow
Tropicana cookies fast flowering just hit the paper towel ✌️ usually within 7 days she'll be popping out the soil 🌱 excited for this one from fastbuds 💚
Likes
13
Share


@Lfuego22
Follow
Day 18 veg from clone
Water temp 69.6
Ph 5.9
Ppm 724
Ec 1.6
Room temp 66.8
Light temp 74.4
Humid in room 48
Over light 42
Day 19. Full flush.
PT 1
Start ppm of RO (filtered/nestle) 146
Ph 7+
Final ppm 880
Ph 5.9/6.0
Temp 70°
Room humidity 50%
Light 45%
Light heat 73.0
Room heat 68/70 depending on if heater on or off