




Processing
Likes
8
Share


@eldruida_lamota
Follow
Impresionante, mirad que flores se están formando aquí , Zambezaseeds si a echo un buen trabajo con estas candy caramelo version fast flowering.
6 semanas de floración y ya no queda casi para cosechar, Añadi esta semana overdrive y retire big bud de advanced nutrients.
Las flores no son muy grandes pero si se ven flores muy compactas y con mucha resina.
Ph controlado 6.2 , humedad entorno al 50% y temperatura media de 26.5 grados, que cara al verano no está mal.
Todas estas flores fueron logradas gracias a una buena iluminación (ts-600 mars hydro) y vaya resultados.
Estas semanas sigo actualizándoos todo , sin más novedades me despido, un saludo fumetillas y buenos humazooos 💨💨💨

Likes
8
Share


@Damaku
Follow
This week, the plants have shown strong growth, with nearly 10cm of height gained. Dominant branches are starting to emerge, though all the shoots are making their way towards the light. The plants are very thirsty, requiring more water, and I've removed a few side branches and shading leaves to improve airflow and light penetration.

Likes
2
Share


@SolitudeCorners
Follow
Vegetative stage
Light and Enviroments💡💧
Light 18/6 (06.00 AM - 12.00 PM)
Aim VPD around 0.7-0.9
Temp26-28 RH70-80
DLI 16-18 PPFD 200-300
22/2/24
Water 15L+Silica m/ fulvic 16ml(half) @0.1ec
+V1 130ml @1.2Ec+V2 125ml @2Ec
Ph 5.4 +Silica m/ Fulvic 25ml @PH6 Ec2.1
@11.00PM -Up to 6.2 @08.00AM
23/2/24
Last batch mix @ph5.7
2.30min shot 180ml
24/2/24
Tents feed 19 drippers @25min per min
Water3.8L+Silica mix Fulvic 6ml+1ml root exceluration+BushDoctor5ml total 0.3Ec
+V1 40ml @1.3Ec(50%)+V2 30ml final@2EC
Ph5.7
1min shot every 4and half hours total 4 shots
07.30 Am
12.00 Am
04.00 Pm
09.00 Pm
25/2/24
🏕️
Water 5L+Silica mix Fulvic+V1 45ml+V2 35ml Ph5.6 EC 2
1shot every 3hrs
First shot 12 AM
03.00 PM
26/2/24
🏕️ Last batch mix feed
1Min feed
12.00 AM
03.00 PM
Veg Foliar last 5min before lights off
27/2/24
🏕️ Water5L+Silica mix Fulvic 7ml+V1 40ml @1EC +V2 40ml @2EC Ph5.7
2Min feed
12.00 AM
03.55 PM
06.25 PM
09.15 PM 1min feed, hand watering to adjust any underwatering
28/2/24
Water 16L+Rhino Skin 15ml @0.1EC+Calmag 15ml @0.3EC PH6.9 + V1 125ml @1.2EC+V2 120ml @2EC PH6.2 adjust to PH5.6
Tray
FEED 1min(60ml) @27/2 at 11.50PM
28/2 Feed
11.00 AM 30Sec (30ml) WC from 52% goes up to 59%
02.42 PM 30sec
Dryback right now is 15% for 24hrs
⛺ Feed
08.50 AM 1.30Min
02.25 PM 1Min
04.50 PM 1Min hand watering to adjust any underwatering
Defoliation most big fan leaves
Likes
4
Share


@knnabisgrower
Follow
En la 6ta semana de vegetación hicimos una poda de bajos y desfoliación en general para potenciar el crecimiento de los brotes superiores, mejorando la iluminación y ventilación en el cultivo. También hicimos unos cuantos amarres (lst).

Processing
Likes
13
Share


@GrowGuy97
Follow
Start of week 5 today, everything seems to be going great! The Gelato OG is by far the biggest plant of the bunch so far but they all seem to be taking well to LST, HST , Topping & defoliation! Will be going in the flower tent as soon as the other ladies harvest so they will probably have atleast 2 to 3 more weeks of veg!


Likes
1
Share

@foxbberg
Follow
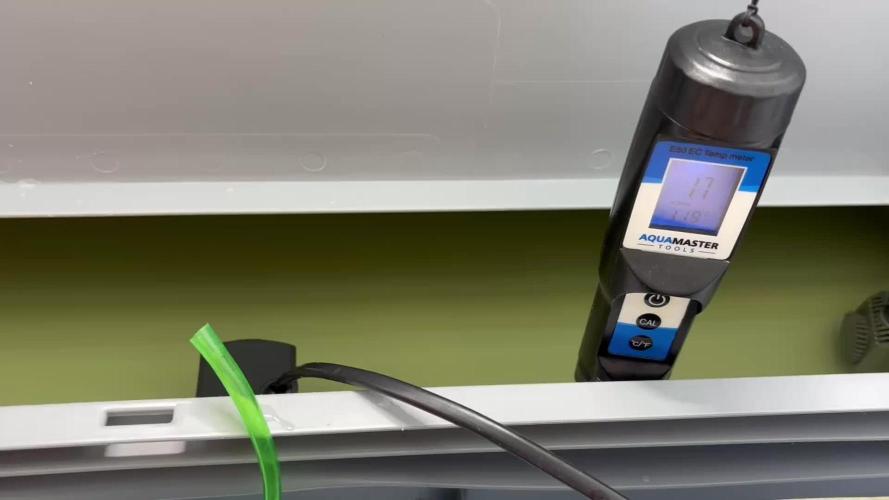
Changed ns …… now @ EC 1.7
The nerdy stuff:
As a result of my testing new growth-fertilzer, i‘m working with extremely high Ca/Mg figures right now.
Future ns will be way more conservative (~100mg Ca/~35mg Mg).
Plants don‘t show any signs of any nutrient excesses or lockouts.
The babies produce a lot of leaf-mass and really push forward. Yet they are dark green - new shoots and foliage turn dark rapidly.
Day 23
All the new growth reacts so well to the light, that i weave away light-thieves whenever i can, to get more strong shoots.
Day 24/25
Leafs start to grow from big to huuuge.
Vigourous nutrient-uptake….. filled up some ns to get back to 1.6. Daily weaving….. everything fine so far .
Day 26
Weaving and wondering how big leafs can grow in such a small tent
Day 27
Same same…..
t.b.c

Likes
11
Share


@Joni2017
Follow
Hello everybody 👋🏻 today full moon 🌕. I put the seed in a tupper on top of the router where it gives a good temperature😊. I will put the led at half power (400W) during vegetation and at full power (800W) in flowering.
Blue Cheese Auto
Blue Cheese Auto from Barney's Farm is a variety classified as indica / autoflowering, it will take longer to make more than the other cars in the catalog but it will surprise us when we finish its cultivation for its incredible quality.
In an interior it is a large producer and not only a central truncheon, but it will have multiple satellites surrounding it with bright and compact buds. Putting 4 plants per focus we will extract the maximum potential, which we will have to tutor so that they do not double the weight; get ready to see 500g dry when doing a manual job.
In outdoor crops it is ideal for hot climates, where we will get the best harvests when there is the strongest summer sun. The size that usually reaches is good, up to the meter; production is also reflected in the high compaction of this genetics, up to 50-80g dry for each car. It has average resistance to the attacks of pests and fungi so it is better to perform biological preventive treatments during the first 20 days.
Type: Feminised
Photoperiod: Autoflowering
Cultivation INTERIOR / EXTERIOR
Genetics Blue Cheese x Ruderalis
Indoor Productivity (g) 500 gr / m²
Productivity Average (g) 500
Autoflowering Harvest Time from Seed (days) 70 - 75
Height (cm) 80 / 100cm
Height in Interior (cm) 100cm
% Indica 80%
% Sativa 20%
Indica / Sativa Mostly Indica
Medical No
Mold Resistance (5 = Maximum) 4
Resistance to Botrytis (5 = Maximum) 5
Resistance to the cold (5 = Maximum) 5
Oidium Resistance (5 = Maximum) 4
Resistance to Red Spider (5 = Maximum) 4
Warm weather
% Stable Stability
Difficulty of Growth (5 = Difficult) 1
Bio Tabs
Now fertilizing your plants will be much easier; we only have to add the Bio Tabs and the other components that are included directly in the pot when we plant, and the rest of the crop will only add water to our pots.
In the middle of the crop you have to apply an irrigation with Orgratrex and Bactrex to reinforce the biological activity and that's it. We will have plants as always, the most productive and tasty, totally organic and without having to worry about excess nutrients or fertilize them.
Dosage and how to use the Starter Pack of Bio Tabs step by step:
Fill our pots to about 3/4 and add 3g of Mycotrex for each pot, no matter the size. More or less are 3 tablespoons of coffee rasas.
Then we add another 25g of Startrex (which comes to be 2 tablespoons) every 5L of soil, so if we have 10L of pot then 50g and so progressively.
We stir well to mix with our substrate and just fill the pot of earth.
Then we make the hole to transplant our plant to the final pot, and in that hole you have to throw another 2g of MycoTrex into the hole itself and we can now transplant our plants.
Then we have to add your Bio Tabs tablets, every 5L of earth a tablet on the substrate, if we have 10L then two tablets ... You have to bury them closer to the edge of the pot than in the center. They are buried about 5 cm deep in the substrate and we will have our plants fertilized for weeks.
We make a mixture with the last component that remains when we plant, Bactrex. Add 1g to a liter of water and give the first watering with that mixture.
From now on, you only have to water with water until the 5th week.
At the 5th week, we will have to contribute a new help to our plants, we will add 20ml of Orgatrex and 1g of Bactrex in 500ml of water and stir well. Water only with that half a liter a plant and only once.
Add water until the end of the crop, that's that easy.😋👏🏻👏🏻
Biobizz light mix
With Light Mix of BioBizz we will be 100% sure of having bought one of the best lands available for your seeds. Saving on the ground is one of the worst mistakes we can make, since we are starting a job that the final result is to seek the highest quality and production. To think that is where the plant will have to live all its days of life so it will have to be of the best possible quality.
With Light Mix you will have an excellent substrate, as each land has a different formula and composition, we will find out who will best resist this substrate, according to the climatic conditions where we are going to plant. It is characterized by its high proportion of water / oxygen retention, this soil pulls more towards water retention so it will be perfect for all those who live in warmer areas avoiding having to water the pots so often, it retains a lot of humidity. We will have to be careful with the first days of our plants so as not to soil the land too much, otherwise the roots will not shoot as they should and you could even drown your plants, this advice is worth all the autoflowering genetics that are more sensitive to root problems and excess irrigation.
This sack of earth comes very light of nutrients, so this substrate should provide practically nutrients in all phases of the crop from the second week.
Composition:
Peat moss
Perlite
Ec: 1.2
Ph: 6.2

Likes
3
Share


@DrJekyll_MrHydro
Follow
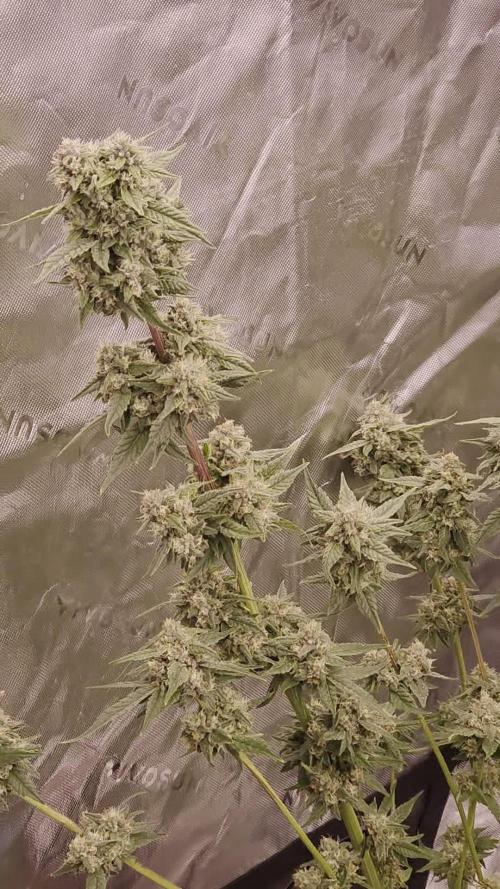
Those kind lights make all the difference... Especially when Power is included in rent. Lol.
Not quite my pound goal, but still from just one plant. Can't complain.
Gonna lose some weight during cure, I'm sure. Can't wait to smoke.
Likes
3
Share


@BossDean81
Follow
Day 22- She stopped putting on height due to one night of a dramatic temperature drop. It's a cooler fall this year plus a freeze came through the night before. That night, I was up doing some studying when I noticed the reading on the remote display. N o telling how long it had been in the very low 60's. The problem was fixed simply by adding a heater to the room. Now, the temp is only in the 68 degree range for the final 2 1/2 hrs. before the lights are cut back on.
Day 26- Her bud branches hav grown at least 2 -5 innches in length and have at least 2-4 bud sites already. Instead of Defoliation, I decided to actual two different types of LST. The first is simply bending to fan leaf branches under to expose the bud branches to more light. The main benefit is that you still keep the ability to absorb more of the light energy with them. I look at the fan leaves as your plant's " Personal Sun Panels". Since they store energy in the day and use that reserve to grow at night, why would you take something away for her that is meant to help her? Also, the second method I used is something I like to call" wind thickening". The technique is using wind resistance to train your plant's stem and branches to become more rigid by growing thicker to stablize itself. So, instead of a gentle breeze, I use a three speed box fan at varies distance. I started doing this on Day 22 and the results are definitely showing. The main stem went from 1/16 in. to a nice 3/8 in.
Likes
26
Share


@FUH20
Follow
2021 - 08 - 29
Wedding Glue Auto 1
- most fan leaf are starting to turn yellow , Hoping she finished up in a week to 2.
- Day 55 since sprout
- trichomes are mostly milky, not much amber on buds yet.
Wedding Glue Auto 2
- Some of the buds and fan leaf with abit of sugar leaf are turning purple...
- Day 50 since sprout
- She's fattening up nicely
image format : Wedding Glue Auto 1-4.1 day 27
Wedding Glue Auto 1( plant strain and tag number) , 4 (week), 1 (image number) , day 27 ( Date since sprout )

Likes
7
Share

@ThatsmyGrow
Follow
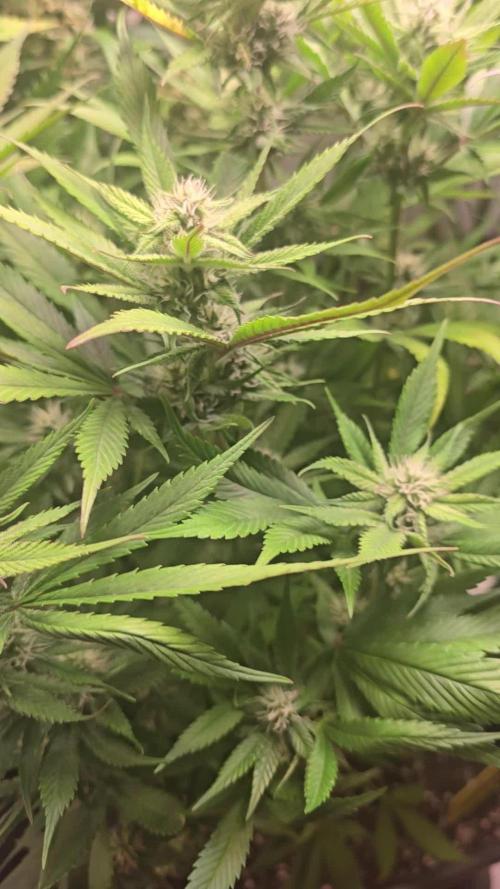
How beautifully it's slowly turning purple. I'm already looking forward to the RF3 version of Strawberry Gorilla. It's really not the biggest, but I hope it will still produce thick buds.
Likes
9
Share


@Canadian
Follow
Looks like the plant is reaching its final weeks and has been doing great in my garden and is looking fantastic from now on pH water and calmag. looks Like it is within 1% of Amber so still a few days to go normally I will cut out all the fan leaf and a few Sugar Leaf then take down the entire plant and hanging upside down but because the place where I dry is the same tent but this time around I'm probably going to need to create a dry box cut them down into more manageable size because the other girls in my tent well take more than a few weeks I also can see how much of a difference does it make between hang them upside down and drying them like this thank you for reading I will continue to update have a happy grow
Likes
14
Share


@CrazyRussian
Follow
This week the flowers became bigger and denser. They all look very healthy, and the smell is really strong right now. If you enter the house you can smell it right at the entrance... Today I have increased the lights to 100% and the sunrise simulation was on as well. My prediction is that the Sweet ZZs will be the first plants that are ready to harvest, then the Royal Cookies, and then Green Gelato. I've set the dehumidifier to 40% humidity, because I would love to protect the buds from rotting. The temperature is around 25-26 degrees, the humidity is very stable.
Likes
13
Share


@Drawer
Follow
A sad week, I found bud rot and had to take my plants out and do a big check and remove all dense underdeveloped growth.
It will be a pretty big hit on the yield I guess but the most important thing is learning and that I did.
The bud rot could spread due to my RH being 65/70 at nights and it used to be +80 before, + bad airflow.
I got new fans in the tent and my dehumidifier was ordered already but its not in yet.
On the other side, the plants are looking pretty damn good, they smell amazing
and 3 of the 4 plants is getting a very dense nug structure.

Processing
Likes
70
Share


@CBD_Sweden
Follow
@MephistoGenetics,
Hi all the happy people here in GrowDiaries.
This is my second cultivation ever and it will be fun to try a bigger space than my closet grow.
First, I'm just going to say I'm done with the construction of my new growroom.
The room is 2.14 meters by 1.7 meters and has a ceiling height of 2 meters.
It provides a floor area of 3.6 square meters.
I use a 54 Watt Lightwawe T5 for germination and 2 Pcs 400 Watt HPS lamps.
I have a channel fan that replaces the room air about 40 times an hour to get a comfortable environment in the room, the air enters a fresh air intake from the outside.
The air is purified through a carbon filter to then leave the room to the rest of the basement.
Then I use that heat to heat the rest of the basement.
I will use 10 pcs 15 liter Autopots to grow with and a 100 liter water tank that supplies the pots of water and nutrition.
I will grow completely organically in soil and will watercure my buds to get the best possible medicine for me.
But there are no cultivation rooms to be displayed here, so I continue with what is most important.
Today I have put my seeds in paper towel and hope the seeds have germinated within a few days.
I am very excited to see how the new growroom will work and how this Illuminauto 21 - Sour Crinkle will turn out.
Illuminauto 21 - Sour Crinkle (Grape Crinkle x Sour Crack)
Two of our fastest and frostiest varieties collide to make a sweet and sour delight!
Expect super frosty, compact nugs that won't be a toke for novices.
Destined to be a great strain for extraction work too!
Plant size - Small - Medium
Cycle time - 60-65 days from sprout
Indica/Sativa - 80/20
Frost level - Extra Ridiculous
https://www.mephistogenetics.com/product-page/illuminauto-21-sour-crinkle
.................................................................................................................................................................................................................................................................................................................................................
2017-08-21. Started to germinate the seed.
.....................................................................................................................................................................................................................................................................................................................................................
2017-08-23. Seed germinated and put in small pot in the humidity dome.
.........................................................................................................................................................................................................................................................................................................................................................
2017-08-27. Slow and steady she grows.
---------------------------------------------------------------------------------------------------------------------------------------------------------------------------------------
2017-08-28. Transplanted in 15 liter autopot. Check the roots on this girl
-----------------------------------------------------------------------------------------------------
2017-08-29. New movie of the girl.
-------------------------------------------------------------------------------------------------------------------------------------------------------------------------------------------------------------
2017-08-29.
Hello to you who read my diary, I just want to say that I am pleased that you have chosen to check in with me and in my diary.
I just want to say that I do this for myself and for a steady flow of my medicine.
Everything you read and see in my diary is 100% honest and I will never distort or beautify anything here.
I document my crops so that I can learn from my mistakes and also to look back at those different crops.
I try to update with pictures every day and with text if something special has happened in the garden.
This is my strainhunt for the best medicine and the beginning of my journey with cannabis and the cultivation of it.
-----------------------------------------------------------------------------------------------------------------------------------------------------------------------
2017-08-30. Cleaned the room this morning, just vacuuming and cleaning with chlorine solution. Im testing the fan to control temp and humidity, it works great.
Added some pics and a movie. Everything is looking great right now.
-------------------------------------------------------------------------------------------------------------------------------------------------------------------------------
2017-08-31. 3 new pics.
---------------------------------------------------------------------------------------------------
2017-09-01. New pics and a video from the grow room today.
------------------------------------------------------------------------
2017-09-02. New pic.
--------------------------------------------------------
2017-09-03. New video from this morning.
---------------------------------------------------------------------

Likes
16
Share


@DonKrika
Follow
I'm starting to see top leaves starting to change colour on the plant to the right, I hope the progression of this problem does not kill the plant.
DAY 116
PH - 6
Solution Temp - 17.5
PPM-1705
Watering Volume per plant - 4L
DAY 119 - Molasses
PH - 6.08
Solution Temp - 19.7
PPM-573
Watering Volume per plant - 4L

Likes
45
Share


@yan420
Follow
FERMAKOR BARREL MIX – BASE IN USE
(Testing on the Fantasy Feast girl we pulled out of another diary
https://growdiaries.com/diaries/274722-grow-journal-by-yan402 )
(FERMAKOR BASE SYSTEM KOH VERSION diary
https://growdiaries.com/diaries/278391-grow-journal-by-yan402)
(Urea & Micros on the way — first week running without them)
🍶💧🍶💧🍶💧🍶💧🍶
💧 30 L Barrel – Current Working Mix
🍶💧🍶💧🍶💧🍶💧🍶
Step 1 – Calcium Nitrate (Part A)
7 L warm water (~35–40 °C) → added 45 g Calcinit, stirred until fully clear.
That’s the calcium + nitrogen backbone for the feed.
Step 2 – FERMAKOR PK Base (Part B)
15 L water in the main barrel → added 30 ml FERMAKOR PK Concentrate, mixed well.
This forms the main P + K part of the formula.
Step 3 – Combine Solutions
Slowly poured the Calcinit mix into the barrel while stirring — no reaction, still crystal clear.
That confirms the mix is stable and precipitation-free.
🌿 Step 4 – FPJ / FFJ Batch
Added 30 ml homemade FPJ (fish + veg batch) ≈ 1 ml/L.
Color shifted to a light-amber tone — looks alive and active.
🍋 Step 5 – Citric Acid Balance
Added 1 tsp citric acid after everything was blended to fine-tune pH and help chelate micros later on.
📦 Step 6 – Top Up & Check
Filled to the 30 L mark with plain water → pH tested with drops, showing yellow-green — roughly 5.8 – 6.0 range.
Nice clean look, stable smell, no residue.
💧 Current Base Ingredients (Active Mix)
Warm Water ≈ 22 L total
Calcinit 45 g → N + Ca foundation
FERMAKOR PK Base 30 ml → P + K support
Citric Acid 1 tsp → Chelation + pH balance
FPJ / Fish Emulsion 30 ml → Organic enzyme booster
Result: clean amber mix, mild and balanced.
I’ll let this version run for a week before adding anything.
👀👀👀👀👀👀
Observations and changes
👀👀👀👀👀👀
27.10.25 VW27 noticed some min burnt tips so I decreased Calcium Nitrate 45 to → 40g, decided to add two more elements micros and Epsom salts just to make sure they got everything, Fetrilon Combi 1 (Micros): 0.5 g, Epsom salts: 8 g
28.10.25 VW27 she seems devoid of any deficiencies, seems ready for the flip to 12/12
02.11.25 VW27 girl is looking good so I decided to stop making daily videos and do a standard once a week update.
09.11.25 aVW28 7 days since flip,stretch in full swing, first pistils showing, leaf color deep and healthy. Slight tip burn early week → gone after pH stabilized.
Feed stayed clear, no residue, roots clean and sweet-smelling, did what I hope is a last cleanup and pruning🎥
10.11.25 VW29 added Phosphoric acid pH down to the schedule for flowering stage.
14.11.25 FW1 FERMAKOR PK Micros 40 → 50 ml
23.11.25 FW2 got some burnt tips, observe and act accordingly in case it worsens, diluted by 25% for this week.
🌱💦🌱💦🌱💦🌱💦🌱💦🌱
🌿Day to day tasks & actions 🌿
🌱💦🌱💦🌱💦🌱💦🌱💦🌱
23.11.25 FW1 – Fed 3l of #1 → 1l runoff
24.11.25 FW2 – Fed 5l of #1 → 2l runoff
25.11.25 FW2 – Fed 5l of #1 → 2l runoff
26.11.25 FW2 – Fed 5l of #1 → 2l runoff
27.11.25 FW2 – Fed 5l of #1 → 2l runoff
28.11.25 FW2 – Fed 5l of #1 → 2l runoff
29.11.25 FW2 – Fed 5l of #1 → 2l runoff
30.11.25 FW2 – Fed 5l of #1 → 2l runoff
🍶💧🍶💧🍶💧🍶💧🍶
💧 Nutrients in 30 L #1 Veg — FERMAKOR
🍶💧🍶💧🍶💧🍶💧🍶
💧 Calcium Nitrate (Calcinit / Nitcal):
45 g → 40 g → 35 g
= 1.33 g/L → 207 ppm N + 253 ppm Ca
= 1.17 g/L → 183 ppm N + 224 ppm Ca (current)
💧 PK Concentrate (FERMAKOR Base):
30 ml → 40 ml → 50 ml
= 1.00 → 1.33 → 1.66 ml/L
→ balanced 1:1 P:K + light micros (from extract)
💧 Home-made FFJ/FPJ (Fish + Veg):
30 ml
= 1.00 ml/L
Epsom Salt (MgSO₄·7H₂O):
8 g
= 0.27 g/L → 26 ppm Mg + 35 ppm S
💧 Fetrilon Combi 1 (Micros):
0.5 g
= 0.017 g/L
→ Fe 0.7 ppm • Mn 0.7 ppm • Zn 0.3 ppm • Cu 0.3 ppm • B 0.1 ppm • Mo 0.02 ppm
Phosphoric Acid (pH down) + Citric Acid (chelation):
→ First set pH with phosphoric acid
→ Add a little citric only if extra chelation is needed
💧 Target pH: 5.8 – 6.0 (drop test yellow-green)
📦 TOTAL Inputs:
60 ml → 70 ml → 80 ml / 48.5 g per 30 L
= 2.00 → 2.33 → 2.66 ml/L + 1.62 g/L (current)
YouTube Link: https://youtube.com/-m8h?si=A7x4Zlr2kj-_ga31
Likes
1
Share


@ChitownCannaChica
Follow
So maybe another 2 weeks? She is super sticky, very beautiful and almost there. I’m getting a little concerned as humidity is super high right now.
✌️🏻💚
Likes
11
Share

@Bread_n_Buds
Follow
Good morning, we're finally here.
We've changed locations, still in southern Spain, but this time much closer to the sea and with a Mediterranean climate, like my Italian roots. Love it.
We'll start with the autoflowering plants first; this time, they'll all be grown without cutting techniques. We'll always have two plants: one grown with just a little tidying and left to grow straight, and the other using techniques that don't involve cutting, and therefore slowing things down.
I need weed; the grower must also consider this, so the autoflowering plants will finish as quickly as possible.
In most cases, it will be a nice, firm LST, not too delicate, and I'll fim if the plant seems to touch the sky, as has happened recently, probably thanks to the Plagron fertilizers, which will be with us this time too.
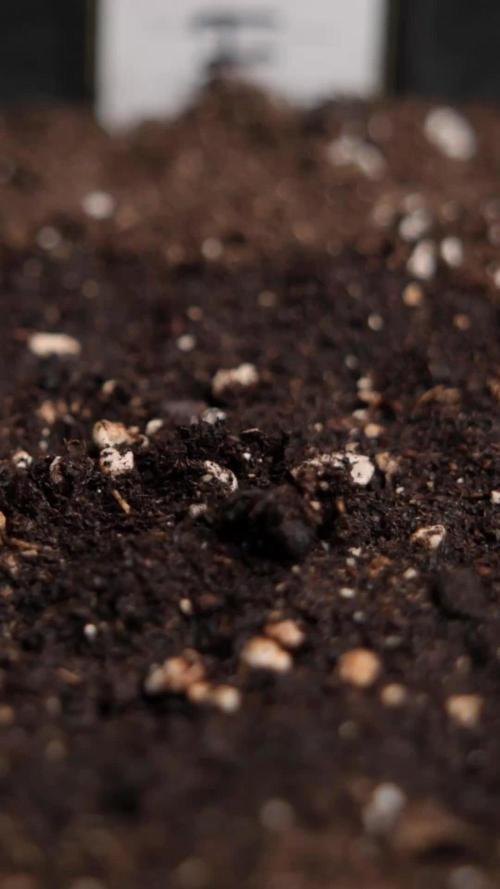
The chosen soil is the recently released Plagron Bio LightMix, which will allow us a more regular and reliable start without the sudden changes that liquid fertilizers can cause.
We're 100% organic this time too. For the first time, we also used Seedbooster as soon as it arrived with the last and first ones: 75% water + 25% hydrogen peroxide. *** From my point of view, it's very important to add hydrogen peroxide if you start with the seed in a small glass of water. As soon as it's opened, it would drown too; the oxygen bubbles in the hydrogen peroxide prevent suffocation.
www.plagron.com
That said, our Critical Cheese Automatic is a classic strain. We expect stability and potency, and to be honest, we're looking for that cheesey aroma that has been lost in the hybridizations of time. We still hope for it. Come on, my friend, you were born beautifully under the eye of our mirrorless camera. Keep giving us thrills until the end.
https://www.zamnesia.io/en/3334-zamnesia-seeds-critical-cheese-automatic-feminized.html
Zamnesia Description - An iconic strain from the UK, Cheese has quickly become one of the most sought-after strains in the world. Thanks to the breeders at Zamnesia Seeds, we now have an easy-to-grow autoflowering variant with identical qualities to the extraordinary original, the only major difference being that it can be harvested in 10 weeks!
www.zamnesia.com
