Likes
Comments
Share
@vito_scl
Follow
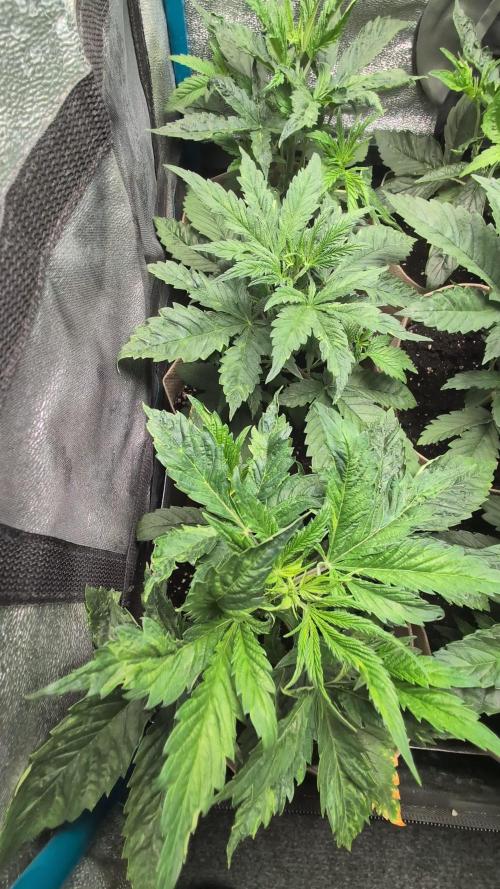
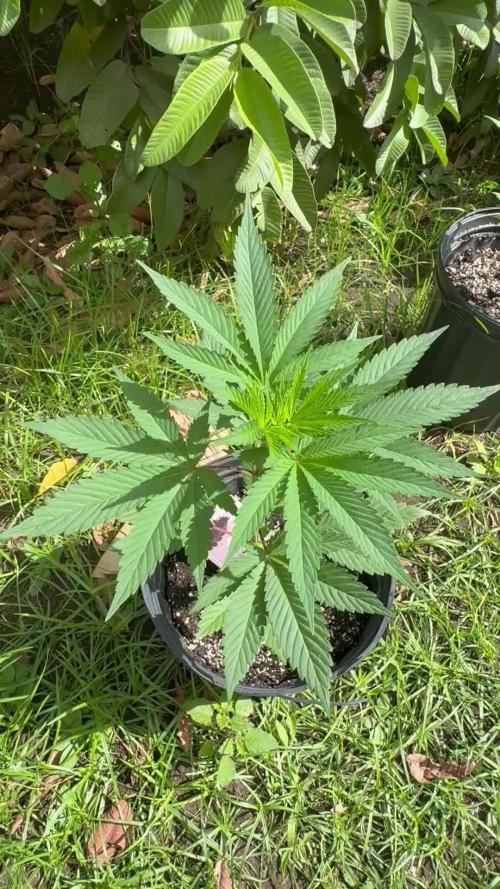
Se sueltan amarras de LST y se deja de tejer en la malla. Ramas presentan crecimiento del 100% durante la semana. Se sube un par de cms la malla. Defoliación selectiva en día 14. Riego por medio con fertilizantes. Riegos abundantes solo con agua. Pistilos comienzan a ser más notorios. Leve olor. Poda de bajos en una semana más. Ventilador en mínimo durante la noche. Al máximo durante el día.
Likes
27
Share
Welcome to my Frosted Guava Auto Diary Sponsored by Zamneisa. Pre Flower Days 21-22 Days 43-44 Flower Days 0-2 Days 45th-47th Day(s) She's been growing nonstop the past 3 weeks. Longest Pre Flower in an auto I've had. She's overall very healthy & happy. Not a lot of girt & heavy loads of thich head pistils sites, more thin & ropey. Leading me to believe. I've a runt on my hands. Idk she has so much growth. I think she's gonna be a larfy owl girl. I've been wrong many a time before. I just don't see it though. Not from other FGA grows. She's skipped a beat. Diet/Defoliation G,B,Micro still 1:3:3 in blooms favour. Have upped her feeds from as I've done with all my soil grows, as opposed to rasing the ppm. I just increased Frequency of feeds. Have been using Terra Powers products to enhance the flavours and terpine profile. Edited Day 48 Will be giving her Green Sensation & Terpinator starting tomorrow. Defoliation was done on day 48, took most of the main fan leafs. About 10% will do a last and hard defol around day 50-52. Lights: P/SF 1000(S) Am using 2 x 100watts. Both put out a ppfd from 850-950 umol.. both dif spectrums. Decided, she'll be getting 14hrs under my SP3000 and then back under the 100watts for the other 4hrs.
Likes
92
Share
Week 9 - First Week of Flowering 🌸 The dark period has ended, and these ladies came back into the light fully energized and ready for action! It’s just the first week of flower, and they’re all praying, stretching, and absolutely thriving—filling up every inch of the tent. This grow space is officially packed from wall to wall, with each plant competing for its share of light and showing off some of the biggest, healthiest leaves I’ve seen yet! 🌱 A few strategic plucks here and there have kept airflow smooth and light penetration balanced. Those big leaves? They’re a sign of happy, healthy growth. Large leaves help the plant capture maximum light energy, essential during this stage, especially as they start focusing on developing those flowers. When plants grow huge, vibrant leaves like these, it means they’re well-nourished and content in their environment—a true testament to the well-balanced conditions we’ve got going in the tent! Flowering Parameters 🌡️ Room Environment: • Temperature: 26.7°C • Humidity: 63.3% • CO2: 960 ppm • VPD: 1.29 kPa (prime zone for flowering health!) Lighting: • Light Intensity: 835 PPFD (ideal for boosting flower growth) • Solution: pH 5.96, TDS 460 ppm, temp 21.1°C • Medium: Moisture: 100%, TDS: 520 ppm, Temp: 21.6°C Carbon Filter Installation & Smell Management 🌬️🌱 With the transition to flower, the scent profile is already starting to kick in—crazy for the first week, right? 🌸 To keep everything fresh and under wraps, I’ve set up a carbon filter system. Here’s how it’s working: I’ve connected the filter to my Aerofan, which pulls air directly from the tent. This air is cleaned by the filter and released into the main room, where it then passes through another filter before exiting my space. This dual-filter setup means no scent escapes into the wild, keeping things stealthy and the grow room a peaceful, scent-contained environment. Perfect for anyone concerned about keeping their home free from that telltale aroma! 🕶️🌬️ Enhanced Lighting with Emerson Effect 🌞 This week, I’ve introduced an extra 15 minutes of red light at the beginning and end of each light cycle. Why? Well, this red boost taps into the Emerson effect, enhancing photosynthesis efficiency, especially during the flowering stage. By stimulating a little extra wake-up and wind-down light, we’re mimicking the natural sunrise and sunset experience for these plants, which can help reduce flowering time. Not only does it encourage smoother transitions into day and night, but in theory, it’ll help these ladies finish a bit faster, while giving them a little nudge to build more substantial, quality flowers. 🌇 Nutrient Adjustments 🌱 Now that we’re in flower, I’ve swapped out the Start Booster for P-Boost and TopBooster to specifically support flowering needs. Here’s why: • P-Boost brings in additional phosphorus, vital for energy transfer and cell division as the plant channels more resources into budding sites. • TopBooster supports the flowering phase by improving flower quality and density, helping to build those big, aromatic buds we’re after. These changes bring the nutrient mix in line with what’s most beneficial at this stage. All this precise dialing in is easy to manage thanks to the TrolMaster system. From pH to nutrient scheduling, the TrolMaster ecosystem and ThinkGrow LEDs have been the ultimate teammates in this grow journey, giving me real-time data, fine control, and peace of mind. 💯 (Not introducing UV light just yet, but stay tuned as that’s coming soon for an added boost!) Looking Forward 🌟 Next week, we’ll be upping the reds, giving us an even greater chance of activating those flowering signals for a smoother, faster transition through the cycle. I’ll keep tweaking and fine-tuning every parameter to make sure these ladies get exactly what they need to thrive. Big thanks to the TrolMaster system for keeping everything in balance and optimized, along with the supportive Grow Fam following this journey! Your enthusiasm, advice, and support are a huge part of this grow’s success. Keep following for more updates, and stay tuned for what’s next! 🌿✨ P.S. Deep Dive: TrolMaster’s MBS-S8 CO₂ Sensor & Smoke Detector 🚨 The MBS-S8 CO₂ Sensor from TrolMaster is a powerhouse for growers, especially when it comes to optimizing plant growth and efficiency in a controlled environment. This sensor continuously monitors CO₂ levels and integrates directly with the TrolMaster ecosystem, giving you real-time data on CO₂ concentration. Ideal levels of CO₂ can significantly boost growth and yield during certain stages, so understanding and managing CO₂ is key. With the MBS-S8, I can control CO₂ levels precisely, keeping them within the optimal range for photosynthesis. This sensor is a game-changer because it adjusts CO₂ delivery automatically, giving plants exactly what they need without any extra monitoring from me. Meanwhile, TrolMaster’s Smoke Detector is an essential safety device, especially in spaces with electrical equipment, lights, and heat-generating components. This detector can be set up to alert me instantly via the TrolMaster app if any smoke is detected, allowing me to respond immediately to any potential issues. Fires and smoke are rare in controlled grow setups but having this safety measure provides peace of mind and lets me focus on the plants without constant worry. It’s an incredible tool for any grower prioritizing safety and proactive monitoring. Discount Codes so you can save big on your next check out 💚💚💚 Kannabia - DOGDOCTOR 30% off SeedsmanSeeds - DOGDOCTOR 10% off CannaKan- DOGDOCTOR 15% off terpyz.eu - DOCTOR 15% off The Neutralizer - PORKIT5-DOG 15% off As always thank you all for stopping by, for the love and for it all , this journey of mine wold just not be the same without you guys, the love and support is very much appreciated and i fell honored and so joyful with you all in my life 🙏
 With true love comes happiness 💚🙏 Always believe in your self and always do things expecting nothing and with an open heart , be a giver and the universe will give back to you in ways you could not even imagine so 💚 Friendly reminder all you see here is pure research and for educational purposes only Growers Love to you all 💚💚💚
Likes
2
Share
Skywalker rounding the corner. Harvested 8/7 @ Day 76 from sprout Blueberry bulking up. Glueberry og done stretching and bulking up now
Likes
19
Share
Day 22 and there have been significant changes in the size of the fan leaves. The stems are looking much fatter and more sturdy as well. Cheech has her 5 nodes, perfect and ready for topping. I am going to put off topping her though until Venezia is ready and that should be in the coming couple of days. Other than that, changed water and adjusted the lights about 3cm higher to keep them at 60cm from the plant. Again I left the Milwaukee PH controller to run for about an hour to get the PH down to 6.0 Day 25 and ladies have been topped at node 4, keeping node 3 and cleaning node 1 & 2. Light LST on Cheech’s axillary buds which are already well developed Day 27 - following up with gentle LST twice daily, tightening up the formation of the mainline. I’ve noticed what seems to be a bit of stress on the leaves of Cheech (see photos) which is affecting both plants under the same light. So I’ve moved the light up a few centimetres and rechecked and adjusted the PH which was at around 6.4.
Likes
39
Share
@J_diaz420
Follow
Esta semana todo tranquilo, en un par de días más haré poda de bajos y defoliación . También se colocaran tutores de vara a cada planta
Likes
10
Share
@Sundance
Follow
This week continues with nice flowering with strong smell. One plant is light green, I don't know why. I also added on more light to my grow tent.
Likes
21
Share
FINALLY TRANSPLANTED into 10 gallon pots: Flowering SUPER SOIL COMPOSITION (per 20 gal): Medium: -25% coco loco (sustainably sourced from shrilanka i think) -25% peat moss (sustainably source in north america) -50% recycled depleted soil Amendments: -3 cups Citrus Tone Espoma 5-3-6 -1 cup 4-8-4 Mother Earth Bloom -1 cup 2-3-6 Earth Dust Boost -5 cups worm castings -80g w- 20 wollastanite (si + ca) -80g epsom salts -40g dolomite lime Here is what i am thinking: -Plants look good in the new pots, i figure it will be ready to scrog in about a week. -Never heard of anyone using this citrus tone fert but the utah state study said that optimal fertilizer is 20-10-20 blue mixture. Well as an organic grower I want to replicate that ratio. Its not 100% but the point is its high in nitrogen and potassium with adequate phosphorous because I am researching small scale rn and one day I will need to be very mindful of my P usage to be sustainable and regenerative. -I performed a preventative insect repellent because I saw thrip damage and I want to be safe. Honestly I think I am just going to do a neem oil treatment twice before going into flower every time now. I did 1tsp cold pressed jacks neem oil + 1 tsp w-20 wollastanite per 16 oz spray bottle and I drenched both girls all over. I plan on doing one more the day I decide to flip to flower. -Ca is far more important than phosphorous and the nutrient companies have been milking the myths about nutrient ratios for 50 years.' -I really put focus on the rock dust and inert minerals because I have never paid any attention to them but I will be stressing and pushing these plants with light so i need them optimal. -I started my own compost bin with holes in the back yard and I am planning on buying african night crawlers to start a worm bin that way I have two kinds of compost to break down my bubble hash waste and food from the kitchen. Will be great for teas. -I will water them in with a compost tea I am brewing/aerating currently. Giving it 24 hours.
Likes
5
Share
@Budhunter
Follow
Unfortunately what we never want to happen has happened with my baby.. bud rot.. on day 98 of cycle I found 1 bud with bud rot, cut it off, checked the plant and could not find more.. flushed the plant and wait next day to see how it goes. After 2 days main bud was identified with bud rot too.. so sad.. probably due high humidity in my environment + colder weather we are starting to have.. so on day 101 harvest it.. could go few more days to get more amber trichomes but decided to harvest it to avoid lose more buds .. I will keep watching it to see if no spread when drying :(
Likes
12
Share
@valiotoro
Follow
One with a topping the other one just LST both huge yield!🦖 For the smell its cookie dough,lemon & diesel🍪🍋⛽️ Super sticky buds 🤩
Likes
7
Share
Turning a beautiful purple color by genetic precursor. I didn’t induce this color change with nutes or temp. Same gorgeous terps getting louder and louder. Can’t wait!
Likes
9
Share
D01 - 25/09 -> New Home for my fellows clones coming from one of biggest plant I ever saw: a Royal Queen Seeds Skunk XL D02 - 26/09 -> I think she has a little zinc deficency, so i dropped down to ph to 5.5 D03 - 27/09 -> Topped one girl to see what happens. If everything goes well, I'm going to topping all of them. Increased EC until 1.3 D04 - 28/09 -> Topping of other buds D05 - 29/09 -> Rest for the girls. Increased EC until 1.5 D06 - 30/09 -> SCROG Net Setup and a little of defolation. Tomorrow I'm going to cut all the branches below the red line (see picture). I want to make a main lining alongside the SCROG Net with 2-3 branches and cut off all the branches below except for the girl on the left that is too short yet. D07 - 01/10 -> I Cut off the branches of only one girl, waiting to see her reaction to the stress before to do the same to other girls. Increased EC until 1.8.
Likes
6
Share
WEEK 4: The plants are now in the third week of the growth phase. I topped all three plants on the main stem and cut off the 4 largest top leaves so that the side shoots have more light available. Plant #1 is clearly the smallest and is not as developed as the other two. Since I only want to take two plants into the flowering phase, I tend to sort them out. Plant #2 looks the most vital and has already developed a noticeable smell. Plant #3 still has a strange leaf shape, although I have the impression that this has improved slightly The plants in 6L pots and added 5% FLO (Living Soil Fertilizer). I let the soil develop for 14 days beforehand. Clear mycelia have formed and the soil has a very pleasant forest floor smell. - Light Power: 40% - Soil: BioBizz Light Mix + 5% FLO (Living Soil Fertilizer) - Additives: Dynomyco mycorrhiza granules
Likes
11
Share
@Sators
Follow
This week marked the final chapter of this journey. After 17 days of sunny, dry conditions, the sudden return of damp, humid weather and low airflow triggered internal bud rot (Botrytis) deep inside the main cola. Despite regular inspections and careful care, it developed rapidly in the dense core. I removed the affected top to stop further spread, but it was clear — nature had made her decision. The plant gave her all and was already in the final ripening stage, so I’m grateful for what she produced. Lesson of the week: Even outdoor autoflowers can fall victim to mould late in flower, especially in humid coastal climates like Ramsgate. Next time, I’ll cover my plants during the final weeks to protect from dew, humidity, and stagnant moisture. Big thanks to FastBuds for a strong and impressive cultivar — this was a powerful pheno with excellent structure, trichome coverage, and strong medicinal aroma. The genetics were solid; this was simply a weather issue. Every grow teaches us something. Grateful for the ride.
Likes
25
Share
Eccoci arrivati al termine..amici grower missione compiuta anche con questa watermelon.ora che sia anche bella dolce e forte soprattutto 🤣😂💪✌️🕉️ boom Shiva Shankar
Likes
1
Share
@BigGGrows
Follow
She has been in the greenhouse OUTSIDE for about 10 days now. I do have supplement lighting and air circulation in there. Running 2 450 watt advertised full spectrum tripple led cobs with an 120 watt true draw per unit. So 240 watts from the plug in the green house. I run them as supplemental on cloudy days and an hour or 2 before complete sunset. I have began flushing towards the end of this week. She was fed 1/4 strength nutes DAILY up to this point. Now only TPS signal and molasses to flush her with. I plan for a 10-14 day flush. The last 4-5 days i will drop the molasses and run straight TPS signal and ph tap water. I am now begining to see the swell towards the end of this week....i am happy about that! I hope those calyxes get nice and fat during this flushing. So far so good.....she has taken to the green house well!
Likes
5
Share
Die Luftfeuchtigkeit ist jetzt ca. bei 40-45 % 💧 Die ersten Anzeichen der Vorblüte kamen gegen Ende der letzten Woche zum Vorschein. Die Vegetationsphase ist somit beendet, nun beginnt der Stretch und die Blütenbildung.🌱🍁 Deshalb beginne ich ab diese Woche mit dem Blütedünger. Vodoo Juice soll weiter die Wurzeln stärken während sie in die Höhe schiesst. Es bleibt nicht viel Zeit bei Autos.👀🌲