Likes
Comments
Share
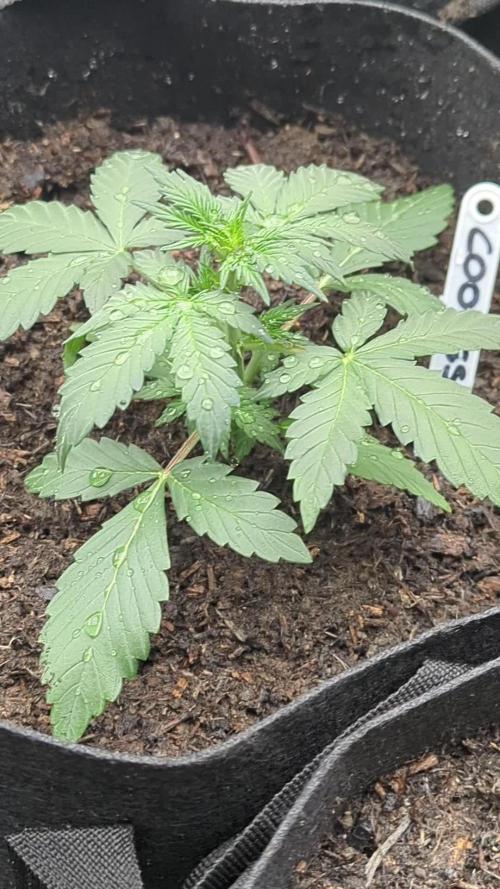
Popped this bad boy into for this week! I did a pretty through preflower trim. I essentially cut all but the uppermost fan leaves on every stem so they're all looking pretty scrawny in the photos. I changed the lights to bloom setting and the timer to 12/12.
Likes
17
Share
We’re in the second week of flowering, and the plants are really starting to stretch! 🌿 They’ve gained good height, especially the one without LST, which has grown tall very quickly. It’s been exciting to watch them reach upward as they prepare for the bud development phase. Everything is looking good overall, and I’m happy with the progress so far. I’m really looking forward to seeing how the buds will start forming in the next few weeks! 😁✹
Likes
45
Share
5/1 Plants are being rock stars. The event horizons and toasted toffy have been lollipopped abd it looks like lsted. I need to tie down the branches. The one sherb pie looks like it has a little bit of light burn but everything else is doing awesome. 5/2 Didn't write anything I forgot. 5/3 Plants are still doing great. The event horizon is coming out of reveg and isn't so twisty. It's time to start LSTing. I just haven't had time. I'm planning to put some work in today. Soil still seemed a little wet. I FIMed a GMO. I'll wait to see how that turns out before I do the rest. After today I'll have more time. Plants still aren't DIRECTLY under the light. I want to turn on both switches but I'm afraid they'll burn. 5/4 Still going strong. Watered today. Used approximately 3 Gatorade bottles. I tried to split one bottle between 3 plants. I want the roots searching for water. I want these 1 gallons to be full of roots before the transplant. I'm thinking I may do some lsting today as well as some topping or FIM. I'll update. Seedlings seem to come out of that stall. Didn't think they'd make it. 5/5 When I arrived I realized I had left the light OFF from the morning before when I was watering and inspecting things. Hooe this doesn't mess things up to bad. I've got one event horizon that's having trouble coming out of reveg. Everything else looks good. Those stunted auto seeds are coming up with their Second set of leaves. Definately took long enough. 5/6 I got close and inspected every plant. I really want to flip the bloom switch on too. I turned it on for a minute and it's bright as fuck. I think if I could find a way to raise the light higher (I'm working on a theory) I might be able to flip both switches. However I'm noticing what looks like light burn or light stress on some of them. It's not the too of the plant though. It's like the serated leaves are turning in on themselves. The 2 that I think reveged are turning their leaves inside out. Not sure if it's a reveg thing or has something to do with the light. I raised the light at noon. I'll see if this has a positive effect. The shades only partially block direct sunlight so I may need to make sure that's what's not causing this. The 4 gmo show no signs. I moved one almost directly under the light to see if it had an effect or if it's strain dependent. I'm definitely need to learn how to use l.e.d's better. Oh well. They'll go outside in less than a month. 5/7 I'm hoping leaving that light off didn't fuck with the clones that revegged. Raisingcthe light was a good idea. I can raise it higher and I'd like to hit the other switch. It's so much brighter and the gmos don't have any burns. They'll be going outside in a few weeks anyway. I was going to but a parmeter and I still might. The auto seeds are coming up pretty good. It's in the 60s today. I might bring the girls outside on the covered porch and see how they do.
Likes
246
Share
@Qutro
Follow
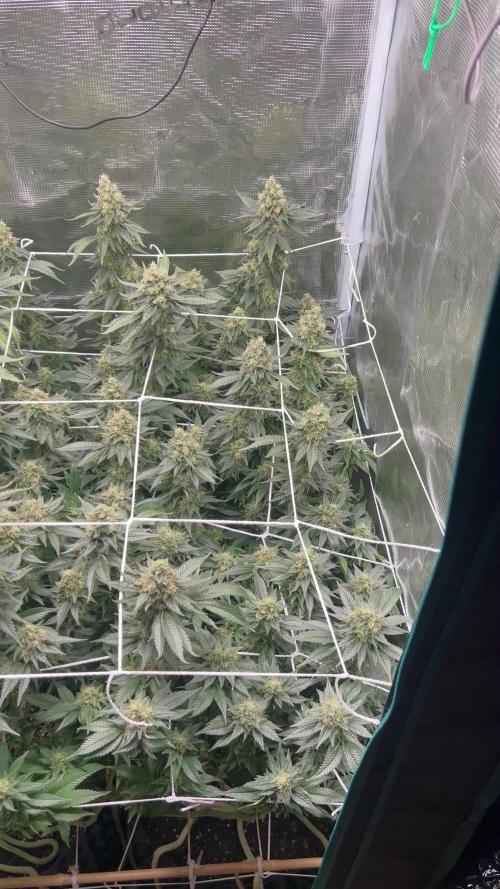
Hi Growmies, This girls are just amazing, they are growing beautifully and from this week asking for more food, there leaf structure is typical hybrid, they are beautiful in all ways.đŸŒžđŸŒ± Last week’s under watering shows some phosphorus deficiency in one lady so we will take more care of her from now. Watering in every third day with 3 litres each. Running the light on 100% brightness. Just rearranged them under the scrog net and while doing all this i got full sticky all over me from fingers to arm so can’t complain about resin production haha.đŸ‘šâ€đŸŒŸđŸ» There sweet and herbal smell with pungent funkiness is lovely and it will just increase for sure in the next week and I can’t wait. Vpd:1,26-1,39kpa Par: 780-1070ppfd Thanks for stopping by and have a lovely week fellow gardeners!đŸȘ😎 Peace âœŒïžđŸ»
Likes
5
Share
@Growin_it
Follow
Getting close to harvest. Very weak smell. Buds slowly fattening. Over all grow looking good. Checked trichomes. Now, nice and cloudy. UVB light on a couple of hours a day, just after mid-day.
Likes
13
Share
Recette du tco pour 20 litres. (Grammes : gr) 50gr biochar 250gr zĂ©olite 3gr granulĂ© Micro-Organisme IT45 10gr pollen d’abeilles 10gr levure de biĂšre 3gr endomychorize 10gr consoude 20gr vers de farine 10gr cendre coque de ricin 12gr ortie microniser 15gr Kelp 10gr spiruline 10gr de cbd living soil 20ml de miel liquide 30ml de mĂ©lasse 20ml d’acide humiques et fluvic Mettre tous les ingrĂ©dients (sauf la mĂ©lasse ,l’acide h/f et le miel) dans un filtre 400micron, le placer dans un seau avec de l’eau (10litres). Rajoutez le miel et 10ml de mĂ©lasse Y mettre un micro bulleur alimenter sur une pompe Ă  air et faire oxygĂ©nĂ© le mĂ©lange pendant 24h. Rajout de 10ml de mĂ©lasse aprĂšs 12h le dĂ©but de la mise en route de la pompe. A la fin des 24h rajoutez le restant de mĂ©lasse et d’acide h/f, mettez y en plus 10litres d’eau au mĂ©lange. Reste plus qu’à arroser! j’y ai incorporĂ© 7litre de mĂ©lange La veille j’ai prĂ©parĂ© le pot Ă  l’arrosage avec 500ml d’eau et 2gr de Bacillus IT35 Amyloliquefaciens X5 Bacillus Amyloliquefaciens : rhyzosphĂšre, probiotiques. Aspersion et arrosage. Utilisable pour toutes cultures. La bactĂ©rie Bacillus Amyloliquefaciens se fixe dans la rhizosphĂšre en se nourrissant des exsudats racinaires. En contrepartie, elle stimule la croissance racinaire en sĂ©crĂ©tant des mĂ©tabolites de croissance et solubilise le phosphore en sĂ©crĂ©tant des phytases (enzymes). Effet probiotique consistant en l’utilisation de micro-organismes bĂ©nĂ©fiques pour la nutrition et la santĂ© des plantes. La spiruline, le plus riche et le plus complet des amendements organiques La Spiruline est une algue aquatique connue comme complĂ©ment alimentaire, la Spiruline est aussi un amendement organique et Ă©cologique trĂšs complet. D'une grande qualitĂ© nutritive, elle apporte Ă  vos plantes une quantitĂ© de nutriments, dont l'azote, phosphore, potassium, minĂ©raux, acides aminĂ©s, vitamines, chlorophylle et protĂ©ine. Le charbon vĂ©gĂ©tal actif est capable d’absorber jusqu’à cinq fois son poids propre en eau ainsi que les Ă©lĂ©ments nutritifs qui s’y trouvent. Il joue ainsi le rĂŽle de catalyseur et d'amplificateur pour les fertilisants traditionnels, qu'ils soient d'origine organique ou minĂ©rale. Ce pourquoi il est idĂ©al pour activer un sol et pour les thĂ©s de compost oxygĂ©nĂ©s. Le charbon vĂ©gĂ©tal amĂ©liore la diffusion et la disponibilitĂ© des Ă©lĂ©ments nutritifs dans le sol et offre des conditions propices au dĂ©veloppement des micro-organismes. Le Biochar peut ĂȘtre introduit dans une grande variĂ©tĂ© de sols. Il est particuliĂšrement efficace dans les sols pauvres, difficiles et acides. Pour faire agir rapidement et efficacement sa capacitĂ© d’amendement, le charbon vĂ©gĂ©tal est enrichi et biologiquement activĂ© avec des micro-organismes. Le Biochar se comporte ainsi comme un structurateur et un activateur dans le but de valoriser les sols. Composition : ‱ Charbon vĂ©gĂ©tal actif 31%‹‱ MatiĂšre organique 33%‹‱ MatiĂšre sĂšche 75%‹‱ C/N : 17‹‱ PH : 7,2‹‱ Azote (N) : 2,1 % dont 1,2 % azote organique‹‱ Phosphore (P205) : 0,74%‹‱ Potassium (K20) : 1,18%‹‱ Calcium (Ca) : 6,8%‹‱ MagnĂ©sium (MgO) : 0,65% Le pollen est l'ingrĂ©dient de base de la fabrication du miel par les abeilles. Riche en vitamines et minĂ©raux, il est qualifiĂ© « d'aliment parfait », y compris pour les plantes ! Les zĂ©olithes sont des roches cristallines, prĂ©sentant des capacitĂ©s d'adsorption particuliĂšrement importantes vis Ă  vis des polluants que l'on rencontre dans l'eau et dans certains liquides, ainsi que dans l'air et les gaz. Elles sont extrĂȘmement poreuses comme les charbons activĂ©s et elles peuvent ĂȘtre chargĂ©es Ă©lectriquement pour opĂ©rer comme des Ă©changeurs d'ions. La zĂ©olithe est un produit naturel qui respecte notre environnement. UtilisĂ© dans le milieu industriel depuis de longues annĂ©es dĂ©jĂ , ce minerai aux propriĂ©tĂ©s filtrantes particuliĂšres commence Ă  se vulgariser dans le domaine de la piscine privĂ©e, de l'aquariophilie, des bassins d'agrĂ©ment, de la rĂ©cupĂ©ration des eaux de pluie, ou encore de la culture des bonsaĂŻs et autres plantations diverses par exemple... 4 points techniques majeurs : - GrĂące Ă  leur propriĂ©tĂ© hydrophile, les zĂ©olithes peuvent adsorber l'eau jusqu'Ă  30% de leur poids total et sans aucune variation de volume : pas de gonflement en prĂ©sence d'eau ni de craquement en cas de dĂ©shydratation comme certaines argiles. Les zĂ©olithes sont d'ailleurs de puissants agents anti-mottant (anti-agglomĂ©rant). Cette propriĂ©tĂ© est trĂšs apprĂ©ciĂ©e dans le cas des terrains de golf et autres aires de jeux. - Les zĂ©olithes ne captent pas l'eau de façon irrĂ©versible, elles se comportent comme une rĂ©serve au voisinage des racines. Celles-ci peuvent capter l'eau en fonction de leur besoin. Les zĂ©olithes permettent ainsi de rĂ©duire les besoins d'arrosage jusqu'Ă  35 %. - Une zĂ©olithe se comporte comme une "Zone de Stockage" qui retient l'azote et les Ă©lĂ©ments minĂ©raux nutritifs au voisinage des racines et les relĂąche lentement en fonction des besoins de la plante. Cela se traduit par une croissance harmonieuse mais rapide du vĂ©gĂ©tal. - La capacitĂ© d'adsorption et l'Ă©norme rapport surface/volume des zĂ©olithes, vont permettre Ă  la fois la rĂ©tention de la solution du sol et une bonne oxygĂ©nation au voisinage du systĂšme racinaire. Les zĂ©olithes favorisent donc l'organisation biologique des sols en contribuant au dĂ©veloppement de la micropopulation. L'apport en nutriments (N, P, K) est rĂ©duit de 20 Ă  25 %. Ces derniers, adsorbĂ©s par la zĂ©olithe, sont beaucoup moins sensibles au lessivage et Ă  l'Ă©vaporation. Composition minĂ©ralogique : * Chabasite 70 % * Phillipsite 2 % * Feldspath 5 % * Augite 3 % * Illite - Mica 2% Analyse atomique: * Sio2 52 % * AL2o3 17 % * CaO 5,7 % * K2O 6,1 % * MgO 2 %, * Na2O 0,6 % * Fe2O3 3,6 % Amendement calcaire, dolomie et gypse avec prĂ©paration microbienne Ă  base de Bacillus Amyloliquefaciens IT45 et Saccharomyces cerevisiae LYCC6420 Formulation : micro granulĂ©s (1 – 1,6 mm) Ă  base de rhizobactĂ©ries favorisant la croissance des plantes qui se multiplient et colonisent rapidement la zone des racines, et de levures Saccharomyces cerevisiae souche LYCC ayant un effet probiotique. Les PGPR produisent des enzymes qui solubilisent le phosphore Ă  partir de complexes inorganiques et organiques dans le sol et stimulent la croissance des racines efficaces augmentant ainsi la zone d'interception des Ă©lĂ©ments nutritifs. Les levures LYCC permettent une occupation de la rhizosphĂšre par une flore bĂ©nĂ©fique. Composition :‹‱ MatiĂšre sĂšche : 96,8%‹‱ MatiĂšre organique : 91,5%‹‱ N total : 6,6% dont N soluble dans l'eau 0,17%‹‱ P total : 2%‹‱ K total : 1,7% Micro-granulĂ©s : ‹‱ Oxyde de calcium (CaO) total : 30%‹‱ Oxyde de magnesium (MgO) total : 7%‹‱ Anhydride sulfurique (SO3) : 13% La levure de biĂšre est une matiĂšre vivante qui permet un meilleur fermentation pour les thĂ©s de compost oxygĂ©nĂ©s notamment conseillĂ© pour accompagner les croissances ou apporter un gros coup de pousse pendant la floraisons. La levure stimule la vie des sols Ă©galement Ă  l'arrosage direct en apportant tout aussi bien que dans le TCO sa population l'espĂšce micro-bactĂ©rienne positive pour votre sols ainsi que des oligo-Ă©lĂ©ments et diverse vitamines. Composition : ‱ 2,8% (N) total dont 1% (Norg), ‱ 2,3% (P205) ‱ 1,6% (K20) ‱ 35% de MO ‱ C/N : 8. PH : 8,4. Sous forme de poudre mouillable. Il contient des spores du champignon mycorhizien Rhizophagus Irregularis MUCL57891 avec des levures inactivĂ©es spĂ©cifiques. 2000 spores/gramme d’endomycorhize Rhizophagus Irregularis MUCL57891 et Saccharomyces Cerevisiae LYC6420 inactivĂ©e. Se connecte efficacement au systĂšme racinaire et forme un vaste rĂ©seau souterrain de filaments, qui agissent comme des extensions pour atteindre les nutriments et l’eau au-delĂ  de la rhizosphĂšre Composition : ‱ Poudre contenant 2000 spores/g. d’endomycorhizes Rhizophagus irregularis La Consoude (Symphytum Officinale) est une plante prĂ©sentant de nombreuses propriĂ©tĂ©s. ParticuliĂšrement riche en Potassium (K) organique, la consoude est une alliĂ©e idĂ©ale pour les pĂ©riodes de floraison. La consoude a tout pour plaire : riche en vitamine B12, elle agira Ă©galement comme stimulateur racinaire, mais aussi comme biostimulant cellulaire, grĂące aux alcaloĂŻdes, aux allantoĂŻnes et jusqu'Ă  30% de protĂ©ine ! 100% dĂ©jection de vers de tĂ©nĂ©brions.‹TrĂšs riche en microorganismes, le guano de vers de farine est une matiĂšre directement compostĂ© par les vers. En effet, c'est bien la digestion de matiĂšres vĂ©gĂ©tales par des larves, insectes ou autres arthropodes qui valident le processus de compostage, que ce soit en zone de production de cultures d'insectes, pour le compost maison ou la dĂ©gradation de litiĂšre forestiĂšre. Les bactĂ©ries et autres champignons obtenus grĂące au systĂšme digestif de nos vers, permettent la dĂ©gradation accĂ©lĂ©rĂ©e des Ă©lĂ©ments nutritifs dans vos supersoils, et les symbioses permettant l'assimilation des Ă©lĂ©ments nutritifs. Cette bio-activation intense mettra dans vos sols, Ă  la disposition de vos plantes, un panel tellement variĂ© de nutriments frais qu'il nous est aujourd'hui technologiquement impossible de pouvoir tous les nommer et de les compter. Le guano de vers de farine fournit une grande polyvalence. TrĂšs Ă©quilibrĂ©, il s'utilise en entretien ou en apport ciblĂ© seul ou en complĂ©ment de d'autres amendements ou fertilisants organiques. Il agit comme un puissant activateur de sol et/ou de substrat. Cendre coque de ricin NPK 0,1-18,6-16,5. 0,1% (N-Azote), 18,6% (P205-Phosphore), 16,5% (K2O-Potasse), 11,7%(Ca0), 9,1 (Mg0) - Origine : Inde ACTION SOL ‱ rend rapidement accessible au sol Phosphore, Potasse, MagnĂ©sium et Calcium. ACTION PLANTE ‱ Apport aux stades agronomiques propices. ‱ Produit riche en Ă©lĂ©ments fertilisants : combinaison NPK 35%. ‱ RĂ©gularitĂ© de l’apport, milieu et fin de floraison. . Favorise la sĂ©nescence. Analyse chimique : ‱ NPK 0,1-18,6-16,5 ‱ N-Azote 0.1% ‱ P205-Phosphore 18,6% ‱ K2O-Potasse 16,5% ‱ CaO-Calcium 11,7% ‱ MgO-MagnĂ©sium 9,1% Ortie bio micronisĂ©e Stimule la vie du sol et la vĂ©gĂ©tation. Composition : ‱ 2,8% (N) total dont 1% (Norg), ‱ 2,3% (P205) ‱ 1,6% (K20) ‱ 35% de MO ‱ C/N : 8. PH : 8,4 KELP poudre‹ascophyllum nodosum‹- amendement sol Croissance et floraison - Meilleure germination - Meilleur dĂ©veloppement racinaire Meilleure assimilation - RĂ©sistance aux stress osmotiques - Augmente la production de chlorophylle = plantes plus vertes = lumiĂšre mieux captĂ©e - Lutte contre le stress osmotique - DĂ©veloppement des Micro-Organismes dans le sol – Riche en vitamines, fer, iode, oligo-Ă©lĂ©ments, hormones de croissance auxines et cytokinines - IdĂ©al en Ă©pandage et pour les thĂ©s de compost oxygĂ©nĂ©s. Important : notre Kelp est un goĂ©mon noir mais il n'est pas le varech bien moins fertile de la mĂȘme famille qui est l'algue qui pullule et pollue la Bretagne, notre algue pousse uniquement Ă  plus de 50 mĂštres de fond dans les grands courants froids au large de la NorvĂšge.
Likes
12
Share
MIMOSA by ROYAL QUEEN SEEDS Week #18 Overall Week #1 Flower This week she's starting to flower always a great time to see your plant start to flower after weeks of veg no issues to report this week!! Stay Growing!! ROYAL QUEEN SEEDS MIMOSA
Likes
6
Share
Sie entwickelt sich langsam. Denke ab nÀchster Woche wird es wild!
Likes
27
Share
1/20/2023- So much to do pre grow and over the next 16 days, absolute first order of business is that I have to take down my current Grow---TIMBER-- Then I have a list of things I have to get done in order to be ready to start this grow 1 Feb. With that said T - 2 days until start 48 hour Flush T - 2 days until Start 48 hours of Light T - 4 days until TIMBER!!! Items that need to be done before 1 Feb 2023 1. I need to clean the tent out 2. I need to clean the equipment- Proper Sanitization between grows in Hydro is a must!!! 3. I need to get the hole in the ceiling above my tent repaired- For my last grow I had a deep sink installed in my grow room, to make Hydroponics a little bit easier and have a water source in the same room. The seals on the pipes they were installing broke and leaked through the ceiling causing some damage all the way across my grow room, I was already weeks into my grow and couldn't risk them working above my tent and it would have been very awkward positon for them to be working in as well, so have to get this done quickly between chop and germination. 4. I have to install my new light- I was using a Vivosun 4000 and for this grow I am switching up to a Spider-farmer SF 7000. 1/20/23- For this upcoming grow I am working with M/F photo seeds so I ordered 4 Sex determination kits. I recieved my my 4 Sex determination testing kits from Rimrock Analytics today. I will be using these to test my plants at week 2 of Veg so that when/if I take clones I know I am taking them off females. As well as I don't want to accidently pollinate my tent during this grow I am looking for big beautiful buds not seeded buds. :-) 1/24/2023- Harvest of current grow- Started at 2:00pm and finshed wet trim and firt batch into the freeze dryer. 1/25/2023- Next batch into the freeze dryer and cleaning all my equipment for this Grow. T-1 Day until the workers are supposed to be here to fix the hole in the Grow Room. T-3 days until I instll my new Gorilla Grow Tent and my New Light Spider Farmer SE-7000 for this grow. T-7 Days until Start of Germination 1/26/2023- Harvest is done ran through the Freeze dryer and dry tim completed. 1/27/2023- Grow Room repairs completed. Hole is gone Letting the paint dry before I install the new tent. T-2 days until Install the New Gorilla Grow tent and the new Light T-3 days until I put the hydro equipment in the new tent T-5 days until Germination 1/29/2023- Day 0- Final Pre Germination activities Germination Start T-3 days The paint on the ceiling was dry and it was time to finish prepping for Germination. I got the following items knocked off my list. New 4X4 Gorilla Grow Tent is up and ready New Spider Farmer SE-7000 Light is installed- Thanks Moony Grows for the suggestion and for the Code that got me some money off and free shipping (Moonygrows)!! I turned the lights all the way up to max and set the timer to 18/6 0600-0000. I will keep an eye on the temperature and humidity without my plants and see how hot it gets with the new light. I put my Hydro system back together and put in 40 gallons of water into it, time to monitor for leaks the next few days. I Setup my cloning machine for Germination Days 3-11 1/30/2023 let me break down the situation, ROOM in the TENT.. Enough said.. No really I tried putting my exhaust system up in the new tent with my new light, The light is so big corner to corner that it really didn't give me enough room for the lights be be raised, with the exahust hanging the buckets my plants are Starting in are 2 and 1/2 feet off the ground, great for plenty of room for roots but not so great for upwards space for the plant to grow. In a 6' 11 tent with the exauhst in side and hanging that only gave me a little over 4 feet of grow room to play with. My last grow if you saw my diary, anyone could tell I was struggling to keep the buds off the lights. No good, Since space was such an issue I was running my carbon filter inside on the ground but It really needed to be up sucking the heat out not shooting the cool out. With that setup I was sucking air through the filter and pushing it out the tent at a bottom exhaust hole cold out. Wasn't doing me any good for my heat. I was hitting temps of up to 85 degrees. I bought a portable AC unit and have been running it in the grow room to try and keep temps below 85 and I have had to lower the power on my lights during grow also not ideal.. With that said a friend of mine MoonyGrows (Check out his diary) took the time to look at my issue send me a picture of my grow tent setup with detailed instructions on how to suck the air out from the top but putting my filter and fan on top of my tent so no room issue and I am sucking the air out from the top where the heat is instead of pushing the air out from the bottom where the cool is... THANK YOU MoonyGrows For taking the time to help me get this straightened out.. Now I have room and I have the exhausts working right and now my temps with everything at 100% are topping out at 80 this dropped the temp by 5 + degrees at 100% max. T-2 days until Start of Germination Prepped my seed tray with humidity dome Prepped my Rapid Rooter plugs. I Used RO water, and I added a few drops of Hydrogen peroxide to Oxygenate the water. I then PH balanced between 5.7-6.0 the same that they will be getting in the Cloning Machine and when they get to thier final grow pod. I perfere the 5.8x range and I hit 5.84 for these rapid rooters. If you want to see a complete video on the process HowWeedGrow has an amzing video that shows step by step how to do it and explains it better than I ever could including how to plant the seeds. Which I will cover when I get to that step on Wed. https://www.howweedgrow.com/how-germinate-weed-seeds-cannabis-rapid-rooters/ 1/31/2023 T-1 day until Germination Start All set and ready have my Rapid Rooter plugs ready to go have my seeds out.. Have my seed tray warming up tonight. Tomorrow morning right into the Rapid Rooter then strait into the tray. I will spray the dome to start the humidity in there. 2/1/2023 Germination Day!! Let the games begin! 0600am Put the seeds into the Root Riots. And then put the seeded Root Riots into their first home the Seed tray. I have them under the light 24/7. Sprayed the dome 7:30pm Sprayed the Dome to keep humidity going on the dome. 2/2/2023 Day 1 of Germination Sprayed the Dome in the morning Sprayed the Dome in the evening 2/3/2023 Day 2 of Germination Roots are starting to come out the bottom of the root riot plugs and the heads are slowly popping out of Number 4 just below the surface. Afternoon- Number 4 has popped up Evening- Number 3 has popped up as well. Happy Dance!! 2/4/2023 Day 3 - Germination Surprise Surprise Surprise- all 4 have now poked their heads up.. Happy day!! 100% Germination succeeded. Now major milestone to track is how many are female and how many are male. I will take look at the roots this afternoon/evening and see if they have enough root to go into the cloning machine for the next 7 days before they go into their Hydro Pods. Day 3 - Germination - Evening.. Roots looked good and they were tall enough to make it into the cloning machine. Now that they are all in the cloning machine I have switched the lighting to veg state 18 on 6 off. 2/5/2023 Day 4 - Germination - Morning All the Ladies (fingers crossed) looking great stretching nicely and look nice and green, Photo synthesis underway.... UPDATE!! After a very interesting POD cast on FSTS by Dr. Bruce Bugsbee from Utah University, I have shifted my lighting to 24 hours on through seedling and then I am going to shift to 20 hours on the rest of Veg. 2/6/2023 Day 5 - Germination While Checking on my conditions inside the new tent last night, I found that the Humidity was down to 39 Percent. I added an AquaOasis Cool Mist Humidifier, the reason I selected this humidifier is that I needed one that could be turned on and off utilizing my Inkbird Humidity Controller IHC200 that I have my Pro Breeze Dehumidifier currently running with. Root structures are starting to get there about 1/4 of an inch. 2/7/2023 Day 6 - Germination Everything seems on track more roots poking out of each today. They are each getting a little taller as well. Checked in the evening and number 3 was drooping the Root riot plug on the bottome was dry and the roots were not in the water yet. I raised the water just enough that the longest root that was sticking out is now hitting the water. 2/8/2023 Day 7 - Germination Everything looked good while checking in on them this morning number 3 is now full up and no droop again. 2/9/2023 Day 8 - Germination T-2 days until Plant into Forever Pods and we start week 1 of Veg .. :-) Surprising thing to me is that number 1 and 2 were later in popping then 3 and 4 but the roots are growing longer in 1 and 2. 2/10/2023 Day 9 - Germination Number 1 and Number 2 are definitely ready for transplant today.. Based on how they were yesterday and where they are today I am hoping by tomorrow 3 and 4 are ready. Today they look to me where 1 and 2 did yesterday.. I really hope 3 and 4 catch up by tomorrow since.. T-1 day until transplant to new/ final home for grow. Need the roots long enough to have some clay down in the basket to keep the root riot out of the water and only roots in the water.. 2/11/2023 Day 10 - Germination Today they got placed in thier forever Home, 7 days from Sprout and 7 days until Week 1 Start. PPM- 180 this is water out of the Tap Temp Water: 70.7 Temp Tent: 77 Humidity: 40% I have a humidifier going 24/7 to try and bring this up.. I also have Humidity Domes on each plant. 2/12/2023 Day 11 - Germination Sprayed the domes, all are looking good.. Nothing much to do at this phase but Keep monitoring the PH level in the system and making sure they have a comfortable home. T-6 days until Week 1 start 2/13/2023 Day 12 - Germination Sprayed the domes, They were looking a little yellow today so I moved the light down to assist. Nothing much to do at this phase but Keep monitoring the PH level in the system and making sure they have a comfortable home. T-5 days until Week 1 start 2/14/2023 Day 13 - Germination Sprayed the domes, They were looking a little Florissant yellow today, with what looks like slight burn on the tips, I talked with a fellow grower and we agreed that It was probably that I was drowning them, Yes you can drown you plants even in Hydro, but only early on.. :-) It usually happens with the water being too high, which soaks not only the roots but the medium (root Riot plug in this case). I lowered the water from touching the bottom of the pot to about 1" away. This will probably take 3-4 days to resolve. I will continue my daily monitoring. T-4 days until Week 1 start 2/15/2023 Day 14 - Germination Sprayed the domes, continue my daily monitoring they look a little darker green instead of lime green now that I lowered the water levels in the system, so I think that I might have resolved the issue but it will take a few days for recovery to happen. T-3 days until Week 1 start 2/16/2023 Day 15 - Germination I looked in on them this morning, 3 and 4 look like they are doing well and recovering nicely. Number 1 not so much it has brown spots on the leaves, this very well can still be a side effect of the overwatering but I decide to go ahead and add Nutes earlier than I was planning just incase. I was going to wait until Saturday but I think intervention is necessary now especially after drowning them early on. I added 1/2 what I am planning on adding for week 1 start. I also think I am going to adjust my chart to add 1/2 2 days after plant from now on. I don't think it would hurt it to have some Nutes to pull from. .25ml/Gal Calmag = 12.5ml 1ml/gal GH FloraMicro= 50ml 1ml/gal GH FloraGro = 50ml 1ml/gal GH FloraBloom = 50ml T-2 days until Week 1 start = I will drain the system and start it over on Saturday with Week 1 Nutes. 2/17/2023 Day 16- Germination I didn't even want to post today after looking in on them this morning, 3 of the 4 are now showing signs of dronwing.. Brown spots on the leaves, the water levels were still too high.. I drained about another inch out of the tanks.. Will see how quick they recover.. I start week 1 tomorrow and will have to ensure my water levels are at least 1" away from the basket on this round.
Likes
19
Share
13.12.2025 Today I did cut her off and my heart is bleeding. She was such a beautiful plant and depending on the smoke-check I will grow her again. Her smell is skunky-citric, with notes of whiskey and fireplace and just calling out to be smoked. I will give an update on her quality but up for now she needs to dry slowly but surely to be ready for christmas 🌾💜
Processing
Likes
60
Share
Hello everyone! Things are growing great! The scent is becoming more like weed and less like trash. Every time I check in on her she seems to have grown. Since I harvested my other girl last night, my six shooter has the whole tent to herself. Thats 3 fans, 2 × galaxy hydro 300 w leds, and an increase in airflow and drop in humidity. One week from today she will be much bigger. I have been feeding her every other watering. Got some nute burn but she seems to like the heavy feeds. I may go water,water, and then feed until harvest . I'm guessing between 2-4 weeks left. I can't wait to grow this strain again!
Processing
Likes
7
Share
Honestly the genetics are always good here from @fastbuds .. not much is changing just getting thicker colas cannot water till the end gets here ready to hard l
Likes
20
Share
@Hawkbo
Follow
They got moved into the 4x4 with the jimmy rigged 180w quantum board light built from ceiling tile grid. The tnb co2 is newish but I gotta get the heat up and bring in a more powerful light to take full advantage.
Likes
6
Share
16/01 Spider mites since 2 days, already start getting black spots on the leaves, she's very close to ready, so cut half way, will keep a close eye on the bottom... For another couple of days... 21/01 not much movement 24/01 cut lower part and cut the clones
Likes
4
Share
I love this plant. She's like a queen 👑
Likes
52
Share
@GYOweed
Follow
Looking good. Temps getting much cooler. STSing one branch for pollen.