Likes
Comments
Share
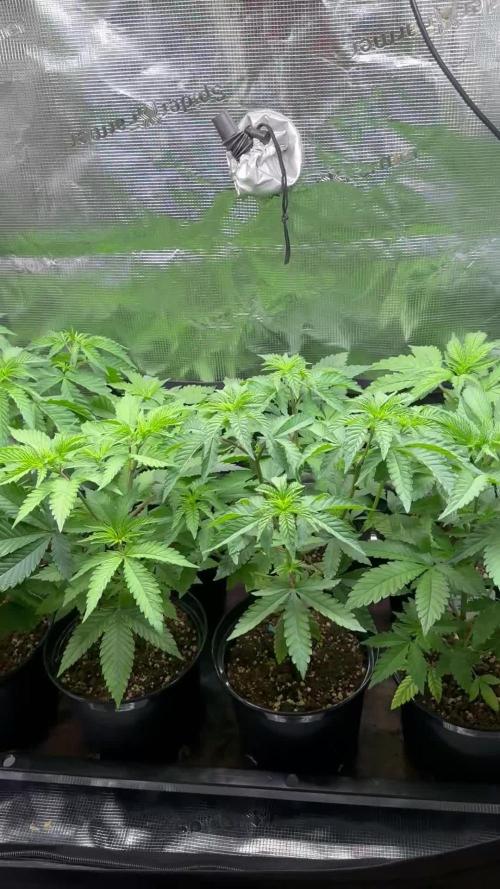
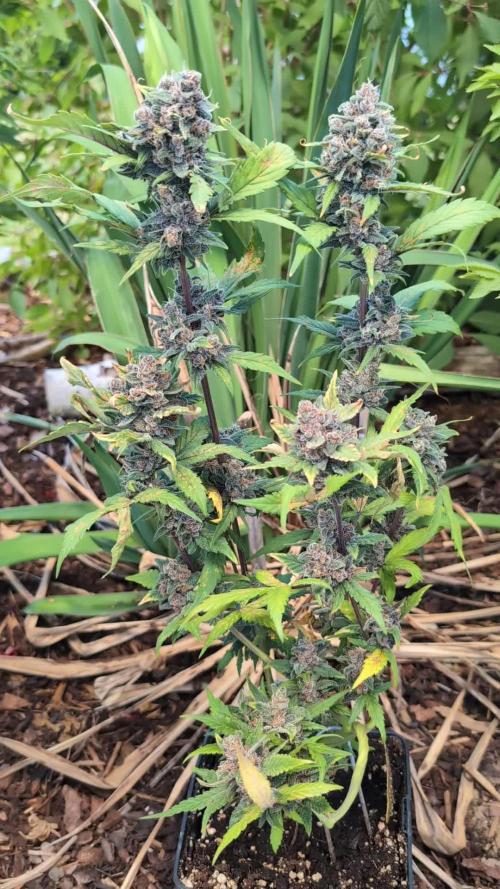
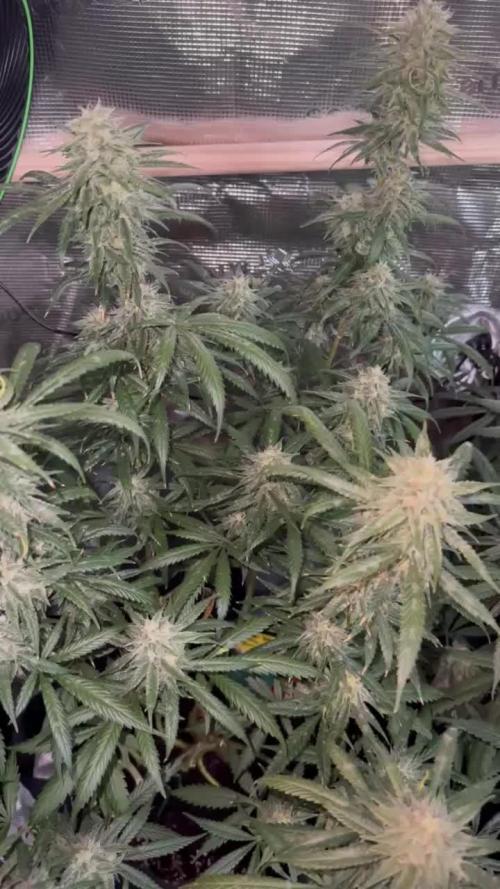
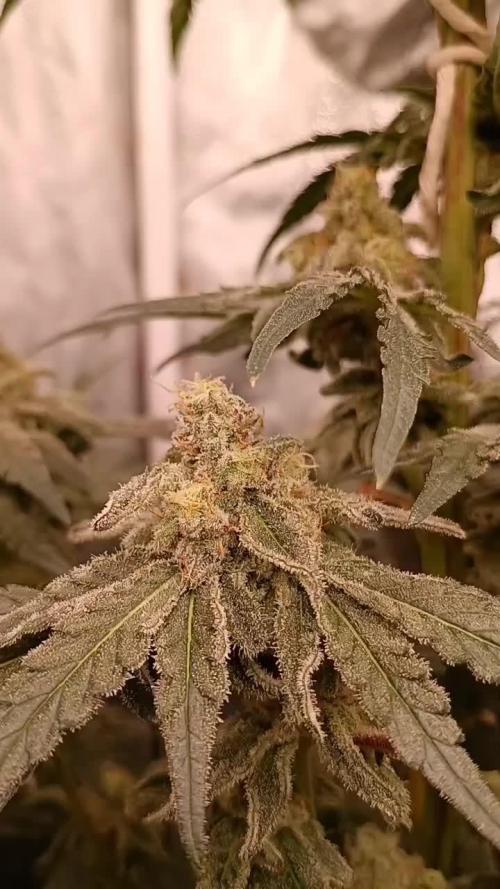
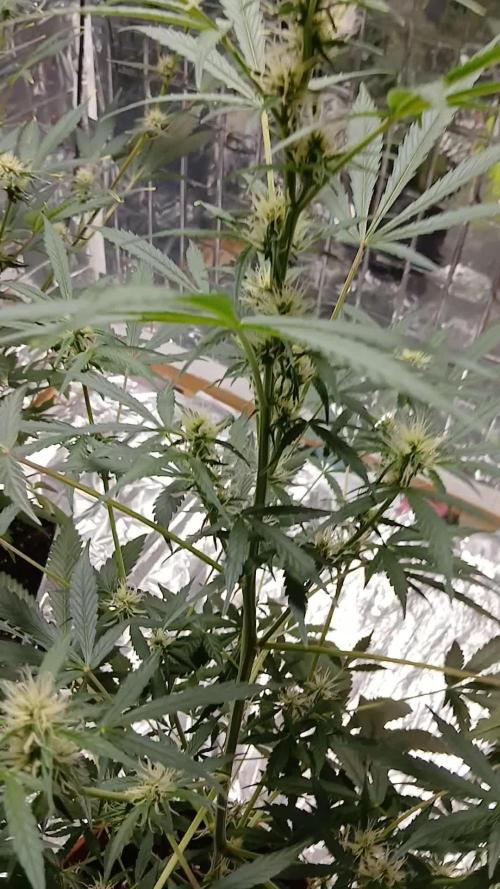
Hice transplante a las pequeñas y he estado usando piraña de advanced nutrients algo de Greatwhite y fertilizantes Orgánicos linea BAC
Likes
20
Share
@Xabii
Follow
Did defoliation as usual and a little lollipoping. Did 2 complete refills of the reservoir, ph stayed stable for 1 day after the exchange but then super unstable again. Dropped the EC with the second refill to 1000 to see if it stays stable. Ori is going good, already looking frosty, NL#2 is comming aswell, NL#1 not so much.
Likes
15
Share
@BicRed
Follow
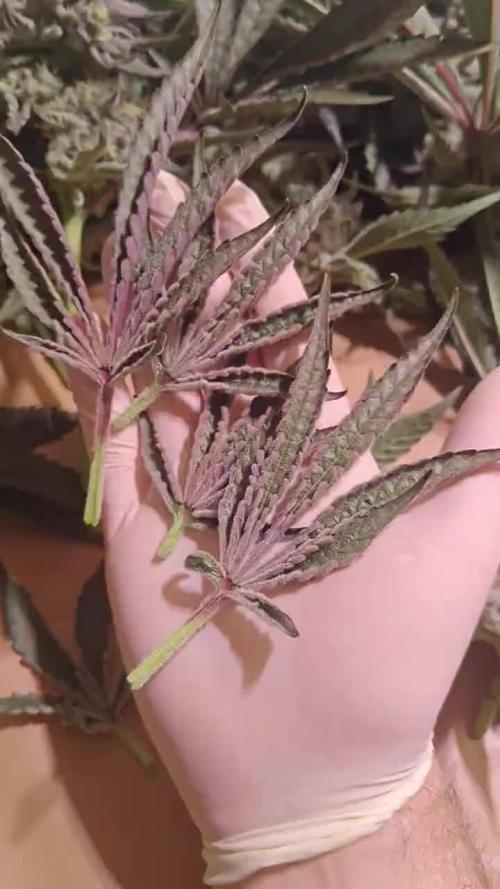
9th Week I'm trying to address the deficiencies, I believe it's due to using coconut substrate. I am gradually reducing the daily light exposure by 1 hour until reaching 12/12. As it's the first time with Delta 9 in the cultivation, I have trow it foliarly.
Likes
4
Share
Lovely weather this week had her dry out and fed her then I defoliate and started training her lower branches. I started seeing pre flowers but I will keep her in veg for anther 2 weeks.
Likes
12
Share
@ELPIRATA
Follow
DIA 50; Comienza una nueva semana, durante estos dias habia tenido problemas con la humedad; dia 25 se instala Deshumidificador El día 25/06/2020 se han regado 3 plantas en macetas de 11 litros: X2 Semillas Auto Lemon Kix= 1,5L [1MlBLOMBASTIC+1mlKnactive+3ml/L ATAGrowth-C+5mL ATAFlower-C+] PH 6.4/ EC=1.84Tº=23 X1 Semilla Auto Tutankhamon= 1L [1MlBLOMBASTIC+1.5mlKnactive+5ml/L ATAGrowth-C+5mL ATAFlower-C+1mLAutoTop] PH 6.2(?) / EC= 1.84Tº=23 *El día de hoy se han regado 1 planta en macetas de 7 litros: X1 Semillas Auto Lemon Kix#3 = 800 ml [1MlBLOMBASTIC+1mlKnactive+3ml/L ATAGrowth-C+5mL ATAFlower-C+] PH 6.4/ EC=1.84Tº=23 *Se comienza a usar Bloombastic en semana 6, dia 42 (0.5 ml/Lt) Me gustaria realizar foliacion en esta etapa, sera recomendable ?
Likes
10
Share
💙 Project Blue Tent – Week 9 Blue Waffle F1 – Pheno A 🌿 Too Much Stretch, Then a Big Reset Hello everyone, and welcome back to another chapter inside Project Blue Tent! 💙🌱 If you're new here, Project Blue Tent is our little experiment with four individual Blue Waffle F1 plants from Zamnesia, each documented separately from seed to harvest. All four girls share the same environment, lighting, irrigation, nutrition and general cultivation philosophy. And yet, as always... they each have their own personality. Last week I was wondering just how much these girls were going to stretch after seven weeks of vegetation. Well... I got my answer. 😂 They stretched. A lot. And this week became one of those weeks where the grower has to stop watching and start acting. The plants were getting simply too tall. With the height of the pots and substrate, the drainage system underneath them, and the distance between the canopy and the LED fixtures becoming increasingly limited, some of the tops were getting dangerously close to the lights. So we made some changes. A fairly big reset, actually. And looking at the room now? I'm very happy with where we landed. 🌿 Pheno A – She Took the Invitation to Stretch Seriously Plant A is now approximately 145 cm tall. 😂 Yes. One hundred and forty-five centimetres. And when you add the height coming from the pots, substrate and drainage arrangement underneath the plants, that number becomes even more relevant when you're working inside a relatively limited vertical space. Last week she was already moving quickly. This week she basically said: "Hold my nutrient solution." 😂💙 The structure she built during those seven weeks of vegetation gave her an enormous amount of material to work with. The SCROG distributed that growth beautifully. But once flowering stretch really kicked in, all of that established structure began pushing upward. And eventually... we simply ran out of comfortable vertical room. So rather than fighting the plants continuously, we changed the room around them. 🕸️ The Second SCROG – Because These Girls Are Getting Big One of the biggest changes this week was the installation of a second SCROG net. This wasn't done because the first net failed. Quite the opposite. The first net did exactly what we wanted during vegetation: It helped distribute the plants horizontally and build an even canopy. But now these girls have become much taller. And as flowering progresses, those branches are going to become heavier. So the second net is there for something different: support. We're essentially creating another layer of structure through the upper portion of the plants. This gives the flowering branches something to lean against as the flowers develop and gain weight. And with plants this tall, I would much rather organize that structure now than discover later that a heavy flowering branch has decided to take a dramatic trip toward the floor. 😂 The second net also helps keep the canopy organized after the major defoliation. And looking at the room now... I think it was absolutely the right decision. ✂️ The Big Defoliation And then came the other major event of the week. Defoliation. Not a little cleanup. Not removing three leaves and calling it a day. We went deep. The room had become extremely dense, and with the plants stretching this aggressively, we needed to open everything up. We removed leaves where they were creating unnecessary congestion and took out foliage from stems where appropriate, leaving the productive growth and flowering structure we wanted to carry forward. This wasn't about making the plants look naked. It was about making the structure functional again. And there's an important distinction here. We're not defoliating because removing leaves magically creates more flowers. That's not the objective. Leaves are valuable. They're part of the plant's photosynthetic machinery. The objective here was to manage excessive congestion, improve visibility through the canopy, increase air movement through the plant and reduce the amount of unnecessary foliage competing for space around the developing flowers. We're trying to create a better working environment for the plant. Not punish the plant. Not stress it for the sake of stress. And certainly not remove every leaf we can find. 🌿 What We Expect From This Defoliation Now comes the interesting part. After a significant cleanup like this, I don't expect the plants to immediately look like they're growing faster. Quite the opposite. There can be a period where they need to settle. They've lost a considerable amount of leaf area. We've physically changed their architecture. So I expect the plants to spend some time adjusting and continuing their transition into flowering. What I'm hoping to gain is something different: better structure. Better airflow. Better light penetration. Better access to the flowering sites. Less congestion. And a much easier canopy to manage as the flowers continue developing. Will it completely stop the stretch? No. I wouldn't expect that. The plants are already well into their flowering transition, and genetics, plant maturity and environmental conditions still have a huge influence on how much they stretch. But by removing excess congestion and adding the second SCROG, we've made the remaining structure considerably easier to manage. Now we watch. 🔥 A Few LED Burned Tops – And We Caught It There was another little lesson hidden inside all that stretching. Some tops had gotten too close to the LEDs. And we saw a few leaves and flowering tips showing signs of LED stress/burning. Nothing catastrophic. Nothing that concerns me at this point. But definitely something we needed to address. And honestly? I'm glad we caught it now. Because once the plants were getting that close to the lights, we were already running out of room to work with. So we attacked the problem from several directions. We moved the ventilation equipment outside the tent. We raised the LEDs. We opened the canopy. We installed another SCROG. And suddenly... we gained some valuable vertical breathing room. That little bit of extra space can make a huge difference inside a tent. 🌬️ Moving the Carbon Filter & Extractor Outside Another major change was moving the carbon filter and extractor outside the tent. Previously, having that equipment inside the tent was consuming precious vertical space. And with these girls reaching toward the lights, every centimetre suddenly became valuable. So we moved the filter and extractor to the top of the tent. The system now pulls air from the tent through the carbon filter and extractor and then exhausts it outside. This gave us the space we desperately needed. And that allowed us to raise the LED fixtures closer to the top of the tent rather than having the ventilation equipment occupying that valuable ceiling space. It sounds like a relatively small modification. But in a tent with plants this tall? Huge difference. Sometimes the solution isn't changing the plant. Sometimes it's changing the room around the plant. 😂💙 💡 More Room for the Lights And this is one of the most satisfying results of the whole operation. Once the ventilation equipment was moved outside, we could bring the LEDs higher. That immediately created more separation between the flowering tops and the fixtures. The few areas that had experienced LED stress were addressed before things could become serious. And now we have much more room to work with. That's exactly what I wanted. Because I don't want to spend the remainder of flowering constantly fighting the ceiling. I want these girls to have somewhere to finish. They already have plenty of height. Now we need them to put their energy into the flowers. 🌬️ Two Fans – Creating a Vortex We also added a second Zamnesia clip fan, positioned underneath the canopy. So now we have: One fan above. One fan below. And the goal isn't simply to make the leaves move. We're trying to create a more complete circulation pattern through the tent. With one fan moving air across the upper canopy and another helping move air underneath, the airflow can circulate through different levels of the room rather than leaving the lower portion relatively stagnant. The idea is to encourage a kind of vortex-style circulation through the canopy. Air moves. Circulates. Changes direction. And continues moving through the plant structure. This is particularly important now because we've spent the week opening the canopy and creating space. There's no point creating all that space if the air simply sits there. So now we've got airflow working from above and below. And looking at the room? It feels considerably more alive. 🌿 The Room After Defoliation I have to say... I love the way the room looks now. Before the defoliation, it was an absolute jungle. Beautiful. Healthy. But incredibly dense. Now? You can see the architecture. You can see the branches. You can see the flowering sites. You can see the second SCROG. You can see the airflow equipment. And most importantly... you can see the plants. 😂💙 The room feels organized again. And that's exactly what we needed. These girls have been growing extremely aggressively. Now we're giving them a structure in which that growth can actually be managed. ✂️ A Word About Scissors I also want to mention something that might seem insignificant but is actually very important to me. The Zamnesia curved scissors. I really like these. For much of my defoliation, I actually use my fingers. If a leaf can be gently removed without cutting anything else, that's often my preference. But that's not always possible. Some leaves are tucked into awkward places. Some are smaller. Some are delicate. Some require a precise cut. And that's where the scissors come in. But there is one rule I don't compromise on: Clean scissors. Always. Even when they're brand new, I still like to make sure the scissors are clean before using them. When you're moving from plant to plant and making multiple cuts, cleanliness matters. We're working with living tissue. So there's no reason to introduce unnecessary contamination into the process. Clean tools. Gentle hands. Deliberate cuts. And don't cut something just because you happen to have scissors in your hand. 😂 💙 Pheno A After the Reset And now... let's come back to our girl. Because despite all the work this week, Pheno A looks fantastic. She's still one of the larger structures in this tent. She's tall. She's vigorous. She's got plenty of flowering sites. And after the cleanup, her architecture is much easier to appreciate. The plant has gone from: "How the hell are we going to fit all of this in here?" to: "Okay. Now we have a plan." 😂💙 The flowers are there. The structure is there. The health is there. And now she has additional support underneath her developing flowering branches. This is a very good place to be heading into the next stage. 🌸 From Building Plant to Building Flowers This is the transition I'm most interested in now. Up until this point, so much of the conversation has been about growth. Height. Branches. SCROG. Canopy. Stretch. But now? The plant has done enough building. I want to see her start putting more of that energy into flowering. The architecture is established. The second net is installed. The canopy has been opened. The lighting has been raised. The airflow has been improved. The room has been reorganized. Now we let her work. And hopefully... the next photographs will show us exactly what all that preparation was for. Beautiful flowers getting bigger. 💧 Nutrition – The Girls Are Hungry Another important development this week is nutrition. The girls are absolutely loving the feeding. So we've increased the Hydro A and Hydro B recipe slightly. We're now running: Plagron Hydro A — 2.2 ml/L Plagron Hydro B — 2.2 ml/L Plagron Hydro Roots — 1 ml/L Plagron Power Buds — 1 ml/L pH adjustment as required That small increase has brought the EC up accordingly. Current recorded EC is approximately 2.49 mS/cm. And again, this wasn't some dramatic change. It was simply a small progression because the plants are consuming aggressively and showing us that they are ready for it. They're growing. They're flowering. They're drinking. They're hungry. So we listen. And we adjust. That's the whole philosophy. Don't feed a number. Feed the plant. 🌡️ Week 9 Environment The current recorded conditions are: 🌸 Flowering: Week 9 📏 Height: approximately 145 cm 💡 Light schedule: 12/12 ☀️ Day temperature: 27°C 🌙 Night temperature: 27°C 💧 Relative humidity: 67% ⚗️ pH: 6.01 ⚡ EC: approximately 2.49 mS/cm 🌡️ Solution temperature: 25.3°C 🌱 Substrate temperature: 24°C 🌬️ CO₂: approximately 666 ppm ? Pot size: 8 L 💦 Watering: approximately 1.6 L per plant / 24h The environment remains remarkably stable. And that's especially valuable after a week where we've physically changed so much of the room. The plants have enough to deal with simply adapting to their new architecture. I don't want environmental instability adding another variable. So now... stability. Consistency. Observation. 🔬 Same Room. Same Conditions. Four Different Girls. One thing that's fascinating about this particular project is how uniform the room remains despite the plants being so vigorous. The four Blue Waffle F1 girls are remarkably similar. They all went through the same long vegetative period. They all experienced the same lighting. They all received the same irrigation. They all received the same nutrition. They all experienced the same environmental conditions. And now they're all showing that same general flowering transition. There are individual differences, of course. That's what we're documenting. But overall? They are behaving like sisters. And that's making this experiment incredibly interesting. 🌿 What I'm Watching Now After this week's reset, there are several things I'm going to be watching closely. First: How quickly does the stretch settle? Second: How do the plants respond to the heavy defoliation? Third: How does the second SCROG hold the flowering branches as they gain weight? Fourth: How does the new airflow pattern perform under a developing flowering canopy? And finally... How much of that beautiful vegetative structure is going to turn into flowers? Those are the questions now. We've done the work. Now we observe the results. 🌸 The Big Lesson From This Week If there's one thing this week reminded me of, it's that a grow isn't always about having a perfect plan. Sometimes you make the best plan you can. Then the plant laughs at you. 😂 We knew they might stretch. We didn't know they'd stretch this much. So we adapted. We moved the ventilation equipment. We raised the LEDs. We cleaned the canopy. We installed another SCROG. We added another fan. We adjusted the nutrition. And now? The room is looking better than it did before the problem appeared. That's what I consider a successful grow. Not avoiding every problem. Recognizing them early and adapting intelligently. 🔭 Looking Ahead – Now We Let Them Flower And this is where things get exciting. The girls have been through a major reset. The canopy is open. The second SCROG is in place. The LEDs are higher. The ventilation system has been moved outside. Airflow is now working from above and below. The plants are receiving their updated nutrition. And Pheno A? She's standing there at 145 cm, looking at me like none of this was particularly dramatic. 😂💙 Now I want to see what she does with the room we've created for her. Hopefully the aggressive vertical growth begins to calm down. Hopefully the flowers start becoming the dominant story. Hopefully the second SCROG gives us the support we need as those flowers gain weight. And hopefully those few LED-stressed tops recover without further drama. I think we caught that issue early enough. Now we watch. 💙 Final Thoughts – The Room Is Back Under Control What a week. Seriously. 😂 We went from: "They're stretching a little." to: "Okay, these girls are going to hit the LEDs." And then we went to work. The carbon filter and extractor moved outside the tent. The LEDs went higher. The canopy received a serious cleanup. A second SCROG was installed. A second Zamnesia clip fan went underneath the canopy. Airflow now works from above and below. The nutrition was increased slightly. A few LED-burned leaves and tops were cleaned up. And after all of that... I look at the room and smile. Because it looks beautiful. The plants look healthy. The structure is organized. The flowering sites are everywhere. And Pheno A is absolutely shining. She's tall. She's vigorous. She's beautifully developed. And now she's finally got some breathing room. 🌿💙 The defoliation wasn't about making her smaller. It wasn't about forcing her to flower. It wasn't about chasing some magical yield increase. It was about taking an overly crowded flowering structure and making it more functional. The second SCROG isn't there because we expect failure. It's there because these girls have become substantial plants and we want to support them properly. The second fan isn't there simply to make the leaves dance. It's there to help create better circulation through the entire canopy. Moving the ventilation equipment wasn't cosmetic. It gave us precious vertical space. And raising the LEDs gave us more room between the fixtures and the flowering tops. Every change had a reason. And now... we wait. The girls have done their part. We've done ours. Now let's see what Blue Waffle F1 Pheno A does with this new chapter. Because I have a feeling the next few weeks are going to get very interesting. 💙🌸🌿 🙏 A Huge Thank You A huge thank you once again to Zamnesia for making Project Blue Tent possible and for giving us the opportunity to explore these beautiful Blue Waffle F1 genetics phenotype by phenotype. Thank you to Plagron for the Hydro nutrient line and everything supporting these girls through this very vigorous cycle. A massive thank you to Zamnesia for the Phytonaut LED lighting and for the curved scissors and clip fan that have become part of the practical side of this project. Thank you to Mars Hydro for the irrigation and drainage system that continues keeping these girls supplied while they absolutely demolish their water. 😂💙 And thank you to GrowDiaries for giving us the platform to document all of this craziness and share it with growers around the world. Most importantly... thank you to everyone following Project Blue Tent. This week was definitely one of those chapters where the plants reminded us who's actually in charge. We planned. They stretched. We adapted. 😂 And now the room is ready for the next phase. Four Blue Waffle F1 girls. One room. One environment. One very ambitious flowering canopy. And a second SCROG ready to catch whatever these ladies decide to throw at us next. Let's see how they finish. Until next week... More room. More airflow. More support. And hopefully a lot more flowers. 💙🌸🌿 Growers Love, happy growing, and take care everyone! 🌱💙
Likes
4
Share
@Momentum
Follow
wurde extra für uns geschnitten, und jetzt nach 2 Wochen Wartezeit ist er endlich da. Wirkt noch zerknautscht, aber das bessert sich die Tage. Auf geht's! (Wir sind übrigens wieder im unauffälligen 40x40x70cm von EazyGreens.)
Likes
5
Share
Sehr lecker und wunderschön. Bin froh sie gesavet zu haben. Kann ich jedem empfehlen
Likes
9
Share
All good. They swell like crazy. Currently on vegetative steering. 9 x 200 ml shots a day. Back to generative on day 49.
Likes
52
Share
@Roberts
Follow
Auto Magnum has sprouted on first seed. She is looking nice and healthy for a few days old. Everything is looking really good at the moment under the Mars Hydro FC4800 light. Thank you Mars Hydro, and Weed Seeds Express. 🤜🏻🤛🏻🌱🌱🌱🌱 Thank you grow diaries community for the 👇likes👇, follows, comments, and subscriptions on my YouTube channel👇. ❄️🌱🍻 Happy Growing 🌱🌱🌱 https://youtube.com/channel/UCAhN7yRzWLpcaRHhMIQ7X4g
Likes
57
Share
@Regenwurm
Follow
Jede der Ladies wurde mit 30 l Regenwasser / Flawless Finish von Advanced Nutrients geflusht. So lange bis im Drain ein EC von 0.3 war. Die Buds werden im Moment sehr schwer und der Ertrag wird gut werden 😍Tricome sind weitestgehend trüb noch nicht Amber..... jetzt geht es bis zum Harvest Day mit 16 Grad Nacht/24 Grad Tags und Feuchte 35 % weiter✌️🏾
Likes
Comments
Share
Blütewoche 2 - 22.06. – 29.06.2026 Auch in der zweiten Blütewoche setzte die Blue Sunset Sherbert ihren starken Stretch fort. Innerhalb von nur sieben Tagen wuchs sie von 48 cm auf 80 cm und legte damit beeindruckende 32 cm an Höhe zu. In dieser Woche wurde die Pflanze zweimal mit jeweils vier Litern Wasser gegossen. Außerdem wurde sie großzügig entlaubt und einige untere, schwach belichtete Triebe entfernt, um die Lichtverteilung und Luftzirkulation zu verbessern. Die Pflanze präsentiert sich weiterhin in einem hervorragenden Zustand. Sie ist kräftig, vital, zeigt keinerlei Mangelerscheinungen und entwickelt zahlreiche schöne Blütenansätze. Mittlerweile füllt sie die gesamte Beetfläche aus. Bis zur LED sind nun nur noch etwa zehn Zentimeter Platz, sodass die Lampe bei weiterem Stretch eventuell nochmals höher gehängt werden muss.
Likes
1
Share
@pagari
Follow
الحمدالله
Likes
2
Share
@Sadhus
Follow
Semaine 2 - Phase Végétative : Journal de Culture pour la Dognabis Cup (Concours DogDoctor)Strain : Jealousy Diesel Auto (OctoGenetica) Système de culture : Super Soil (mélange enrichi, Aptus adapté) Nutrition : Aptus (programme organique pour Super Soil, EC naturelle ~1.8-2.0 mS/cm) Éclairage : 1000W full spectrum, contrôlé par Trolmaster Tent X (augmentation progressive de 10 PPFD par semaine) Contrôle environnemental : Total via Trolmaster (climat, lumière, CO2, VPD) Objectif global : Développer une base solide pour une autoflo robuste, maximiser les têtes en tenant compte du rythme rapide de l'auto. Salut la team DogDoctor et la communauté Dognabis Cup ! Voici le journal de ma semaine 2 en végé pour ma Jealousy Diesel Auto d’OctoGenetica. Cette auto pousse déjà comme une dingue – typique des genetics rapides – avec des tiges qui se renforcent et des feuilles qui s’élargissent bien. Le Super Soil avec Aptus donne une explosion de vert, et malgré un pH encore un peu capricieux en début de semaine, tout s’est stabilisé. Objectif : construire une structure dense avant que l’auto ne bascule en flo d’elle-même (prévu vers semaine 4-5). État des PlantesLes Jealousy Diesel Auto sont en mode turbo : hauteur moyenne 10-12 cm, avec 3-4 nœuds visibles. Les racines explorent bien le Super Soil, et la couleur feuille est un vert profond grâce à l’apport naturel des nutriments. Pas de LST/FIM cette semaine – je laisse l’auto s’exprimer naturellement pour l’instant, mais je surveille pour un éventuel topping léger si un dom domine trop. L’humidité du sol (moyenne 90%) est parfaite, avec un drainage au top via les billes d’argile en surface. Pas de signes de sur-arrosage ou carences – l’EC naturelle du Super Soil (1.9 mS/cm) suit bien la demande. Environnement et ContrôlesTrolmaster tient tout en main : température stable autour de 24°C (cible), humidité à 70% (idéal pour végé), CO2 maintenu à 900 PPM pour booster la croissance. VPD à ~0.9 kPa, parfait pour éviter le stress hydrique. Lumière augmentée de 10 PPFD (passée à ~669 PPFD moyen), et les graphs montrent une belle régularité. Pour l’arrosage : cycles manuels adaptés au Super Soil (1-2 arrosages/jour, ~500 mL par plante), avec pH ajusté à 6.1 après des débuts instables (5.9-6.3). Température de la zone racinaire à 17.8°C, bien ventilée. Données Récapitulatives de la SemaineTableau synthétique des stats clés (moyennes sur Mon/Dim/Nuit pour les zones "Plantes" et "Chambre", basé sur les logs app).Paramètre Zone Moyenne Mon (°C / % / kPa / PPFD) Max Mon Min Mon Moyenne Dim (°C / % / kPa / PPFD) Max Dim Min Dim Moyenne Nuit (°C / % / kPa / PPFD) Max Nuit Min Nuit Cible / Notes Température Plantes 23.6°C 24.3°C 22.1°C 21.5°C 24.0°C 19.8°C - - - Cible 24°C ; stable Chambre 23.7°C 24.5°C 19.8°C 19.8°C 22.4°C 19.0°C - - - Ventilation nocturne ok Humidité Plantes 69.56% 71.9% 49.4% 63.78% 73.3% 52.3% 70.22% / 66.64% 74.1% / 72.3% 58.5% / 63.4% Cible 70% ; pics max bien gérés Chambre - - - - - - - - - - VPD Global 0.89 kPa 1.48 kPa 0.8 kPa 0.93 kPa 1.38 kPa 0.68 kPa 0.87 kPa / 0.77 kPa 1.06 kPa / 0.91 kPa 0.72 kPa / 0.7 kPa Optimal 0.8-1.0 ; transpiration saine PPFD (Lumière) Plantes 669 PPFD 693 PPFD 431 PPFD 0.46 PPFD 5 PPFD 0 PPFD 674.5 PPFD 684 PPFD 292 PPFD +10 PPFD vs. S1 ; full spectrum ok CO2 Global - - - - - - - - - Maintenu à 900 PPM Solution/Sol pH / EC / Temp 6.1 / ~1.9 mS/cm / 17.8°C - - - - - - - - EC naturelle Super Soil ; pH stabilisé Notes sur les données : PPFD bas en "Dim" dû aux cycles lumière éteints ; focus sur Mon/Nuit. Graphs 24h confirment stabilité (Temp 22-24.5°C, Humidité 58-74%, VPD 0.7-1.0 kPa).Défis et AjustementspH instable résolu : Début semaine, pH oscillait entre 5.9 et 6.3 à cause du Super Soil en rodage. Ajustements manuels avec Aptus pH Down, stabilisé à 6.1 fin semaine. Arrosage : Réduit légèrement les volumes (de 600 à 500 mL) pour éviter l’excès d’humidité – sol reste à 90% de mousture, parfait. Croissance auto : Pas d’intervention lourde (LST/FIM) pour l’instant – l’auto pousse vite, je surveille pour un topping si besoin semaine prochaine. Objectifs Semaine 3Augmenter lumière : +10 PPFD (cible ~679 PPFD). Maintenir EC naturelle (~2.0 mS/cm) et pH (6.0-6.2). Tester un léger LST si un dom prend le dessus, sans stresser l’auto. Suivi VPD
Likes
5
Share
dec 6. megacrop 1.06gr/litre ph'ed at 6.28. ~500 ml dec 8. megacrop 1.06gr/litre ph'ed at 6.28. ~500 ml dec 8. pretty heavy defoliation and some light LST dec 10. megacrop 1.06gr/litre ph'ed at 6.35. about 500 ml LED is about 85%
Likes
16
Share
@MrGoonai
Follow
07/06/2025 - Day 98 Short Facts: - 86 cm tall - VPD @ 1.0 - Approx. 900 PPFD - Fungus gnats still there - Thrips seen ------------------------------------------------------------------------ Sorry for not updating the diary over the past few weeks. I had a medical emergency in the family, which caused quite a bit of chaos. There’s not much to report — her flowers are getting bigger and bigger. The smell is really special and intense! It looks like senescence is starting. She has lost some color in her leaves and is now turning more yellow. Just to be safe, I added a small amount of Epsom salt. And of course, there are still problems: The fungus gnats are still around, although there are far fewer than before. I’d say their numbers are down by about 80% compared to the peak, so at least some progress has been made. I’m still fighting them and have ordered more predatory mites. Unfortunately, I also noticed some leaves that didn’t look good, so I took a closer look. The result: I found thrips on both plants. It doesn’t look like a full-blown infestation yet, so I hope I can get it under control. The predatory mites should help, and I’ve also ordered some green lacewing larvae to support the fight and hopefully wipe them out. This whole situation is really frustrating. I recently had to deal with thrips on one of my biggest Alocasias, and I’ve been battling a persistent aphid infestation on my largest Dieffenbachia for weeks now. I’ve never had this many issues with pests before.
Likes
13
Share
Buds starting to form now looks like all vertical growth has stopped. All nutrients based on 10 litres Any questions ask away 💚
Likes
6
Share
@IamCy
Follow
She's starting to fatten up nicely! Terps still off the meter,and the roots are ridiculous. Definitely one of the best plants I've ever grown.
Likes
4
Share
This week has been troublesome.. had a plant show severe wilt/droop one morning and despite being proactive in trying to revive it.. I am losing the battle. I have isolated that plant and another that is looking similar thinking some possible root pathogen issue to blame.. however I ended up floating one out and examining the roots and can’t see or smell any sign of rot.. it’s got me puzzled, for now they are isolated in plant hospital.