Likes
Comments
Share
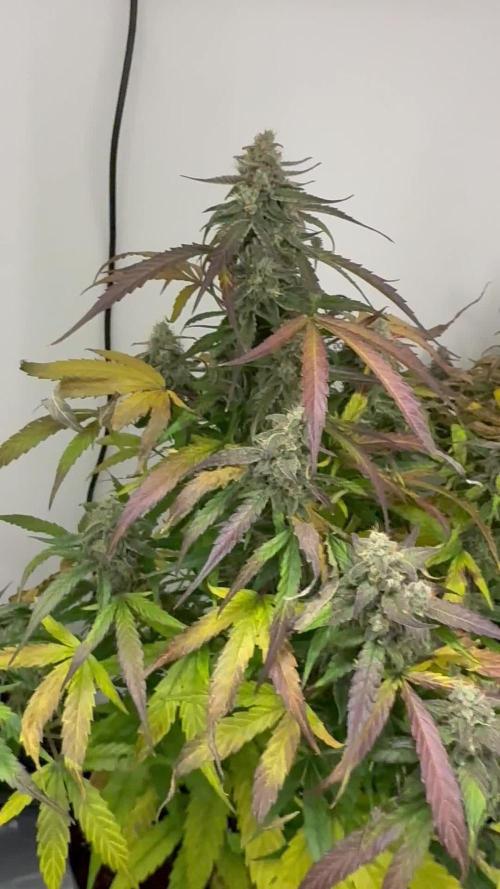
Im really pleased with how these girls are turning out, i was worried at 1st as the propagation tent they were in wasnt big enough to get good air flow so they were very small but as soon as i got them into the Homebox triangle tent that all changed and they are looking great. Fantastic strains and genetics by Anesia Seeds.
Likes
22
Share
12/25/2023-Germination Day 1 Merry X-mas 2023 I decided to start a run of SolFIre Gardens Hoodz Candyz S1. I am going to do a cup filled with RO water a touch of Hydrogen peroxide and let it sit for 24-48 hours until I see tap root then I am going to put it into a rapid rooter.. Tap root Down and put it about 1/4 of the say down the Rapid rooter. I made some modifications to my basket on this run.. I have taken a few Pods that I use for my cloning machine and decided that I am going to try and use them as sure plants, so that I can take my water right up to the bottom of the basket this time and see if these can make my planting more consistent.   12/26/2023-Germination Day 2 Tap root achieved Planting Commencing 12/27/2023-Germination Day 3 Misted the dome lightly misted the rapid rooter and added a little water to the bottom of the pan to encourage root growth to the pan. 12/28/2023-Germination Day 4 Ground Hogs day 12/29/2023- Germination Day 5 She is up, she has broken surface, I misted the root riot, and around the bottom of the tray to try and entice root growth down rapidly. 12/31/2023- Germination Day 6 Ground Hogs Day 1/1/2024-Germination Day 7 HAPPY NEW YEARS!!.. I did it I planned it out so my planting day would fall on New Years and it worked.. Yay!!! 1/2/2024- Germination Day 8 Since the roots are not to the water yet, I am pouring one cup of water lightly on the hydroton around the lady to try and encourage root growth down to the water.. 1/3/2024- Germination Day 9 Ground Hogs day, will continue until roots hit the water. 1/4/2024- Germination Day 10 Ground Hogs day, will continue until roots hit the water. I will just continue to top feed until roots are in the water.. Shouldn't be more than a few more days. 1/5/2024- Germination Day 11 Ground Hogs day, will continue until roots hit the water. I am going to change the water Sunday and kick off Week 1, I will just continue to top feed until roots are in the water.. Shouldn't be more than a few more days. 1/6/2024- Germination Day 12 Ground Hogs day, will continue until roots hit the water. I will just continue to top feed until roots are in the water.. Shouldn't be more than a few more days. 1/6/2024- Germination Day 13 Ground Hogs day, will continue until roots hit the water. 1/7/2024- Germination Day 14 Ground Hogs day, will continue until roots hit the water.
Likes
35
Share
welcome to week 16 it is day 71 and she is looking good and getting euge lol quick reminder that my watering schedule says 2L or .5 gallons but that is because that is what I put in for my nutrient mix I do not include the 3L of water or .75 gallons. That being said the ppm's in the run off are holding steady at 1558 ppm's my nute mix that I added was 1642 ppm's for those who may be relatively new to growing this discrepancy in numbers is normal as the water that I add drips out the bottom a little bit before I add the nute's there for diluting the nute mix ever-so-slightly Day 72 looking healthy still and nute ppm is 1594 and run off is 1501 ppm also she is still gaining mass so i will keep going Day 73 fatter by the day it would seem lol nute ppm 1700 with run off at 1500 pmm never had such growth at this late in the game Day 74 she may be starting to slow down now in growth. nute ppm 1669 run off is 1643 ppm time to get a closer look again. YES i found a new way to use my jewelers scope nute ppm 1486 run off is 1687 ppm Day 77 and this ia the last day of nutes starting tomorrow its water only for at least 2 days then 1-2 days of darkness or maybe i will do a dark flush with ice water and see what happens. sooooo ppm of the nutes is at 1553 and run off is 1412 ppm Day 76 amber trichomes are starting to appear and orange hairs are becoming more abundant then the white ones. so i have made up my mind that this is the last week of flower flush starts sat morn for 2 days then 2 days darkness
Likes
45
Share
9/10 Went and shook the plants off. I don't think it rained. I think it's just dew. Plants with ailments seem to be progressing well and it looks like they'll outrun the pathogens. It may not be a banner year yield wise but the quality will be great it looks like. GMO is stacking up real nice. The ones in further flower are swelling more and more everyday. Earwigs MAY be back because I noticed a couple of plants where I left a tiny little branch on the bottom have been lollipopped on tje sherb pie and rather quickly too. I suppose it could be leaves dieing and rotting bit I doubt it. If they are here there aren't many and most plants are too far in flower for them to bother. They eat the lower newly developing shoots. Not big dense buds. Luckily. I noticed some pm on the gmo with pm. Looks like it's time for another treatment of k bicarb. I'll probably do that tonight. I'll keep this updated. WENT BACK OVER AND DEFOLIATED A BUNCH OF STUFF. ITS TIME FOR ANOTHER APP OF K BICARB. I CHECKED THE SHERB PIE AND IT DOESNT NEED TO BE WATERED. IT WAS STILL VERY HEAVY. IM THINKING I MAY HAVE EARWIGS THAT ARE FEASTUNG ON LOWER BRANCHES THAT SHOULDVE BEEN PRUNED. I NOTICED SOME LARFY SHIT THAT KOOKS LIKE NEW SHOOTS WERE CHEWED. LUCKILY THEY DONT SEEM TO BOTHER DEVELOPED BUDS. ESPECIALLY ROCK HARD BUDS. I'LL DO SOME RESEARCH AND DO SOME FORM OF APPLICATION FOR THE PM SPOTS I SAW AND THE SEPTORIA I KNOW IS THERE. IM SUPER GRATEFUL THOUGH. THESE ARE VERY HARD TO GROW STRAINS AND I THINK ILL KNOCK IT OUT OF THE PARK. Also thinking of switching to cha ching shortly on the toasted toffy and the event horizon that's furthest along. 9/11 I Didn't water anything today because things still seemed heavy. I'm noticing the same thing that happened a few years back. Lower secondary or tertiary branches are getting stripped on a couple plants. They never touch the developed buds they want the new shoots. If IT IS ear wigs they are impossible to fight. I put poison down and d.e. around those plantscand we'll see. It could also be rot from dying leaves. I need to treatcsome of the plants with a longer flowering time with plant doctor. I'm going over today to spend a few hours working in the garden. I'll apply something I just don't know WHAT yet. One event horizon looks like it tried to reveg AGAIN which is super weird . I just see a lot of one and 3 finger leaves. It will probably turn out to be great. The other event horizon looks like its going to be incredible. The toasted toffy is getting close too. Temps only reached 62° yesterday. It took FOREVER to shake these plants off. Time to get the leaf blower out. I'm going to bring my trich scope when I go over today. I wanna look at tgat event horizon. Pistols are retracting on the top flowers. This may be a multiple stage harvest. I'll keep this updated. UPDATE: WENT OVER AT FOUR AND WATERED. I MIGHTVE BEEN ABLE TO HOLD OFF UNTIL TOMORROW MORNING BUT I HAVE PLANS EARLY MORNING. I ALSO DEFOLIATED QUITE A BIT. BUDS ARE SWELLING CONSIDERABLY. THE SHERB PIE HAS TURNED COMPLETELY PURPLE. IT HASNT HAD ANY FLOWERS ON IT BUT NOW IT HAS FLOWERS BIGGER THAN A QUARTER! THESE PLANTS ARE VIGEROUSLY FLOWERING. I NEED TO CHECK THE TRICHS ON A COUPLE PLANTS AS THEY DONT HAVE MUCH TIME LEFT. AS I WAS DEFOLIATED I NOTICED THAT SOMWTHING HAD STRIPPED FRESH BUDSITES ON SOME LOWER BRANCHES. IN YEARS PAST THATS ALWAYS BEEN EAR WIGS WHICH ARE IMPISSIBLE TO DEAL WITH. THEY USUALLY DONT TOUCH THE BIG BUDS THOUGH. TJEY LIKE THE FRESY SHOOTS. ILL GO OUT AT NIGHT AND SEE IF THIS IS THE CASE. ITS ONLYVHAPPENING ON A COUPLE PLANTS BUT STILL. THE EVENT HORIZON IN THE MIDDLE IS GROWING DIFFERENT THAN ITS SISTER. YOU CAN TELL THE STRAIN IS THE SAME BUT THIS SEEMED TO REVEG (AGAIN) BECAUSE IM SEEING SMALL FULLY DEVELOPED BUDS THAT I DONT REALLY SEE CONNECTING. CRAZY TRICHS THOUGH. IT WILL BE INTERESTING TO SEE HOW IT COMES OUT. I TREATED THE GMO WITH WPM WITH A QTR GALLON OF K BICARBONATE FOLIAR SPRAY WITH A DROP OF DAWN FOR A SURFICANT. 9/12 Shook everything off and then used the leaf blower to try to better dry them. Weather is lookingvyo be good for the next couple weeks. Perfect finishing weather for my two that are furthest in flower. I may have to do a staged harvest. Some BOTTOM branches on e.h. are FAT and have trichs on trichs. I'll have to use my scope. I'm switching to cha ching next feed for the three furyhest in flower. Maybe four. The sherb pie had NO flowers last week but it's exploding with really compact buds. The whole plant turned purple. I need to be careful of botrytis with this weather. I've been pretty good about leaving and removing any dead or dying leaves. Even the plant in the ten is filling out nice. I have SOMETHING (behaving like earwigs) and eating "fresh" shoots. It's like lollipopping the new growth on a couple plants. I'll becstaying at the grow from now forward so I'll go out tonight and see what I found. The poison I put down seems to be gone. Anyway I'm very grateful for what I've got. I'm update as I go. 9/13 It's sprinkling a half hour trom my grow. I think it's supposed to be nice though. I found some botrytis on two plants. Two are so close to finishing that I need to closely watch them. I don't want botrytis. I applied k bicarb to the middle gmo as I saw a spot of pm. I spent a ton of time defoliating. This cold weather has brought the fade much faster. Trichs are looking good. WENT THROUGH THE PLANTS AND DEFOLIATED A SHIT TON. APPARENTLY THIS EARLY FADE IS NORMAL THIS YEAR. AT LEAST IN ALL MY CANNABIS GROUPS. WENT THROUGH EVERYTJING! STILL HAVE THE MIDDLE EVENT HORIZON I WANT TOO TIE DOWN BUT I DID A LOT OF DEFOLIATION. THIS ALLOWED ME TO FIND A FEW PIECES OF BOTRYTIS. ON MY PLANTS THAT ARE ALMOST DONE. WE HAVE GOOD WEATHER FOR A LITTLE BIT BUT I MAY HAVE REACHED DIMINISHING RETURNS ON A COUPLE. THAT E.V. AND THE TOASTED TOFFY I DONT WANT GETTING WET. THEY ARE TOO DENSE. TRICHS ARE ALL MILKY AND THEYRE SWELLING. IM SLEEPING ON IT BUT IM ALMOST POSITIVE IM GOING TO DO A SELECTIVE HARVEST ON THOSE TWO. IM NOT LETTI G SHIT ROT AND AGTER LOOKING AT THESE UNDER A SCOPE I WOULDS TAKEN THEM YEARS AGO. GMO IS FROSTY AS HELL. EXTREMELY ARONATIC GARDEN. ILL KEEP THIS UPDATED. Decided to hold off feeding and watering. Defoliated a shit ton throughout the day. Around five I noticed that my shittiest GMO with the yellow leaves had a couple dead interior branches. Upon closer inspection it looked like grey mold. A few tiny buds were destroyed but the branch needed to be removed. Jot any big loss but if it's in the shit that doesn't matter than it's around the shit that does. Found info on event horizon flowering time. Middle of September until middle of October. That could be why I'm seeing coke cans on the bottom branches of that phenome. I've got some decisions to make. I mixed up enough water to water in the morning. I'll mix up feed in the morning. Tje garden has gotten a lot of attention lately. I hope it pays off. I'm leaning on a multi staged harvest of the event horizon amd toasted toffy but we'll 9/14 Hurries morning. Mixed water for this morning last night. WATERED AND FED EVERYTHING (BUT TOASTED TOFFY AND EVENT HORIZON #2 DUE TO THEM BEING CHOPPED SOON.) Everything got a gallon of water and a qtr of food. I had to cut a couple small interior secondary branches on my shottiest GMO due to the appearance of grey mold. I also found some botrytis in both the event horizon and toasted toffy that I plan to take the tops of today. I scoped them and I'm planning to do a staged harvest. Trichs are milky with some amber. Everything is blowing up! I'm not sure what's happening but like it previous years there's a couple plants with leaves dieing near bud sites and an overall yellow appearance. Maybe it's late stage septoria. I cant isolate it due to local laws but if I have to I'll deal with it. Nothing else had anything like that. I hace noticed SOMETHING nocturnal that can eat a small branch and leave it bare. Also eat the small newly forming shoots at the bottom of plants. I shouldve taken off ALL the larfy stuff as it draws bugs but I did things a like different with each plant this year. I'm going to go through the plants again today and I'll update what I decide. Chances are the top half of those two plants are coming down. I'll do a video. 9/15 I'll have to add pics and videos tomorrow. Last night I did a final check of the trichs on event horizon #2 and toasted toffy. Everything looked great so I proceeded to do a "wet trim" outside (ill use the leaf blower to clean up) and cut the tops off the plant. I know this injures tje plant but it also makes them go crazy thinking they are dying and the buds and trichs swell. I had one plant last year I got two harvests off and a bunch of fresh frozen for concentrates. I looked this morning and I madecthe right decision. These plants are DONE. I've got another event horizon but it's not quite there yet. I'm going to leave it as long as I can. If the injured plants pick up pm or something (already had septoria) then the flower will be used for extracts or I'll do a Cervantes wash. I imagine concentrates though. One GMO isn't doing as good as the rest. Yesterday I had to cut three branches off due to grey mold on the stalk. If laws allowed it I'd isolate that plant. Luckily since I spend so much time going through the garden I'm able to find this kind of stuff. The GMO'S look wonderful (even the one with some yellow leaves that I cut the branches off) . K bicarb has kept pm at bay so far. This strain has TONS of trichs. It's like trich on trich on trich. I can't wait to try it. It smells amazing. Sherb pie is completely purple with rock hard buds that smell amazing. It's quality over quantity this year. The big one in the 50 (I think red runtz) is swelling more everyday. I'm going to switch to ch ching soon. The plant in the 10 had TOTALLY SUPRISED ME. I've never grown a plant lime this. It started out with dark purple in the middle now buds are swelling and calyxes are EVERYWHERE! This plant is growing extremely fast! You'll see what I mean when I put the pics and the videos up. I'm not going to do the event horizon harvest until I get both plants and all of both plants. It will be a while before I finish the toasted toffy one as well. 9/16 I'm glad I took those plants. Weather is good but plants were soaked thos morning. I need to go out at night and see what is eating new shoots. Flowers are looking great. I need to do another app of k bocarb sometime. I'm suprised the pm has pretty much stayed with that one plant. That two other GMO's flanking it are doing awesome! Purple, sticky stinky. It's got the whole package. The one in the 50 has some huge flowers that won't require much longer. The one invthe 10 has some time left. This is clearly a sativa dominant hybrid. The buds are swelling like crazy. It went from NO buds to having little purple calyxes to flowers that look like cat-tails! I can't wait to see what rhis year brings. Once I get things dry and manicured I'll give you guys a look at how the first stage of the first harvest went. I'm super happy. Spent a large part of this morning shaking plants by handcand removing any dead leaves or anything that could cause rot then I went over them with a leaf blower. I'll need to water tonight I imagine. WATERED AROUND 3:00 PM. MY FAVORITE GMO STARTED DROPPING. WATERED EVERYTHING A GALLON EXCEPT I SPLIT ONE GALLON ON THE PLANTS THAT HAD BEEN CUT. IM EXTREMELY TIRED BUT I NEED TO GO OUT AT NIGHT AND SEE IF I CAN FIND EARWIGS CRAWLING UP THE STALKS. WEATHER STILL LOOKS GOOD. BUDS SWELLING PISTOLS RETRACTING AND MORE AND MORE LEAVES DYING. I CANT BELIEVE THE SIZE OF THAT SATIVA LEANING HYBRID IN THE TEN!
Processing
Likes
14
Share
Day 14 of flower and all 4 plants have stretched over a foot in the last week. Should start putting all of their energy into flowering now. Looking really good so far. Really, really good.
Likes
19
Share
Eccola!!! La rossa pianta bellissima da odore favoloso ti fa venire l’acquolina in bocca. Sicuramente la riproporrò in quanto davvero è fantastica come genetica!! Grazie a tutti per il supporto e a @Sweet_Seeds per la collaborazione ❤️🔥🌲
Likes
6
Share
@Naujas
Follow
63 dienos!!! Mergaitės būklė tikrai pagerėjo :) šią savaitę įjungiau mergaitės papildomą šoninį apšvietimą, tai pirmas kartas su tokia įranga :) pamatysime, kas iš to gausis :) sėkmės visiems .
Likes
60
Share
@SooSan
Follow
12/12 + 19 jours 1️⃣ 🏠 90x60x90 ☀️ FC-E 4800 => puissance a 30% 🍁 1x Black Bomb / Philosopher Seed 2x Amnesia Lemon / PEV Seeds 1x Blueberry / PEV Seeds 1x Blueberry / 00 Seeds 1x Wappa / Paradise Seed 1x Dark Phoenix / Green House Seed 1x Quick Sherbet / Exotic Seeds 1x Mango Cream / Exotic Seeds 1x Banana Frosting / Sensi Seed 1x Hindu Kush / Sensi Seed 4x Fast Mix / Sweet Seed 📎 https://growdiaries.com/diaries/122084-grow-journal-by-soosan 📎https://growdiaries.com/diaries/124052-grow-journal-by-soosan 2️⃣ 🏠 30x60x50 ☀️TS1000 => puissance a 60% 🍁 4x Quick Sherbet - Exotic Seed 📎 https://growdiaries.com/diaries/122080-grow-journal-by-soosan Sponsorisé par Mars Hydro
Likes
12
Share
Welcome to Flower Week 3 of SuperStrains OreoZ I'm excited to share my grow journey with you from my SuperStrains Project . It's going to be an incredible ride, full of learning, growing, and connecting with fellow growers from all around the world! For this Project , I’ve chosen the Feminized Photo Strain OreoZ: Here’s what I’m working with: • 🌱 Tent: 225x150x150 • 🧑‍🌾 Breeder Company: SuperStrains • 💧 Humidity Range: 50 • ⏳ Flowering Time: 8-9 Weeks • Strain Info: 22%THC • 🌡️ Temperature: 26 • 🍵 Pot Size: 20 • Nutrient Brand: Hy-Pro • ⚡ Lights : 600W x 2 A huge thank you to SuperStrains for allowing me to try my Best with this amazing collection from Photo Strains they managed to Sponsore side by side with theyre Hy-Pro Nutriets . Big thanks for supporting the grower community worldwide! Your genetics and passion speak for themselves! I would truly appreciate every bit of feedback, help, questions, or discussions – and of course, your likes and interactions mean the world to me as I try to stand out in this exciting competition! Let’s grow together – and don’t forget to stop by again to see the latest updates! Happy growing! Stay lifted and stay curious! Peace & Buds!
Likes
3
Share
Holky začínají svůj předposlední týden , ted už se pojede jen základ hnojiv v polovičních dávkách , s úrodou budu asi spokojeny . Jedna devčice tam vyčnívá z řady s nejvíc cukrem, ale každá tam má něco do sebe . Za mě dobrý 👍 problémy žádné velice nebyly a snad už ani nebudou, jen jedna špatně pobrala to zvýšení hnojiv v tom 6.tydnu (trošku listy popálené ).
Likes
6
Share
@Oldwied
Follow
Mhmmm yummy Light Power: 100% Day 106 Flower day 59 Defoliation Day 109 Flower day 63 Last Photosession in Sanlight
Likes
4
Share
@Ensign420
Follow
|»» LOG DISCLAIMER: Not intended as a grow guide. Grow log entries are usually posted 3 weeks later and are for my learning reference. ««| Introduction - Week 26 Summary - Ensign's log, stardate 17608.3, Wow what a week! Drying is always pretty simple and been checking daily. Buds are drying nicely and terps are smelling pretty dank!! Most of the week has been in the veg tent with tissue culture! Mixed another batch of establishment media and took proper explant cuttings. Also super-cropped the mothers to even out the canopy. Ahh yea! Getting hyped for trim day next week! Next week will also be the last week for this grow log, but am already planning out the next cycle. Anyways! Onwards to next week! [START OF WEEK 26] ========================================================== ---------- [ 4x4 MAIN TENT ] ---------- Heady OG BX1 #1 [Round4 ~Wk19] - WEEK 26 - Dry Wk1 ----------- [ 3x3 VEG TENT ] ------------ TKO - WEEK 09 - Full Veg Gorilla Goat #1 - WEEK 05 - Full Veg Heady OG BX1 - WEEK 09 - Full Veg Garlic Budder OG#1 - WEEK 05 - Full Veg 10/13/25 → 10/19/25 This Week's Estimated Goals ---------------------------------------------------------------------------------------------- DLI: ~0 mol/m²/d PPFD: ~0 μmol/m²/s VPD: ~1.5 kPa This Week's Meter Readings & Averages ---------------------------------------------------------------------------------------------- Light On/Off: 00:00 - 00:00 | Wattage: ~000.0W [LV00] Distance From Canopy: ~00” DLI: ~0.00 mol/m²/d PPFD: ~0 μmol/m²/s VPD: ~1.17 kPa Soil %: [47.4, 34.1, 35.0, 55.7, 43.7, 43.6, 44.0, 43.3] ========================================================== Day 01 - Monday - 10/13/25 - Total Days: 183 ----------------------------------- Daily Averages ~[+01:00] - Temps: 78.8°F [26.0°C] - Humidity: 64.4% - VPD: 1.19 kPa - Soil %: [49, 34, 35, 57, 44, 44, 44, 42] ----------------------------------- - [22:05]: Night check on the 4x4 tent. --- Ca-Caw!! Looking great! --- Heady OG BX1 #1 is drying along and no signs of mold. Also airflow and RH is stable and within the 60-70% range. --- Getting stoked! Trim day is 9 days away! - [22:09]: Checked the Ecowitt soil moisture sensor data: ------------------ [ 4x4 MAIN TENT ] --------------- ------ 48% - [CH01 FT » G30 - Heady OG BX1 #1] ------ 35% - [CH02 FB » G30 - Heady OG BX1 #1] ------ 35% - [CH03 BT » G20 - TKO] ------ 56% - [CH04 BB » G20 - TKO] ------------------ [ 3x3 VEG TENT ] ---------------- ------ 46% - [CH05 BL » GR7 - TKO] ------ 40% - [CH06 BR » GR7 - Gorilla Goat #1] ------ 40% - [CH07 FL » GR7 - Heady OG BX1 #1] ------ 40% - [CH08 FR » GR7 - Garlic Budder OG#1] --------- Veg: 38% - 45% | Flower: 45% - 55% --------- General: 30% [Dry] «| 45 - 60% [Moist] |» 70% [Wet] - [22:18]: Checked the 3x3 veg tent. --- Looking healthy in the veg garden! --- All of the vegging mothers are looking great and the canopy is starting to even out. --- Also clones look healthy and no need to water yet. --- The stems, err, I mean, explants, don’t show any signs of contamination. --- Staying positive, glad the growth media is sterile and the overall procedure was successful. --- Anyways! Plan to create more establishment media and cut proper explants soon! - [22:21]: Checked the humidifiers. --- Tanks are still full and no leaks found. Day 02 - Tuesday - 10/14/25 - Total Days: 184 ----------------------------------- Daily Averages ~[+01:00] - Temps: 76.9°F [24.9°C] - Humidity: 64.8% - VPD: 1.11 kPa - Soil %: [46, 34, 35, 56, 43, 43, 44, 43] ----------------------------------- - [21:44]: Night check on the 4x4 tent. --- Looking good in the dry tent! --- Heady OG is drying along and humidity levels look great! --- Nothing to do but maintain and wait to trim in 8 days! - [21:55]: Checked the Ecowitt soil moisture sensor data: ------------------ [ 4x4 MAIN TENT ] --------------- ------ 45% - [CH01 FT » G30 - Heady OG BX1 #1] ------ 34% - [CH02 FB » G30 - Heady OG BX1 #1] ------ 35% - [CH03 BT » G20 - TKO] ------ 56% - [CH04 BB » G20 - TKO] ------------------ [ 3x3 VEG TENT ] ---------------- ------ 41% - [CH05 BL » GR7 - TKO] ------ 40% - [CH06 BR » GR7 - Gorilla Goat #1] ------ 47% - [CH07 FL » GR7 - Heady OG BX1 #1] ------ 46% - [CH08 FR » GR7 - Garlic Budder OG#1] --------- Veg: 38% - 45% | Flower: 45% - 55% --------- General: 30% [Dry] «| 45 - 60% [Moist] |» 70% [Wet] - [21:59]: Checked the 3x3 veg tent. --- Looking healthy and growth is raging! --- All mothers are looking beautiful! --- Clones are getting taller and looking healthy! --- Gorilla Goat #2 needs watering. Let’s go Ensign! - [22:03]: Here is the starting initial watering range: ------ Gorilla Goat #2 » 255.4g → 300.3g and was last watered 4 days ago. --------- General Solo Range: [Dry] «| [Initial Cup Weight] + ~55-100g |» [Wet] --- Took the starting weight before watering, ------ Gorilla Goat #2 » 230.8g --- While on a scale, --- Gently misted her straw mulch with RO water. --- Tried to keep the top growth dry. --- Misted 5-10 sprays. Waited a few seconds, then misted again. --- Made sure to reference the watering weights. --- Repeated this process until the cup weighted at least 300g. --- There was no runoff. - [22:23]: Took the saturated weight after watering, ------ Gorilla Goat #2 » 345.7g --- Marked the watering date on the side of the cup. Also marked the saturated weight on the back. --- Placed her back into the tent. --- Decided to train and super-crop both clones. --- Bent the taller branches to lower the canopy. - [22:38]: Checked the humidifiers. --- Tanks are still full and no leaks found. --- Onwards Ensign! Day 03 - Wednesday - 10/15/25 - Total Days: 185 ----------------------------------- Daily Averages ~[+01:00] - Temps: 75.6°F [24.2°C] - Humidity: 63.8% - VPD: 1.09 kPa - Soil %: [48, 34, 35, 56, 44, 43, 44, 42] ----------------------------------- - [+01:33]: Quick night check on the 4x4 tent. --- Looking great in the dry tent! --- Also starting to smell dank! --- 7 more days until the big trim! - [+01:37]: Checked the 3x3 veg tent. --- Veg garden is healthy and growth is green! --- Both the Heady OG BX1 #1 and TKO mothers will need another topping soon. --- Clones in the propagation tray also look great and no need to water. --- The explant media is still looking sterile with no signs of contamination. --- Easy night in the garden. Nice! - [+01:40]: Checked the humidifiers. --- Tanks are still full and no leaks found. --- Okay! Tomorrow plan to dive back into tissue culture and prep more growth media. --- Onwards Ensign! Day 04 - Thursday - 10/16/25 - Total Days: 186 ----------------------------------- Daily Averages ~[+01:00] - Temps: 74.6°F [23.7°C] - Humidity: 62.2% - VPD: 1.11 kPa - Soil %: [46, 34, 35, 56, 43, 44, 44, 45] ----------------------------------- - [11:41]: Alright! Back to tissue culture and time to start another batch of establishment media! --- Took the plant growth regulators out of cold-storage (my fridge). ------ [ » SMOKES A BOWL « ] --- While the products warmed up, gathered the necessary supplies and setup my workstations. --- Currently, focusing on: ------ PHASE 01 » ESTABLISHMENT --------- » DAY 01 » MEDIA - PART 01 - Mixing the growth media --------- » DAY 01 » MEDIA - PART 02 - Sterilization of media and tools [via autoclaving] --- Going to use the same establishment formula, but doubling the yield. --- Also using RO water instead of distilled water. --- Here's the establishment media formula: --- [» VER.0001 |» INITIAL TROPICAL PLANTS FORMULA |» 0.5L (500mL) RO WATER «] ------ MS [Muashige & Skoog] --------- » 2.22g ------ Sucrose [Cane Sugar] --------- » 15g ------ BAP [6-Benzlaminopurine | Cytokinin] --------- » 0.5mg » 0.5mL » 500μL ------ IBA [Indole-3-Butyric Acid | Auxin] --------- » 0.05mg » 0.05mL » 50μL ------ AGAR [Jelling Agent] --------- » 3.5g ------ PH [Potential Hydrogen] --------- » 5.7 --- [» 1mg/mL CONCENTRATION ratio | 1mg = 1mL | 1mL = 1000μL «] - [12:59]: Time to prep the growth media! --- Made sure to turn OFF the lung-room's oscillating fan. --- Filled a measuring cup with 400mL of RO water. --- Dropped a clean magnetic mixing bar into the measuring cup. - [13:05]: Placed the measuring cup on the magnetic stirrer. --- Turned the unit ON and have the unit on LOW. - [13:11]: Using a precision scale (sensitive to 0.01g) along with a micro-pipette (1000μL capacity along with tips) and disposable (100mL) weigh boats, ------ Added 2.22g of MS [Muashige & Skoog] ------ Added 15g of Sucrose [Cane Sugar] ------ Added 500μL of BAP [6-Benzlaminopurine | Cytokinin] ------ Added 50μL of IBA [Indole-3-Butyric Acid | Auxin] ------ Added 3.5g of AGAR [Jelling Agent] ------ Then filled the measuring cup to the 500mL line before covering the top with plastic wrap. --- Alright! - [13:46]: Let the media mix on the magnetic stirrer for a bit. --- Have the unit set to LOW with a steady vortex. ------ [ » ~20 MINUTES LATER « ] - [14:09]: Okay! Time to pH the establishment media! --- Gently removed the bottom cap of the AC Infinity PH Meter PRO [AC-PHM7]. Placed the cap in the storage case for later. Covered the top with plastic wrap (KCL solution still inside the cap). --- Swirled the probe in a cup of RO water to rinse off the storage solution. --- Shook the excess water out and wiped the unit with a clean paper towel making sure all mineral buildup was removed (kept away from the very tip of the probe). --- Temporarily placed the meter back into the cup of RO water. --- Removed the plastic wrap of the establishment media. - [14:13]: Using the AC Infinity PH Meter PRO [AC-PHM7], --- Took the establishment media's initial pH reading. --- The pH was at 5.14 --- Using the micro pipette, ------ Added pH Up solution. --- Made sure to let the media solution mix for a bit before checking for pH readings. - [14:21]: Adjusted the media's pH until it stabilized to 5.58 --- For this batch, tried to go for a range of 5.4 to 5.8 pH. --- Also glad that I did not need to add PH down. - [14:43]: Poured the pH'd establishment media into separate polypropylene containers. --- Made sure to re-mix the media solution between container fillings. --- Ended up splitting the media solution into 12 containers. ------ 8x » 125mL Polypropylene Bottles [with screw cap lids] ------ 4x » 236mL (0.5pt) Glass Mason Jars [with polypropylene jamming lids] --- Have the lids of all vessels loosely on and set each aside for later autoclaving. --- Also filled 12 empty polypropylene bottles with RO water and placed the lids on loosely (4 bottles are re-used). - [14:58]: Prepped the tools for sterilization. --- Took a new 5.25in x 10in sterilization pouch and added the following tools: ------ 3x stainless steel forceps ------ 3x stainless steel scissors --- Before placing into the pouch, wiped each tool with a paper towel sprayed with 70% isopropyl alcohol. --- Sealed the bag and marked the date. --- Time to autoclave everything in the pressure cooker! --- Filled a Presto 23qt-Pressure Cooker with 12 cups of RO water. - [15:06]: Added a few aluminum foil balls to the bottom of the pressure cooker. --- Placed the first rack on top of the foil. --- Made sure the rack was level and stable resting above the water. --- Gently placed the containers of media into the pressure cooker and onto the first rack. Lids are still loose. --- Made sure to give space for each container and kept them away from the sides of the pressure cooker. --- Placed a second pressure cooker rack on top of the containers of media. --- Placed the containers of RO water onto the second rack. Lids are still loose. --- Placed the third rack on top of the containers of water. - [15:16]: Lastly, placed the sterilization bag of tools on top of the third rack. --- Took the pressure cooker lid and made sure the release vent was clear of debris before placing it on. --- Sealed and secured the lid. --- Pressure vessel has been sealed! --- Alright! Time to sterilize! --- While keeping the vessel level and straight up, moved the sealed pressure cooker to the kitchen for heating. - [15:23]: Placed the pressure cooker onto a butane-gas stove. --- Turned the stove ON and set it to HIGH. ------ [ » ~20 MINUTES LATER « ] --- Once steam was venting out of the release vent, --- Placed the metal rocker onto the vent. --- Shortly afterwards, the pressure top-lock sprung up to indicate the vessel was under pressure. --- Then the pressure gauge started to rise. ------ [ » ~10 MINUTES LATER « ] --- At 15psi, the metal rocker started to rock! - [15:56]: Turned down the stove down to LOW. --- Set a timer for 15 minutes and began monitoring the pressure gauge. --- Maintained the 15psi by making minor adjustments to the stove. ------ [ » ~15 MINUTES LATER « ] - [16:12]: Turned the stove completely OFF and waited until the pressure cooker's top-lock dropped down which indicated that pressure levels were safe to open. ------ [ » ~40 MINUTES LATER « ] --- Once the pressure cooker was at safe levels (0psi) and the top-lock was down, - [16:48]: Moved the pressure cooker into the lung room. --- The pressure cooker was still quite hot so was careful to keep the vessel straight up and level during transport. --- Used towels for insulation. --- Rested the hot pressure cooker onto a stack of 5-gallon buckets covered with layers of towels and folded paper bags. --- Gently opened the pressure cooker and set the lid aside. - [16:57]: While wearing nylon gloves, sprayed my hands with 70% isopropyl alcohol. --- Gently removed the bag of sterile tools placed it onto a Pyrex dish. --- Removed the top rack and set it aside. --- Then one container at a time, --- Gently tightened and secured the lids of each bottle of sterile water before placing onto the Pyrex dish. --- Removed the middle rack and set it aside. --- Then one container at a time, --- Gently tightened and secured the lids of each bottle and jar of sterile media before placing onto the Pyrex dish. --- Throughout the entire process, kept the gloves on and sprayed my hands regularly with 70% isopropyl alcohol. --- Decided to store all the bottles in the Pyrex dish. - [17:16]: Have the dish resting on a shelf in the lung room. The jars of media are set right next to the Pyrex dish on a towel. --- To prevent dust, covered everything with towels. --- Done for now and will check on the growth media tomorrow. --- If all goes well, should be taking new explant cuttings in a couple days! - [17:39]: Night check on the 3x3 veg tent. --- Looking beautiful and healthy in the veg garden! --- All moms are getting bushy and getting pretty close to the grow light. --- Since I plan to take explant cuttings soon, not going to top or train quite yet. --- Clones also looking healthy and seem unaffected by the super-cropping. Nice! - [17:57]: Checked the Ecowitt soil moisture sensor data: ------------------ [ 4x4 MAIN TENT ] --------------- ------ 45% - [CH01 FT » G30 - Heady OG BX1 #1] ------ 34% - [CH02 FB » G30 - Heady OG BX1 #1] ------ 35% - [CH03 BT » G20 - TKO] ------ 55% - [CH04 BB » G20 - TKO] ------------------ [ 3x3 VEG TENT ] ---------------- ------ 43% - [CH05 BL » GR7 - TKO] ------ 45% - [CH06 BR » GR7 - Gorilla Goat #1] ------ 42% - [CH07 FL » GR7 - Heady OG BX1 #1] ------ 44% - [CH08 FR » GR7 - Garlic Budder OG#1] --------- Veg: 38% - 45% | Flower: 45% - 55% --------- General: 30% [Dry] «| 45 - 60% [Moist] |» 70% [Wet] - [17:59]: Checked the 4x4 main tent. --- Ca-Caw!! I got Headies! --- Wow! Heady OG BX1 #1 is drying along beautifully and she is smelling dank! --- Also no signs of mold and RH levels look stable! --- 6 more days until the big trim! - [18:11]: Checked the humidifiers. --- Tanks are still full and no leaks found. --- Wow what a day! --- Still gots more to do! --- Let’s go! Let’s grow! --- Onwards Ensign! Day 05 - Friday - 10/17/25 - Total Days: 187 ----------------------------------- Daily Averages ~[+01:00] - Temps: 76.0°F [24.4°C] - Humidity: 62.0% - VPD: 1.16 kPa - Soil %: [48, 34, 35, 55, 44, 44, 44, 42] ----------------------------------- - [22:57]: Night check on the 4x4 tent. --- Ca-Caw! Headies is smelling dank! --- RH levels are getting a bit dry, but are okay. --- Wow buds are frosty with trichomes! --- With 5 days until trim day, getting stoked! - [23:04]: Checked the Ecowitt soil moisture sensor data: ------------------ [ 4x4 MAIN TENT ] --------------- ------ 47% - [CH01 FT » G30 - Heady OG BX1 #1] ------ 34% - [CH02 FB » G30 - Heady OG BX1 #1] ------ 35% - [CH03 BT » G20 - TKO] ------ 55% - [CH04 BB » G20 - TKO] ------------------ [ 3x3 VEG TENT ] ---------------- ------ 46% - [CH05 BL » GR7 - TKO] ------ 40% - [CH06 BR » GR7 - Gorilla Goat #1] ------ 45% - [CH07 FL » GR7 - Heady OG BX1 #1] ------ 50% - [CH08 FR » GR7 - Garlic Budder OG#1] --------- Veg: 38% - 45% | Flower: 45% - 55% --------- General: 30% [Dry] «| 45 - 60% [Moist] |» 70% [Wet] - [23:11]: Checked the 3x3 veg tent. --- Looking healthy in the veg garden! --- Mothers are getting bushy and tall! --- Super-cropped and trained the taller branches down to lower the canopy. --- Plan to take tissue culture cuttings tomorrow so glad there are plenty of tops to choose. Still deciding on which mother to preserve next. --- Clones in the propagation tray look healthy! --- The original Garlic Budder #2 clone needs watering. - [23:26]: Here is the starting initial watering range: ------ Garlic Budder OG#2 » 256.4g → 300.2g --------- General Solo Range: [Dry] «| [Initial Cup Weight] + ~55-100g |» [Wet] --- Took the starting weight before watering, ------ Garlic Budder OG#2 » 258.9g --- While on a scale, --- Gently misted her straw mulch with RO water. --- Tried to keep the top growth dry. --- Misted 5-10 sprays. Waited a few seconds, then misted again. --- Made sure to reference the watering weights. --- Repeated this process until the cup weighted at least 300g. --- There was no runoff. - [23:40]: Took the saturated weight after watering, ------ Garlic Budder OG#2 » [000.0]g --- Marked the watering date on the side of the cup. Also marked the saturated weight on the back. --- Placed her back into the tent. - [23:45]: Checked the humidifiers. --- Tanks are still full and no leaks found. Day 06 - Saturday - 10/18/25 - Total Days: 188 ----------------------------------- Daily Averages ~[+01:00] - Temps: 76.8°F [24.9°C] - Humidity: 60.3% - VPD: 1.25 kPa - Soil %: [47, 34, 35, 55, 44, 44, 44, 47] ----------------------------------- - [15:19]: Decided to decrease the VPD level a bit. --- Within the AC Infinity App, --- Changed the schedule name from 'Flower [12/12]' to 'Drying [0/24].' Oops. --- For the Main Tent [4x4] controller, --- Adjusted the 'Drying [0/24]' Schedule for the exhaust fan. ------ Decreased the VPD LOW trigger value from 1.5kPa to 1.4kPa --- Adjusted the 'Drying [0/24]' Schedule for the humidifier. ------ Decreased the VPD target value from 1.5kPa to 1.4kPa --- This should increase the relative humidity a bit and will maintain a 60-65% range - [16:59]: Evening check on the 3x3 veg tent. --- Wow the veg garden is raging with healthy growth! --- Even with the lower veg temps, growth has been perky and bushy! --- The TKO mother has been looking a bit on the purple-side, but I plan to increase the temps back after trim day. - [17:23]: Okay! Time to continue the tissue culture journey! --- Checked on the sterilized media, water, and tools. --- Ooo yea! The growth media in the glass jars have solidified nicely! --- The media in the bottles also look great! Found only one that did not gel properly. --- Hmm. The sterile water bottles are not looking sterile. Unlike the first batch (using distilled water), each RO bottle had tiny white particles floating in the water. --- I think this was due to the water source. The RO water used was from the plant reservoir. For the next sterilization, will try using water straight from the tap. Will discard the entire batch and try again later. - [17:34]: Anyways! Time to cut and sterilize another batch of explant cuttings. --- Using the similar protocols as last time, but with a few changes. --- Instead of distilled, using reverse-osmosis (RO) water. --- Also simplifying the workflow and will not be using the sterile water. --- Only taking cuttings from one cultivar. --- Today, attempting to preserve Heady OG BX1 #1 --- Unlike the last attempt, going to be cutting apical nodes and will leave all leaf growth on. --- Last attempt was more for monsteras and not cannabis. - [17:35]: Made sure the lung room's oscillating fan was OFF during the entire process. --- Put on a fresh pair of nitrile gloves. --- Okay! Let's grow Ensign! - [17:47]: Filled a glass beaker with 180mL of RO water. --- Using a micro-pipette, ------ Added 20mL of Clorox bleach --- Mixed the solution. - [17:52]: Poured the bleach solution into a glass mason jar. ------ Added 1 drop of Dawn dish soap. --- Dropped a magnetic mixing rod into the jar before setting it onto the magnetic stirrer. --- Turned the unit ON and set it to a low setting. --- Placed a polypropylene lid loosely on. - [18:02]: Rinsed and filled the glass beaker with 70% isopropyl alcohol. --- Filled another glass beaker with RO water before adding a drop of Dawn dish soap. Mixed the solution. --- Okay! Time to take the cuttings! --- Using a clean pair of trimmers, - [18:09]: Gently cut two clone cuttings from the Heady OG BX1 #1 mother. --- Stripped each cutting down to 2-inch apical nodes making sure to leave about 0.5 inch of stem growth for planting. ------ Prepared a total of 2 nodal cuttings. --- Dropped the nodal cuttings into the cup of soapy water. --- Swirled the cuttings in the soapy water for a bit. --- Opened the jar containing the 10% bleach solution. --- Using clean tweezers, --- Took each cutting out of the RO water and carefully submerged it into the beaker of 70% isopropyl alcohol for about 30 seconds. --- Then transferred the cutting from the isopropyl alcohol straight into the jar of bleach solution. --- Once both cuttings were in the jar, sealed the top with the polypropylene lid. - [18:23]: Flipped and set the entire bleach jar upside down onto the magnetic stirrer. --- Started using the magnetic stirrer. --- But the cuttings were getting hit by the bar so ended up turning the unit OFF. --- Instead, made sure to swirled the bottle every few minutes to agitate the cuttings. --- For a proper sterilization, the cuttings should be agitated in the hypochlorite (bleach) solution for at least 20 minutes. --- While waiting for the explants to sterilize, prepped the still air box. - [18:39]: Unfolded and placed a Safloga still-air box onto my desk. --- Thoroughly misted the inside of the air box with 70% isopropyl alcohol making sure to coat the entire chamber. --- Then isopropyl misted and placed the following items inside of the still air box, ------ x1 » Jar of Establishment Media ------ x1 » Bottle of Establishment Media ------ x1 » Glass-Bead Sterilizer ------ x1 » Roll of Plastic Wrap [pre-cut] ------ x1 » Sterilization Bag Containing: --------- x3 » Stainless Steel Forceps --------- x3 » Stainless Steel Scissors --- Made sure to fully coat the outside of the tool bag and each of the containers with 70% alcohol. --- The bag had a torn corner (Oops), so made sure to spray the inside with a few mists of isopropyl alcohol. --- For the glass-bead sterilizer, ------ Wiped the entire unit with isopropyl alcohol. ------ Before filling the unit with the included beads, misted the heating chamber with a spray of isopropyl alcohol. ------ Misted the glass beads again with a spray of isopropyl alcohol. --- Set the cleaned glass-bead sterilizer into the still air box. - [19:02]: Still air box fully prepped for explants! --- Okay! Explant nodal sterilization complete! --- While still wearing gloves, --- Misted the outside of the explant jar with 70% isopropyl alcohol before placing it into the still-air box. --- Turned the glass-bead sterilizer ON. --- Made sure to re-seal the chamber. - [19:05]: Okay! Finally time to start the tissue culture transplant! --- Let's go Ensign! --- Sprayed my gloved hands with 70% isopropyl alcohol (also put on a pair of cloth arm sleeves), --- Placed my hands through the arm holes and into the still air box to begin the process. --- Started by laying out my initial workspace: ------ » Far Left Quadrant » Jar of Sterile Establishment Media ------ » Far Center » Bottle of Sterile Establishment Media ------ » Far Right Quadrant » Glass-Bead Sterilizer ------ » Mid Center » Bleach Jar with Explant Cuttings [Main Workspace] ------ » Near Left Quadrant » Empty [Trash Area] ------ » Near Right Quadrant » Bag of Sterile Tools & Roll of Plastic Wrap --- Opened the bag of tools and placed the forceps and scissors into the pre-heated glass-bead sterilizer. --- Set the bag in the trash area (near left quadrant). --- Loosened the lids of both containers of sterile media but did not remove the lids. The lids were resting on top and could easily be lifted. --- Also took lid off of the bleach jar and gently set it on the table. --- Took the jar of sterile media and set it in the center of my workspace (to the right of the bleach jar). --- Using my left hand, took a set of scissors from the glass-bead sterilizer and gently cut the bottom of the first cutting. --- Once the bottom cut was made, placed the scissors back into the glass-bead sterilizer. --- Using my left hand, lifted the lid off of the jar of sterile media and inserted the trimmed end of the cutting straight into the growth media (using my right hand). --- Covered the jar with the lid and placed the forceps back into the glass-bead sterilizer. --- Tighten the lid of the jar and set it aside. ------ [ » REPEATED THE ABOVE PROCESS FOR THE BOTTLE OF GROWTH MEDIA « ] --- Once the last cutting was transferred from the bleach jar into the sterile media, --- Turned the glass-bead sterilizer OFF. --- Cleaned up my workplace and placed the scrap stem tips and bleach jar out of the way (near left quadrant). - [19:28]: Wrapped the lid of each explant container with plastic wrap before setting it in the center of the workspace. --- Explant transplant completed! - [19:59]: Using a label printer (Brother DT410), made a set of labels for each container: ------ Heady OG BX1 #1 | 04.24.25 | Photo | Reg ------ Formula: v0001 | ExBatch: 0002 | Lot: 01 | Pod: 01 ------ Establishment Media | Sealed On: 10/18/25 --- Opened the still air box. --- Then one container at a time, took an explant out and wrapped the lid with a label. --- Set the labeled containers onto the propagation tray (in the 3x3 veg tent). - [20:07]: Done! ------ The explants are around 37 μmol/m²/s which gives a DLI of 2.40 mol/m²/d under an 18/6 light cycle. --- Will check daily for contamination. --- Ca-Caw!! Ahh yea! --- Heady OG BX1 is now officially my first true attempt at cannabis tissue culture! --- Using this new workflow, I may try reusing the TKO media. Do plan to take new cuttings soon. May even try using the liquid media. --- Shout out to microclone and Bill Graham! His 'Tissueponics' video contains tips and tricks of the trade that have straight up changed the way I think of DIY cannabis tissue culture. --- Plan to further refine my process and will continue to refine the workflow with each attempt. - [20:15]: Checked the Ecowitt soil moisture sensor data: ------------------ [ 4x4 MAIN TENT ] --------------- ------ 54% - [CH01 FT » G30 - Heady OG BX1 #1] ------ 34% - [CH02 FB » G30 - Heady OG BX1 #1] ------ 35% - [CH03 BT » G20 - TKO] ------ 55% - [CH04 BB » G20 - TKO] ------------------ [ 3x3 VEG TENT ] ---------------- ------ 43% - [CH05 BL » GR7 - TKO] ------ 48% - [CH06 BR » GR7 - Gorilla Goat #1] ------ 42% - [CH07 FL » GR7 - Heady OG BX1 #1] ------ 45% - [CH08 FR » GR7 - Garlic Budder OG#1] --------- Veg: 38% - 45% | Flower: 45% - 55% --------- General: 30% [Dry] «| 45 - 60% [Moist] |» 70% [Wet] - [20:56]: Checked the 4x4 tent. --- Ca-Caw! Looking great my ladies! --- Humidity levels are still a bit on the dry side, but still okay. - [21:08]: Checked the humidifiers. --- Tanks are still full and no leaks found. --- Wow what a day! --- Oh yea, 4-more days until trim day!! Ca-Caw! Let’s go! Day 07 - Sunday - 10/19/25 - Total Days: 189 ----------------------------------- Daily Averages ~[+01:00] - Temps: 76.7°F [24.8°C] - Humidity: 59.4% - VPD: 1.27 kPa - Soil %: [48, 35, 35, 55, 44, 43, 44, 42] ----------------------------------- - [07:08]: Quick morning checked on the 3x3 veg tent. --- The veg garden is healthy and perky! --- All moms and clones are healthy and raging with growth! --- Both Heady OG BX1 #1 explants also look alive and green! - [19:26]: Night check on the 4x4 tent. --- Ca-Caw! We got MENDO DOPE in the trunk! --- Wow terps are getting loud and buds are drying along nicely! --- Looking frosty and coated in trichomes! --- Three more days until trim day!! - [19:33]: Checked the Ecowitt soil moisture sensor data: ------------------ [ 4x4 MAIN TENT ] --------------- ------ 46% - [CH01 FT » G30 - Heady OG BX1 #1] ------ 35% - [CH02 FB » G30 - Heady OG BX1 #1] ------ 35% - [CH03 BT » G20 - TKO] ------ 54% - [CH04 BB » G20 - TKO] ------------------ [ 3x3 VEG TENT ] ---------------- ------ 40% - [CH05 BL » GR7 - TKO] ------ 43% - [CH06 BR » GR7 - Gorilla Goat #1] ------ 47% - [CH07 FL » GR7 - Heady OG BX1 #1] ------ 41% - [CH08 FR » GR7 - Garlic Budder OG#1] --------- Veg: 38% - 45% | Flower: 45% - 55% --------- General: 30% [Dry] «| 45 - 60% [Moist] |» 70% [Wet] - [19:35]: Checked the 3x3 veg tent. --- Vegging along beautifully in the garden! --- Mothers are getting taller and probably could train, but will wait until tomorrow. --- Clones and explants also look healthy and green! --- Gorilla Goat #2 needs watering! - [19:44]: Here is the starting initial watering range: ------ Gorilla Goat #2 » 255.4g → 300.3g and was last watered 5 days ago. --------- General Solo Range: [Dry] «| [Initial Cup Weight] + ~55-100g |» [Wet] --- Took the starting weight before watering, ------ Gorilla Goat #2 » 244.9g --- While on a scale, --- Gently misted her straw mulch with RO water. --- Tried to keep the top growth dry. --- Misted 5-10 sprays. Waited a few seconds, then misted again. --- Made sure to reference the watering weights. --- Repeated this process until the cup weighted at least 300g. --- There was no runoff. - [20:04]: Took the saturated weight after watering, ------ Gorilla Goat #2 » 345.6g --- Marked the watering date on the side of the cup. Also marked the saturated weight on the back. --- Placed her back into the tent. - [21:41]: With a few days before the big trim, decided to sample a few buds! --- Cut and trimmed branch for sampling and wow she’s got terps! --- Buds are dense and have a gassy diesel funk! Ca-Caw!! Wow! --- Without even curing, pretty sure she’s the one! --- Plan to grow out another cycle (in clone of the same pheno), but I think I found my female for my first breeding project! - [22:01]: Checked the humidifiers. --- Tanks are still full and no leaks found. --- Ahh yea! Three more days until the big trim! --- Also next week will be the last for this log. --- But already stoked for the next! --- Planning on popping more seeds and continuing the pheno hunt for another female! --- Since I lost TKO this harvest cycle, plan to grow a clone cutting of the same pheno (#2). --- As for seeds, popping more regulars and going to attempt to grow some of Mr. Grow-It’s Chillout OG! --- Got a pack of F3s and am stoked to give them a try! --- Also going to sprout some beans of Dead Ops OG from Zaza Genetics! --- Chillout OG, Dead Ops OG, and another round of TKO! Let’s go! Let’s grow! --- Hunters of the dank! Ca-Caw! --- Anyways! --- Onwards to next week! [END OF WEEK 26]
Likes
31
Share
Como se puede ver al dia de la fecha (19/01) las plantas de macetas vienen creciendo con un problemita,que no sé cual es, pero las hojas algunas están tomando un color amarillo. Pensando que puede ser una carencia, le suministre 2 ml x litro de agua de oro negro de namaste, en los próximos días tendré que ver los resultados para ver si mejoran. Con respecto a la planta de la tierra, viene creciendo bien y fuerte, doble sus puntas principales para que crezca más horizontal.
Likes
6
Share
Well topping her most certainly paid off!! I got two huge Colas...awesomeness!! She was a pleasure to grow so far... Since she is a chuy Sativa she seems to have produced almost frost everywhere!
Likes
10
Share
On day 2 of the week I turned both lights settings on (there are 3 options; growth: on flower: off / growth: off flower: on / growth: on flower: on) I set them both on because I read the more light the more bud and I was sure that the plant had started the transition and was flowering like stated in the previous week, the main stem got way to close to the light, (4in from ) and not having more room in the tent I bought a cheap garden net and distributed the plant so the light was as even as possible using a cheap little instrument with light sensor I bent the main stem pretty violently but it recovered well and is doing well tried dropping the temperature a bit by keeping my window open but I didn't drop it too much due too the fact that I live and sleep in the room just realized today that I should have changed the nutrient mix dosage at the begging of flower as recommended on the bottle to help the transition but I guess it turned out alright watering 2 -3 times a week 3L at a time
Likes
92
Share
D91 Still a couple of weeks to go at least. She is putting on nice long bud mass as all bud I'll get off her will have very few sugar leafs. And with the top 30cm of the nodes bent outwards it's allowed the light to reach down deeper into the plant itself, and well, you can see the results, bud sites galore. Not much left to do with her. I threw her into a heavy flush for 24hrs first flush run-off was coming back at 2900, way too high, salt and nute residue is been left behind because of the poor P-K uptake that control the spread and uptake of nutes. Got her down to 980 today with her final flush before going into her rest. After the flush I poured 100ml of 2ml/l of cal to help break down the nutes behind so the plant can uptake them, this is very important when doing a flush to lower your TDS add some cal to it as this will keep the plant sucking not only thr water and leaving the nutes behind, cause you need cal espically in subs with nute build up it has to be broken down and will help to avoid nute lock or going into an unwanted flush to early. I'll be dropping her next feed by 200ppm down to around a 1000. I will still give the nutes I've been given just a little less and she needs to get ready for a flush but be kept with enough to keep her mass of growth going. RH is between 55-60%:air been blown in is reading at 48-50% temp is 22c in tent it's 21.7c in the dark and 27-28c with the light on. With my new 4inch intake smart fan im going to set it up so it blows 100% air in at the top and a 4inch intake fan will suck out 80% I'm hoping by doing this it will change the RH of the room 48-50% into the tent creating the same environment. The air that is brought in is filtered by a carbon filter, no need for 1 to blow the air out. 19/3/22 As you can see I have the RH as best as I can get in my grow room, I've installed the smart fan and inserted the sensor giving me 57%RH 75F in the tent, with the light off, it's rather hot today, much hotter than normal, it's normally 21c in my room it's 24.5 today. RH is at 50% in room, hopefully by installing my old intake fan in the lowest part of my tent and suck out 80% While 100% gets blown in on top will bring the tents RH to the same as the room, that's the hope anyways. But 57%RH is still okay, not optimal but not too bad neither 21/3/22 So, I tried out my new method. Of having my smart intake fan suck in 50RH and a bottom intake fan at the end sucking out older air at a lesser speed had it running for 8hrs, no change in humidity whatsoever just dropped the temp by 1.5c. I think the fact I have a 70x70 with so many plants has set the RH and thankfully it's not what it was which was touching on 80rh at some days. A bigger tent and I'll really be able to dial in my grows now I have all the tools to control RH/TEMP from S/H. For now 57%RH when it's low and 62% when the lights are on for a few hours. Stays around 57-60% atm for around 85% of the time. Temp is constant and doesn't change without my control within a range of 4-6c change difference, this number I have no problem in changing and I'll be making my tent a lot cooler after this wk ends. I'll be keeping her at 18c with lights off and 28 with lights on. As for the plant, she has fully turned the corner and I can say whatever the issue was, which no 1 can still tell me what it was not do I know. It wasn't a def because it was so random and hit all different levels of growth. But, thankfully she has passed it, am really dialing in this coco grow. I know exactly how much water she takes without spilling a drop of run-off unless I want it to. The buds, well, they are small at the moment but they are so fucking dense and hard I really hope they get at least 30% bigger of the next 2 wks. The last few days some has but on at least 10% bud mass and all sites have moved out of pre-flower (stigma), so growth is over for the plant, it's just bud sites now, how you can tell is your sites will start to give off their aroma and will start to get sticky to the touch. 85% of the plants buds are all in the same range mature wise or only a few days out from their sister buds. Still some 15% that still has stigma but as this is at the bottom of the plant I know she will not grow anymore but maybe a little if any around these sites. 21/3/22 GRRRRRR stupid rust spots all over her again today, yday she got a mix of all the nutes above, one of these nutes is causing this, I am 75% sure it's overdrive. Really annoying, as there is no deficiencies, no signs, just these poxy rust spots. So annoying, as NO 1 can tell me exactly what they are, it's not a def, the plant ozzs health, she's the pic of it, every leaf stands tall, very good color, slight old nute burn very little on about 10% of the leafs but these stupid rust spots are stupid. Overdrive, or 1 of the nutes is doing this, I reckon it's this as it's only been given that the past 10 days and I'm nearly sure this is the cause, but I can't be sure, and until I figure it out I really don't feel comfortable moving forward with the AN line. Sadly I think I'll be dropping everything but big bud, bud candy&voodoo juice. 22/3/22 Was going through my buds and man, they are so sticky you would nearly say they are done until you look close at them, there still full of pistils, white hairs, the bud growth will come past them, so there is still a big push yet to come so I was hoping to start dropping the micro nutes but I think that would be a massive mistake and cost me dearly on harvest day. Fuck it, I'll flush the shit out of it for 2 weeks on flawless finish and then a week on water and 2-4 days in the dark just on water. With much thought I pushed the PPM back up to 1450. I've decided to drop overdrive. After 24hrs of flushing my coco like crazy I'll be happy to start her back on nutes in 24hrs when she's drank the 2.8-3.2l of water she's currently holding, the run-off from that was 1800 btw, but with salts and so on from the last feed I've learnt with AN the PPM reading is what you give it, not always the Run-off. Yeah I'd trust the PPM reading 2moro if i was doing another ppm run off test, but as im not ill go by what im putting into it, cause my weekly flushes/flushing in general in pretty good, very little nute lock experinces with mixing so many nutes 22/3/22 Messaged AN and sent them pics and info, by going through my nutes and the fact that I gave some big bud in the same window as overdrive causes these rust spots. Thankfully I finally have an answer as to the rust issues. Just a bad mix with nutes that shouldn't come into contact with each other. Thanks AN Thanks for reading, drop a like and I'll know u drop by and I'll do the same gottagrowsometime
Likes
6
Share
I’m very impressed by this strain. This is my first Atlas Seeds grow and it’s dominating my Mephisto genetics in frostiness. She’s already browning on the pistils, this will be a fast, potent, high yielding harvest!
Likes
117
Share
OMG OMG OMG my caligirl and really very prosperous ... These girls are about a meter and one of them has just passed the central bar coming to measure almost at one meter in height. I hope to travel the right road until the end