Likes
Comments
Share


@JoeyGonz
Follow
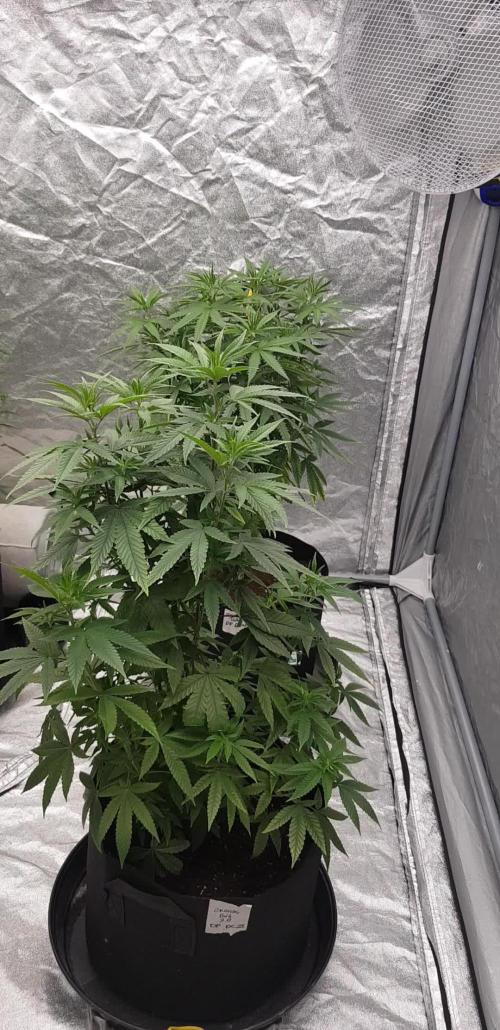
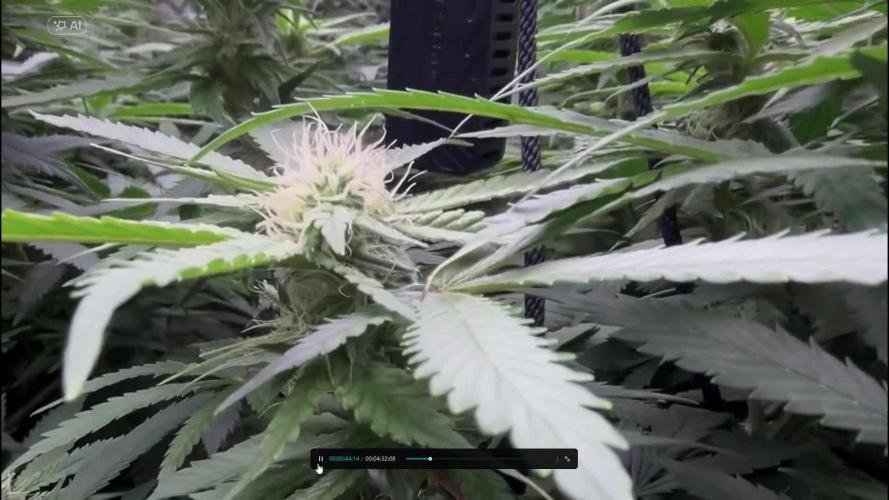
Buds are starting to widen up, Looking nice and dense. Overall both look great.. Leaf tips started to burn a tiny bit so I backed light up couple inches. The C99 has about two weeks left. Everywhere I read it was 7 weeks to flower..Red Diesel still has like 3 to 4, I read around 9 weeks for that.. I’ll jus keep eye on tricomes.. But thank God everything is good ..


Likes
11
Share

@BalconyBoy
Follow
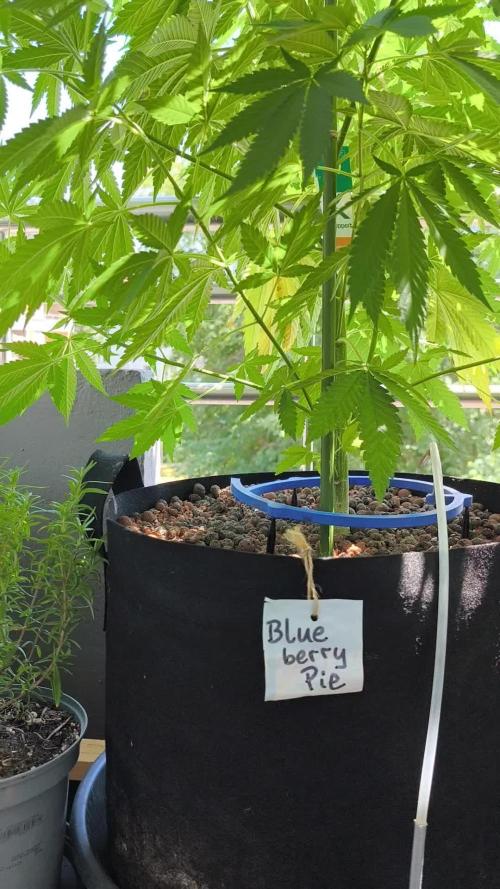
13.07.26 die Luft nach oben wird langsam knapp für die Blueberry Pie, nun mist sie 1,50m und hat noch 30cm bis zur Decke. Gleichzeitig sehe ich an den Triebspitzen nun mit deutlich mehr Pistillen den Übergang zur Blütephase und damit vielleicht das Ende des Höhen Wachstums.
2025 habe ich Ende Juli den Blütedünger ausgebracht, ich denke heuer werde ich das etwas früher tun und mich im Laufe der Woche daran machen. Ernsthafte Mängel sehe ich noch nicht, aber ich habe bereits 3 große Blätter entfernt die gelb geworden sind, was in dieser Saison eine Premiere ist.
Auch die großen Pflanzen haben letzte Woche Tüten mit Raubmilben gegen Thrips bekommen und trotz eigentlich zu niedriger Luftfeuchtigkeit, sehe ich weder neue Fraßstellen noch Thripse.
Die automatische Bewässerung liefert aktuell 3x je 2 Minuten Wasser, was 3x2x700ml = 4.2l entspricht
2x2 Minuten (2.8l) waren bei den Temperaturen nicht genug
Danke fürs vorbei schauen und angenehme Woche euch allen!

Likes
8
Share


@4F1M6
Follow
Stretch is done and flowers are piling on now! I treated with lost coast as a preventative. I kept the feed the same but it will be altered end of grow week. Canopy is getting hella full can't wait to watch these colas stack on. Until next update. Happy growing and stay lit fam.

Likes
14
Share


@MrGrowthSpurt
Follow
The week is progressing wonderfully, it's been 8 or 9 days since I flipped them and they have completed the transition and are really starting to stretch. CF#1 is 24 inches, CF#2 is 32 inches CF#3 is 25 inches and CF#4 is 27 inches. #2 by far has been the biggest and quickest developer of the 4. I wonder if the fact that it is directly under the CO2 bag??
I fed them 1.5 tsp of the g.h. flora series this week, called myself stepping it up a notch. The second feeding I fed them plain tap water p.h.'d to 6.6 ish. I upped the amount of water to 3 liters for one feeding (the one with the nutes) it created alot of run off, which the plant eventually sucked up. I was a bit surprised because I thought for sure a 10 gallon pot would take atleast 2 gallons of water or more to see runoff. In this case it appears a little over 2 liters until the first signs of runoff.
This is the first grow where my plants have made it this far without showing nute burns at the tips, they seem to be loving my feeding cycle.
I plan on adding another trellis net in about a week or two, once they stop stretching, I know from experience with this strain the buds are going to grow nice and dense and cause the branch to sag over without the extra support.



Likes
1
Share


@richthegrower
Follow
OG Kush Auto actually was germed on 12.18.22.
The OG Kush ended up being a Triploid.

Likes
8
Share


@Cannabot
Follow
Lol this plant says it all I think...my only regret is I never cloned.Never seen anything like it,unique strain.In fact it's unique in so many ways.Cant wait,although this looks like a 10/11 week flowering to me.

Likes
17
Share


@MoneyGrowup
Follow
Everything is pretty much the same this week the purple punch is doing up numbers, the zkittles is rite behind it with the gelato struggling. Already germinated some seeds for the summer grow hope the gelato grows better out doors
Likes
81
Share


@UnorthadoxDude
Follow
Welcome to the beginning of week 7 for Karen. Thank you for stopping by!
I'm counting this as the first week of flowering but she's been sending out pistils for two weeks, so I guess that weeks four and five should have been flowering weeks. Sorry about that. Surprised to be here but excited to see the next few weeks.
Day 44: This girl is amazing. She took the horrendous start I gave her for the first three weeks, and just exploded. Look at her now! If you are really interested, now look at Misty and Nesia - imagine what they could do! I am really pleased with Karen here, I think she has more surprises in store. I am very glad I decided to LST or she would be towering above everything else in the tent. I have noted early Mg deficiency, as more advanced on Nesia. Correcting with foliar and re-addition of CalMag to feed.
Day 44.5: Fertigated approx 1.5l. Defoliated approx 10 leaves. Slightly adjusted LST.
Day 46: Fertigated 2l. Karen is very thirsty. Her roots have breached the side walls at the bottom of the pot in 360 degrees... this is the biggest root system I've had on any potted plant to date. She is stretching fast now, I think by the end of next week she will be done stretching. I must get a photo of her stem. The base is ridiculously thick. Overall Karen is shockingly good compared to expectations from the poor start. I can only imagine how big she would be.
She is currently 27cm tall and at least 50cm in diameter. I count at least a dozen colas.
Day 47. She is now 29cm tall and pistils are bursting forth at a phrenetic pace. I have added a comparison shot of my grow space for size reference.
Day 47.5: Defoliated approx 30 fan leaves. Slightly adjusted LST. Rearranged tent and cleaned floor. I have ordered some risers to raise the pots off the floor, this will make it easier to deal with run off. While I was inspecting Karen I had a good look at her roots. The fabric pot she is in has viewing flaps (they were designed for potatoes) and I had a look... every bit of the pot is full of roots, and they're all properly pruned. I see no circulation or binding. If Karen produces at anywhere near the rate she is supposed to then she might yield as much as 150g.
Day 48.5: Rapid changes. Pistils everywhere, more stretching. Karen is very thirsty. Fertigated. Added pot risers and adjusted pot. Did a little LST to separate some bunched colas a bit. Had a really good inspect of the root system. Wow this plant is a beast.
Day 48.75: Fertigated 3l
Day 49: Height 34cm Diameter: 60cm. End of week summary. Really big week, she is stretching quicker and quicker. Today she has developed a striking scent. I will now have to keep the tent closed so temps will rise.
Day 49.5: Removed about 10 fan leaves. On reflection back over this week I think I needed to be taking a top and side photo, so I shall do that from next week.

Likes
4
Share

@IslandTerps
Follow
Strain: Divine Seeds – Auto Candy
Grow Type: Indoor
Pot Size: 7 Gallon
Medium: Peat Moss & Perlite
Nutrient Line: Athena (Bloom)
Week 5 Update
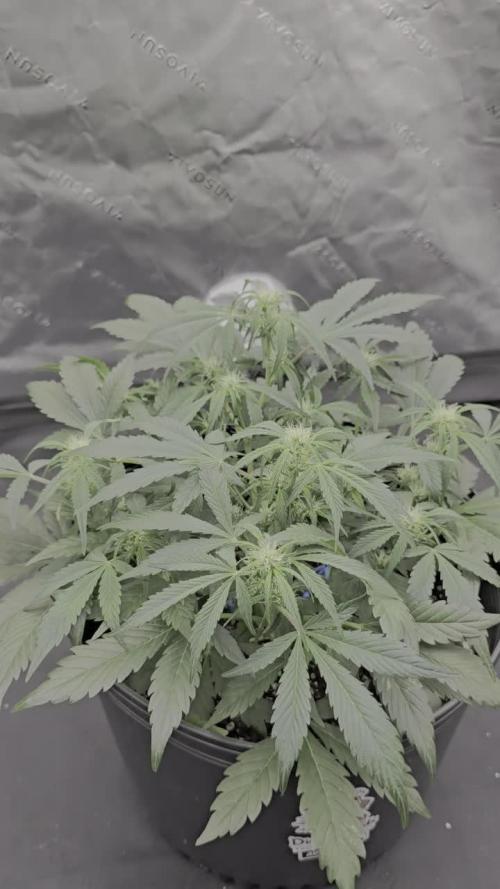
She’s doing really well this week, showing healthy growth and strong flower development. Her buds are looking impressive for week two of flower stacking up nicely already.
She’s handling her feedings perfectly with no signs of deficiencies or stress. Everything’s on track, and I’m hoping she continues to bulk up and fill out like this in the coming weeks.
Feeding
1.7 L Athena Bloom nutrient mix (will raise gradually if needed).
Indoor Climate Conditions
Temperature: 18–23°C
Humidity: 60–65%
VPD: ~0.5–0.8 kPa
See y’all next week!

Likes
27
Share


@Rap_a_cap
Follow
Well, my organic vegetables garden, in anticipation of growing weed has been at rest for twenty months. I started to amends with green manure from legumes and lawn mowing (expecially the last month, for ready availability of N). I've mixed 1 gallon of Vigo Plant Full (perlite, guano, peats) to improve drainage. All the roses around, the apple tree and the hedges were treated with deltamethrin so as to preventively reduce the population of aphids, whiteflies & red spiders.
My vegetables & weed eventually will receive only spraying of nettle macerated.
Now in the evening I will have to pay close attention to broadnose weevils and later to bedbugs. It will be a tough fight against the wind and heat. A whole week of full sun awaits them.
Royal Gorilla has spent the previous week outdoors night and day in her pot savoring the discrete temperature changes in my area.
She is a runner, born 9 days after the sisters and is already making up for lost time. 💪

Likes
24
Share


@MadeInGermany
Follow
Hi everyone :-)
This week it has developed really well 😍.
it was also topped for the first time. Like the Cup, I will not do an LST here either, just top it a few times 😃.
I wish you all a nice week, stay healthy 🙏🏻 and let it grow 🌱

Likes
14
Share


@Mr_Dior21
Follow
So It’s now week 8 on seedsman’s website flowering is done in 65 days so I have 1 more week left before the dark period. Yesterday I watered with a couple tbps of molasses other than that ive been doing regular watering with just tap.
Likes
28
Share


@TrueNorth
Follow
Okay growmies here we are at the end of our PURPLE LEMONADE by FAST BUDS. It was such a pleasure to grow, i learned so so so much this run that will help me through the rest of my adventures. The beginning was tough as i am new i over watered and did not ph the water and what i mistake. But its okay i learned. She bounced back like nothing and produced these HUGE, THICK, DENSE BUDS!i remember the panic i had week 2-3 and wanted to scrap all of this and start over.... thank the weed gods i didnt because look at this masterpiece. I always said in the passed weeks comments i hope my ugly duckling becomes a beautiful queen. And here she is. She was SOOO HUNGRY AND THIRSTY! Over 5L a day guys..... and not a SINGLE drop would come out of the bottom.... over a all a pleasure and amazing grow. I will for sure grow again and again. I would love to Try this out door or in a 10L pot can probably get this beast to be the size of a 5x5 easily! She responded so well to LST and topping... slowed it down but it was so worth it guys lmao.... like honestly OVER HALF A POUND!!!!!!
GROWMIES! I LOVE LOVE LOVE YOU ALL SO SO MUCH! Thank you for all the continued support and likes and comments and help. Id be no where with this with out all of you. And thank you to the FAST BUDS team and to you heather! Grow diaries thank you for the plat form. I love you guys. All of you. All my sponsors. Thank you.
Until
Next time growmies! Stay positive, stay safe, stay high.

Likes
46
Share


@Capo420
Follow
This strain was a breeze to grow. The purple phenotype is hands down some of the best herb I have ever tried. Will definitely recommend to anyone looking to grow a highly resilient, highly potent strain. Thank you to all those on this platform.
Grow diaries really made it easy to have my first grow be a success! Until next time Growmies 🤙😎🤙
Likes
1
Share


@Mollyboo
Follow
Pulled the smallest plant out. It’s been under no light for 36 hours now. Will chop down in a day or two
Likes
3
Share

@birdmountain
Follow
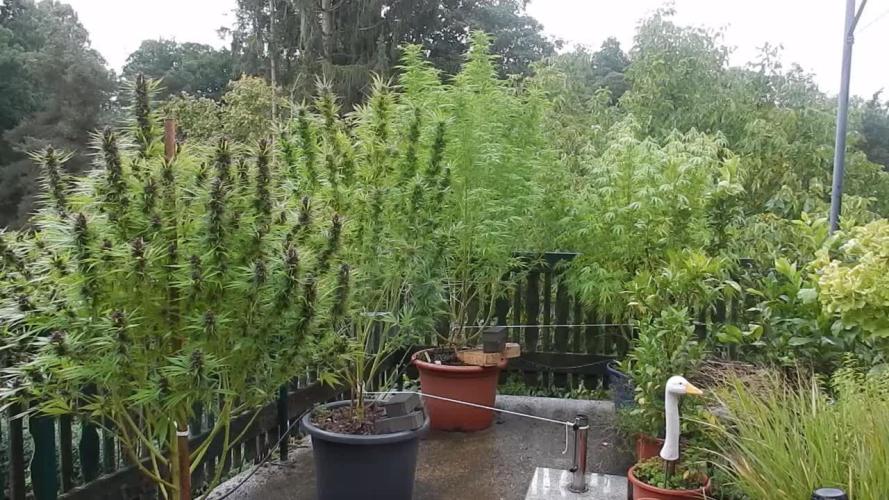
Es war eine sehr gemischte Woche mit viel Regen, etwas Sonne und eine Menge Wind. Die Durban Poison lässt sich davon wenig beeindrucken, sie ist am Stock festgebunden, steht kerzengerade und lässt ihre Buds weiter anschwellen. Leider habe ich bei sehr genauem Hinsehen doch ein welkes verdrehtes Blatt in einer Blüte gefunden und dieses mit der Blüte sofort entfernt. Weiteres Untersuchen brachte aber keine weiteren beginnenden Schimmelstellen zum Vorschein. 100% schommelfrei ist sie also nicht... Das Wetter ist jedoch sehr schimmelförderlich zur Zeit. Ich freue mich schon auf die Ernte, in ca. zwei Wochen dürfte es soweit sein und und dann benötige ich viiiel Platz zum Trocknen. Die DP ist dieses Jahr etwas kleiner als im Jahr davor, was sicherlich an der Düngemenge im Topf in der Vegetationsphase liegt. Entscheidend wird sein, ob das Entlauben etwas am Erntergebnis verbessern wird. Letztes Jahr hatte ich mehr Blätter an der Pflanze gelassen.
Vielen Dank für den Besuch mit besten Wünschen für eine schimmelfreie Woche! 😀
---
It was a very mixed week with lots of rain, some sun and a lot of wind. The Durban Poison is not particularly affected by this; it is tied to the stake, stands straight as a die and continues to swell its buds. Unfortunately, upon closer inspection, I did find a wilted, twisted leaf in one of the flowers and immediately removed it along with the flower. Further examination revealed no other signs of mould. So it's not 100% mould-free... However, the weather is very conducive to mould at the moment. I'm looking forward to the harvest, which should be ready in about two weeks, and then I'll need a lot of space for drying. The DP is a little smaller this year than last year, which is certainly due to the amount of fertiliser in the pot during the vegetation phase. The decisive factor will be whether defoliation will improve the harvest yield. Last year, I left more leaves on the plant.
Thank you very much for visiting and best wishes for a mould-free week! 😀

Likes
8
Share

@Nickeluring
Follow
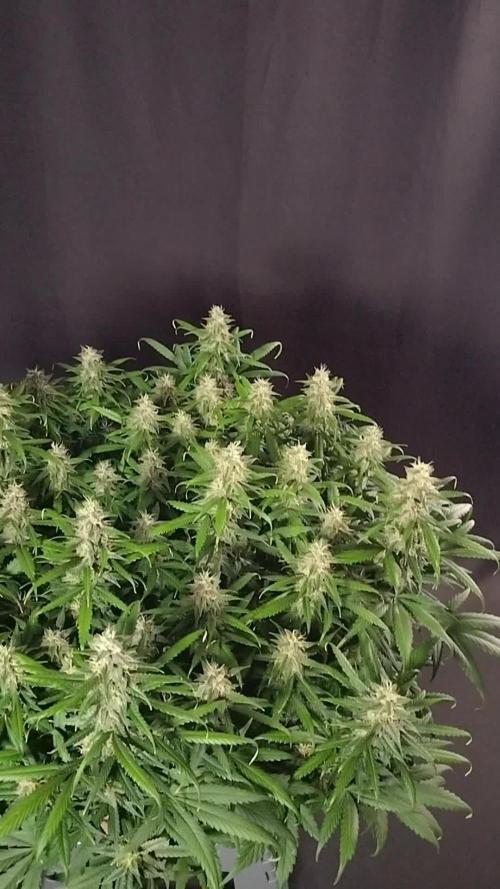
I have only removed a few leaves this week.
Lemon Cherry Cookies and Guava should be ready during the coming week. Apricot is still fattening up.
Likes
24
Share


@Susquihanna
Follow
Miss Mango was reaching for the sun this week. She grew 5 inches this week, however, it is still on the small side of 17 total inches. There is a lot of undergrowth on Miss Mango, so I am thinking this may be a bushy plant. The @Zamnesia website: "This plant stays close to the earth, only reaching 2.5ft indoors and around 3.2ft outdoors."
I included a magnified picture of a possible flower. @Zamnesia website it says, "All it takes is 10–11 weeks from seed to harvest to really get the best out of this cultivar." So, at 5 weeks, with a magnifier, I am seeing the beginnings of flower.
It is only It has been dreadfully hot here and I am giving 1 gallon of nutrients per day. I also have a large pool umbrella shading my plants from the direct sunlight.