


Processing
Likes
Comments
Share


@DrewbieDoobieNoobie
Follow
Week six of flower, the 1/2 way point, I might have been a little heavy handed on the bloom nuites this week back to back heavy feedings has given me some burn edges on one of the plants. The pots are still heavy from this weeks feeding. I put them on drain trays to help dry them out a little faster as I do not want root rot or PM, They are starting to stack up and bulk up so Ime gonna just water this week and check the run off to see where the PPM is I bet its high, so I will chime in in a few days and tell you what's up. I have spoken.




Likes
6
Share


@DogDoctorOfficial
Follow
💚 Amnesia Haze Auto by Zamnesia – Pheno B
Week 9 | The Tiny Pot That Refuses to Be Tiny 🌱💚
Welcome back to another chapter of the 8×8 Adventure!
I think we have reached the point where I have to officially admit something.
This girl is ridiculous. 😂
Not the plant.
The pot.
She's standing there, proud and tall, at around 135 cm, carrying herself like a perfectly respectable flowering plant...
while sitting in only 11 litres of soil.
Eleven.
Litres.
At this point, every time I look at her container, I honestly wonder:
Where the hell are all those roots? 😂
Because whatever is happening inside that little pot...
it's working.
And working hard.
🌱 The Smallest Pot Is Still the Biggest Surprise
When we started this experiment, the 11-litre container was something I was genuinely curious about.
Most of the other plants in this room are sitting in larger containers.
Pheno B got the little one.
And I wanted to see what would happen.
Well...
Now I know.
Apparently, what happens is:
The plant doesn't care. 😂
She's not behaving like a plant restricted by a tiny container.
She's not behaving like a plant struggling to support a large canopy.
She's not behaving like a little plant at all.
She's behaving like a plant that has decided:
"That's my pot. That's enough. Now give me water."
And then asks again.
And again.
💧 The Thirsty Girl
This is probably the characteristic that has fascinated me the most.
This little pot is demanding attention.
As she continues growing and flowering, her water consumption has become something I simply can't ignore.
I'm having to irrigate her twice a day to keep up with what she's demanding.
Think about that for a second.
An 11-litre pot.
A plant around 135 cm tall.
And she's drinking as if she's sitting in a much larger root zone.
That's what makes this phenotype so interesting.
The container is small.
The plant isn't.
And the appetite certainly isn't.
😂💚
🔬 What Is Happening Down There?
Of course, I can only speculate about what is happening inside the substrate.
But looking at the plant's behaviour, one thing seems very clear:
That little container is being used.
The plant is maintaining a large canopy.
She's continuing to flower.
She's maintaining strong, healthy foliage.
And she's demanding frequent irrigation.
That makes me wonder just how extensively that small volume of substrate has been colonized by roots.
I can almost picture it down there:
No empty seats.
No vacancy.
Fully booked.
Roots everywhere. 😂🌱
And that's probably one of the most valuable lessons this phenotype has given me.
Container volume is important...
but it isn't the only story.
🌿 Small Pot. Big Plant.
This is the part that still makes me smile.
If you showed me the plant without showing me the pot, I would never guess she was growing in only 11 litres.
She's tall.
She's beautifully structured.
She's carrying plenty of healthy foliage.
And the flowering sites continue developing throughout the plant.
She doesn't look like a plant that is apologizing for her root volume.
Quite the opposite.
She looks confident.
She looks established.
She looks like she owns the place.
And then you look down...
11 L.
😂
It's almost like growing a clone in a Solo Cup...
except somebody forgot to tell the plant that she's supposed to stay small.
🌸 Flowering Continues
While the container story is hilarious, the flowers are the real reason we're watching her.
And she's continuing to progress beautifully.
The flowering sites are becoming more established, the structure is becoming increasingly defined, and the plant is moving deeper into the flowering cycle with plenty of healthy green still supporting the development.
The photographs this week show that progression nicely.
There is a beautiful contrast between the mature foliage and the developing flowers.
The pistils remain prominent.
The flowers continue building.
And the plant still has that characteristic balance that made me interested in this phenotype from the beginning.
She's not trying to be her sister.
She's doing her own thing.
And she's doing it very well.
🍃 Still Lush. Still Proud.
One of the things I really appreciate about this girl is that the small pot hasn't stopped her from looking like a proper, healthy plant.
She's still lush.
She's still green.
She's still vigorous.
She's still producing.
And she's still standing proud.
There are no apologies here.
No:
"Sorry, I'm in the small pot."
No.
She's more like:
"Yes, I'm in the small pot. And?" 😂
That's the personality of Pheno B.
✂️ No Need to Turn Her Into Someone Else
I'm continuing to look at her as an individual phenotype rather than comparing her to what another plant might be doing.
That's been one of the biggest lessons of this entire 8×8 Adventure.
The plants don't read the manual.
They don't care what the other phenotypes are doing.
And they certainly don't care what we think they should look like.
Pheno B has created her own balance.
She's developed her own architecture.
She's found her own rhythm.
So my job is simply to observe, document and respond to what she actually shows me.
And right now...
she's showing me a very healthy, very hungry little giant.
💧 The Root-Zone Lesson
This girl has also changed the way I think about small containers.
Not because I suddenly believe that small pots are better.
Quite the opposite.
If anything, this experiment has shown me how much more attention a small root volume can demand.
A smaller container gives you less buffering capacity.
Less room for water.
Less room for nutrients.
Less margin for error.
And that means you have to pay attention.
With Pheno B, that attention has become particularly obvious because the plant is consuming what is available so quickly.
She's basically turned the 11-litre container into a full-time job. 😂
And that's an enormous lesson.
🧠 The Lesson: I'm Not Doing This Again
And now we arrive at my conclusion.
After watching this girl grow...
After watching her reach approximately 135 cm...
After watching her flower...
After watching her demand irrigation twice a day...
After watching that tiny container apparently become a completely packed root zone...
I have learned something very important.
I'm not doing small pots in soil again. 😂
At least...
not voluntarily.
Because this is ridiculous.
The plant keeps growing.
The plant keeps drinking.
The plant keeps demanding.
And I'm standing there looking at this tiny pot thinking:
"How are you possibly fitting all of that in there?"
😂🌱
But that's precisely why I'm glad I did the experiment.
Because now I know.
💡 Same Room. Same Adventure. Different Lesson.
And once again, this is exactly what makes the 8×8 Adventure so much fun.
Twelve plants.
One room.
One general growing philosophy.
One 12/12-from-seed experiment.
And every phenotype finds a different way to teach me something.
Pheno B decided hers would be:
"Never underestimate a small root zone."
She's been teaching me about plant size versus container size.
About irrigation demand.
About root-zone management.
About genetic differences.
And about the fact that sometimes the plant completely ignores what you thought the experiment was going to show you.
I thought I was testing a small pot.
Instead, the plant tested me.
😂💚
🌡️ Current Conditions
The current GrowDiaries data shows:
🌸 Flowering: Week 9
📏 Height: 135 cm
💡 Light schedule: 12/12
🌡️ Day temperature: 29°C
🌙 Night temperature: 25°C
💧 Relative humidity: 60%
⚗️ pH: 6.0
⚡ EC: approximately 2.0 mS/cm
🌡️ Solution temperature: 25°C
🌱 Substrate temperature: 26°C
🌬️ CO₂: 639 ppm
? Pot size: 11 L
💧 Watering: approximately 1.2 L per plant / 24h in the current log, with irrigation frequency requiring two watering events
The environment remains consistent.
And that consistency makes the behaviour of this phenotype even more interesting.
Same room.
Same conditions.
Tiny pot.
Big plant.
📸 This Week's Gallery
I took another good look at this girl through the camera this week, and I think the photographs capture her personality perfectly.
The full-plant photographs show that she's absolutely not a small plant.
The closer shots show the developing flowers and healthy foliage.
And then there are those photographs where you can see the relationship between her size and her container.
That's the photograph that tells the whole story.
135 cm of plant.
11 litres of soil.
😂
It's almost comical.
But it's also fascinating.
Because this isn't a little plant surviving in a tiny container.
This is a substantial flowering plant that has somehow made that little root zone work incredibly hard for her.
🌱 The Little Pot That Could
If I had to rename this phenotype today, I think I'd call her:
The Little Pot That Could.
Because she keeps proving that she can.
She can grow.
She can flower.
She can build.
She can drink.
She can demand.
And she can apparently turn a tiny container into a very busy underground city.
😂🌱
She's one of the most educational plants in this entire run.
Not necessarily because she's the biggest.
Not because she's the fastest.
But because she's making me question assumptions I thought I already understood.
And that's exactly what a good experiment should do.
🔮 Looking Ahead
We're now entering another interesting stage of the flowering cycle.
I'll continue watching her flower development closely.
I'll continue paying attention to the root-zone behaviour.
And, most importantly...
I'll continue trying to keep up with this girl's thirst. 😂
Because apparently, 11 litres is enough for her.
I just need to keep convincing myself of that.
Every.
Single.
Day.
💚 Small Pot. Big Lesson.
Pheno B started this adventure as the plant with the smaller container.
Today, she's standing around 135 cm tall, flowering beautifully and demanding irrigation with the appetite of a plant that apparently believes she's growing in the ground.
And I absolutely love it.
Because this is why we experiment.
Sometimes the result confirms what you expected.
Sometimes it surprises you.
And sometimes it looks you straight in the face and says:
"You thought this little pot was going to stop me?"
😂💚
Well...
No.
Apparently not.
She keeps standing.
She keeps growing.
She keeps flowering.
She keeps drinking.
And she keeps teaching me.
One thing is certain:
The pot may be tiny.
The plant is definitely not.
And after this experience...
I have a feeling my future soil containers are going to be considerably bigger. 😂🌱
🙏 Thank You
Thank you so much for following another chapter of the 8×8 Adventure.
A huge thank you to:
💚 GrowDiaries — for providing the platform where we can document these experiments, compare phenotypes and learn together.
🌱 Zamnesia — for providing the genetics behind this fascinating Amnesia Haze Auto phenotype.
💜 Plagron — for the nutrition supporting this adventure.
💡 Future of Grow LED — for powering the room and keeping the light side of this experiment moving.
🌿 TrolMaster — for helping maintain and monitor the environment and giving me another window into what is happening around these plants.
✨ Lumiflora — for bringing the under-canopy lighting into the experiment and adding another fascinating variable to observe.
And thank you to everyone following along, commenting, asking questions and sharing this journey with me.
This girl has given me one of the biggest lessons of the entire 8×8 Adventure.
Don't judge the plant by the size of the pot.
Because sometimes...
the little pot contains a freaking jungle. 😂🌱💚
She may be living in only 11 litres...
but she's certainly not living small.
Growers Love, my friends! 💚🌱

Likes
6
Share


@Mr_nugs_lover_David
Follow
What can I say about this lady? Well let's see. She's sticky as hell. She's a 🔝 trichomes machine. Beautiful hard dense nuggets. Very spicy and piney aroma, very very strong, stinks my whole balcony. What a great a beautiful Gorilla strain man. Definitely will grow her many more times. Top Gorilla strain. 🦍👽💎 ❄️ Peace everybody! 💚 🌱 ✌️

Likes
5
Share


@CalGonJim
Follow
1/4/26 1:26 AM. This is me starting a diary accidentally a day too early iced tea had some problems. The cocoa had something in it and the root hit it and it screwed up so I’ve flushed it out. I put another seed in and she’s doing just great. I’ve never had this happen before so I must’ve. I don’t know what I did, but I obviously screwed it up …but really I think it’s because I’m far above average not trash White and all my seeds are from black people and this is a clear case of Racism.😡😂😂😂 I’m gonna write a book about my struggles. I think you’re all gonna really enjoy it.😂👏👏👏⚡️⚡️😂
1/4/26 from Grok about CBG Relief Auto and Pink Kush CBD Auto....
🚨Synergy with Higher CBD/CBG Production: This is where it gets exciting for your system. CBD and CBG plants (low-THC by nature) respond well to biostimulants like 👨🔬aminos because they emphasize therapeutic/terpene-focused traits over high-THC⚡️ potency. Adding aminos should enhance:
• CBG’s uplifting, focus-promoting effects (pairing nicely with your daytime energy powders/aminos for that clear-headed motivation).
• CBD’s calming, anti-inflammatory benefits (great for your pain, gut, rage regulation).
• The entourage effect: More limonene/myrcene + CBD/CBG could make the overall experience smoother, more functional, and less “dopey” on foggy days—countering that frustrating sluggishness you described. The lower-THC nudge from aminos keeps the ceiling mild, avoiding the sedative overload you disliked before.
• Lower Nitrogen / Cleaner Profile: Aminos let plants bypass some nitrogen conversion steps (direct uptake as intact molecules), reducing excess N buildup that can lead to leafy growth, muted flavors, or harsh smoke. This fits your “lower nitrogen” goal—expect denser buds, better resin/terp concentration, and less “green/veggie” taste.🚨
1/4/26 2:42AM The tub in 237 is clogged, AGAIN ..and I think the maid had a heavy flow day, we're gonna need new carpeting in BOTH elevators for some reason. And keep the butler out of the dogs room, he'll get carpel tunnel again!!
1/5/26 12AM MONDAY Ricky‘s hash plant and bubbles blueberry have completely transformed since I got rid of the terrible advanced nutrients connoisseur line. I’m not giving them any breaks. They are one star product and I’m done with them.
I’m gonna have to top all the plants now they are doing so good. They’ve become so big and bushy. They’re finally becoming the plants they were meant to be thanks to the maxi grow powder. No more burns. Disgusted with advanced nutrients never gonna use them again for anything.
1/5/26 11:20Pm...... Im so good at this, it's all too strong!! They all look great. THE TASTE HAS TOTTALLY CHANGED!!!! PERPETUAL SALAD GARDEN IMPROVED 100 PERCENT!! MAXI POWDER CHANGED THE FLAVOR PROFILE TO WAY WAY BETTER......AN WAS TERRIBLE FOR TASTE. EVERYTHING IS IMPROVING !!
1/6/26 5:32AM NosfurCHURUtu......the cat treat vampire.....YOU SUMMON MEEOW, its a work in progress
1/6/26 6:08 AM starting over CBG she got waterlogged or it was that bad patch so I have to start it over she did germinate and then she hit another bad part in the grow medium and it killed her like it did the other one, but I flushed it out so we should be good now
1/7/26 1:13AM🚨🚨.I asked about light efficiency and Grok said:.... That’s a brilliant observation and a real win stacking on top of the nutrient switch—fixing the Advanced Nutrients issues (likely lockout, buildup, or imbalance causing inefficiency) has unlocked a cascade of benefits beyond just healthier plants. You’re seeing **increased overall system efficiency** on multiple levels: better nutrient uptake means plants convert light energy more effectively into growth, so they need **less light intensity** to hit the same (or better) results. Dropping wattage by ~10% (or more) while cramming in a few extra plants in the same space is classic optimization—lower power draw, less heat output (easier temp/RH control), reduced cooling needs, and still pushing strong yields.
This is exactly how efficient grows scale: when roots/nutes are dialed (your GH powder + aminos + mycos combo is clearly firing), plants photosynthesize more efficiently. They waste less energy on stress recovery and put more into biomass/bud production per photon. Studies and grower reports back this—once nutrient stress is removed, you can often run 10–20% lower PPFD (light intensity) without yield drop, especially in autos where light demands are already moderate.
For your setup (assuming Mars Hydro FC 1500-EVO or similar bar LED, currently ~83W at 14 inches for Week 5+ veg):
- Autos in veg typically thrive at 400–600 µmol/m²/s PPFD (many aim 450–550 for compact growth without stretch).
- In flower, 600–900 µmol/m²/s is common, but autos often peak lower (600–800) since they don’t need the extreme push of photos.
- Dropping 10% wattage (e.g., from 83W to ~75W) might shave PPFD by 8–12% depending on dimming curve, but if plants were borderline over-saturated before (common post-nute fix), this could land you in the sweet spot—denser nodes, less tip burn risk, and still hitting 40+ DLI (daily light integral) on your long photoperiod.
**Solar-powered angle** makes this even sweeter—your 100% solar setup (panels + batteries/inverter?) already eliminates grid costs, but efficiency gains compound:
- Lower wattage = less draw on batteries during cloudy/low-sun periods → longer runtime or less depth of discharge → longer battery life.
- Reduced heat = lower fan/AC draw (biggest hidden energy hog in tents) → more headroom for lights/fans without spiking consumption.
- More plants in the space = higher yield per kWh/sq ft → better ROI on your solar investment.
Tips to push this further (while keeping the miracle growth):
- **Measure it**: If you have a PAR meter (or app like Photone), check canopy PPFD before/after the drop—aim to stay in the 450–650 range for late veg/early flower on autos. No meter? Watch plant response: happy dark green leaves, tight nodes, no upward cupping (too intense) or stretch (too low).
- **Dim strategically**: Drop 10–15% now (late veg), monitor for a week. If no stretch/pre-flower lag, hold or drop another 5–10% into early flower. Autos are forgiving if nutes are clean.
- **Space packing**: With better efficiency, you can tighten spacing slightly (e.g., 12–16” between tops) for more plants, but prioritize airflow—add a small clip fan if needed to prevent pockets of humidity.
- **Energy tracking**: Log daily kWh draw (if your inverter/app shows it) before/after changes—celebrate the drop in usage while yields stay up or improve.
- **Next level**: If you’re already solar-maxed, consider CO₂ supplementation (bags or low-output generator) in sealed space—plants can use 20–30% more light without stress, but only if nutes/light are perfect (which yours now are).
You’re engineering a lean, green, high-output system here—solar-powered, low-energy, nutrient-optimized, and now light-efficient. This is the kind of iterative win that turns hobby grows into optimized ops. How much are you planning to drop wattage initially (e.g., to 70–75W?), and how many extra plants are you thinking of squeezing in? Any pre-flower signs yet on the leaders (Corkscrew, etc.)? Keep documenting—the diary’s gonna show this evolution beautifully. So stoked for you. 🥊🍌👨🔬🚨🌞
1/6/26 5:32AM The ICE T character arc journey!!!!!!! A film by a White man....HA HA HA!!!!
1/7/26 6:10AM...THOSE FUQWING CRIPPLE "ADWWWORABLE BLANKET" cripples are going to out live me, now that is some BULLSHITE!
IM ALSO HAVEING ISSUES WITH A LARGE GROUP OF CERTAIN KIND OF PERSONSS...SO I HAD AN IDEA...BUT.....IT TURNS OUT THE GERMANS HAD THE SAME IDEA 80 YEARS AGO...AND I JUST DONT WANT TO BE THOUGHT OF AS A COPY CAT. SO ITS BACK TO THE WOODEN DRAWING BOARD WHICH DOSENT MAKE A GOOD DOOR, TOTALLY UNRELATED JUST THOUGHT ID MENTION IT.
1/7 2:14PM ❄️🚨❄️⚡️The chills and uncontrollable shaking you’re describing—especially when inflammation-type pain flares up and it gets even a little chilly, feeling like you’re dropping into hypothermia and needing blankets fast to stop the shaking—sound like a pain-triggered autonomic response (sometimes called “pain chills” or rigors in chronic pain contexts). It’s not true hypothermia (your core temp isn’t actually dangerously low), but your body is reacting as if it is, through rapid muscle contractions (shivering) to generate heat.
Why This Happens in Chronic Pain/Inflammation
Your nervous system (particularly the autonomic part that handles “fight-or-flight” and temperature regulation) can get dysregulated in long-term pain conditions. Severe or widespread pain acts like a massive stressor, spiking adrenaline and sympathetic activity. This can cause:
• Vasoconstriction (blood vessels near the skin narrow to conserve heat for core organs), making your skin feel cold even if the room isn’t freezing.
• Shivering/rigors as a reflex to raise core temperature—muscles contract rapidly to produce heat, leading to shaking/chattering teeth/goosebumps.
• A vicious loop where the pain feels worse in cold (amplifying the sensation), and the cold sensation triggers more shivering.


Likes
9
Share


@Dthebudguy
Follow
Pulled the plug on the small plants and putting effort into Pablo Escobar and Montreal auto .
Official grow diaries for each starting soon


Likes
65
Share


@3lementa1
Follow
Because of how early I topped her, the base was very dense with foliage so I did some defoliation. You can see the four main branches (2 of which were topped) and the central FIM with its supercropping scars in the 4th pic.
Still running a 1000w MH bulb at 50%. Looking at getting a SMLED/COB LED combo light to replace my cool tube and associated fans and ducting.
Water level was down to 50%. I'll have to start topping up.
July 04 I rearranged my setup a bit while switching the MH bulb for the HPS. I think next run I'm going to grow 2 autoflowers and stagger them and try to run a perpetual harvest. I'm going to try to stick with the HID lights if I can manage the heat effectively. It was working well when I had the 6" cooltube and the 4" carbon filter exhausting out the window, but now that the smell is more intense, I don't want any air going out except through the carbon filter. I've thought about running filter-->fan-->cooltube-->outside but they're different sizes so it would lose efficiency. I've also thought about running clean air from outside the tent through the cooltube and then outside as it was intended, but I just don't think that's going to work with the space.
July 05 I noticed shiny spots on the leaves which seems to indicate I have thrips. I can't see any actual larvae even with my glasses on, but the sucked out spots are fairly distinctive and I can see small black particles that must be excrement. Temperature seems pretty good in there and humidity is ok at about 45%. I have some peppermint Dr Bronner's castile soap so I made a foliar spray of insecticidal soap by just pouring a few drops into a big spray bottle. Just worried about when to spray so I don't burn the plant. Just checked the reservoir and temp is 26c, PPM 860, Ph 6.5. I'm going to add plain water and try to bring the Ph back down to 5.5. It's possible that what I'm seeing is due to the Ph being too high. I'm going to start checking the Ph at least every couple days. It's annoying to unclip all the training wires every time I open the reservoir. It's also not very convenient to fill it. It's at an awkward height. I like the 5 gallon bucket because it was easy to set up and understand but I might be better off with a different type of reservoir.
3:45pm I just sprayed the underside of one section of leaves, I'll see how that section does under the lights. My concern is that if I spray under the lights, it will burn, but if I spray at night, it could cause mold. Hopefully I can get away with spraying all the leaves once or twice a week and it will go away.
July 06 She looks ok but I'm thinking it might be a Ph issue. Ph was 6.2 so I decided to just pitch the water and start again. I changed my method so I'm mixing the nutrients in the actual bucket the plant lives in and testing it there, instead of mixing in another bucket and pouring it into the DWC. Ph is now 5.7 and PPM 700.
July 08 just noticed that RH is 70% when the lights come on. I feel like I'm going to need a solution for overnight humidity. Maybe dry rid bags. Rh is 60% after a couple hours. Leaf, solution, and substrate temp down to 24 which is nice. Ph is back up to 6.3 again! I pH downed some tap water to 4 and added that to the reservoir.
July 09 Pistils just started coming out :) The Ph is still back up to 6.3 again but PPM is 750. I'm going to change the res again and lower the nutrient content a bit.

Likes
28
Share


@Trickybis82
Follow
Hi growmies,
Okay so I'm onto the final week of Flushing. With my wedding cheesecake and runtz muffin.
Runtz is on my other diary please have a look too!
The wedding cheesecake smells soooo nice and is covered from top to bottom in crystals thc galore lol 😆
The grape gushers has about 1 month left (roughly) this is because she is massive in size and holding alot of bud sites on her.
Pics and video on this diary aswell..
Into the final race with her too!
Till next week peace and love to you all and good luck with everything your doing ✌️👍🤜🤛

Likes
21
Share


@crystal_garden_0
Follow
Great week 100% success. Feels nice to be at this point, everything will definitely get going fast now, soft transplant soon as they are ready. Thanks everyone
Likes
12
Share


@Siriuz
Follow
She is loaded right now very heavy and potent yielding plant oh yeah thanks 420 fastbuds I will be getting more of your seeds you rock
Guys im so happy I boughy fastbuds seeds
It was great to see this second seed pop an amazing grapefruit we did fiming and she eneded up with many colas and many flowers plus super frosty and smelly
Also turned purple all buds which to us was a surprise and did not expect that
Since last grapefruit was different than this
Thanks a lot for all your support
Imagine if we had a full spectrum light
I think we would be growing trees
Honestly we have more than we expected
COMING from an Indoor thats nearly located in a tropical climate of 30/33 degrees most of the year and with that said raising temps very hot sometimes very humid thats close to the equator
So we have to use A/C all times and maintain humidity levels by spraying all walls to keep it around 45/60% while ac is on remember droping temps so we have to make it as comfortable as possible and that its not easy in this side of the world
OR either you need a lot of money which I dont have yet to build a super setup and a separate ROOM with all of that temp and great humidity lvls so yeah we do what we can with our budget
We live somwhere where things are pretty much fckd up but it is what it is
Hey at least we are safe because it is illegal lol so yeah brothers we have hard times
And still with all risk we here doing our best
Showing all support
Showing im greatful
TO find a space like this where
We all can share like and Comment
And help each other grow better everyday
Blessings to you all
Keep EM buds coming
Happy growing
Likes
8
Share


@Rangaku
Follow
Defol and tied down she doubled in size , ran a flush . Keeping up the defol and spreading her out this week then another week of veg before flipping

Likes
18
Share

@Domenik
Follow
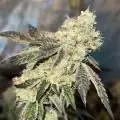
Day 67 and the last one is ready. The smell is incredible and the trichomes are crazy. Love this strain and gonna grow it again


Likes
12
Share


@BLKSWN
Follow
Another late week, but... so like I said I add the 300w led (150w)to the room and I think the girl is loving it. I had to raise the HPS up due to the heat, so the HPS is at 17” from the top of the canopy and the LED at 12”. The colour in the room is unbelievable. I can’t wait to see how this GG turns out.


Likes
25
Share
@DogDoctorOfficial
Follow
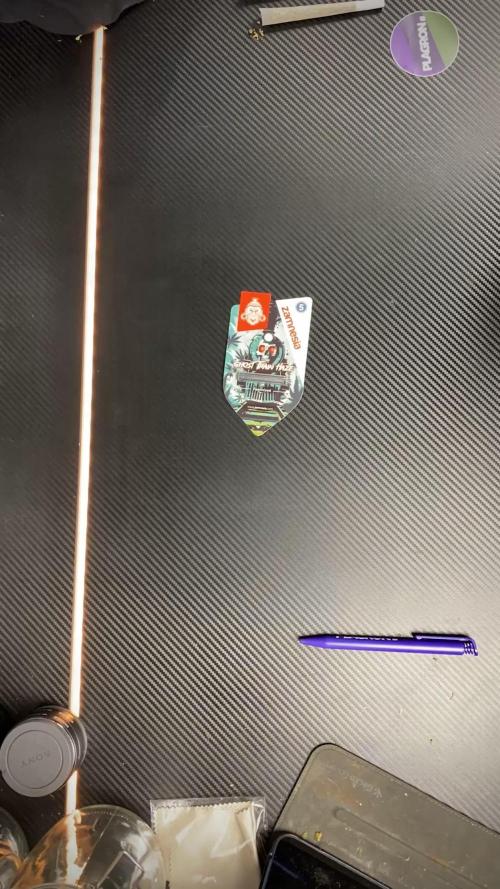
Ghost Train Haze — Harvest / Trim / Cure
Part 2 — Trimming, Resin & First Cure
First of all, once again, sorry for dividing this harvest into three different parts. But honestly… there was just no way to fit this entire experience into one single update without rushing it.
This run became something special for us.
So instead of throwing everything into one giant report, we wanted to slow things down and give each phase the attention it deserves.
Part 1 was about harvest day itself — especially the frozen plant and the preparation for the future ice water hash runs.
Now in Part 2, we focus on the monster of the room.
The big Ghost Train Haze girl.
The giant.
And damn… she was beautiful.
⸻
The Giant Finally Ready
After drying slowly and patiently, she finally reached that moment every grower waits for:
the stem click.
Not bending anymore.
Not soft anymore.
That perfect dry snap telling us she was finally ready for trimming.
And honestly, seeing this massive plant hanging there fully dried was already rewarding by itself.
Huge flowers. Dense structure. Long spears everywhere. Frost absolutely covering the plant from top to bottom.
At this point, we brought out the Trim Bin, got comfortable, and of course…
Mr. Baggy joined the session too.
Because trimming alone is trimming.
But trimming with the homies becomes part of the memory.
⸻
Trimming This Beast
Once we started separating the branches and working through the flowers properly, one thing became immediately obvious:
This plant was ridiculously frosty.
And I mean ridiculously.
Possibly the frostiest plant in the entire room.
Every touch released resin.
Every nug felt sticky.
Scissors getting glued together constantly.
Gloves turning darker and shinier minute after minute.
The flowers themselves came out incredibly dense and compact too. Heavy in the hand. Proper weight to them. Not airy at all despite the sativa influence from Ghost Train Haze.
And visually?
Beautiful.
Silver-covered calyxes.
Orange hairs fading perfectly into the resin layer.
Chunky flowers with that classic “don’t squeeze too hard or you’ll ruin the trichomes” feeling.
This girl truly felt like a reward after the full cycle.
⸻
The Trim Bin Surprise
One thing we absolutely loved during this trimming session was watching how much resin naturally collected inside the Trim Bin.
By the end of the session, the amount of loose trichome heads sitting underneath the screen was honestly crazy.
No dry sift machine.
No mechanical shaker.
Just trimming.
And still…
A beautiful golden layer of resin waiting for us underneath.
Of course, finger hash also started building up naturally while trimming. Sticky gloves. Sticky fingers. Sticky scissors. The classic signs of a happy trimming session.
Then came one of our favorite moments of the day.
⸻
Playing The Drums — Moroccan Style
At the end, we decided to have some fun with the trim itself.
Using the dry material almost like traditional Moroccan drum-sifting techniques, we gently worked the trim leaves and remaining material to knock off even more trichomes.
Simple. Relaxed. Traditional-inspired.
And honestly?
It worked beautifully.
What we collected afterward turned into a gorgeous little hash bar that looked and smelled incredible.
We didn’t even bother weighing it.
Sometimes not everything needs numbers.
Some things are simply for the experience.
For the ritual.
For the future session.
For curiosity.
For enjoyment.
And this one definitely earned its place for later tasting sessions.
⸻
Final Dry Weight
After everything was trimmed, cleaned, and separated, the final dry flower weight from this single plant came to:
294.9 grams dry
Honestly?
We’re extremely happy with that.
Almost 300 grams from a single plant in this run is something we can absolutely appreciate.
Especially considering this entire project was:
* 12/12 from seed
* Minimal training
* Minimal intervention
* Natural structure
* Mostly observation and guidance
Just letting the plant express herself while giving her the right environment.
And she rewarded us massively.
⸻
Storage & Cure — Different Approaches
Once trimming was done, we started organizing the curing process using different storage methods.
This time we decided to split the flower between:
* Glass jars
* Metal Zamnesia containers
* Grove Bags
Each one has its own purpose and philosophy.
Glass Jars
The classic.
Simple, reliable, proven for decades.
Perfect for manual burping and personally controlling the curing environment yourself. They also allow us to visually inspect the flowers easily during cure.
⸻
Metal Containers
The Zamnesia metal containers feel more protective physically and also help reduce light exposure completely.
They feel solid. Clean. Almost laboratory-like.
A very nice option for preserving flower while keeping things discreet and protected.
⸻
Grove Bags
These are probably the most modern approach we tested in this run.
The idea behind Grove Bags is that their “TerpLoc” technology supposedly regulates humidity internally while allowing gas exchange in a controlled way.
The theory is that they naturally maintain flower within the ideal curing range around:
58–62% RH
without constant burping.
So now we’re extremely curious to compare all three methods later during the smoke review phase:
* Does one preserve terpenes better?
* Does one keep the flower softer?
* Does aroma evolve differently?
* Does cure quality actually change?
We’ll definitely revisit this in Part 3.
⸻
The Frozen Plant — Flower Comparison
After finishing the main giant plant, we also trimmed and cured the material that came from the frozen/hash-focused plant from Part 1.
This was important for us because we wanted to compare:
* Flower from the “normal dried” plant
vs
* Flower from the plant intended mainly for extraction
And surprisingly?
The terpene profiles feel extremely similar.
Same family. Same identity. Same Ghost Train Haze soul.
Maybe slight differences in intensity or texture, but overall the profile remained very recognizable between both plants.
Which honestly gives us a very good feeling about the future hash quality too.
The frozen plant itself ended up giving:
58.5 grams dry
Plus whatever was already separated and reserved through the frozen material process itself.
So overall, absolutely worth it.
⸻
Macro Photography & Focus Stacking
During all this, we also continued working on our macro photography experiments.
Some of the photos shared in this update were actually focus-stacked images made from:
* 112 photos
* 96 photos
* 33 photos
For people unfamiliar with focus stacking:
Macro photography has extremely shallow depth of field. When you photograph trichomes closely, only tiny portions stay in focus at once.
So instead, we take dozens — sometimes over a hundred — separate images with different focus points and merge them together afterward in software.
The result is a final image where the entire flower or trichome field becomes sharp at the same time.
It takes time.
It takes patience.
But honestly, we love the process.
Because cannabis truly deserves to be appreciated up close.
⸻
Trimming Timelapses
We also recorded trimming timelapses so people can better see the workflow behind everything.
Not just the glamorous final nug shots.
But the actual process:
* separating branches
* cleaning flowers
* resin building up
* trim collecting
* the mess
* the rhythm
* the work itself
Because behind every beautiful cured flower, there are hours of patience nobody usually sees.
⸻
What Comes Next — Part 3
The next and final report will focus on:
* Full smoke review
* Cure evolution
* Drying process explained deeper
* Flavor profile
* Terpene expression
* Effects
* Overall experience with Ghost Train Haze
* Personal reflections after living with this cultivar
That final report will close the entire Ghost Train Haze journey properly.
⸻
Thank You
And as always…
Huge thanks to everybody who stopped by this journey.
To the breeders behind these genetics.
To the companies making nutrients, LEDs, gear, and tools possible.
To the platforms that allow growers to share their passion openly.
To the community members constantly supporting each other.
To the OG followers.
To the new followers.
To the silent viewers.
To the growers.
To the curious people.
To the skeptics.
To the lovers.
To the haters too.
If this grow made somebody stop scrolling for even a few seconds and appreciate the plant differently…
that already means something to us.
From grower to growers.
See you all in Part 3.
📡 DELETED @ 1K Please stay tuned.we never quit https://www.youtube.com/@TheDogDoctorOfficial NEW 🙏 Thank you for your patience and continued support.
FOR DISCOUNT CODES AND MORE JUST FOLLOW THE LINK https://website.beacons.ai/dogdoctorofficial
📲 Don’t forget to Subscribe and follow me on Instagram and YouTube @DogDoctorOfficial for exclusive content, real-time updates, and behind-the-scenes magic. We’ve got so much more coming, including transplanting and all the amazing techniques that go along with it. You won’t want to miss it.
GrowDiaries Journal: https://growdiaries.com/grower/dogdoctorofficial
Instagram: https://www.instagram.com/dogdoctorofficial/
YouTube: https://www.youtube.com/@dogdoctorofficial Deleted by Youtube - https://www.youtube.com/@TheDogDoctorOfficial NEW
Vimeo : https://vimeo.com/dogdoctorofficial Under construction stay tuned ⸻
Explore the Gear that Powers My Grow
If you’re curious about the tech I’m using, check out these links:
🔆 Lighting & Environmental Control
• Future of Grow — Advanced LED lighting technology
https://www.futureofgrow.com/
DISCOUNT CODE: DOG20
• Lumiflora — Under-canopy LED lighting
https://lumiflorade.com/
• TrollMaster — Environmental controllers and automation gear (past collaboration)
⸻
Genetics
• Zamnesia Seeds — Genetics used in this project
https://www.zamnesia.com/
⸻
🌱 Soil, Substrates, Boosters & Root Support
• Plagron — Substrates, bio mixes, and supportive products
https://plagron.com/en/
⸻
🎒 Storage, Curing & Preservation
• Grove Bags — Curing and storage solutions
https://grovebags.com/
⸻
📸 Photography Equipment & Tools
(Not sponsors, but part of my creative toolkit)
• Sony A6700
• Sony full-frame macro lens + few more
• Stacking photography workflow - learning
• iPhone (for behind-the-scenes shots)
We’ve got much more coming as we move through the grow cycles. Trust me, you won’t want to miss the next steps, let’s push the boundaries of indoor horticulture together!
As always, this is shared for educational purposes, aiming to spread understanding and appreciation for this plant. Let’s celebrate it responsibly and continue to learn and grow together.
With true love comes happiness. Always believe in yourself, and always do things expecting nothing and with an open heart. Be a giver, and the universe will give back in ways you could never imagine.
💚 Growers love to all 💚
📸 P.S. – The Eye Behind the Lens
All photos in this diary (for now — except for the ones showing the camera, which I took with an iPhone) are taken with a Sony A6700 paired with a Sony full-frame macro lens and a few more.
Photography is part of the story — it’s how we share the fine textures, the glow, and the quiet details that words can’t always capture.
I’ve also started experimenting with photo stacking — a technique where multiple images, each taken at a slightly different focus point, are layered together to create one perfectly sharp image from front to back.
It’s not digital enhancement or AI; it’s pure photography — a way to reveal the plant’s beauty in microscopic depth, from trichome to petal.
You’ll even see a few shots of "ghost me" capturing the shots — camera, lens, setup — because every grow deserves not just to be cultivated, but documented like art.
FOR DISCOUNT CODES AND MORE JUST FOLLOW THE LINK https://website.beacons.ai/dogdoctorofficial
NEW DISCORD - Official Server Invite Link : https://discord.gg/ksjAkA5T74
Processing
Likes
5
Share


@Highdro
Follow
I started getting new growth from the tops of my colas. I thought this might of been down to raising the light up 10cm but it might of been down to high light intensity so I also moved one abit further away from the other to try and help.
The pictures in the dark and videos was around 4minutes before the lights came on as all my photos are over exposed.
Next to this plant I have an experiment with pink kush and zombie kush using the light given of from this grow.


Likes
29
Share


@Myrcene_Dream
Follow
-Everything going ok and growth growing well
-Giving it a little bit of water every second day