Likes
11
Share
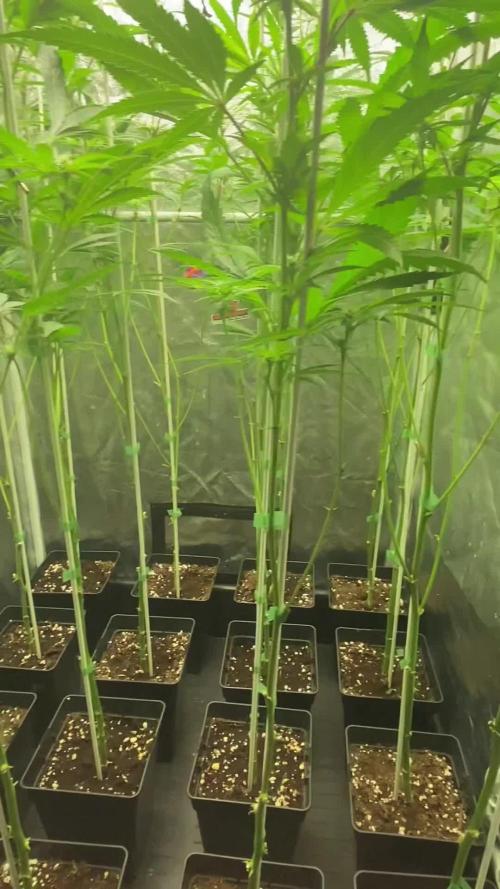
Veg into week 2 running smoothly thus far. No signs of deficiencies or areas of concern. See following specs. Seedsman (Critical-Auto) - 6.0 Inches - Growing Tall - Healthy Fan leaves BlimBurn (Apple Fritter - Auto) - 5.5 Inches Growing wide - Stems thicker then average. Introduced Raw (NPK) Veg Part 2 (3.5g's per gal) - Assists with topping rebound Hard Topping LST should begin this week Coco topped with worm casting and perlite Light run - 18/6 Temps High 70 - Low 80's - Humidity - 78-91% Heavy on the Myco *End of week recap above* 08-11
Likes
Comments
Share
Good growth. Stem is very sturdy. Overall growth is very Compact and abundant. Will have to keep her mainlined. Fimmed this week. We’ll See Id it worked, otherwise will top. Water still automatic. No issues. No Rain.
Likes
13
Share
@COCOBAM
Follow
Some LSD was done. Pinhas is looking good, giving a nice grow this week.
Likes
7
Share
No bug or disease problems. I even took her off veg nutes way too soon and she recovered like a fucking champ. I’m popping two more this week. Unfortunately i didn’t weigh it because Of some very unfortunate circumstances that I was dealing with at the time. I essentially had to vacate my premise within 24 hours. A few days after harvest. Anyways. I ended up smoking the whole thing with my friends and it was straight fire. The terps were crazy also. Super sweet. After curing she had a very sweet smell like bubblegum / grape. This was only my second harvest ever.
Likes
12
Share
2ª settimana vegetativa 💚 La piccola CRITICAL LEMON cresce bene, bella e forte🍋⚡💪🏻 Trapianto effettuato da vasetto da germinazione a vaso 6,5 litri definitivo! 👍🏻 Sta per arrivare anche il controller TENT-X gentilmente prestato dagli amici di TROLMASTER
Likes
Comments
Share
I transplanted the plants into larger pots, the photoperiodic in a 50-liter pot filled with supersoil while the auto fractal by divine seeds in an 11-liter pot hoping there are no problems. Delay on the autoflowering, humidity at 75%, pH of the osmotic water 6.5, air conditioner 25 degrees, marshydro fc4800 .
Likes
4
Share
💙 Project Blue Tent – Week 3 Blue Waffle F1 – Pheno A (Folder 13A) Welcome back everyone to another week inside Project Blue Tent! For anyone joining us for the first time, this project is all about exploring the incredible Blue Waffle F1 genetics from Zamnesia while putting the complete Zamnesia ecosystem to work. Every plant is grown individually, documented separately, and allowed to express its own personality, even though they all share the exact same environment. Unlike our 8×8 Adventure, where twelve different genetics share one room, Project Blue Tent is dedicated to learning every detail about these F1 hybrids. Every week we compare their growth, structure, vigor and responses while growing them in Plagron Premium Coco Growbags using the Plagron Hydro nutrient line. Every diary tells the story of one plant. Today, the spotlight belongs to Blue Waffle F1 – Plant A. ⸻ 🌱 Week Three – Finding Her Rhythm This week marked a noticeable change in Plant A. She started the week looking like a healthy young seedling settling into her new home, but by the end of the week she had completely shifted gears and began growing with much more confidence. The internodal spacing remains compact, her branching is symmetrical, and every day she seems more eager to push fresh growth from the center. One thing I really appreciate about this phenotype is how organized her structure already looks. Even without heavy training she naturally wants to build a balanced canopy, which is always a pleasure to watch. ⸻ 🌡️ The Blue Tent Environment This entire room is built around the Zamnesia ecosystem, allowing every component to work together. The Phytonaut LED continues providing an even light spread across the canopy, while the Grow Environment Controller manages ventilation and airflow to keep the conditions stable throughout the day. This week’s average environmental conditions were: * 🌡️ Day Temperature: 27°C * 🌙 Night Temperature: 27°C * 💧 Relative Humidity: 67% * ⚗️ pH: 5.8 * ⚡ EC: 1.61 mS/cm * 💨 CO₂: approximately 450 ppm * 💡 Light Schedule: 18/6 * ☀️ PPFD: approximately 350 * 🌈 PAR levels remain ideal for this stage of vegetative development. The plants continue receiving gentle but sufficient light, encouraging compact growth without unnecessary stretching. ⸻ 🥥 Feeding Update Coming from many years of growing in living soil, switching to coco is definitely teaching me a few new lessons. One thing I noticed this week was that the plants were beginning to ask for a little more nutrition. Their colour shifted slightly toward a lighter green—not anything alarming, but enough to tell me they were ready for a stronger feed. Instead of chasing deficiencies after they appear, I prefer listening to what the plants are telling me. Because of that, I increased the base nutrition. The feeding schedule is now: * Plagron Hydro A — 1.6 ml/L * Plagron Hydro B — 1.6 ml/L * Plagron Hydro Roots — maintained at the previous dosage This adjustment raised the EC slightly and should provide enough nitrogen and overall nutrition to bring that rich healthy green back over the coming days. Growing in coco is all about making small corrections instead of large ones, and that’s exactly the approach I’m taking. ⸻ 🚿 A Little Adventure… The Flood Well… Every grow has at least one story. This week’s story involved water. I’ve always joked that irrigation systems make me nervous because they work perfectly… until they don’t. This week proved my point. After activating the irrigation system, one small mistake turned into a flooded tent. Fortunately, it was nothing catastrophic. We immediately shut everything down, soaked up the water using plenty of towels, cleaned the tent thoroughly, checked every connection, and got everything back under control. Thankfully, this happened in coco, not soil. One of the great advantages of coco is its excellent drainage and oxygen retention. Even after receiving more water than intended, the medium remains highly aerated, allowing the roots to continue breathing. Had this happened in heavy soil, recovery would have been considerably more stressful. The plants never showed signs of distress, and after allowing the medium to dry slightly we simply resumed the irrigation schedule as normal. Problems happen. The important part is solving them. We’re already working on a better solution for the irrigation system, and once the new equipment arrives I’ll be sharing everything in the upcoming weekly reports. Mistakes are part of learning, and I think documenting them honestly is just as valuable as showing perfect results. ⸻ 🌿 Plant A Herself This lady continues to impress me. Her structure is compact. Her leaves are broad and healthy. The stem is already developing beautiful thickness with subtle purple pigmentation beginning to appear. Most importantly, every day she seems to accelerate. The newest growth is noticeably more vigorous than it was only a few days ago, which tells me she’s becoming fully established inside her root zone. She’s looking like a plant that’s preparing to explode with growth over the coming weeks. ⸻ 👀 Looking Ahead Next week should be an exciting one. With the feeding adjusted and the roots now well established throughout the coco, I expect significantly faster vegetative growth. We’ll continue monitoring colour, internodal spacing and overall vigor while preparing these ladies for the next stages of training. If Plant A keeps following this trajectory, she may very well become one of the stars of Project Blue Tent. ⸻ 💙 Thank You A huge thank you goes out to Zamnesia for making this entire project possible—from these beautiful Blue Waffle F1 genetics to the complete ecosystem surrounding this grow. A massive thank you as well to Plagron for providing the Premium Coco Growbags and the Hydro nutrient line that is feeding these ladies every single day. Thank you to GrowDiaries for giving growers from all around the world a place to document, learn and share our journeys together. And finally… Thank you to every single person reading these updates. Whether you’ve been following since day one, recently joined the adventure, leave comments every week, simply stop by to look at the photos, or even quietly disagree with my methods—you all contribute to making this community what it is. I genuinely appreciate every view, every conversation, every piece of advice, every question, every like, every criticism, and every bit of support. I hope you’re all having an amazing week, and I can’t wait to show you how these beautiful ladies evolve in the next update. Until then… Growers Love, happy growing, and I’ll see you all next week. 🌱💙 P.S. One final shout-out has to go to the Zamnesia ecosystem itself. As messy as the irrigation mishap looked, the Zamnesia tent tray proved exactly why it’s part of the setup. Every drop of water was safely contained inside the tent, with absolutely nothing leaking onto the floor. What could have become a much bigger problem ended up being nothing more than grabbing a few towels, drying everything up, and carrying on with the grow. Sometimes you only discover how valuable a piece of equipment is when something goes wrong—and this week, the tray passed that test with flying colours. Huge thanks to Zamnesia for designing an ecosystem that’s ready for real-world growing, not just the perfect days. 💙🌱
Likes
10
Share
@Cannabot
Follow
Rootzone is getting stronger,will be transplanting in the next week
Likes
20
Share
2024-10-18 The le Plants do a super job. spreading the semen into the feale Flowers absolutely extiting BE a Breeder", is one of Doctor´s Choices Motto. Regular Seeds Seeds germinate- A backcross from Chronic Ryder_ BREEDER INFO LEGEND We’re so proud of our latest drop - Chronic Ryder regular - as it results from a hardworking breeding process. We used an original Chronic male plant from Serious Seeds and backcrossed it with our Chronic Ryder from Sasha The Joint Doctor’s private collection to receive the Chronic Fast F1 BX Regular. By crossing 2 Chronic Ryder F3 lines, L1 and L2 from the same parents, we have created a new hybrid line. Well, it seems like it should be an F4 hybrid, but it's incorrect to name so. This process is called interline breeding, which means the cross of 2 lines. This cross allowed us, over several generations, to get a fully automatic Chronic Ryder that predominates its parents by 25% in key characteristics. Chronic Ryder is also available in feminized variety. GROWING Chronic Ryder regular shows the best performance of parents’ heritage. It grows into a uniform and compact plant that rarely exceeds 1m in height. Thanks to its compact size it is better grown in small spaces, terraces, and balconies and is quite suitable for stealth growing. The plant forms a single huge central bud cola with few side branches. Fatty and frosty buds will be ready to harvest in 70-75 days from germination. You’ll be truly surprised how big and dense buds are - the nice and fruity smell adds extra pleasure. The short growing period and strong resistance are other strong points of the strain. Chronic Ryder regular would be a great choice for growing outdoors with short summers - you’ll get your guaranteed high-quality yield in any case. Be ready to harvest up to 500 g/m2 indoors and 50-100 g per plant outdoors. TASTE and EFFECT Chronic Ryder regular has a nice taste - fruity and citrus tones complement one another, giving an unforgettable aftertaste. The effect is mild and doesn’t hit you like a hammer - the perfect choice for novice smokers. It brings balanced high and stone effects. Thanks to it, Chronic Ryder is a good smoke that calms your body, giving a strong body relaxation for a long time. CHARACTERISTICS Autoflowering: Yes Type: Regular | Autoflowering Room: Indoor | Outdoor | Greenhouse Genotype: Hybrid Genetics: (Serious Seeds) Chronic BX Chronic Ryder Finish time: 70-75 days from seed Indoor: Productivity: 500 g/m2 Height: 60 - 80 cm Outdoor: Productivity: 50-100 g/plant Height: 60 - 80 cm THC: High Flavour: Citrus | fruity | apricot Effect: Balanced high and stone | daytime | giggly
Likes
4
Share
🌿 Grow 🤝 Freunde 🌱 🔥 Update – Woche 35, Tag Blüte | DWC-Grow Die Lady’s sehen auf den aktuellen Bildern sehr gesund, vital und schön gleichmäßig aufgebaut aus – kompakte Buds, sattes Blattgrün und ein gut gefülltes Blütendach, genau so wünscht man sich die Blüte in dieser Phase. 🌱✨​ Die Pflanzen stehen jetzt bei ca. 93 cm und wirken strukturiert, stabil und gut durchlüftet – viele Kopf- und Seitenbuds bekommen gleichmäßig Licht, was man an der homogenen Blütenbildung erkennt. Die Blätter zeigen ein kräftiges Grün ohne deutliche Mängel, die Buds sind schon schön aufgegangen und die Harzproduktion legt sichtbar zu. 😍​ Setup-Details: Beleuchtung: Farmlite LED, ca. 20 cm Abstand, 12/12 Lichtzyklus Topfgröße: 20 L DWC Nährstoffe: Hy-Pro Hydro A/B je 5 ml, Generator 0,15 ml auf 1 L Wasserwerte: pH 6,3, Lösung 20 °C Klima: 26 °C Tag / 18 °C Nacht, 53% RLF Pflanzen: aus Samen, aktuell ca. 93 cm hoch Sponsoren-Reminder: Danke an Thomas Benedikt, Green Growery, Hy-Pro Fertilizers und Farmlite Grow Light ! Denkt an die Rabattcodes: Green Growery: GrowFreunde20 (20 % auf Erstbestellung, Versand frei) & GrowFreunde10 (10 % auf Folgekäufe)! und 5 % mit dem Code UGL97KZF auf Amazon für die Farmlite Grow Light: Bleibt dran – bald gibt’s die nächsten Blüte-Updates! Happy Growing 👍 Grower Boris https://www.facebook.com/groups/1140006947653435 #growfreunde #DWC #blütephase #hydropower #greenlovers #cannabiscommunity #happyplants #growreport 🚀🌱🌸
Likes
3
Share
@Bdawg
Follow
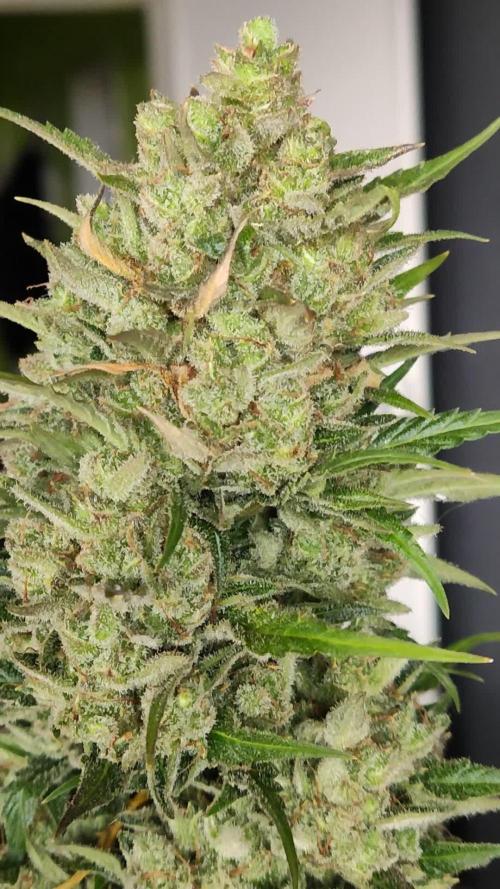
Getting frosty in eya Flawless finish few nore days
Processing
Likes
21
Share
@Dunk_Junk
Follow
Her flowers are forming nicely now. Pistils JUST starting to change colour. A few weeks left yet!
Processing
Likes
27
Share
@BudXs
Follow
Getting there... cant wait for Spring Walls are up and painted, floor is laid, electrical all done, exhaust outlets mounted. Ive started to install the trim - I decided to put a grey stain instead of boring paint on the floor trim boards. Looks really solid against the dark bamboo floors. I used two gallons and two coats of flat pure white paint for walls and ceiling. Should give me a reflectivity somewhere around 80%. Some may ask why not opt for mylar? I just dont like the look. I dont care too much for reflectivity, as I will be well above the required watts/sqft with the light setup I will be using. I mounted an electrical receptacle in the ceiling, I thought it may come in handy for cord management. Im going to mount the 3 x meanwell drivers outside of the grow room and run some extra long cables to them. This is to keep heat out of the room, any little bit helps. Will be running a 8inch fan with about 750 CFM in order to properly vent the room. Intake will be a door vent and the negative pressure the fan provides. Odor is not too much of a concern, but may as well add a carbon filter. Tables to be built this week after trim is installed Week 1 Spend - $2080 Week 2 Spend - $350 (mostly on hardware store visits) Total so far - $2430
Likes
Comments
Share