


Likes
Comments
Share


@Santica_Garden
Follow
So this is how things are looking at the end of Week 3 from Seed, not happy with their growth as I have explained in the video posted.... Hopefully I will see some improvement in the next couple weeks. Happy Growing guys! More Diaries coming soon and Wedding Cake Harvest coming.

Likes
2
Share

@DerEkstaseHase
Follow
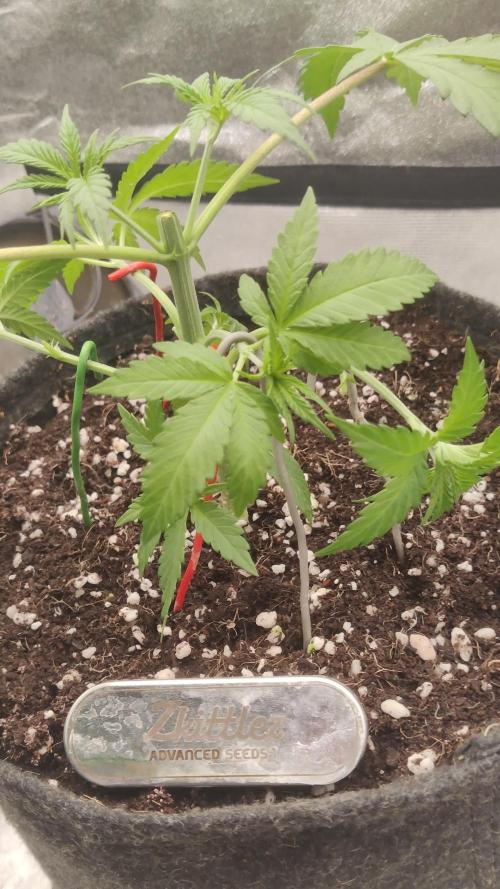
Diese Woche wird die Pflanze getoppt und die Seitentriebe runtergebunden.
Außerdem habe ich das Substrat noch mit etwas wieder aufbereitetem Coco aufgefüllt.

Likes
24
Share


@weedacouple
Follow
Easiest harvest we ever did (in our short career lol), the plant lost many leaves by herself. she has a strong flavour and we literally cant wait to smoke her.

Likes
1
Share


@MOTB666
Follow
they're finally starting to take off! Will probably do one more week of veg get them to at least 18 inches tall before flowering. They've been doing great considering all the mistakes and stress I put them through never showed signs of deficiencies or stress just the weird yellow patter that's has stuck around on #2 hoping its just another mutation

Likes
Comments
Share


@Comfrey
Follow
23.-30.07.
Die Woche verging wie im Fluge. Strawberry Haze Auto duftet mittlerweile sehr fruchtig mit Zitrusnoten.
Die Blüten schwellen nach einem krassen Stretch an. Das intensive LST und das Entfernen störender Blätter hat dazu geführt, dass die Blüten sehr gleichmäßig Sonnenlicht bekommen und später in der Blüte die Luft gut zirkulieren kann.
Zwei Tage der Woche standen die Pflanzen unter der Markise, es hat über Stunden heftig geregnet.
Das Gießen läuft wie gewohnt nach Gefühl. An heißen Sonnentagen bis zu 1,5 Liter.

Likes
3
Share


@CalGonJim
Follow
My favorite strain for some reason. It always survives, I thought one seed died. So I planted another...week later the other one grew. Survived mealy root bugs and all the insect soap, neem oil both altered the pH massive 5 to 9 fluctuation burned other plants but she kept going. She's smells like chewing gum fresh when I grind her up. I only dry for a day or over night because I do 4 smaller colas that don't take much time to dry. Got about an 1/2 oz or something, I trim and smoke as I go along, my grow tent is like my refrigerator , I just take some when I need it. 😎👍


Likes
7
Share


@Whitemexican27
Follow
This strain was just what I was looking for. After the previous trauma of letting my plant grow WAY too tall, I went into this grow looking for something much shorter and manageable and this was exactly it. The tying down at times were a pain, but one of those things that’s better in the long run. The transplanting kind of screwed me up a bit. Not only did I not really fill the pot enough, but I put them in horribly. The soil was falling apart and it was just an ugly mess. Trying to OD the plants wasn’t part of the plan either but they bounced back just fine. All in all it was a very easy strain to grow. The dry amounts of each plant are as follows. Plant 1: 48.2 grams. Plant 2: 51.8 grams. Plant 3: 46.4 grams. Plant 4: 50.1 grams and Plant 5: 51.2 grams for a total of 196.4 grams (7.8 oz’s)

Likes
13
Share


@Adriplnks
Follow
Las 2 más pequeñas, se adelantan y empiezan a madurar antes que las demás, ya tienen algún pelillo marrón, y sueltan una cantidad de resina increíble.
Las más grandes y con cogollos más gordos, empiezan a doblarse, así que voy atando las que no aguantan el peso

Likes
28
Share

@Joni2017
Follow
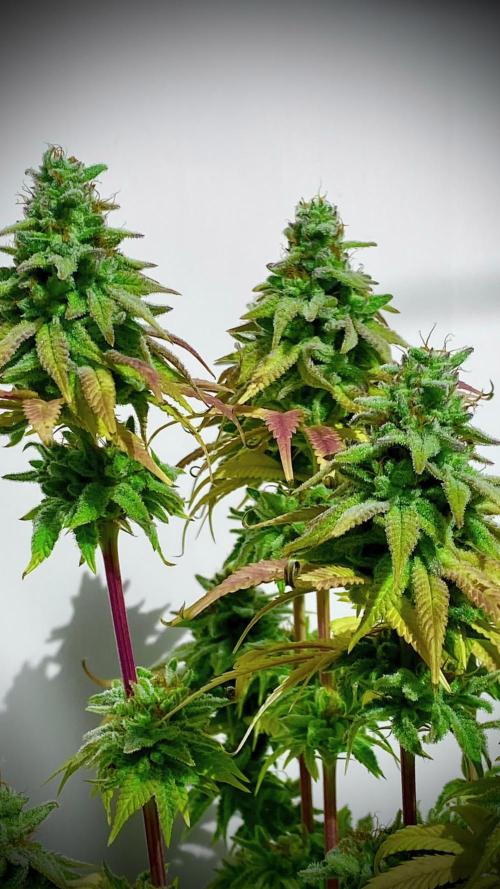
The big day is here! 😎 Today, March 28th, 104 days (15 weeks) after germination, I have harvested my first indoor photoperiod plant. It has been an incredible challenge, especially managing it in the middle of a winter environment, but the results speak for themselves.
📏 Harvest Data (Wet Weight)
-Total Wet Weight: 56.5 grams (15.7g + 40.8g).
-Final Height: 40 cm of pure density.
-Status: Rock-hard buds and an impressive resin layer.
-Dry Estimate: I estimate that after water loss (60-70% less), the final dry weight will be between 14 and 17 grams, given how dense the buds are and the cold conditions we’ve faced.
🌡️ Process Summary
-Managing a grow with lows of 12°C for my first indoor photoperiod experience has been difficult. I am aware that a climate control system would have been ideal, but the budget is what it is 😆.
Despite the limitations, using lukewarm water for irrigation and controlling the lamp height were vital. This plant has been a great learning experience, and I am sure the next one will be much better, applying everything I’ve discovered during these 15 weeks.
Now, on to a slow and controlled dry so the flavor is as spectacular as its look!
I want to wrap up this diary by thanking everyone who has joined me during these 15 weeks. Your likes, and comments have been an extra motivation to pull this Critical through despite the cold challenges.
It has been an incredible learning journey, and I couldn't be happier with the outcome of my first indoor photoperiod plant. See you all very soon with the Cream Caramel and that Main-Lining I have planned!
Happy growing and happy smoking to everyone! 🌿💨
Processing
Likes
4
Share


@Nookandplant42o
Follow
watered with nutrient-free rainwater, pH 6.4, a moisture absorption level of 56%, water was sprayed without ppm lights off temperature the night is around 23 ° to 24 ° I will take with water and nutrients from the soil itself with a little light down, to make the plant smaller, which was not getting much light, although 86 watts for each of them are beautiful and healthy, by photos it is visible how cold they are


Likes
9
Share


@Ryno1990
Follow
Wedding glue from @fastbuds is flowering along nice an stacking up the trichromes as the gelato from @herbies is comming along a little slower as i feel like the gelato has a longer veg cycle by a week or 2 but shes comming along beautiful just like last time i grew her

Likes
Comments
Share

@BBZETTA
Follow
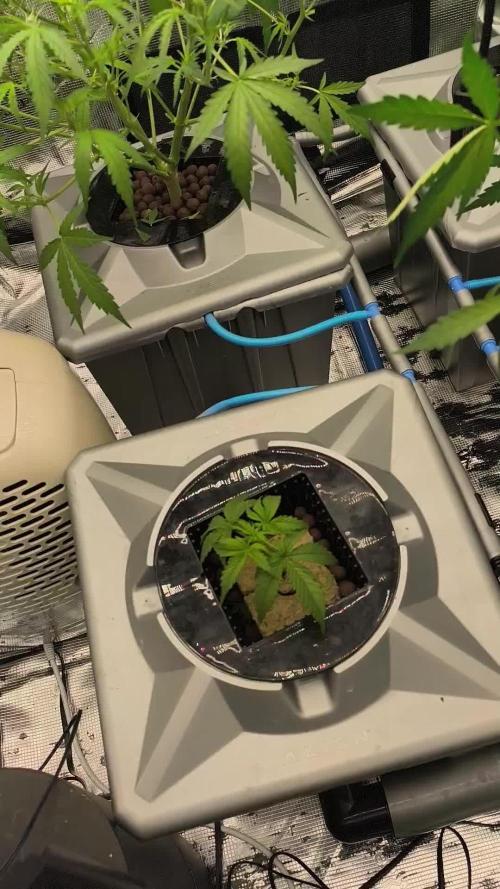
The bloom hast started feeding Go switched now im waiting for the Budsites to multiply!


Likes
42
Share


@DrLaggis
Follow
🌱 Day 57 - Start of the Second-to-Last Flowering Week 🌱
Hello, Grow Friends!
Today marks the start of the second-to-last flowering week—Week 9 overall, and Week 5 of flowering. 🌿 I’m getting more and more excited as my first grow nears its end. As I approach harvest, I’ve decided, based on my research, to stop feeding nutrients and stick to just pH-adjusted water for the final two weeks. 💧⚖️
Watering Routine:
I’ll keep the same watering schedule—1 liter every two days, which is about 10% of the pot volume. 🌱💧 This should be enough to flush out the remaining nutrients, ensuring a clean finish for the plant.
Temperature & Humidity:
The temperature remains stable between 19-23°C, which I believe is ideal for this stage of the grow. 🌡️🍂 No more high temperatures to worry about! The humidity is fluctuating between 45-58%, and I’m keeping a close eye on it to stay below 60%. 💧🔍 Everything seems on track for now. 🌿
Plant Health & Growth:
The plant still looks very healthy overall. 🌱💪 However, I’ve noticed that in the past three days, there haven’t been any visible changes in the size of the buds. 🤔 It could just be that I’m not seeing the growth clearly, but the only noticeable change is the daily opening of new flower calyxes. 🌸
Harvest Preparation:
I’m already getting my equipment ready for drying after harvest. 🛠️ Once it’s time to cut, I’ll be hanging the plant to dry for the first 10 days. 🌿✂️ I want to make sure everything is set for a smooth drying process.
Stay tuned for more updates, and as always, daily photos of the plant will be posted! 📸🌱
Day 62 - Last-Minute Decisions with Urgent Changes 🌱
Hello, my grow friends! Due to the trichome pictures I took on Day 61—which you can check out too—I’ve made an unexpected decision to harvest my plant a bit earlier than planned and make some changes.
🌿 Watering and Flushing:
The last time I watered was on Day 61, using all the usual nutrients at the doses I mentioned before. But after seeing the trichome pictures, I decided to start a light flush today. I gave the plant 4 liters of plain water to begin flushing and will now only water lightly on Day 64. After that, no more water until harvest on Day 67.
🌑 Dark Period:
From Day 66 to Day 67, I plan to keep the plant in darkness. I’m not entirely sure if this will make a difference, but I’m curious to try it out.
✂️ Defoliation:
The plant is doing well, and I’ve done a thorough defoliation. I removed all leaves that aren’t sugar leaves or directly attached to the buds to improve air circulation and reduce the risk of mold as I approach the end of the grow.
💭 Trimming Decisions:
I’m still undecided about whether to do a wet trim or a dry trim. Based on what I’ve read, especially regarding the yield from trim, I’m leaning towards dry trimming, as it might give me more usable trim material.
I can feel the plant entering its final phase, and I’m getting really excited about the results and what the next few days will bring. Remember, I post a video update every day. If you have any tips or suggestions, I’d love to hear them!
Until next time! 🌱
Likes
29
Share


@Basementganja
Follow
This C4 auto was very fast to flower, and stretched up to produce some very pretty, berry smelling/tasting nugs!
The buds didn't flower very dense, they formed as fox-tail shapes.
Yield is on the low-end of acceptable, but good considering the bud structure!
I'm growing another next run, to compare phenotypes!
Likes
11
Share


@ILoVeThiSpLaNt
Follow
Day 7
Le piante sono nate e tutte e stanno bene.
Aggiunto un po' di terra diatomacea vicino al tronco perché ho notato che gli insetti che ho sempre nel box (tripidi) salgono proprio da questo punto e la situazione sembra migliorare.
Ogni 10gg per tutta la fase vegetativa userò Zeolite (5gr x litro) per via fogliare. Si macchie ranno un po' le foglie ma questo creerà una patina su di esse così da proteggerle da stress di calore e sbalzi termici. Protegge da malattie fungine (peronospora e botrite) e preserva le superfici da attacchi di patogeni, muffe saprofitarie e batteri.
A settimana prossima 😊


Likes
11
Share


@Greenfingers666
Follow
Into week two all cuttings have taken 8 have been topped, spacers have been deployed to train branches 3cm spacers I will increase the size of spacers once the branches develop a little more.
about every 3 days Is required depending on how the strain performs.
this is a more creative method of growing with the final picture of your media in mind {peecock effect}.
once the media has starched I will snap on the spacers to create the scrog for a level canopy, holding the outer plants left and right further out to the left and right for more light exposure to develop my flowers to there full potential.
middle of week 2 I put the spacers together to make the scrog mainly two train the left and right rows of plants outwards for more space in the middle of my canopy.


Likes
210
Share


@Rock_n_Roll_Randy
Follow
I'm really looking forward to these seeds and strains from NUKA SEEDS. I've heard and seen amazing things from them.
CHECK EM OUT:
https://nukaseeds.com

