


Likes
Comments
Share


@PizzaBoy
Follow
Starting the week healthy after a week of recovering from nuit burn.
Strong growth continues and added a 3000W LED in the middle.
Lights as far up as possible and raised the reflective curtain to capture the escaping light.
The tallest tops do not appreciate the speed two of the fans. Lowered to speed one and added an oscillating fan to move air below the canopy.

Likes
4
Share


@GodZilla_Owner
Follow
Week 9 – Day 65
Flower Day 35
🔄 Looking back:
One of those weeks where everything just runs smoothly… 😎
The BioBizz pH+ is finally making a difference:
📈 Drain pH is now increasing by 0.1 to 0.2 points – a noticeable improvement compared to Canna pH+.
Other than that – just the usual routine: water, observe, and enjoy the view 🙌
🌿 Plant status – Mimosa Evo
📏 Holding steady at 104 cm, stretch is definitely over
🌼 Bud development is progressing steadily – no issues at all
✅ Still the most reliable performer in the tent – strong, stable, and stress-free!

Likes
23
Share


@BENY_TRUBY
Follow
Segunda planta cosechada (automaria). En las imagenes se ven las 2 plantas cortadas hasta la fecha (automaria, la más ramificada es preciosa). La humedad relativa en el cuarto de secado es de 63% y la temperatura 21 grados celsius.
El resto de plantas siguen madurando. He reducido todos los fertilizantes hasta regar sólo con agua a partir de ahora. Espero poder cortar pronto porque no voy a estar en casa 2 semanas desde el 29 de junio, pero los tricomas no terminan de ponerse de color ambar.


Likes
13
Share


@HeavyHead
Follow
Great week :) getting heavier by the day ;p put them onto flushing with straight ph’d water from here out.
Keeping the pots on the dryer side from here out. Lowered the temp of my room and my water as well.

Likes
1
Share


@Barcelona_Farmers710
Follow
Booommm! Llegó la hora tan esperada Farmers nuestras flores llenas de resina acabandose de formar, la verdad que estas genéticas ayudan mucho al desarollo del cultivo espero que os guste!! Una locura de olores y terpenos!!💚
Likes
Comments
Share


@0ni_wan_kenobi
Follow
These plants are doing well. The Ph is going down to a more normal level. They also got LST on the main branches. The only thing I see that is odd is that the leaves are a little yellow. I'll keep a close eye on them, in the next week.
Likes
5
Share


@pzwags420
Follow
The start of week 5 is going well. Blueberry is smelling nice and my seedlings should be showing preflowers soon.


Likes
16
Share

@Wookie
Follow
1 week if 12/12 and you can see the first light green showing, she will stretch for sure!
Awesome health, nice scrog, great lollipopping. I wont touch her until week 4 shes perfect for my liking!
Watering 2.5 Liters every 2 Days and we will up it now

Likes
435
Share


@Ju_Bps
Follow
Hello my friends 👨🌾👩🌾,
Let's go for a new run!
First of all a big thank to Mars Hydro and @Coco_Pan for sponsoring the TS1000 ❤️❤️, as well as Sweet seeds for donating the seeds ❤️❤️ in a contest.
I was able to get a glimpse of the TS1000 for a good part of the flowering of my auto mimosa, I'm really not disappointed with the result, this time we're going to start from the seed.
First Sweet seeds photo, first seeding with the TS1000.
The seeds germinated very quickly, opened in less than 24h👍👍,
I put the seeds in plugs when the root measured 1/2 cm (48h), the same day 2 had already come out.
Since it's my first seeding with the TS1000, I put it on the minimum, and created a little shade, 2 have a lot of stretch 😅🤦♂️,
So, I put them in direct light.
#3 came out of the ground after 5 days.
I wrapped the roots around the plug then put the plugs in 2l pots,
Plagron Light mix + rqs pellets.
Today all 3 are in pots,
About #4, bad news, I probably broke the germ during the translation, it is no longer connected to the seed 😪.
I moisten the soil twice a day with my water + rhizo spray, maintain a temperature of 26°C.
Thanks community for follow, likes, comments, always a pleasure 👩🌾👨🌾❤️🌲
Mars Hydro TS 1000
https://www.mars-hydro.com/ts-1000-led-grow-light
Gorilla Girl F1 fast version
https://sweetseeds.es/en/photoperiod-dependent-seeds/3065-gorilla-girl-f1-fast-version.html

Likes
4
Share

@Chubbs
Follow
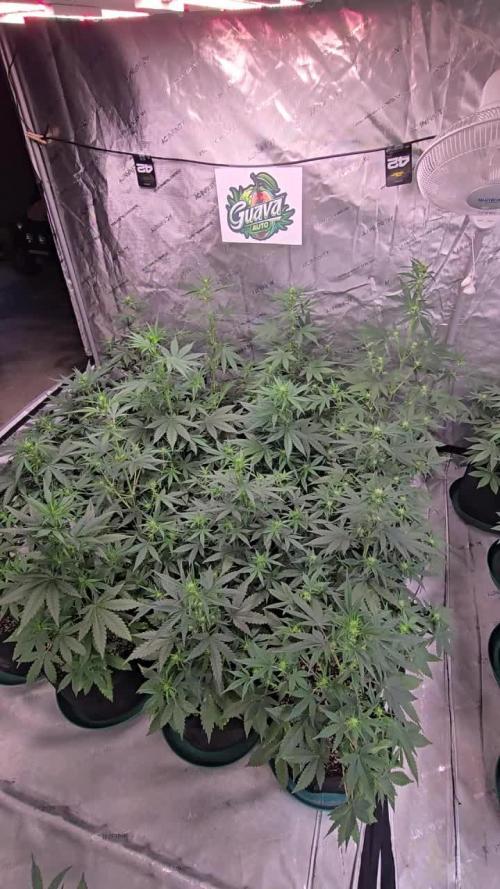
What up Fam. These girls are growing amazing. Now that I can controll the temps a little better they've taken off with growth. Starting the flower period which we all no know what that means. The countdown is on. Over all Happy Growing.
Likes
3
Share


@VTR90
Follow
Been flushing for the last 2 days and will be coming down next week ready for the autos to go in there
Autumn colours coming on now :) I have another young photo purple punch waiting on the sidelines to get mainlined when this 1s
Likes
6
Share

@Snugens
Follow
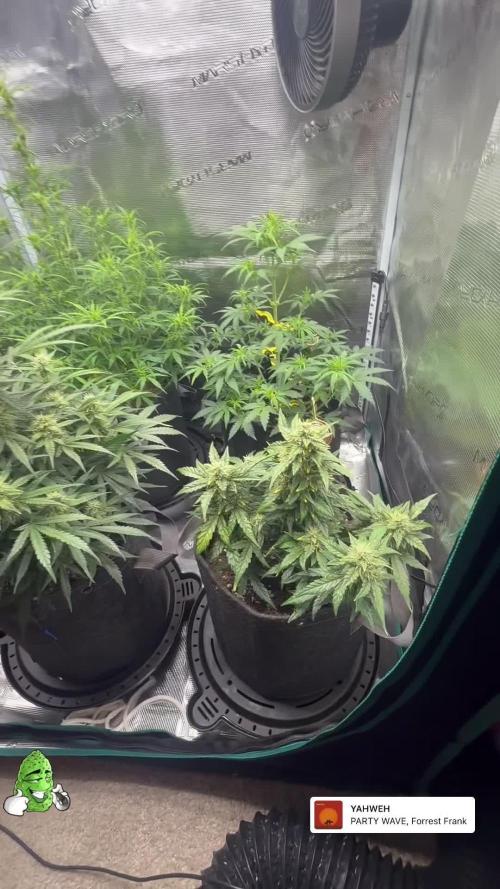
This week fall has entered the scene and the girls are nearing the end of their time in the sun.
Front right: Og Kush auto - week 7 she’s got some burnt tips but the terps are the absolute loudest. Straight up reminds me of back in the day when you’d get that rare dankness that only rolled around every blue moon. Started pre flush this week with 10 ml per gal winter frost, 5 ml per gal ruby, and 5 ml per gal of the carb from new millennium.
Front left: Pineapple Og auto - week 8 she’s is stacking those golf ball nugs and is a beauty queen. The terps I’m getting are like gym socks and dog shit with some gas. Super stoked to try it out. Not available on Humboldt site so I’m pretty sure it’s a trial pack? Either way glad they sent them to me. Started pre flush this week with 10 ml per gal winter frost, 5 ml per gal ruby, and 5 ml per gal of the carb from new millennium.
Back left: Dream Queen auto - week 6 she’s still has a few weeks to go before I start doing any pre flush. She’s out going the tent but I’m not complaining. The terps are a little lighter and still developing. I can’t really seem to trim it enough. It’s like every time I look at her I have to take off another fan leave.
Humboldt tri gro is going really well and man I’m super stoked. Just a few weeks left till they go in the diy “canna troll” I rigged up.
Big spliffs and mad rips grow brows 🤘✌️🌲🔥💨
Likes
24
Share


@TheIceCreamParlour
Follow
First week of flower in the Parlour.
They started the week receiving a feed of 1.8ec Calcium at 6.4 PH. Reason being the Pinapple they are sharing the tent with were showing cal deficiency with patchy leaves and some major droop. Back on regular feeding schedule now and needing a watering every day. I'm doing a day of ph water then next day nute feed. Stops any build up but also keeps costs down. If they show any deficiencies then I'll take the hit and switch to nutrients every day. The BioGreen range I'm using is exactly that, biological. So in theory there shouldn't be any salt issues.
As in the title its my first time trying autos so I'm pretty impressed with how much flower they have produced in just 7 days. One seems to be a slightly different pheno but both are looking happy and healthy.
Likes
29
Share


@GTools
Follow
I've been waiting for at least some trichomes to turn amber. I prefer to harvest when there are at least a few amber. I took the PL2 3 days before the PL1. Flushed them for a week only

Likes
18
Share


@thenotillwizard
Follow
Harvested at day 76, after 72h of darkness.
Very good yield!
3.3 pounds of dry buds + 1 pound of trim
The 2 keepers yielded 366 and 342g of premium quality smoke.
Very uplifting and energizing high :) Love it!


Likes
22
Share


@m0use
Follow
***Sponsored Grow*** = Medic || https://medicgrow.com || Grow = ***Sponsored Grow***
I was told about Kannabia seeds from a friend as they have some special edition and fancy medical strains so I asked them if I could test out some of their strains and they said yes! :D in this grow I will be showcasing their pineapple dream from their limited edition series of seeds. I am hoping it smells like a sweet n delicious ripe pineapple when its all done. I do love me some fruity/berry strains. They also shared with me CBG Auto, CBDV Auto and Swiss Dream Auto CBD. They will be showcased in another grow. Also don't forget you can get 15% off using this code, [ KHkgKksQ ] cAsE sensitive for online orders.
As of now I've scarified the seed, soaked in water for 20hr then moved to paper towel till a 1mm or less tap root was showing then planted in the medium.
This grow has a lot of new things happening. its my first attempt at indoor growing using dry crystal fertilizers, the brand of nutrients I'm using is Lotus. It was also a gift from another user @SanderanderS as shipping to them would have been astronomical for the stuff they wanted. I have noticed some weird things like boated packaging, off gassing and weird consistency with the nutrient line up so far and been in contact with the reps online about it, They said everything is normal and not to worry.
Another new thing with this grow is how it will be grown under the new LED's by Medic Grow. They will be under two of their MINI-SUN 2 240W LED grow lights using their V1 Spectrum, Its good from seed to harvest. You can find more information about this in the foot note.
Just going to wait for another week till It pops up and will update as follows. Watered in with PH of 6.2 and a EC of 0.6 or 340ppm 500 scale.
This is part of a 5 part diary in conjunction with medic grow led lights, in the beginning it was to be 6 plants but one of the selected strains died out and its replacement/backup seeds also failed. Sorry to say Humboldt Seeds Raspberry Diesel was a big flop all 3 seed did not meet my expectations, really wanted to try that one it looked nice. Can add that to the failed 4 seeds of Seedsman Cookies Chill :(
***Sponsored Grow***
Official Website:
https://medicgrow.com/
+
https://www.kannabia.com/en
Facebook:
https://www.facebook.com/medicgrowled
+
https://www.facebook.com/kannabiaseed/
Twitter:
https://twitter.com/medicgrow
+
https://twitter.com/kannabiaseeds
Instagram:
https://www.instagram.com/medicgrow420/
+
https://www.instagram.com/kannabiaseedsint
YouTube:
https://www.youtube.com/channel/UCNmiY4F9z94u-8eGj7R1CSQ
+
https://www.youtube.com/c/KannabiaSeedCompany
Growdiaries:
https://growdiaries.com/grower/medicgrowled
https://growdiaries.com/grow-lights/medic-grow
+
https://growdiaries.com/grower/kannabia
https://growdiaries.com/seedbank/kannabia

Likes
14
Share


@Canna96
Follow
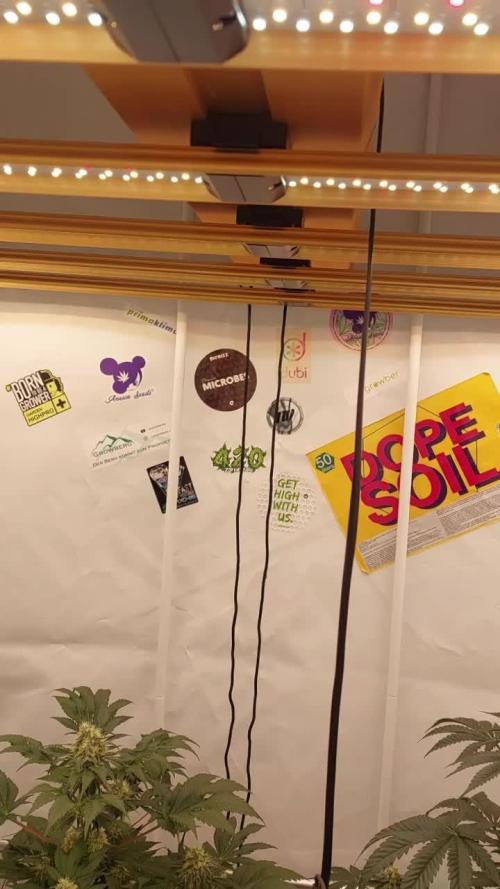
Hey now, hope everyone is having a great weekend and staying safe. Another great week for the ladies, as they are now about 2 weeks into flower, and the stretch is winding down. I am still feeding them silica, cal mag, and flower nutrients maxi bloom by GHE. I will start to add a PK booster this week. I also will be switching to light from V1 to F1 sometime this week, and also integrating the UV/IR bar into the light cycle later this week. I will run the UV/IR bar for approximately 30 minutes prior to lights off to get started.
The 5X5 is really starting to fill up nicely, I am running two dehumidifiers outside of the tent and I am able to maintain around 50% RH in the tent during lights on, and around 55% RH with lights off.
Still very happy with the Spectrum X from Medic Grow. I am running her at 90% in the V1 cycle and will be transitioning to the F1 cycle later this week. Overall, the plants seem very happy and healthy. The temperature and humidity is significantly dropping so that helps keeping the tent cool and not overly humid. This is by far the best time of year to be flowering plants in my region.
I hope everyone has a great weekend, Thanks for stopping by, Stay Safe and Blaze On!!! 💪
Website: https://medicgrow.com/
https://growdiaries.com/grower/medicgrowled



Likes
50
Share


@Blabina
Follow
😍 And here we are. 😍
👻 Every explanations about the moovie and what I did are written at the end of the video. 10 minutes of your life to watch 57hours and 54 minutes of my Quickgreen's life. ♥️Shot in 2k ♥️Watch it fulll screen ! 👻
♫♪ Music : Act I Year 1 of Akhnaten's Reign (Thebes) - Scene 1 Funeral of Amenhotep III ♥️♫ by Philip Glass ♪♫ End credits : Act I Year 1 of Akhnaten's Reign (Thebes) - Prelude - Refrain, Verse 1, Verse 2 ♥️♫ by Philip Glass ♪♫
😻It was a lot of work while I was feeding them at the same time, I got a small place for the grow area and the camera (who isn't small at all).
💪Thank you to my dwarves who accompany me during this creative process 💪
Enjoy the moovie ! 👻
👉 12th of october 2021 / DAY 6 👉 Shooting the film from day 10 late at night, this feed was not too hard (I bumped the tripod of my camera on day 5) 👽Calmag 1.6 ml/2L + 👽 Acti-Vera 0.8ml/2L 👽Bio-Grow 0.6ml/2L 👽Bio-Heaven 0.8ml/2L 👽Terra Aquatica Root booster (GHE) 10 ml/2L /// p.h. 6.3 EC : 07
I mooved a bit while feeding Quickgreen, the big star of the movie, during the shot... I will take some pictures of the 2 others on the following days when the moovie will be over.
👉 13th of october 2021 / DAY 7 👉 Finish and uploaded the moovie. First time my lovely quick have a light break !!! Lights where on for 3 days. 12h00 to 18h00, lights are off.
18h00 : 👽Calmag 2 ml/2L + 👽 Acti-Vera 2 ml/2L 👽Bio-Grow 0.6ml/2L 👽Bio-Heaven 1 ml/2L 👽Terra Aquatica Root booster (GHE) 10 ml/2L /// 😇 p.h. 6.0 EC : 07 degree 22° 😇 Run-off : The smart pot are in direct contact with "fresh" wood, naked wood so I don't know if the run-off is accurate despite the plastic plant cup i've put under them to retrieve the water and to test it : 😰 Quigreen (moovie star) : E.C. 1, ph. probably 7 degree 19° ... 😰 QuickPink : E.C. 1.2 ph 7.2 degree 19° 😰 QuickBlue : E.C. : 1.1 ph 7.3 degree 19°
Tent : Temp 24.2°- 19.5° // 61-81 % (light on - light off)
👉 14th of october 2021 / DAY 8 👉 👽Calmag 1 ml/1L + 👽 Acti-Vera 1 ml/1L 👽Bio-Grow 0.3333 ml/1L 👽Bio-Heaven 1 ml/1L 👽Terra Aquatica Root booster (GHE) 5 ml/1L /// 😇3 L. p.h. 5.9 EC : 08 degree 22° 😇 Run-off : from 0.8 to 1.2, quick blue seems to have troubles, ph seems decreasing, 6.9 about.
👻👻👻 New video : x3 speed with new music ! I keep shooting so I am adding materials, I will keep shooting until I have to close the tent in flow (smell reason)... Let's do it !👻👻👻 Edit : I've left a black frame (you will see shortly a fast cut) to show when the light turn off. So 6 hours in real life are not showned anymore since today.
👻💪😍Dwarves POWER 😍💪👻
👉 15th of october 2021 / DAY 9 👉 12:00 : took dailies back and added in editing timeline. Mooved the light from 100cm to ☼ 79cm (31inch) MAX 24.4°//92% MIN 20.4°//45% : average : 23°//61% Fan is on since yesterday (not the extractor but tent is a bit open on top so... we are good. /autoflower power
18h00: 👽Calmag 2 ml/3L + 👽 Acti-Vera 2 ml/3L 👽Bio-Grow 1 ml/3L 👽Bio-Heaven 2 ml/3L 👽Terra Aquatica Root booster (GHE) 15 ml/3L /// 😇3 L. p.h. 6.0 EC : 07 degree 23,8°
👉 16th of october 2021 / DAY 10 👉 12:00 : took dailies back and added in editing timeline. 👻👻👻 New video : x5 speed ! ... Let's do it !👻👻👻
18h00 : 👽Calmag 2 ml/3L + 👽 Acti-Vera 2 ml/3L 👽Bio-Grow 1 ml/3L 👽Bio-Heaven 2 ml/3L 👽Terra Aquatica Root booster (GHE) 15 ml/3L /// 😇3 L. p.h. 5.9 EC : 07 degree 22,4°
👉 17th of october 2021 / DAY 11 👉 12:00 : took dailies back and added in editing timeline.
18h00 : 👽Calmag 2 ml/3L + 👽 Acti-Vera 2 ml/3L 👽Bio-Grow 1.2 ml/3L 👽Bio-Heaven 2 ml/3L 👽Terra Aquatica Root booster (GHE) 15 ml/3L /// 😇3 L. p.h. 5.9 EC : 08 degree 21,4° /// Run-off pretty much the same for quickblue quickgreen and quickpurple. E.C. around 0.9 and p.h from 6.9 to 7.0, I don't know why my p.h is so high....
👉 18th of october 2021 / DAY 12 👉 12:00 : took dailies back and added in editing timeline.
👽Calmag 2 ml/3L + 👽 Acti-Vera 2 ml/3L 👽Bio-Grow 1.2 ml/3L 👽Bio-Heaven 2 ml/3L 👽Terra Aquatica Root booster (GHE) 15 ml/3L /// 😇3 L. p.h. 6.0 EC : 08 degree 21,5° /// Changed light hours : 13h00 - 19h00 dark
👉 19th of october 2021 / DAY 13 👉 19:00 : took dailies back and added in editing timeline.
👽Calmag 2 ml/3L + 👽 Acti-Vera 2 ml/3L 👽Bio-Grow 1.8 ml/3L 👽Bio-Heaven 2 ml/3L 👽Terra Aquatica Root booster (GHE) 15 ml/3L /// 😇3 L. p.h. 6.0 EC : 09 degree 23,3°
👻👻👻👻 /// The moovie (quick green) star IS UNFORTUNATLY NOT the QUICKEST Quick one I have, completly the opposite, she is definitly the slowest to grow (so I will take more time to shoot to have something more "spectacular" to show)👻👻👻👻
👉 20th of october 2021 / DAY 14 👉 13:00 : took dailies back and added in editing timeline.
19h00 : 👽Calmag 2 ml/3L + 👽 Acti-Vera 3 ml/3L 👽Bio-Grow 1.8/2.0 ml/3L 👽Bio-Heaven 2 ml/3L 👽Terra Aquatica Root booster (GHE) 15 ml/3L /// 😇3 L. p.h. 6.0 EC : 1.0 degree 24.2°
Likes
16
Share


@Ensign420
Follow
Introduction - Week 14|07 Summary -
Ensign's log, stardate 9437.65,
Great week of growing! Wow what a good week!
Growth in the main tent has all around been incredible!
Submitted my first submission to the Global Grow Cup! Filmed a video of the solo cup container (marked with the ticket/order number) that will be used for the competition. Also had to fill and prove the solo cup holds 2 cups of soil. Now I need to root a clone (for the first time), transplant her into this cup, and submit my 2nd entry before the 30th of this month.
As far as my first attempt at cloning, have already begun the rooting process! Managed to take cuttings from 3 out of the 6 phenos in the main tent (the first cutting was also my first time topping). Soaked the cuttings for two days before planting them into Coco Coins. So far everything has gone surprisingly well! The clones are now rooting under the propagation dome with the vents fully closed. Will check for roots soon!
At the end of the week, growth was just raging! Was planning on flipping to flower in a week, but decided to begin the first week of flower next week! Thus this is the last week of veg. Plan to flip to 12/12 next Monday!
Onwards to next week!
[START OF WEEK 14|07]
==========================================================
Garlic Budder #1 - WEEK 14|07 - Full Veg Wk5
Garlic Budder #2 - WEEK 14|07 - Full Veg Wk2
Garlic Budder #3 - WEEK 07 - Full Veg Wk5
Garlic Budder #4 - WEEK 06 - Full Veg Wk4
06/03/24 → 06/09/24
This Week's Estimated Goals
----------------------------------------------------------------------------------------------
DLI: ~26 mol/m²/d
PPFD: ~400 μmol/m²/s
VPD: ~1.0 kPa
This Week's Meter Readings & Averages [Lights On: 16:00 - 10:00]
----------------------------------------------------------------------------------------------
DLI: 24.56 mol/m²/d
PPFD: 379 μmol/m²/s
VPD: 0.91 kPa
Soil %: [32.7, 37.6, 37.9, 34.1]
==========================================================
Day 01 - Monday - 06/03/24 - Total Days: 098
-----------------------------------
Daily Averages [~23:00]
- Temps: 80.7°F [27.1°C]
- Humidity: 74.4%
- VPD: 0.90 kPa
- Soil %: [31, 34, 39, 35]
-----------------------------------
- [09:57]: Quick morning check!
--- #1 is looking a bit droopy, but almost lights off (at 10:00) so not concerned.
--- Nice! Mainly wanted to check on #4 and she is looking great! She’s perked back up and looking good!
- [23:08]: Evening check.
--- Wow! It’s a jungle in here!
--- #1 has gotten too big? Nah!? Keep on growing girl!
--- #2 is growing and definitely getting bigger! Growth just looking really weird.
--- #3 has continued to get larger and is looking quite uniform in growth!
--- #4 is growing and looking perky again!
--- Even the original #1 and #2 phenos (in the back) are looking good!
--- Wow! #4 is really getting close to the light.
- [23:14]: Checked down both fill tubes.
--- Both reservoirs were completely dry!
- [23:27]: Checked the Ecowitt soil moisture sensor data:
--- 30% - [CH01 EB1 - Garlic Budder #1]
--- 34% - [CH02 EB2 - Garlic Budder #2]
--- 39% - [CH03 GFP - Garlic Budder #3]
--- 32% - [CH04 FPT - Garlic Budder #4]
- [23:32]: Poured 4 cups of distilled water down EB1’s fill tube.
--- Poured 2 cups of distilled water down EB2’s fill tube.
- [23:38]: Checked the humidifiers.
--- Refilled the 4X4’s humidifier with distilled water.
--- Tomorrow, plan to defoliate and start cloning for the first time!
--- Going to take multiple cuttings from both #1 and #4 for sure, but still deciding on the rest.
--- Getting hyped!
Day 02 - Tuesday - 06/04/24 - Total Days: 099
-----------------------------------
Daily Averages [~23:00]
- Temps: 81.4°F [27.4°C]
- Humidity: 74.3%
- VPD: 0.93 kPa
- Soil %: [29, 35, 38, 32]
-----------------------------------
- [11:59]: Time to film the first entry for the Global Grow Cup!
--- Going to be using BuildASoil 3.0 potting soil.
--- Filming the video using a stand and my phone.
--- This video is mainly to establish the container that the plant will be grown in. Also to prove that the container is a 16oz container and that it can hold 2 cups of soil.
--- The ticket (order) number also had to be written on the cup.
- [12:36]: Done!
--- The video had to be done in one continuous shot with no edits (my original submission does not have the logo).
--- There was also a photo that needed to be shot which shows the cup filled with 2 cups of soil (just like the video, the original image submission did not have the logo).
--- I think I did everything correctly, but also sent an email for verification of submission and validation.
--- Getting hyped!
--- [*smokes a bowl]
--- Going to defoliate today along with for the first-time, going to take cuttings for clones!
--- After a bit of online research, decided to split the cloning process into two days.
--- Today going to take cuttings and will soak them in a solution of aloe for 24hrs. Afterwards will change the water out and use straight distilled water.
--- Then in a couple days, plan to transplant into coco plugs (Coco Coins) for rooting.
--- For optimal results, also be using a rooting hormone (Clonex).
--- Well.. Here goes nothing!
- [17:01]: Evening check.
--- Wow! #1 is looking huge! Her main top is stretching above the lower canopy which is continuing to bush out.
--- #2 is growing along. Growth is gnarly and a bit droopy, but she’s getting taller!
--- #3 is looking great! Still a bit small, but she is continuing to get larger.
--- #4 looks like she needs a watering.
--- Both plants in the back are also looking surprisingly great as well!
- [17:05]: Checked down both fill tubes.
--- Both reservoirs were completely dry!
--- As far as today's defoliation, going to leave #2 and #3 alone and will focus my defoliation and cloning on the rest of the plants.
--- This will be my first attempt at cloning, also going to try topping for the first time today.
--- No pressure Ensign. What can possibly go wrong right?
- [17:27]: Time to start the cloning and defoliation process!
--- Filled a measuring cup with 3 cups of distilled water.
------ Added 3/4tsp of Horticultural Aloe
------ Added 1 more cup of distilled water
--- Mixed the solution and poured an even amount into three separate solo cups.
--- Made sure to mark two of the cups (#1 and #4). The unmarked one will be for any other clones from amongst the 6 phenos (if any at all).
- [17:43]: Time to top and defoliate #1!
--- Using a pair of brand new trimmers (AC Infinity),
--- Gently cut the main stalk to even out the canopy.
--- Then trimmed and cleaned most of the nodes leaving the top node or two.
--- Also trimmed the leaf fingers a bit before placing the top cutting into the cup of aloe solution.
--- Now for the rest of the cuttings!
--- [~45 minutes later]
- [18:32]: Managed to finish defoliating and cutting the rest of the clones.
--- Took two more lower cuttings from #1 (3 clones total).
--- Took 3 lower cuttings from #4
--- While defoliating, decided to try and clone the original #2 pheno as well. Took 4 small cuttings.
--- Similar to the top cutting, trimmed and cleaned each lower node for each cutting before placing them into the cups.
--- Before finishing up the 2nd cutting, I noticed the first cutting (the top cut that was also trimmed) was drooping.
--- So I did not trim and the leaf fingers for the other cuttings.
--- In total there were 10 cuttings taken for potential clones.
--- My main focus was to take cuttings and to clean up all the lower growth from both #1 and #4.
--- Defoliated and cleaned up the back original phenos as well (also trimmed back the cover crop).
- [18:35]: Temporarily placed the cuttings onto the floor of the 4x4 tent.
--- Took the trimmings (about 3 cups) and spread them onto the top mulch of #1 and #2.
--- Time to set the environmental controls for the 3x3 veg tent.
- [18:43]: Within the AC Infinity App,
--- For the Veg Tent [3x3] controller,
--- Adjusted the 'Vegetative [18/6]' Schedule for the grow light.
------ Set the Mode to ‘On Mode’
------ Set the START/END times to 04:00PM/10:00AM
------ Set the MAX to 1
--- The IonBoard S33 is now utilizing around 60.8W (at intensity 1 out of 10).
--- Adjusted the 'Vegetative [18/6]' Schedule for the exhaust fan.
------ Increased the Humidity’s HIGH trigger value from 81% to 87%
--- Adjusted the 'Vegetative [18/6]' Schedule for the humidifier.
------ Decreased the VPD target value from 1.5kPa to 0.8kPa
- [18:52]: Moved the cuttings into the 3x3 veg tent.
--- It begins! I think.
--- Going to let these cutting drink some aloe for a day before switching to straight distilled water.
--- Hmm. Could be the white floor of the 3x3 veg tent, but have noticed the S33 has a whiter spectrum whereas the FC-6500 seems to be warmer in color.
--- Anyways,
- [18:58]: Poured 4 cups of distilled water down EB1’s fill tube.
--- Poured 2 cups of distilled water down EB2’s fill tube.
- [19:06]: Filled a pump sprayer with 5 cups of distilled water.
--- Focused mainly on the straw mulch of #4.
--- But also misted the straw mulch for the rest of the plants a bit.
- [19:12]: Checked the humidifiers.
--- Refilled the humidifiers with distilled water.
- [19:44]: Going to be using Clonex rooting gel before planting the cuttings into Coco Coins (pre-soaked with microbes and aloe). But before that begins, going to transfer the Clonex gel into a squeeze bottle.
--- Gently peeled back the seal on the original Clonex bottle. Just enough make a tiny opening,
--- Then slowly and carefully poured the gel into an empty squeeze bottle.
--- Also removed the sticker from the original bottle and placed it onto the new one.
- [19:54]: Perfect!
--- Instead of applying the gel to the cutting, going to be applying the gel to the Coco Coin.
--- This squeeze bottle will make applying the gel a lot easier.
--- Will take PPFD readings tomorrow.
--- Also will change out the aloe solution to distilled water.
--- I really hope I didn’t screw things up before they could even begin.
--- Don’t die on me ladies!
--- Please.
Day 03 - Wednesday - 06/05/24 - Total Days: 100
-----------------------------------
Daily Averages [~23:00]
- Temps: 81.9°F [27.7°C]
- Humidity: 75.5%
- VPD: 0.90 kPa
- Soil %: [29, 36, 38, 36]
-----------------------------------
- [09:40]: Quick morning check!
--- #1 is looking a bit droopy, but looking okay. Topping is a high stress technique so going to take some time to recover. Don’t plan on flipping the main 4x4 tent to flower for a good week or so which should be enough time.
--- #4 looks great! The defoliation seems to have no effect on growth. Nice!
- [09:41]: Also quickly checked on the 3x3 veg tent,
--- Nice! The cuttings are looking great!
--- No yellowing and they all seemed to have turned up towards the light.
--- So far so good!
- [22:53]: Evening check.
--- #1 is continuing to dominate this grow! She has spread wide and looking incredible!
--- #2 is looking gnarly, but getting there.
--- #3 is getting larger! But still a runt. By far, her leaves are the darkest of the bunch, but she is still growing!
--- #4 looks happy and growing along beautifully! Wow!
- [22:55]: Checked down both fill tubes.
--- Both reservoirs were completely dry!
- [22:59]: Poured 5 cups of distilled water down EB1’s fill tube.
--- Poured 2 cups of distilled water down EB2’s fill tube.
- [23:05]: Checked on the 3x3 veg tent.
--- Ooo yea! The cuttings are still green! Nice!
- [23:07]: Took PPFD readings.
--- The cuttings were around 121 μmol/m²/s which gives a DLI of 7.84 mol/m²/d
--- Nice! These levels are on the lower range for seedlings (~100-300), perfect! I think.
- [23:14]: Swapped the aloe water out to straight distilled water.
--- Going to let these cuttings soak for one more day before planting.
--- Please don’t die girls!
- [23:15]: Checked the humidifiers.
--- Refilled the humidifiers with distilled water.
--- Ooo yea!
--- Tomorrow is the big rooting day!
Day 04 - Thursday - 06/06/24 - Total Days: 101
-----------------------------------
Daily Averages [~23:00]
- Temps: 81.9°F [27.7°C]
- Humidity: 75.2%
- VPD: 0.91 kPa
- Soil %: [32, 38, 38, 34]
-----------------------------------
- [16:20]: Evening check.
--- #1 is a bit droopy, but growth is looking green and healthy.
--- #2 is looking bigger! She’s also looking sort of droopy.
--- #3 is growing along nicely! Looking good girl!
--- #4 is looking great! A bit droopy but plan to water today.
- [16:23]: Checked down both fill tubes.
--- EB1's reservoir still has some water.
--- EB2's reservoir was completely dry!
- [16:23]: Checked the Ecowitt soil moisture sensor data:
--- 28% - [CH01 EB1 - Garlic Budder #1]
--- 36% - [CH02 EB2 - Garlic Budder #2]
--- 37% - [CH03 GFP - Garlic Budder #3]
--- 30% - [CH04 FPT - Garlic Budder #4]
- [16:30]: Using a pump sprayer,
--- Misted the straw mulch of #4 with 6 cups of distilled water.
--- Focused mainly on the straw mulch.
--- Also misted the straw mulch of #3 (in the grassroots fabric pot) a bit.
- [16:43]: Poured 5 cups of distilled water down EB1’s fill tube.
--- Poured 3 cups of distilled water down EB2’s fill tube.
- [16:52]: Checked the Ecowitt soil moisture sensor data:
--- 56% - [CH01 EB1 - Garlic Budder #1]
--- 44% - [CH02 EB2 - Garlic Budder #2]
--- 40% - [CH03 GFP - Garlic Budder #3]
--- 45% - [CH04 FPT - Garlic Budder #4]
- [17:01]: Took general PPFD readings.
--- #1 was around 379 μmol/m²/s which gives a DLI of 24.56 mol/m²/d
--- #2 was around 333 μmol/m²/s which gives a DLI of 21.58 mol/m²/d
--- #3 was around 293 μmol/m²/s which gives a DLI of 18.99 mol/m²/d
--- #4 was around 378 μmol/m²/s which gives a DLI of 24.49 mol/m²/d
- [17:09]: Took the weekly height and light distance measurements.
--- #1 was about 21" tall.
--- #2 was about 13.5" tall.
--- #3 was about 9.5" tall.
--- #4 was about 19.25" tall.
--- Hmm..
- [17:19]: Adjusted the right oscillating fan a bit.
--- Re-angled the CloudRay S6 oscillating fan upwards. Been noticing that the air has been hitting the tops of the plants so easing off a bit (#1 is still getting hit, but she’s huge so not too worried).
- [17:23]: Back to the measurements!
--- #1 was about 9.5" away from the grow light.
--- #2 was about 17" away from the grow light.
--- #3 was about 17.5" away from the grow light.
--- #4 was about 11.5" away from the grow light.
- [17:46]: Checked on the 3x3 veg tent.
--- Cuttings are still green! They do look a bit droopy but no signs of yellowing.
--- Okay!
- [17:55]: Time to begin the rooting process!
--- For my first attempt at rooting, going to be using Coco Coins pre-soaked in saponins, microbes and aloe.
--- To further help with rooting, going to also be using Clonex rooting gel.
--- Filled a measuring cup with 4 cups of distilled water.
------ Added half of 1/64tsp of Quillaja Saponaria Extract [60]
------ Added 1/16tsp of Horticultural Aloe
------ Added 1/8tsp of Mycrobe Complete
--- Mixed the solution thoroughly.
--- Time for the Coco Coins!
--- 10 cuttings means 10 Coco Coins.
- [18:09]: Dropped 10 Coco Coins into the measuring cup.
--- The coins immediately started to expand.
--- A bit too much.. Oops!
--- Poured the solution and Coco Coins into a pitcher.
--- Added 2 cups of distilled water to the solution (now at 6 cups).
--- Great! The coins are pretty much fully expanded, but going to wait a bit longer to fully saturate each coin.
--- [~20-30 minutes later]
- [18:42]: Great!
--- Took the seedling and flood tray from the AC Infinity propagation dome and placed all 10 Coco Coins into the slots.
--- Gave each Coco Coin a quick shake to remove excess solution. The coins were not dripping with solution but still pretty saturated.
--- Arranged them into 3 groups with the cuttings in mind.
--- Also tried to keep the pre-made holes intact.
--- Time to inoculate the Coco Coins!
- [18:54]: Using a squeeze bottle,
--- While keeping the nozzle from making contact with the coco, gently filled each pre-made hole with Clonex rooting gel. Just enough gel to fully cover the hole of each coco coin.
- [19:00]: Time to plant the cuttings!
--- Gave each cup a misting of distilled water. Focused on wetting the top growth with water.
--- Okay!
--- To avoid mixing cuttings up.
- [19:01]: Starting with the original #2 pheno cup,
--- For each cutting,
--- Using a pair of clean trimmers, made a final 45° cut about 1/2" from a bottom node.
--- Then stripped away and scared the protective membrane below the node before planting.
--- Made sure the node was about 1/2" below the surface of the coco.
--- To help with planting, while inserting each cutting, gave the Coco Coin a gentle squeeze to loosen the coco. This also helped to ensure the coco and gel was in good contact with the cutting.
--- Once the cutting was planted into the Coco Coin, made sure to place back in the same spot (made sure to keep the cuttings in their groupings).
--- Once a cup was complete, made sure to keep the label with the group.
--- Re-misted the top growth as needed to keep it wet.
--- Also wiped the trimmers with isopropyl alcohol in between cuttings (plan to use 10% bleach solution for next time).
--- Repeated this process until all 10 cuttings were cut, planted, and in the tray.
--- The coco coins fit perfectly into the tray and don’t reach the bottom. Nice!
--- The bottom air gap is important.
--- Poured a bit of distilled water through one of the empty slots into the bottom of the tray. Just enough to fill the bottom of the tray, but not enough to reach any of the Coco Coins (~1/4cup).
- [19:35]: Placed the propagation tray with cuttings into the 3x3 veg tent.
--- Placed the first layer of the propagation dome on before giving the sides a misting of distilled water.
--- Also sprayed the top of the propagation dome before covering the cuttings.
--- Vents are all fully closed.
- [19:40]: Placed the bar lights onto the top of the dome before configuring the controller.
------ Set the START/END times to 04:00PM/10:00AM
------ Set the bar light’s intensity to 2 (out of 10).
--- Also made sure the propagation light controller’s time was in sync with the Controller 69 Pro.
- [19:47]: Took PPFD readings.
--- The cuttings were around 136 μmol/m²/s which gives a DLI of 8.81 mol/m²/d
--- The PPFD levels are similar to the floor.
--- Perfect!
--- Going leave the IonBoard S33 on during this rooting process.
--- Will check back tomorrow to cycle the air under the dome.
- [19:56]: Checked the humidifiers.
--- Refilled the humidifiers with distilled water.
- [20:17]: Quick night check!
--- Ooo yea! Growth is raging and looking perky!
--- Mainly checked on #1 and #4 which were looking incredible!
--- Keep on growing ladies!
Day 05 - Friday - 06/07/24 - Total Days: 102
-----------------------------------
Daily Averages [~23:00]
- Temps: 82.7°F [28.2°C]
- Humidity: 76.2%
- VPD: 0.89 kPa
- Soil %: [37, 40, 38, 35]
-----------------------------------
- [10:03]: Decided to increase the ambient temp in the 3x3 veg tent.
--- Within the AC Infinity App,
--- For the Veg Tent [3x3] controller,
--- Adjusted the 'Vegetative [18/6]' Schedule for the heater.
------ Increased the Temp target value from 78°F to 82°F
--- Hopefully this will help to keep the veg tent at a more consistent temp.
- [22:26]: Evening check.
--- Ooo yea! The garden is looking incredible!
--- #1 is looking perky and just bushing out! Wow!
--- #2 is getting big! Growth is weird and leaf fingers are huge! Just going to let her grow.
--- #4 is looking happy and growing along like a champ! Nodes are starting branch out and she is turning into a bush!
- [10:28]: Checked down both fill tubes.
--- Both reservoirs were completely dry!
- [22:33]: Poured 5 cups of distilled water down EB1’s fill tube.
--- Poured 3 cups of distilled water down EB2’s fill tube.
- [22:40]: Checked on the propagation dome (inside the 3x3).
--- Ah yea! Looking great ladies!
--- Lifted the top of the dome to let some fresh air in for a bit.
--- Wow!
--- Leaves still look nice and green!
--- So far everything looks great!
--- Just going to continue on!
- [22:53]: Checked the humidifiers.
--- Refilled the humidifiers with distilled water.
- [11:01]: Decided to adjust the humidifier for the 3x3.
--- Within the AC Infinity App,
--- For the Veg Tent [3x3] controller,
--- Adjusted the 'Vegetative [18/6]' Schedule for the humidifier.
------ Increased the VPD target value from 0.8kPa to 1.5kPa
--- The higher VPD level will essentially turn the humidifier off.
--- I won’t be needing the humidifier for a good week so might as well save the water.
Day 06 - Saturday - 06/08/24 - Total Days: 103
-----------------------------------
Daily Averages [~23:00]
- Temps: 81.6°F [27.6°C]
- Humidity: 74.9%
- VPD: 0.91 kPa
- Soil %: [35, 40, 37, 31]
-----------------------------------
- [07:40]: Quick morning check!
--- #1 and #4 are looking perky and happy!
--- Also checked on the propagation dome,
--- All cutting still look green! Hyped!
- [20:02]: Evening check.
--- Wow the garden is raging with growth!
--- #1 has blown up! She has clearly recovered and growth is ramping up again!
--- #2 is stretching upwards!
--- #3 is now the smallest of the 4, but still getting larger!
--- #4 is looking incredible! Wow! Growth looks perky and happy!
- [20:05]: Checked down both fill tubes.
--- Both reservoirs were completely dry!
- [20:10]: Poured 6 cups of distilled water down EB1’s fill tube.
--- Poured 2 cups of distilled water down EB2’s fill tube.
- [20:16]: Checked the Ecowitt soil moisture sensor data:
--- 35% - [CH01 EB1 - Garlic Budder #1]
--- 40% - [CH02 EB2 - Garlic Budder #2]
--- 36% - [CH03 GFP - Garlic Budder #3]
--- 27% - [CH04 FPT - Garlic Budder #4]
- [20:19]: Using a pump sprayer,
--- Misted the straw mulch of #4 with 5 cups of distilled water.
--- Focused mainly on the straw mulch.
--- Also misted the mulch of #3 a bit (in the fabric pot).
- [20:27]: Checked propagation dome (in the 3x3),
--- To cycle the air under the dome, lifted the top off for a bit.
--- Ooo yea! Everything is still green and looking great!
--- Keep on rooting ladies!
--- Oops!
- [21:45]: Checked the humidifiers.
--- Refilled the humidifiers with distilled water.
Day 07 - Sunday - 06/09/24 - Total Days: 104
-----------------------------------
Daily Averages [~23:00]
- Temps: 81.5°F [27.5°C]
- Humidity: 74.8%
- VPD: 0.91 kPa
- Soil %: [36, 40, 37, 36]
-----------------------------------
- [08:18]: Quick morning check!
--- Nice! The main tent is looking great! #1 and #4 are both raging with growth!
--- Checked on the propagation dome (inside the 3x3) and the clones are still looking green!
--- Wow! Everything is going almost too well! Just keep on growing!
- [19:08]: Evening check.
--- Garden is just exploding with growth! Seems everyone has fully recovered from the defoliation and topping!
--- Wow #1 is bushed out and looking incredible!
--- #2 is growing really starting to get large! Growth still is funky, but stoked none-the-less.
--- #3 is starting to fill in the pot! Getting larger!
--- Wow! #4 is getting taller and looks healthy and green!
- [19:12]: Checked down both fill tubes.
--- Both reservoirs were completely dry!
--- Wow the canopy is really starting to get taller and closer to the light. May need to raise it up soon.
--- Absolutely surprised how low the light levels have been throughout this entire cycle. Barely moved the light and have not increased the intensity past 2 (out of 10). Less is really more.
--- Anyways!
- [19:18]: Checked the Ecowitt soil moisture sensor data:
--- 36% - [CH01 EB1 - Garlic Budder #1]
--- 41% - [CH02 EB2 - Garlic Budder #2]
--- 37% - [CH03 GFP - Garlic Budder #3]
--- 34% - [CH04 FPT - Garlic Budder #4]
- [19:19]: Poured 6 cups of distilled water down EB1’s fill tube.
--- Poured 3 cups of distilled water down EB2’s fill tube.
- [19:24]: Checked propagation dome (in the 3x3),
--- To refresh the air, lifted the top off for a bit.
--- Sweet! Still green! Wow!
--- Using a spray bottle, misted the top growth with distilled water.
- [20:35]: Checked the humidifiers.
--- Refilled the humidifiers with distilled water.
--- Wow what a week!
--- Growth has been just insane in the 4x4 tent! All plants have fully recovered and have just exploded with growth.
--- I think it’s time to flip to flower!
--- Also, I’m absolutely baffled about how well the cloning process has been going.
--- So far no issues!
--- Not complaining, but just surprised. Keep on growing ladies!
--- If all goes well, should have fully rooted clones soon ready for transplanting (into solo cups of course).
--- Absolutely hyped for next week!
--- Maximum warp Ensign, Engage!
[END OF WEEK 14|07]
