


Likes
Comments
Share


@microgrowshow
Follow
This little one gallon girl is pushing along nicely. I'm shocked that aside from the yellowing leaves, which I believe was just a bit of a nitrogen deficiency, she seems to be the healthiest of all of my plants. My other 3 autos have had low soil pH issues recently, which has caused a nutrient buildup in my root system, but I think this girl has been blessed with that extra bit of runoff, and from also being watered daily, giving the roots no time to dry out. Loving the structure of these colas though, they're really filling out, and a lot more time to go! Excited to see what she'll bring to the scale :D

Likes
11
Share


@Newbie5648
Follow
Love this 1st grow. Even though its small.
Hope I got good weight out of this.
Smells great whenever I open my cupboard.
Cant wait for my next grow green gelato auto. 😁
Likes
22
Share


@GrowinHome
Follow
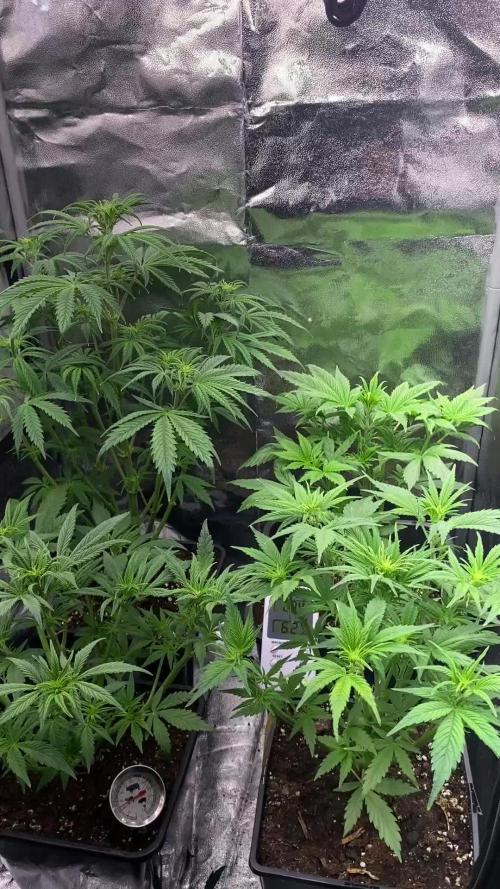
Most ladies are showing signs of flowering so today I will start counting the weeks.
Here u can also see my mutant/special ladies. They germinated a bit different from the others.
Day 3 of flower is showing some major progress‼️🙌🏽
I did NOT top any of these mutated plants. I only removed some very ugly growing leaves.
So everything u see on them is done by mother nature.



Likes
38
Share


@Snakeking
Follow
Because of my area and situation i have height problem . Lets give scrog technique a chance

Processing
Likes
16
Share


@HisHope
Follow
2/26 Week 9 /3 flower
Update:
After a meeting of the minds we have decided to give Chiana her own feed schedule as the FF7 just need other than the FF5.
Dropping PK temporarily to 1ml/gal due to slightly too dark green leaves but upping CocoTek to 7 ml give her plenty of good stuff to work on.
2/28
HPS back online
Height set slightly on the high side for both lights to better disperse the light pattern.
Nuets continue to be the focus looking for her sweet spot. Leaves on this strain run dark green anyway so putting PK up slightly and monitoring.
IN PPM 800 OUT PPM 900
Seems all is well
Buds n' smells
Buds are going to be very white with a majority fuel/chem smell- kind of like some Skunk1 strains just a wild guess
2/29
Pics
Buds beginning to cone building nicely
Increasing PK slightly for 800ppm
runoff at 25% for one time mini-flush

Likes
7
Share


@Bluemels
Follow
Tag 112: In 1 Woche möchte ich die Gorilla ernten. Leider habe sich auch ein paar Pollsäcke gebildet 😱


Likes
3
Share


@MicroHidroGrow
Follow
Día 16.
Ayer en el cambio de solución me olvidé la bomba desenchufada y las plantas estuvieron medio caidas hoy. Me di cuenta a tiempo y solamente tuve que sacar 6 hojas grandes que sufrieron mucho y cayeron. Luego prendí la bomba continua, bajé .un poco la intensidad de luz, y en un par de horas las plantas ya estaban mucho mejor. Esta semana agregué big bud de advance y reduje a la mitad el bud blood. Compré un medidor de ph y TDS, pero tengo que comprar baterías. Hasta ahora navego en ciego confiando en feeding y la verdad que no me ha fallado. Hice un LST para ocupar mejor el lugar, exponer más otras ramas y emparejar la altura de las plantas. Las flores han empezado a aparecer y parecen de un tamaño respetable.
Día 19. Las plantas se adaptaron muy bien al LST. Ya están empezando a formarse las flores. Por suerte las veo muy bien y estoy contento con cómo vienen. El haber defoliado bastante hizo que las plantas tomen menos agua y ahora el depósito de 20 litros me alcanza bien. Estoy muy ansioso, pero siento que va pasando muy rápido el tiempo.
Likes
12
Share


@NONSENSE
Follow
Good afternoon everyone!
One more week is gone of the flowering.
the plant looks beautiful, the buds become heavier every day.
I still only use Hesi sponsored nutrients with every watering.
I don't overdose on nutrients and follow the weekchart I got from Hesi.
genetics is good old school from Neville's seed bank.
It is also a normal seed, not femenized.
The light schedule is 12/12 ,
feeding every day( I try to handle the cocos always wet)
next week is the last flowering, after that I will clean the plant and will harvest it.
Good luck, everyone

Likes
3
Share


@Carpangler
Follow
Ahoj.Začíná nám druhý týden květu.Je to prales.Ohýbám zatím listy pod sebe.Ať to roste,přátelé. :)
Processing
Likes
15
Share


@medicalcannabelfast
Follow
These 2 LSD-25 are growing well ,allow the only resemblance to each other they have is their colour and smell .
They are nearing the end and I can’t wait to try this strain :)


Likes
4
Share


@Felixcommi
Follow
Average stem height of the big ones are 36 inches, but the mishap past week with the lights might have stressed em a bit and caused some stretching. There was also a humidity issue for a few hours, which could be the culprit for the stretching. Two stems are pushing 40 inches. However, there are no signs of light or heat stress, despite the stems getting within inches of the leds. We shall see...
I’m also battling a cold Canadian winter where it hit -42 Celsius today. Plants are in a cold basement in an old house. Had to bring out an extra space heater. Can’t get the temp in my tent above 20. Tent is too packed to introduce a stand up heater. Maybe I’ll convince the plants that fall is coming and they need to bud like crazy.


Likes
30
Share


@CanadianFillmore
Follow
Welcome growfessors to another weekly update on the outdoors grow! LSD and Green Crack are budding nicely, with LSD slightly a head. Both ladies got fed Gaia Green power bloom and they got a big drink of water.
Thanks for stopping by growfessors 👽🌳💚

Likes
8
Share


@sellem
Follow
Flowering is well under way!
one of the Banana Purple Punches is already kind enough to start purpling!
Rootjuice has been faded out to 0.
Watering on 13/03 with 4 ml/L of terra bloom, 1,4 EC, 1.5L each per plant
Watering on 16/03 with 5 ml/L of terra bloom, 1.6 EC, 1.5L each per plant
Defoliated today, hopefully for the last time. Mainly the insides of every plant where it gets too bushy.
i used the trellis net in the early week of veg just to help me spread the branches out, now im unsure of what to do with it (continue, dont continue etc) since im pretty happy with how the plants turned out training wise. it still functions to hold my humidity sensors i can check over my feed so its not "useless" lol
Likes
149
Share


@CBD_Sweden
Follow
Hi all the happy people here in GrowDiaries.
This is my second cultivation ever and it will be fun to try a bigger space than my closet grow.
First, I'm just going to say I'm done with the construction of my new growroom.
I put some pictures on the construction here in week one.
The room is 2.14 meters by 1.7 meters and has a ceiling height of 2 meters.
It provides a floor area of 3.6 square meters.
I use a 54 Watt Lightwawe T5 for germination and 2 Pcs 400 Watt HPS lamps.
I have a channel fan that replaces the room air about 40 times an hour to get a comfortable theme in the room, the air enters a fresh air intake from the outside.
The air is purified through a carbon filter to then leave the room to the rest of the basement.
Then I use that heat to heat the rest of the basement.
I will use 8 pcs 15 liter Autopots to grow with and a 100 liter water tank that supplies the pots of water and nutrition.
I will grow completely organically in soil and will watercure my buds to get the best possible medicine for me.
But there are no cultivation rooms to be displayed here, so I continue with what is most important.
Today I have put my seeds in my moisture dome and hope the seeds have germinated within a few days.
I am very excited to see how the new growroom will work and how this Blue cheese Auto from Royal queen seeds will turn out.
Blue Cheese automatic cannabis seeds are a cross of Blueberry Automatic and Cheese Automatic that has been perfected over five years of breeding and careful selection. The result is a feminized, autoflowering strain with superior yield, flavor, and effects to either of its distinguished parent strains.
THC: 16%
CBD: Low
Yield Indoor : 325 - 375 gr/m2
Yield Outdoor: 60 - 110 gr/plant
Height Indoor: 40 - 70 cm
Height Outdoor: 60 - 110 cm
Flowering: 7 - 8 weeks
Harvest month: 9-10 weeks after planting
Genetic Background: Blueberry x Cheese x Ruderalis
Type: Sa 35% In 40% Ru 25%
Effect: Cerebral and uplifting
Climate: Mild
..............................................................................................................................................................................................................................................................................................................................................
Update 2017-08-15. All 4 seeds have germinated and planted in small pots inside the humidity dome.
I'm so glad it worked so well and now it's just hoping they'll start growing and become 4 big healthy girls :)
...............................................................................................................................................................................................................................................................................................................................................
Update 2017-08-16. I have mixed my own soil today. Its 40% sieved peat harrow H2-H4 0-30 mm, 45% sieved peat harrow H4-H6 0-30 mm. 5% sand and 10% of compost soil. And i use 15% of perilite and mix it all together.
................................................................................................................................................................................................................................................................................................................................................
Update 2017-08.20. Nr1 and 2 grow and thrive.
Number 3 just got rid of the seedpod and is folding out the sheets.
Number 4 is a bit shy and can only be seen if you look carefully into the soil.
.........................................................................................................................................................................................................................................................................................................................................
Update 2017-08-21. Nr 1 and 2 is doing well. Nr3 is trying to catch up and Nr4 is still shy.
--------------------------------------------------------------------------------------------------------------------------------------------------------------------------------------------------------
2017-08-23. Transplanted 2 girls from humidity dome and the small germinating pots to 15 liter autopots. The other 2 girls have to wait a little more before transplant to the autopots.
................................................................................................................................................................................................................................................................................................................................................................................
2017-08-27. The girls have settled in to there new home of the 15 liters autopot after a little transplant chock. Now the real week 1 starts for me and the girls.
--------------------------------------------------------------------------------------------------------------------------------------------------------------------------------------------------------
2017-08-28. New pic and movies.
---------------------------------------------------------------------------------------------------------------------------------------------------------------------------------------
2017-08-28. Nr3 is transplanted in 15 liter autopot.
-------------------------------------------------------------------------------------------------------------------------------------------------------------------------------
2017-08-29. New movie of the girls. Its no water for 3 days now for Nr1 and 2 so the roots develop more and match the plant above the soil. The temp controlled fan is awesome, its easy to set what temp you like to have in the room. Right now its 28 celcius. And humidity is 56%.
------------------------------------------------------------------------------------------------------------------------------------------------------------------------------------------
2017-08-29.
Hello to you who read my diary, I just want to say that I am pleased that you have chosen to check in with me and in my diary.
I just want to say that I do this for myself and for a steady flow of my medicine.
Everything you read and see in my diary is 100% honest and I will never distort or beautify anything here.
I document my crops so that I can learn from my mistakes and also to look back at those different crops.
I try to update with pictures every day and with text if something special has happened in the garden.
This is my strainhunt for the best medicine and the beginning of my journey with cannabis and the cultivation of it.
-----------------------------------------------------------------------------------------------------------------------------------------------------------------------
2017-08-30. Cleaned the room this morning, just vacuuming and cleaning with chlorine solution. Im testing the fan to control temp and humidity, it works great.
Added some pics with measurements and movie. Everything is looking great right now.
---------------------------------------------------------------------------------------------------------------------------------------------------------------------------
2017-08-31. New pics and videos.
---------------------------------------------------------------------------------------------------------------------------------------------------------------------------------
2017-09-01. New pics and videos. Gave each of the girls with 2 ml Alg-A-Mic, 4ml Bio-Grow, 4ml Bio-Heaven and 10 ml Formulex mixed in 2 liters of water.
I hope they like it :)
-------------------------------------------------------------------------------------------------------------------------------------------------------------------------------------------------------------------------------------------
2017-09-02. New pics and the girls liked the water and nutrients yesterday.
-------------------------------------------------------------------------------------------------------------
2017-09-03. New videos of the girls this morning. Nr1 and 3 looks great and nr 2 is looking a little funny, maby a little stressed.
Kl. 16.00. Did some defoliation on the girls. Added video.
Kl.. 23.00. New videos, defoliation and leaftucking.
-----------------------------------------------------------------------------------------------------------------


Likes
112
Share


@PEAKYPLANTERS
Follow
Hello, all grower brothers and sisters!
After a long wait, we are finally ready to show you all the finish of this harvest!
I shared a lot of content for you and I hope you enjoy it..
The growth of these plants has all in all been quite simple .... in comparison .... what they have been able to give me back .... is something extremely RARE
Between one phenotype and another they each took on a different color....but all extremely potent! Tight, solid buds that overflow with resin 😬😋 Just how I like them!!
my work combined with the scrog technique paid off and these fantastic lights meant that even the lower buds got the light they deserved ,But all this would not have been possible if I hadn't had good nutrients with me to enrich the soil at the right point! All without ever checking the EC of the ground 😉
Stay updated
Likes
156
Share


@StarLorr
Follow
Helloing 👋🏻friends and visitors.
Welclone to my Clone diary🙃
First and foremost, I want to wish you all an Happy New Year
Love, Health, Wealth and Harvest in abundance for 2024 and beyond!
Feeding:
Tue 26Dec: 3L each with nuts pH'd 6.5
Fri 29Dec: 3L each water with Monster K 3 grams per litre pH'd 6.5
__________________________
The end is soon, trichomes are almost all milky and spotted rare ambers,
Next feedings will be water with Flawless Finish and get them gals sweet and ready for the eventual chop-chop 😋😁
Thanks for stopping by, likes and comments are appreciated.
Keep on growin!
Keep on tokin!!!
😙💨💨💨💨💨
