Likes
Comments
Share
@Dunk_Junk
Follow
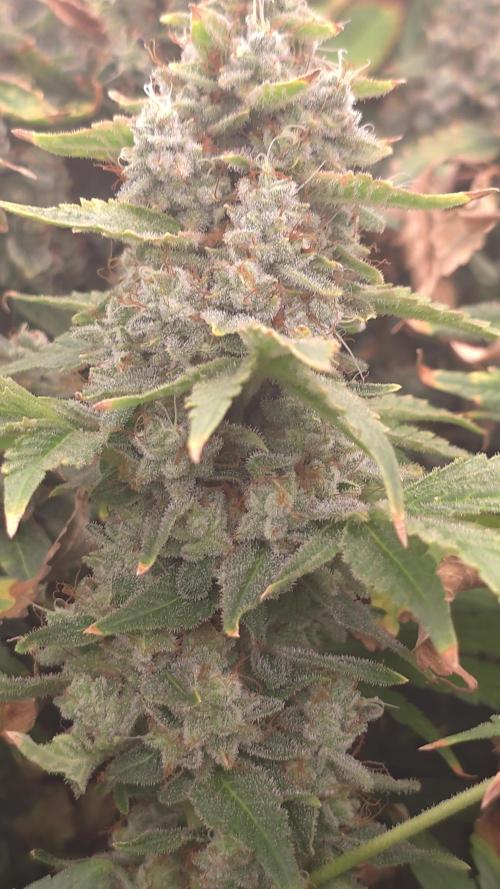
She dried out a little too much during the week. Lots of leaves turned brown too. I think she is done anyway, trichomes are all milky and the pistils are mostly brown. Based on that = harvest in 24h 💪
Likes
4
Share
@Ensign420
Follow
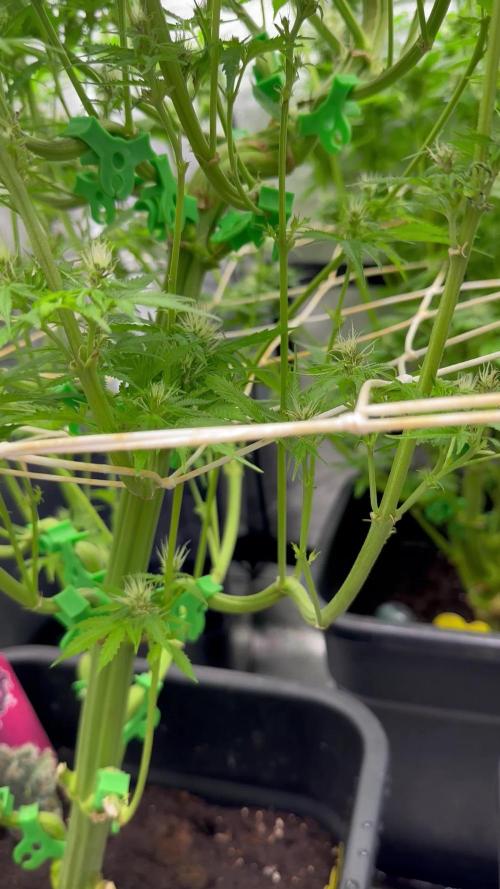
|»» LOG DISCLAIMER: Not intended as a grow guide. Grow log entries are usually posted 3 weeks later and are for my learning reference. ««| Introduction - Week 16 Summary - Ensign's log, stardate 17547.8, Wow what a great week in the garden! By the end of the week, the main tent has pretty much doubled in size! Upgraded the scrog frame and now have a second layer of netting about 14in above the original netting which is already filling in and looking incredible! The tent’s floor slightly flooded, but fixed it. Also trying Stash Blend for the first time! As for the veg tent. To preserve the genetics, started the mother plant cycling process and took more clone cuttings (which were rooting in Coco Coins by the end of the week). To make more room, also bonsaied all mother plants. The stretch is starting to slowing down and next week begins the first week of bloom! Ca-Caw! Let’s go! Onwards Ensign! [START OF WEEK 16] ========================================================== ---------- [ 4x4 MAIN TENT ] ---------- Heady OG BX1 #1 [Round4 ~Wk9] - WEEK 16 - Pre-Bloom [Stretch Wk2] TKO [Round2 ~Wk14] - WEEK 16 - Pre-Bloom [Stretch Wk2] ----------- [ 3x3 VEG TENT ] ------------ Garlic Budder OG#1 - WEEK 09 - Full Veg Garlic Budder OG#2 - WEEK 09 - Full Veg Gorilla Goat #1 - WEEK 09 - Full Veg Gorilla Goat #2 - WEEK 09 - Full Veg 08/04/25 → 08/10/25 This Week's Estimated Goals ---------------------------------------------------------------------------------------------- DLI: ~13 mol/m²/d PPFD: ~300 μmol/m²/s VPD: ~1.0 kPa This Week's Meter Readings & Averages ---------------------------------------------------------------------------------------------- Light On/Off: 19:00 - 07:00 | Wattage: ~326.5W [LV04] Distance From Canopy: ~31”, 27” DLI: ~15.60 mol/m²/d PPFD: ~361 μmol/m²/s VPD: ~0.69 kPa Soil %: [40.7, 47.0, 38.1, 56.6, 41.9, 42.7, 42.9, 43.9] ========================================================== Day 01 - Monday - 08/04/25 - Total Days: 113 ----------------------------------- Daily Averages ~[+01:00] - Temps: 83.6°F [28.7°C] - Humidity: 83.6% - VPD: 0.66 kPa - Soil %: [49, 37, 45, 60, 44, 43, 43, 45] ----------------------------------- - [+00:14]: Night check on the 4x4 tent. --- Holy Cannoli! Wow! These girls are in full stretch! --- Both cultivars have grown beyond the netting and have stretched beyond the (green) Vivosun’s CFM bars! Heady is a bit low on the left, but the canopy is pretty even and perky! --- Ca-Caw! Let’s go cuddies! --- Heady OG (BX1 #1) is starting off shorter than TKO, but am pretty confident that she’ll catch up. --- TKO is looking incredibly healthy! She’s the larger plant, but also in the smaller 20-gallon pot. Well she is 5 weeks older than Heady OG so makes sense. Regardless of the growth difference, absolutely stoked for this grow cycle!! - [+12:19]: Checked the Ecowitt soil moisture sensor data: ------------------ [ 4x4 MAIN TENT ] --------------- ------ 46% - [CH01 FT » G30 - Heady OG BX1 #1] ------ 37% - [CH02 FB » G30 - Heady OG BX1 #1] ------ 48% - [CH03 BT » G20 - TKO] ------ 62% - [CH04 BB » G20 - TKO] ------------------ [ 3x3 VEG TENT ] ---------------- ------ 41% - [CH05 BL » GR7 - Garlic Budder OG#1] ------ 44% - [CH06 BR » GR7 - Garlic Budder OG#2] ------ 40% - [CH07 FL » GR7 - Gorilla Goat #1] ------ 50% - [CH08 FR » GR7 - Gorilla Goat #2] --------- Veg: 38% - 45% | Flower: 45% - 55% --------- General: 30% [Dry] «| 45 - 60% [Moist] |» 70% [Wet] - [+00:14]: Checked the 3x3 veg tent. --- Ooo yea! The veg garden is looking incredible! --- All mamma plants are looking bushed out and beautiful! - [+00:37]: Super-cropped and bend the canopy down a bit. --- Lowered the canopy down a few inches. Really need to defoliate soon. The top growth is bushing out and getting really thick! --- Clones are also looking incredible and both are rotting along beautifully! Heady is going to make it and she is looking great! - [+00:38]: The cuttings are looking good for the most part. One is looking pretty droopy (damnit Ensign). --- Misted the cups with RO water. --- Think the RH may not be consistent enough and the cups might be drying out too quickly. - [+00:41]: Checked the humidifiers. --- Tanks are still full and no leaks found. --- Another day done! --- Okay! Since growth is raging upwards, decided to upgrade the scrog frame and plan to add a second layer tomorrow. --- Ahh yea! This grow is turning out to be an epic one! Day 02 - Tuesday - 08/05/25 - Total Days: 114 ----------------------------------- Daily Averages ~[+01:00] - Temps: 83.3°F [28.5°C] - Humidity: 83.3% - VPD: 0.67 kPa - Soil %: [49, 38, 47, 62, 41, 43, 43, 45] ----------------------------------- - [16:25]: Evening check on the 3x3 veg tent. --- Ooo yea! The clones are looking incredible! --- The cuttings still seem to be struggling. --- Hmm. - [16:27]: Misted the cups with RO water. --- Made a slight modification and wrapped the top of both cups with plastic wrap. --- Cut a slit from the middle to the edge. Misted the cup through the slit with RO water (2-3 sprays each). --- Then gently slipped the cups over each cutting. --- Also slightly misted each Coco Coin with RO water. --- Great! This should hopefully make a better seal and will keep the RH higher. I think. --- Anyways! --- The mother garden is vegging along beautifully! --- Growth is getting really bushy and need to do a heavy defoliation soon. - [16:56]: Checked the Ecowitt soil moisture sensor data: ------------------ [ 4x4 MAIN TENT ] --------------- ------ 48% - [CH01 FT » G30 - Heady OG BX1 #1] ------ 36% - [CH02 FB » G30 - Heady OG BX1 #1] ------ 47% - [CH03 BT » G20 - TKO] ------ 61% - [CH04 BB » G20 - TKO] ------------------ [ 3x3 VEG TENT ] ---------------- ------ 41% - [CH05 BL » GR7 - Garlic Budder OG#1] ------ 43% - [CH06 BR » GR7 - Garlic Budder OG#2] ------ 41% - [CH07 FL » GR7 - Gorilla Goat #1] ------ 49% - [CH08 FR » GR7 - Gorilla Goat #2] --------- Veg: 38% - 45% | Flower: 45% - 55% --------- General: 30% [Dry] «| 45 - 60% [Moist] |» 70% [Wet] - [19:03]: Night check on the 4x4 tent. --- Ooo yea! Wow these girls are stretching! --- Growth has clearly grown since the last checkup and getting taller! --- Ca-Caw! Let’s go ladies! - [19:14]: Wait. Uh-Oh! --- The tent seemed to have flooded slightly.. DAMNIT ENSIGN! ------ [» A FEW HOURS LATER.. «] --- Okay! Think I figured out why the tent flooded and how to fix it. --- The main reason was the new soil sensor which was probably not in proper contact with the soil. --- Fixed this by re-seating the unit. Also adjusted the drip ring a bit. --- Also poured about a cup of water straight onto new sensor. This should make the surrounding soil wetter and will hopefully fix the dry pocket. I think. --- For added redundancy, added additional trigger conditions to both Ecowitt WittFlows (TKO and Heady OG). - [23:45]: Adjusted the watering triggers for the auto-watering system for TKO. --- Changed the ON trigger from: --------- When CH3 soil moisture is under 45% ------------ Updated to: --------------- When CH3 soil moisture is UNDER 45% --------------- AND When CH4 soil moisture is UNDER 50% --- Changed the OFF trigger from: --------- When CH3 soil moisture is OVER 50% ------------ Updated to: --------------- When CH3 soil moisture is OVER 50% --------------- OR When CH3 soil moisture is OVER 50% --- Applied similar watering triggers for Heady OG. --- Changed the ON trigger from: --------- When CH1 soil moisture is under 45% ------------ Updated to: --------------- When CH1 soil moisture is UNDER 45% --------------- AND When CH2 soil moisture is UNDER 50% --- Changed the OFF trigger from: --------- When CH1 soil moisture is OVER 50% ------------ Updated to: --------------- When CH1 soil moisture is OVER 50% --------------- OR When CH2 soil moisture is OVER 50% --- Will check back daily to make sure the flooding has completely stopped. --- Well that pushed everything back a bit. --- Okay! Anyways, - [23:57]: Time to both build and install the second frame and netting. Let’s go! --- Got four 1in PVC corner fittings (local Lowes) along with four 1in PVC pipes (10ft long each). Also got more self-tapping screws. --- For the netting, using mason string. Usually use the braided nylon, but the twisted variant is a lot cheaper. --- To build the frame, I cut the 1in PVC pipes down to two different lengths: ------ [» x2 @ 42.5in «] – Front / Back ------ [» x2 @ 44in «] – Left / Right --- This makes the frame slightly thinner from left to right. --- Saving the extra piping for future projects. - [+04:04]: Okay! The new frame is built and looking sturdy! --- Did not use any glue and simply dry fitted each component. --- For easier fitting, smoothed the ends of each pipe with sand paper. --- Also marked each pipe to indicate the front, back, left, and right sides. --- For the fittings, used corner fittings and have open slot facing downwards. This way I can add the legs. --- After the frame was built, marked and drilled screws about 3in apart (self-tapping). Made sure to mirror the screw spacing on the opposite side. --- Time to weave the netting! - [+04:06]: Using some mason string, --- Started at one corner and strung all the horizontal lines. --- Double-wrapped each screw. --- After the horizontal lines were strung, continued and wrapped the vertical lines. - [+04:44]: Now that the frame is built and the netting fully weaved, time to install the frame! --- First the support poles. Cut and sanded more 1in PVC piping. ------ [» x4 @ 14in «] – Vertical Support - [17:56]: Installed the back support poles before the front ones. --- Temporarily removed the front CFM bar and had to raise the fan up a bit (was not easy, but got it done). --- Once the support poles were installed, gently set the new frame on top. - [+06:07]: Done and wow she’s a beauty! --- Well that took a bit longer than anticipated (also the flooding did not help), but glad the frame fit perfectly and the netting looks great! - [+06:12]: Checked the humidifiers. --- Tanks are still full and no leaks found. --- Ooo yea! What a day! Day 03 - Wednesday - 08/06/25 - Total Days: 115 ----------------------------------- Daily Averages ~[+01:00] - Temps: 83.9°F [28.8°C] - Humidity: 83.1% - VPD: 0.69 kPa - Soil %: [42, 54, 43, 60, 42, 43, 43, 45] ----------------------------------- - [+00:17]: Night check on the 4x4 tent. --- Ca-Caw!! Let’s go cuddies! Growth is looking beautiful and green! --- The second layer of scrog netting was not the easiest to install, but wow the garden is looking incredible! --- Both Heady OG and TKO are still stretching upwards with new nodes branching out everywhere! --- The canopy hasn’t reached the top net yet but hoping a few will make it. --- Regardless, absolutely hyped for this flower cycle! - [+00:23]: Checked the 3x3 veg tent. --- Looking beautiful in the veg garden! --- Wow the mothers have bushed out and have reached the grow light! - [+00:32]: Super-cropped and lowered the canopy --- The canopy is getting really thick! Plan to do a pretty heavy defoliation tomorrow. --- Clones look great and stoked that both Heady OG and TKO seem to be rooting along in the cups. Need to check the weights. Let’s go! - [+00:37]: Here are the starting initial watering ranges: ------ Heady OG BX1 » 261.4g → 301.2g ------ TKO » 240.9g → 301.4g --------- General Solo Range: [Dry] «| [Initial Cup Weight] + ~55-100g |» [Wet] --- All cups were last watered 5 days ago. - [+00:37]: Took the starting weight of both clones before watering, ------ Heady OG BX1 weighed 250.4g ------ TKO weighed 240.9g --- Oops! Probably should have watered earlier, sorry ladies! --- Stoked that Heady OG is clearly going to make it! Also good to know the soil dryback can be at least 10g from the initial pre-saturated weight. --- Anyways! --- While on a scale, --- Gently misted the straw mulch of both cups with RO water. --- Focused on the straw and sprayed as evenly as possible. --- Misted 10-20 sprays. Waited a moment, then misted again. --- Made sure to reference the watering weights. --- Repeated this process for both cups. --- There was no runoff. - [+01:08]: Took the saturated weight of both clones after watering, ------ Heady OG BX1 » 335.5g ------ TKO » 345.1g --- Marked the final wet weight on the back of each cup. Also marked the watering date on the front. --- Placed both phenos back into the tent. --- Cuttings are looking better! --- Glad that the slight modification to the cups helped to keep the moisture in (covered both with plastic wrap). --- Gently removed both cups and re-misted each with RO water (~2 mists). --- Carefully placed the cups back onto the cuttings. - [+01:21]: Checked the Ecowitt soil moisture sensor data: ------------------ [ 4x4 MAIN TENT ] --------------- ------ 34% - [CH01 FT » G30 - Heady OG BX1 #1] ------ 52% - [CH02 FB » G30 - Heady OG BX1 #1] ------ 39% - [CH03 BT » G20 - TKO] ------ 58% - [CH04 BB » G20 - TKO] ------------------ [ 3x3 VEG TENT ] ---------------- ------ 44% - [CH05 BL » GR7 - Garlic Budder OG#1] ------ 47% - [CH06 BR » GR7 - Garlic Budder OG#2] ------ 41% - [CH07 FL » GR7 - Gorilla Goat #1] ------ 46% - [CH08 FR » GR7 - Gorilla Goat #2] --------- Veg: 38% - 45% | Flower: 45% - 55% --------- General: 30% [Dry] «| 45 - 60% [Moist] |» 70% [Wet] - [+01:23]: Checked the humidifiers. --- Tanks are still full and no leaks found. Day 04 - Thursday - 08/07/25 - Total Days: 116 ----------------------------------- Daily Averages ~[+01:00] - Temps: 84.9°F [29.4°C] - Humidity: 82.0% - VPD: 0.75 kPa - Soil %: [32, 51, 37, 57, 42, 43, 43, 45] ----------------------------------- - [09:42]: Quickly checked on the propagation dome (in the 3x3 veg tent). --- Nice! Clones are both looking great! --- Heady OG is clearly recovering and looking better! --- Wow! TKO is looking incredibly healthy! Top growth has perky leaves with a few nodal growth sites starting to stretch. As far as cloning, she has been healthiest with no issues the entire way! --- Both Heady OG cuttings are looking beautiful and should be rooting. Plan to check for roots in a few days. --- Plan to do a pretty heave defoliation today. --- Also going to start the mother plant cloning process. - [17:12]: Evening check on the 3x3 veg tent. --- Mother garden is looking beautiful and the canopy is bushy with growth! --- Both Heady OG and TKO clones also look green and healthy! --- My main focus for today is the veg garden and the preservation of the genetics . --- Lots of work to do and time to also start the mother cycling process! --- This time, going to do a pretty heavy defoliation! --- Going to pretty much bonsai each mother while taking a few clones to preserve the genetics. --- Let’s go Ensign! - [17:58]: Filled a measuring cup with 1.5 cups of RO water. ------ Added 1/8tsp of Horticultural Aloe --- Mixed the solution and poured it straight into a clear solo cup. --- Repeated this process until 4 cups were filled. - [18:05]: Also marked each cup with the corresponding mother plant name. --- Time to defoliate and take the clone cuttings! - [18:07]: Using a pair of trimmers (AC Infinity), --- Bonsaied each mother plant. Removed over 75% of overall growth leaving several branches and nodes. - [19:44]: Done and wow what a difference! --- Pretty much removed all growth leaving a few nodal growth sites to heal. --- This is my first time going this heavy and am hoping that they recover. --- If this bonsai defoliation heals up with healthy growth, this can also be an alternative to a full plant cycling. --- Anyways! - [19:46]: To preserve the genetics, made sure to cut clone cuttings from each mother plant. --- To ensure successful rooting, took several cuttings. --- Made sure to clean each cutting by trimming most of the branches off leaving the top one or two nodes. --- Did not cut any leaf fingers and made sure to cut the tip of the stalk (about 45°) before placing into the cup of aloe solution. - [19:55]: Placed the fresh cuttings into the 3x3 veg tent. --- Have each cup resting on top of the corresponding mother plant. --- Okay! Let the two-day soak begin! - [20:00]: Mulched the trimmings in a paper bag. --- Since the bottom of the paper bags tend to decompose, have the bag in a used BuildASoil soil bag which should not decompose (these are meant for soil). --- Also added a bit of Kashi Blend and worm castings to the bottom of the bag. --- Back to the Heady OG cuttings! --- Gently removed the cups and misted the inside of each with RO water (~2 mists each). - [20:02]: Carefully placed the new cups onto the cuttings. --- Great! Plan to check for roots soon. - [20:08]: Checked the Ecowitt soil moisture sensor data: ------------------ [ 4x4 MAIN TENT ] --------------- ------ 31% - [CH01 FT » G30 - Heady OG BX1 #1] ------ 51% - [CH02 FB » G30 - Heady OG BX1 #1] ------ 35% - [CH03 BT » G20 - TKO] ------ 56% - [CH04 BB » G20 - TKO] ------------------ [ 3x3 VEG TENT ] ---------------- ------ 41% - [CH05 BL » GR7 - Garlic Budder OG#1] ------ 40% - [CH06 BR » GR7 - Garlic Budder OG#2] ------ 42% - [CH07 FL » GR7 - Gorilla Goat #1] ------ 44% - [CH08 FR » GR7 - Gorilla Goat #2] --------- Veg: 38% - 45% | Flower: 45% - 55% --------- General: 30% [Dry] «| 45 - 60% [Moist] |» 70% [Wet] - [20:12]: Checked the 4x4 tent. --- Ca-Caw! Ah yea! The garden is looking incredible and wow growth is raging! --- The tallest growth is just barely under the netting! --- Not much to do in the main tent now but to wait until the stretch slows down. --- Time to relax and let the grass grow! Let’s go! - [21:34]: Have an extra stainless steel rack and thought of a better way to hold the solo cups in the veg tent. --- The cups are balancing on the edge of the pots am concerned that they may tip over. --- Carefully too each cup out of the tent. - [21:36]: Placed the rack upside-down in the middle of the tent. --- Have the rack positioned on top of all 4 pots just above the center floor fan. - [21:39]: Gently placed each cutting cup onto the rack. --- The floor fan can easily still blow through the grid of the rack. Great! --- This should be way more stable while still allowing decent airflow. - [21:40]: Checked the humidifiers. --- Tanks are still full and no leaks found. Day 05 - Friday - 08/08/25 - Total Days: 117 ----------------------------------- Daily Averages ~[+01:00] - Temps: 84.5°F [29.2°C] - Humidity: 82.5% - VPD: 0.72 kPa - Soil %: [32, 50, 30, 53, 40, 42, 41, 42] ----------------------------------- - [23:02]: Night check on the 4x4 tent. --- Ahh yea! The garden is thriving! --- Both Heady OG and TKO are still stretching upwards and the canopy is getting dense! --- Wow! TKO has reached the top netting! Heady OG is just under the top netting. --- Ca-Caw! Let’s go ladies! - [23:11]: Checked the 3x3 veg tent. --- The veg garden is looking great! --- The bonsaied mother plants are still recovering from the heavy defoliation. But growth is looking a lot better than I would expect from such a large biomass reduction. Nice! --- Cuttings are looking great as well! - [23:13]: Time to swap the aloe water out! --- Replaced each solo cup with a clean one filled with fresh RO water (1.5cups). --- Plan to start using the propagation dome soon! --- Going to let these soak for another day before transplanting into Coco Coins for rooting. - [+02:05]: Quickly checked on the auto-watering system. --- System is still charged and no leaks or kinks found in the tubing. - [+02:08]: Checked the humidifiers. --- Tanks are still full and no leaks found. Day 06 - Saturday - 08/09/25 - Total Days: 118 ----------------------------------- Daily Averages ~[+01:00] - Temps: 83.4°F [28.6°C] - Humidity: 83.3% - VPD: 0.67 kPa - Soil %: [32, 50, 35, 52, 41, 40, 41, 41] ----------------------------------- - [07:55]: Quickly checked on the 3x3 veg tent. --- Looking great in the veg garden! --- Mothers are all recovering nicely from the bonsai defoliation. Great! --- Cuttings also look healthy and ready for transplanting! --- Both Heady OG and TKO clones are looking perky and getting bigger! --- Heady OG cuttings also looking green and rooting! I think. Will check for roots in a few days. - [20:58]: Night check on the 4x4 tent. --- Ca-Caw! This is why we grow! Wow! --- Also hyped that the canopy is getting dense with nodal growth! --- TKO has more tops stretching through the top scrog netting! Heady OG has not reached the net yet. --- Stoked the 14in space in between the netting is filling quite nicely and just going to let everything grow! - [21:01]: Checked the Ecowitt soil moisture sensor data: ------------------ [ 4x4 MAIN TENT ] --------------- ------ 29% - [CH01 FT » G30 - Heady OG BX1 #1] ------ 50% - [CH02 FB » G30 - Heady OG BX1 #1] ------ 34% - [CH03 BT » G20 - TKO] ------ 53% - [CH04 BB » G20 - TKO] ------------------ [ 3x3 VEG TENT ] ---------------- ------ 40% - [CH05 BL » GR7 - Garlic Budder OG#1] ------ 40% - [CH06 BR » GR7 - Garlic Budder OG#2] ------ 40% - [CH07 FL » GR7 - Gorilla Goat #1] ------ 40% - [CH08 FR » GR7 - Gorilla Goat #2] --------- Veg: 38% - 45% | Flower: 45% - 55% --------- General: 30% [Dry] «| 45 - 60% [Moist] |» 70% [Wet] - [21:05]: Checked the 3x3 veg tent. --- Growth is still recovering quite nicely! This may be my solution to maintain mother plants longer between cycles. --- Mother clone cuttings are also looking healthy and ready to be rooted! --- Was originally planning on rooting all of the cuttings, but since the mother plants are recovering better than anticipated, just going to plant one of each pheno. --- Let’s go! - [21:23]: Filled a measuring cup with 1.5 cups of RO water. ------ Added a pinch of Quillaja Saponaria Extract [60] ------ Added 1/64tsp of Horticultural Aloe ------ Added 1/32tsp of Mycrobe Complete --- Mixed the solution thoroughly. - [21:26]: Dropped 4 Coco Coins into the measuring cup. --- The coins immediately started to expand. ------ [» ~10 MINUTES LATER «] --- Placed each fully saturated Coco Coin into half-cut solo cups. - [21:41]: Using a squeeze bottle filled with Clonex, --- Gently filled each pre-made hole with Clonex rooting gel. - [21:43]: Time to plant the cuttings! --- Using a pair of clean trimmers, made a final 45° cut. --- Also stripped and scrapped some of the stem’s outer membrane. --- To help with planting, gave each Coco Coin a squeeze to loosen the coco. --- Made sure to insert each stem straight and snug with the tip about a 1/4 inch from the bottom of the Coco Coin. --- Also secured the stem by pinching and pressing in the top of the Coco Coin. --- Once each cutting was planted, - [22:11]: Placed each pheno into the propagation dome’s tray. --- Made sure to keep each clone properly tagged. --- Added 1/4 cup of RO water to the bottom of the tray. --- Placed the side extensions onto the tray. - [22:15]: Misted the top of the propagation dome before covering the cuttings. --- Vents are fully closed. --- Also lowered the intensity from 5 to 1. --- At the current light intensity (LV1), the PPFD is around 110 μmol/m²/s which gives a DLI of 7.13 mol/m²/d under an 18/6 light cycle --- Will check back daily to cycle the air under the dome. - [22:17]: Placed the extra mother cuttings back on the rack. Will try to keep these cuttings alive until the planted ones root. --- Will need to change the water every day or two. --- Also need to water the Heady OG and TKO clones. --- Ca-Caw! Let’s go! - [11:33]: Here are the starting initial watering ranges: ------ Heady OG BX1 » 261.4g → 301.2g ------ TKO » 240.9g → 301.4g --------- General Solo Range: [Dry] «| [Initial Cup Weight] + ~55-100g |» [Wet] --- All cups were last watered 3 days ago. --- Took the starting weight of both clones before watering, ------ Heady OG BX1 weighed 257.0g ------ TKO weighed 259.7g --- While on a scale, --- Gently misted the straw mulch of both cups with RO water. --- Focused on the straw and sprayed as evenly as possible. --- Misted 10-20 sprays. Waited a moment, then misted again. --- Made sure to reference the watering weights. --- Repeated this process for both cups. --- There was no runoff. --- Also defoliated and removed the lowest growth on both clones. - [23:03]: Took the saturated weight of both clones after watering, ------ Heady OG BX1 » 345.3g ------ TKO » 355.4g --- Marked the final wet weight on the back of each cup. Also marked the watering date on the front. --- Placed both phenos back into the tent. Have them now resting on the rack (on drip trays). - [23:14]: Checked the humidifiers. --- Tanks are still full and no leaks found. Day 07 - Sunday - 08/10/25 - Total Days: 119 ----------------------------------- Daily Averages ~[+01:00] - Temps: 83.9°F [28.8°C] - Humidity: 83.6% - VPD: 0.66 kPa - Soil %: [49, 49, 30, 52, 43, 45, 46, 44] ----------------------------------- - [08:02]: Quickly checked on the 3x3 veg tent. --- Ooo yea! Looking great in the veg garden! --- All mothers are still green and recovering. New growth is starting to develop and growth is looking healthy! --- Quickly checked on the propagation dome. --- All clone cuttings are looking green and healthy! - [19:04]: Night check on the 4x4 tent. --- Ca-Caw! Ah yea! Heady OG has reached the top scrog net! --- TKO has several tops above the netting and she is raging with healthy! --- Canopy is also showing more signs of pistil crowning and vertical growth seems to be slowing down. I think. - [19:07]: Checked the Ecowitt soil moisture sensor data: ------------------ [ 4x4 MAIN TENT ] --------------- ------ 48% - [CH01 FT » G30 - Heady OG BX1 #1] ------ 49% - [CH02 FB » G30 - Heady OG BX1 #1] ------ 36% - [CH03 BT » G20 - TKO] ------ 55% - [CH04 BB » G20 - TKO] ------------------ [ 3x3 VEG TENT ] ---------------- ------ 41% - [CH05 BL » GR7 - Garlic Budder OG#1] ------ 43% - [CH06 BR » GR7 - Garlic Budder OG#2] ------ 43% - [CH07 FL » GR7 - Gorilla Goat #1] ------ 43% - [CH08 FR » GR7 - Gorilla Goat #2] --------- Veg: 38% - 45% | Flower: 45% - 55% --------- General: 30% [Dry] «| 45 - 60% [Moist] |» 70% [Wet] - [19:10]: Checked the 3x3 veg tent. --- The veg garden is recovering beautifully! --- Since the stretch seems to be slowing down in the main tent, going to give these ladies a little extra. - [19:17]: Going to feed some Stash Blend for the first time. --- This blend of beneficial microbes and mycorrhizal fungi also includes a bit of silica which should help during the bloom phase. --- Also shout out to Mr. Grow It, Rob (from CLTV), and Pigeons420! Stay lifted! - [19:19]: Filled a pitcher with 16 cups (1gal) of RO water. ------ Added 1/8tsp of Quillaja Saponaria Extract [60] ------ Added 1tsp of Stash Blend --- Mixed the solution before pouring 6 cups straight into a pump sprayer. --- Gave the sprayer a good shake before spraying the entire solution onto Heady OG’s straw mulch. - [19:52]: Repeated this process again for TKO. --- Depending on how growth develops, may start feeding these ladies weekly. --- From personal experience, the veg phase can easily be grown with straight RO water. --- Flower is probably the most important time to feed because there are more roots and the plants are trying to produce more biomass. I think. --- Anyways! - [20:10]: In the veg tent, repeated the watering process for all mothers (1 cup + 1 cup RO each). --- Focused mainly on the straw (2 cups each). - [20:13]: Checked the humidifiers. --- Tanks are still full and no leaks found. --- Wow what a grow week! --- The difference in growth from Monday until now has been incredible! [END OF WEEK 16]
Likes
23
Share
Ooooh boy, what an eventful beginning to week 14! I took this beast out of the tent for a reservoir change and noticed that she had a few branches hanging below the canopy in the middle of the plant that had a lot of heat damage. 😩 So that haircut she needed turned into a bit of an amputation... I've never dealt with heat damage before, so I don't know what it does to the quality of the bud, but what I DID know was that if I didn't change something, it certainly wasn't going to get any better. I removed 90% of the heat damaged branches, leaving only the branches that had mild damage to the leaves only. Looking at her, she doesn't look like she's missing much of anything, but what she gained was some more space to breathe and to feel the breeze. 😊 If anyone has dealt with heat damage in the past, I'd love to know what you did about it. Did you keep the buds? Ditch em? Are they safe to smoke? Do you think I did the right thing? Every grow throws me so much more to learn about and so many more opportunities for hands on experience dealing with things that I've only ever read about. It's the freaking tits! ✌️💜🌱
Likes
11
Share
The pics are a day old and allot has changed since then.. theres allot more yellowing (fading of leaves).. and the trichomes just look big and swollen.. you can see the kinda mushroom like shape easily.. the smell has gotten really nice.. starting to get that really dank pink smell. I cant find my 420 scope.. but it doesnt take a rocket scientist to know she's almost there.. I will chop her down on friday. And start drying it out.
Likes
2
Share
@KEVS_BEST
Follow
Woche 6 - Übergang zur Blütephase und erste Herausforderungen Die sechste Woche markierte den Übergang von der Vegetations- in die Blütephase. Bis zum Wochenende wurde weiterhin der Terra Vega Dünger verwendet, mit einem Verhältnis von 30 ml pro 10 Liter Wasser. Am Samstag, dem ersten Tag der Blütephase, wurde jedoch deutlich, dass ein Wechsel auf den Blütedünger nötig war. Leider führte die verspätete Umstellung auf die Canna Terra Bloom Linie zu einem leichten Nährstoffmangel, der sich in den ersten Tagen der Blüte zeigte. Anfang der ersten vollen Blütewoche wurde dies korrigiert, indem vollständig auf Canna Bloom umgestellt wurde. Die pH- und EC-Werte blieben stabil und optimal eingestellt. Die Temperaturen stiegen minimal an, blieben jedoch bei angenehmen 26 Grad. Mit Beginn der Blütephase startete der sogenannte Stretch, und die Pflanzen legten beeindruckende 2,5 cm pro Tag zu. Während dieser Woche wurden die ersten unteren Blätter entfernt – ein leichtes Lollipopping, um die Energie auf die oberen Bereiche zu konzentrieren. Die entfernten Blätter wurden getrocknet und sogar laminiert, um den Fortschritt dieses besonderen Grows festzuhalten. Es wurden ebenfalls einige kleinere Zweige und Blätter im unteren Bereich entfernt, um die Belüftung zu verbessern. Das eigentliche, umfassendere Lollipopping wird jedoch erst in zwei bis drei Wochen erfolgen. Trotz des anfänglichen Mangels aufgrund der zu späten Umstellung des Düngers blieben die Pflanzen insgesamt kräftig, gesund und wuchsen konstant weiter. Der Übergang in die Blütephase verlief somit erfolgreich, und die Pflanzen zeigten weiterhin ihr beeindruckendes Potenzial. ENGLISH Week 6 - Transition to Flowering and Initial Challenges The sixth week marked the transition from the vegetative to the flowering phase. Until the weekend, the Terra Vega fertilizer was still used at a ratio of 30 ml per 10 liters of water. On Saturday, the first day of flowering, it became clear that switching to the flowering fertilizer was necessary. Unfortunately, the late transition to the Canna Terra Bloom line caused a slight nutrient deficiency that appeared in the first few days of flowering. This was corrected at the beginning of the first full flowering week by fully switching to Canna Bloom. The pH and EC levels remained stable and optimally adjusted. Temperatures increased slightly but stayed at a comfortable 26 degrees. With the start of the flowering phase, the stretch began, with the plants growing an impressive 2.5 cm per day. During this week, the first lower leaves were removed—a light lollipopping to focus the energy on the upper parts. The removed leaves were dried and even laminated to document the progress of this unique grow. Some smaller branches and leaves were also removed from the lower areas to improve ventilation. However, the main lollipopping will take place in about two to three weeks. Despite the initial deficiency due to the late fertilizer switch, the plants remained overall strong, healthy, and continued to grow beautifully. The transition to the flowering phase was successful, and the plants continued to showcase their impressive potential.
Likes
50
Share
Week of 9/12 The plants responded well to the Down to Earth dry nutrients I top dressed with the week before, but I wanted them to get some more sugar so I switched back to my previous nute regimen with molasses. Problem Child is finally getting in the swing of flowering. A lot more pistils making their way out so hopefully this train will keep rolling so we can get her finished before Thanksgiving😅 Good Girl has a very strong Pine scent, so should be good for reducing inflammation, pain relief and relaxation. Otherwise I think everything is covered in the video. Clearly I was not able to update after I took the photos and video, my migraine decided to kick it up a notch with the kaleidoscope aura so I had to go hide in the dark.
Likes
13
Share
Been 250 watt hps first week turn up to 400 w.
Likes
65
Share
@Dendegrow
Follow
Welcome to week six! 🌱 Week five was a complete success – all parameters are perfectly aligned. I’ve increased the water conductivity to a solid 3000 and bumped the CO2 level up to 1200 🌿. Light intensity is now set at 1400 µmol in the center and 1000 at the edges, which will keep the plants strong in their generative state 🌞. I’ll maintain these levels until the end of the third week and then start slowly removing the large fan leaves to ensure the buds get plenty of light 💡✨. I’m also trying something new to activate the “Emerson effect” 🌄: I’m running the deep red lights for 5 minutes before sunset and for another 5 minutes after the day ends. This should give the plants a final boost in photosynthesis, helping to maximize their growth potential! Everything’s looking fantastic so far! The Black Cherry has rooted well across different experimental setups, and at the end of the grow, I’ll provide a full report on the best care techniques for both strains 🌺👌. Willkommen in Woche sechs! 🌱 Die fünfte Woche lief perfekt – alle Parameter stimmen. Ich habe die Leitfähigkeit des Wassers auf satte 3000 erhöht und den CO2-Gehalt auf 1200 angehoben 🌿. Die Lichtstärke beträgt jetzt 1400 µmol in der Mitte und 1000 am Rand, was dafür sorgen wird, dass die Pflanzen stark im generativen Zustand bleiben 🌞. Ich werde diese Werte bis Ende der dritten Woche beibehalten und dann langsam damit beginnen, die großen Sonnensegel zu entfernen, damit die Blüten ordentlich Licht abkriegen 💡✨. Zusätzlich probiere ich etwas Neues aus, um den „Emerson-Effekt“ zu aktivieren 🌄: Ich lasse das tiefrote Licht 5 Minuten vor Sonnenuntergang und 5 Minuten nach dem Ende des Tages weiterlaufen. Das sollte der Photosynthese einen letzten Schub geben und das Wachstum der Pflanzen maximal fördern! Bis jetzt sieht alles fantastisch aus! Die Black Cherry ist in verschiedenen Versuchsreihen gut angewachsen, und am Ende des Grows werde ich einen ausführlichen Bericht darüber abgeben, wie sich die beiden Sorten am besten pflegen lassen 🌺👌.
Likes
27
Share
Let’s Go day 29!! This week went real nice ! Girls are staying very healthy and building up nicely and even started showing signs of female sex which is super great ! We started doing a little bit of leaf tuck training method on em , nothing to big as like I said I want these girls just to do there thang an grow more on naturally side! My Air temp and Humidity have been on point all week, staying from 70-75 degrees throughout the day and humidity staying around 58-61% humidity , my girls are loving that summer an 75 feeling !! Can’t wait to see what we do this week ! Hopefully you all enjoy, and are ready for another great productive week ! Peace love an positive vibes to y’all Cheers 😶‍🌫️💨💨💨💨🤙🏻Happy Grows✌️🏻Week 4 let’s get it !
Likes
4
Share
Number 2 pheno might herm on me so I have to watch but I have limited plants and I really want to keep these genetics so I need atleast one female. Number 3 the mutant stopped growing before I topped, or maybe not stopped but it threw out pistils at the apical meristem and not producing leaves so I topped to see if I could promote side growth but it hasn't worked; I'm going to keep her around just for the fun of it. 4 is my hope of producing female and a good clone.
Likes
23
Share
😞😞😞My Alaskan purple and the one I gifted my girlfriends son have the weird discoloration. It appeared at the same time on both plants that r at 2 dif places so its not likely to b fertilization or the dirt. Other then that everything is going good and the stretch appears to be setting in. Thought id have another week or so but obviously not. This damn Alaskan purp is confusing the hell outta me 7/27
Likes
47
Share
@Jimmy89
Follow
The the buds were small so it made trimming a nightmare! But it’s done and the end product is worth all the time. I have loads of trim and small popcorn buds that will be dry Ice sifted and pressed into a hash brick. Will update the diary when I have some bcp hash Weighed up the trim at 588 grams, used my trim bins with dry ice to sift the trim and pressed it into blocks using a rosin pre press, I’ll now jar this and put it to one side. My first time doing this, definitely worth the effort!
Likes
2
Share
@Chucky324
Follow
Hello. This is the end of week 8 and the beginning of week 9 of veg. This plant is doing good. Growing well after sitting so long, 8 weeks, with only it first leaves out. This plant is really 16 weeks old. See week one for pics and story. Hope it's strong... I like strong... I like it's shape... OK. Keep growing Straight. Chuck.
Likes
44
Share
So far so good with this watermelon zkittles from barneys 😁 no issues and responding well to the topping and lst, I am making 3 litres worth of food for the week and will up it as the plant needs it. I will post more pics and a video later of the room. The purple lemonade and runtz are doing well, they look lost in there big pots 🤣. Pics to come. The orange sherbert are on day 3 of there 2 week flush with molasses and phed water, hopefully there fill out, on the plus side there getting purple on them now 😀. Marshydro tsl2000 is doing a amazing job and is really nice and cool, my hps light use to cook the plants this led is perfect can achieve good temps even cold temps to pull the colour out at the end 😀. The ac infinity with digital controller is a must have and a real game changer for a grower, I love it my mate loves his and trust me it helps, easy to use and set it up outside your grow area, dangle the thermometer cable at canopy hight and your good to go. Day 29 day 2 flower, the watermelon zkittles is starting to start her stretch I think she is going to be a nice plant, iv had no issues in the last 4 weeks and never have with the barneys seed selection.
Likes
100
Share
@AsNoriu
Follow
Day 99. All 3 girls down. Wet trim . Can't wait to try them out. Scissors hash was so sweet ... 1.6 kg for wet plant is not bad too I think. Plant A should be biggest in this grow from all strains ... She has to beat 202 g. of AD. Happy Growing !!!
Likes
15
Share
@ho99o9
Follow
MAGIC STRAIN This strain easy to grow and beautiful to look at. Nice colour, incredible taste, great smell. This strain takes well to LST. Made a few mistakes, but the bud came out great overall. Very pleased and will grow again.
Likes
9
Share
@Philski87
Follow
These have come on leaps and bounds in the last week. I have struggled with temps been way to high, outside weather hasn't helped, so much so I have bought a bigger tent today to try and combat the issue and also transplanted into bigger pots.
Likes
4
Share
@DE_BW
Follow
This strain was an absolute pleasure to grow. I’ll update in a week
Likes
1
Share
Copper Cathode Plates & Zinc Anode Plates Not all minds think the same, it's a hard concept to grasp from one who has only ego. When someone operates solely from the ego, they tend to view their own perspective as the objective truth. To them, if someone else thinks differently, it is seen as a flaw, a lack of intelligence, or a personal affront, rather than simply a different, valid experience. The ego assumes that others are just extensions of itself. It cannot easily differentiate between "I think this" and "This is the universal truth". This is called the Mirror Fallacy. True understanding of another mind requires stepping out of oneself. The ego, by definition, is obsessed with self-preservation and being "right," which blocks empathy. Different perspectives are interpreted as attacks on the ego's stability. Instead of curiosity, it feels defensive. Acknowledging that others have entirely different internal worlds—with unique motivations, fears, and histories—requires dismantling the illusion that the world revolves around one’s own viewpoint. It’s a shift from "Why are they wrong?" to "How did they get to that perspective?" Gospel of Thomas #17 "I shall give you what no eye has seen, what no ear has heard, and no hand has touched, and what has not come into the human heart." precedes saying #18, which questions the "beginning" and "end". First, you need The Eyes to See, The Ears to Hear & The Mind of the Heart. "Alpha to omega" refers to the first (Α/α) and last (Ω/ω) letters of the Greek alphabet, symbolizing "the beginning and the end". It represents totality, eternity, or the entirety of something. Revelation 22:13, "I am the Alpha and the Omega, the First and the Last, the Beginning and the End" (NKJV, NIV). Alpha & Atom: Both originate from Greek. Alpha (Α/α) is the first letter of the Greek alphabet (representing the beginning). Atom comes from atomos, meaning "indivisible," often seen as the foundational "first" particle of matter. Adam & Atom: In some esoteric and linguistic theories, the biblical name "Adam" (Hebrew for man/earth) is connected to "atom" because both represent the original, foundational unit (the first man vs. the first particle). Alpha Particles are particles emitted during radioactive decay, named "alpha" because they were the first type of nuclear radiation discovered. They are atomic nuclei consisting of two protons and two neutrons. The study of the atom often deals with the "beginning" (alpha) of chemical reactions and fundamental building blocks. The terms are linked primarily as symbols for "the beginning" (Alpha), the "fundamental unit" (Atom), and the "original man" (Adam). The uppercase symbol Omega (Ω/ω) is primarily used in electronics and physics to measure electrical resistance in ohms, representing how materials resist electron flow. It is also used in various fields to represent the density parameter in cosmology, solid angles in physics, and special constants or asymptotic growth rates in mathematics. In quantum mechanics, "Omega" (Ω/ω) can refer to several concepts related to measuring or representing quantum coherence, generally categorized into dynamical, mathematical, or physical parameters: Dynamical Coherence Measures Omega Pattern (Superconducting Circuits) Coupling Strength Angular Frequency Quantum Coherence Framework (Omega v24.0) Electron flow is not the same as electrical conductivity, but they are intimately related. Electron flow is the physical motion of electrons, while electrical conductivity is the material property that determines how easily that flow can happen. Electron Flow (The "What"): The physical movement of negatively charged electrons through a conductor (usually from negative to positive). It is the act of carrying charge. Electrical Conductivity (The "How Well"): An intrinsic material property that measures how easily a material allows electrons (or other charge carriers) to move through it. Electron Flow (The Action): The actual physical movement of electrons from one molecule (donor) to another (acceptor) in a pathway, such as the photosynthetic electron transport chain or cellular respiration. The current itself (dynamic electricity). Electrical Conductivity (The Property): An intrinsic property of a material (like copper vs. glass) that measures how easily it allows electric current (electron flow) to pass through it. A measure of ease. A high-conductivity material has low resistance and lets electrons move freely. Electron transport rate (ETR), the rate at which electrons travel through the chain. You can have Electron Flow occurring (electrons moving through the chain), but a very low Electron Transport Rate if the plant is in the shade. If light increases, the Electron Flow still follows the same path, but the Electron Transport Rate increases because more electrons are moving per second. In summary, ETR is a quantitative measure of electron flow. The Electron Transport Rate (ETR) is not exactly the same as Electron Flow, although they are intimately related. Think of "Electron Flow" as the movement itself, and "Electron Transport Rate" as the speed or quantity of that movement. Photosystem II (PSII) is a critical multi-subunit protein complex in thylakoid membranes that initiates photosynthetic light reactions by splitting water and transferring electrons. "Et lux in tenebris lucet, et tenebrae eam non comprehenderunt,"