


Likes
4
Share


@Bear_Grows_Green
Follow
01/29 day 23 start of week 4 and things are popping!! Haven't fed at all this week should tomorrow .
01/30 bed for 7 gallons water 3.5 gallons feed full bloom recipe
02/02 bed got 7 gallons 3.5 with rootwise products and wdg3000 and sprinkled some BB on bed.


Likes
5
Share


@grazi2706
Follow
Another good week, just waiting for them to ripen. I'm planning on another week. That will put us at 9.5 weeks and they should be good to go.

Likes
17
Share


@HeartStrong_Garden
Follow
I don't think this one is growing as fast as the first one did but still looking great. Trying Gaia Green for forst time

Likes
3
Share


@blackrain
Follow
Day 63, Coming closer to the end but with some problems that I've never had before, this is all because I ran out of CalMag and took most people's word that soil would be fine without it, not with biobizz all mix, which I will carry on using still but, it's quite rubbish soil to be honest.

Likes
47
Share


@S2340420
Follow
It came into my head last night a migjt have been under feeding them by mixing enough feed for 10 litres of water instead of the 20 i meant to account for i will give them a full dose on the same feed as last week 4ml per 10 litre and 1ml of pk for the 1st feed tnis week and see how they look 🤯

Likes
11
Share


@CropHouseLew
Follow
Trying flawless finish for the first time, hoping it will help with this rushed flowering stage.
Really unfortunate to have to cut this one short, but some things in life are out of our control...
Anyway, harvest is currently curing. Check out the results and leave a like/comment cos I'm always looking for constructive criticism!
Lets gooo

Likes
8
Share


@MrTopshelfGrow
Follow
3. Zake stark überdüngt alle anderen leicht, Bat Guano von plagron zum ersten Mal während der vegi verwendet war anscheind Zuviel Phosphor für die kleinen, da es der Guano der Obst fressenden Fledermäuse ist und somit mehr PK haltig. Stark überdüngte Zake wurde gespült mit dem 3 fachen des Topfvolumens, die anderen wurden erstmal weiter beobachtet

Likes
1
Share

@sunshinegroww
Follow
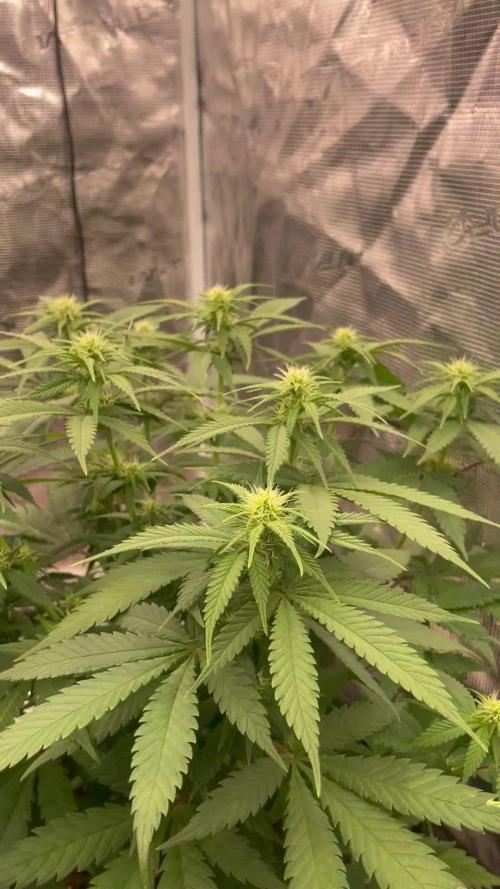
Welcome week 3 defo no more stretch few more days and will lolipop and let her fattens those flowers she is happy as lary indeed lets gooooooo


Likes
19
Share


@Selkot
Follow
I didn't make life easy for my autos...
topped 2x, repotted 1x, several defoliations, bad water stress for 2 weeks, moved to another tent... I couldn't hope for a miraculous harvest
but I'm not complaining at all: in only 10 weeks from seed to harvest, not far from 58g dry, with dense and frosty nuggets, and a nice smell that fills my room as soon as I open the jars 🤩
I won't wait long for the smoke test 👌
Processing
Likes
Comments
Share


Likes
33
Share


@Weird_Jimmy
Follow
😼Wk15: Surprise! This is the right time.
👉This week’s journal is only the days that lead up to the harvest which happened mid to late in the week. Since the harvest process takes more than a couple days, and it happened late in the week, I will be making one more week with the harvest process after the buds are dried to 20-25% (hopefully) and in jars. I should have all the final specs for the grow.
👉The 1 gallon plan was not even absorbing much fluid. The saturation volume of the media was getting smaller each day it seemed. It would take over 5 minutes to be able to pour 1.5 liters of solution into the pot. The run-off would also end very quickly as compared to all other plants I grew. I surmise this is due to the roots packing the pot and compressing the media very tightly, not allowing it to absorb much solution. The light sweet caramel aroma is now replaced by what I would call the strong generic funky stank of weed. While there is nothing extraordinary about the aroma, it’s so strong that you can smell it outdoors (its vented outside from second story window). Even with, medium to strong winds you can catch whiffs of it. Smells like heaven to me! Super frosty buds. Only a couple buds had any fresh calyx’s with white pistols. During my trichome hunting expeditions I see very few amber. But those are not what Im hunting. Im looking for the majority of the trichomes to be cloudy. I believe by mid-week all the buds had mostly cloudy trichomes with a few clears left. Harvest came on day the 3rd day of the week.
👉The 3 gallon plant was consuming less fluid. It was easy to fertigate it with 3l of water. The EC was spiking very quickly and would not come down very much. The run off would fall back in range but be above target the next fertigation event. I figured it may just be the densely packed roots in the pot. With the pH runoff going in the opposite direction as the 1 gallon plants run-off and I was wondering what was causing the difference. Even though the lowest leaves look a little like the plant was over watered, I continued the high volume of fertigations. I did reduce the EC somewhat. I was giving it week 10 mix on the GHE mix chart for drain to waist mix. The leaves looked crappy, but the buds were looking awesome. The plant had the same light creamy caramel aroma when sniffed up close, but the strong aroma of stanky funk was the permeating odor that filled room. I had only done some light scouting for the trichomes on the plant and each time saw more cloudy tips. I wasn’t sure but by Tuesday the trichomes looked at least 50/50, which is a little further along than I thought it would be. After harvesting the 1 gallon plant I had room to pull the plant out and rotate it and give it an exhaustive scan for a more complete idea of how much time it had. When I rotated it, I didn’t notice it at first. Then I focused on it as the top of a cola was brown and the leaves around it were all dried. “Oh fuck!” I shouted. It was like someone had walked up behind me and jabbed me in the ribs and yelled "BOO"! I was startled and even jumped out of my chair. I then did a double and triple take to make sure my eyes weren’t being grizzled or bent. I then grabbed the branch cutters and took that branch. I searched the cola and it was isolated to the top 3 inches of this fat pine cone. I snipped it below that group of bud and removed it from the house, took it out back in the field and stabbed it, shot it and set it on fire (only in my imagination). I then washed and sanitized my hands, returned to the tent and inspected some of the larger colas, pulling them apart and looking to the center for nasty pestilence. Fortunately I didn’t see any. I didn’t have time to harvest it right then and there, but I did on Friday night. I knew I wasn’t out of danger yet though. These buds are pine cones and very dense. I was afraid Id see the same thing I saw in my Critical purple and lose all the best buds. I wouldn’t know until the harvest was complete, with the buds curing in the jars. 🙀

Likes
45
Share


@yan420
Follow
FERMAKOR BARREL MIX – BASE IN USE
(Testing on the Fantasy Feast girl we pulled out of another diary
https://growdiaries.com/diaries/274722-grow-journal-by-yan402 )
(FERMAKOR BASE SYSTEM KOH VERSION diary
https://growdiaries.com/diaries/278391-grow-journal-by-yan402)
(Urea & Micros on the way — first week running without them)
🍶💧🍶💧🍶💧🍶💧🍶
💧 30 L Barrel – Current Working Mix
🍶💧🍶💧🍶💧🍶💧🍶
Step 1 – Calcium Nitrate (Part A)
7 L warm water (~35–40 °C) → added 45 g Calcinit, stirred until fully clear.
That’s the calcium + nitrogen backbone for the feed.
Step 2 – FERMAKOR PK Base (Part B)
15 L water in the main barrel → added 30 ml FERMAKOR PK Concentrate, mixed well.
This forms the main P + K part of the formula.
Step 3 – Combine Solutions
Slowly poured the Calcinit mix into the barrel while stirring — no reaction, still crystal clear.
That confirms the mix is stable and precipitation-free.
🌿 Step 4 – FPJ / FFJ Batch
Added 30 ml homemade FPJ (fish + veg batch) ≈ 1 ml/L.
Color shifted to a light-amber tone — looks alive and active.
🍋 Step 5 – Citric Acid Balance
Added 1 tsp citric acid after everything was blended to fine-tune pH and help chelate micros later on.
📦 Step 6 – Top Up & Check
Filled to the 30 L mark with plain water → pH tested with drops, showing yellow-green — roughly 5.8 – 6.0 range.
Nice clean look, stable smell, no residue.
💧 Current Base Ingredients (Active Mix)
Warm Water ≈ 22 L total
Calcinit 45 g → N + Ca foundation
FERMAKOR PK Base 30 ml → P + K support
Citric Acid 1 tsp → Chelation + pH balance
FPJ / Fish Emulsion 30 ml → Organic enzyme booster
Result: clean amber mix, mild and balanced.
I’ll let this version run for a week before adding anything.
👀👀👀👀👀👀
Observations and changes
👀👀👀👀👀👀
27.10.25 VW27 noticed some min burnt tips so I decreased Calcium Nitrate 45 to → 40g, decided to add two more elements micros and Epsom salts just to make sure they got everything, Fetrilon Combi 1 (Micros): 0.5 g, Epsom salts: 8 g
28.10.25 VW27 she seems devoid of any deficiencies, seems ready for the flip to 12/12
02.11.25 VW27 girl is looking good so I decided to stop making daily videos and do a standard once a week update.
09.11.25 aVW28 7 days since flip,stretch in full swing, first pistils showing, leaf color deep and healthy. Slight tip burn early week → gone after pH stabilized.
Feed stayed clear, no residue, roots clean and sweet-smelling, did what I hope is a last cleanup and pruning🎥
10.11.25 VW29 added Phosphoric acid pH down to the schedule for flowering stage.
14.11.25 FW1 FERMAKOR PK Micros 40 → 50 ml
23.11.25 FW2 got some burnt tips, observe and act accordingly in case it worsens, diluted by 25% for this week.
🌱💦🌱💦🌱💦🌱💦🌱💦🌱
🌿Day to day tasks & actions 🌿
🌱💦🌱💦🌱💦🌱💦🌱💦🌱
23.11.25 FW1 – Fed 3l of #1 → 1l runoff
24.11.25 FW2 – Fed 5l of #1 → 2l runoff
25.11.25 FW2 – Fed 5l of #1 → 2l runoff
26.11.25 FW2 – Fed 5l of #1 → 2l runoff
27.11.25 FW2 – Fed 5l of #1 → 2l runoff
28.11.25 FW2 – Fed 5l of #1 → 2l runoff
29.11.25 FW2 – Fed 5l of #1 → 2l runoff
30.11.25 FW2 – Fed 5l of #1 → 2l runoff
🍶💧🍶💧🍶💧🍶💧🍶
💧 Nutrients in 30 L #1 Veg — FERMAKOR
🍶💧🍶💧🍶💧🍶💧🍶
💧 Calcium Nitrate (Calcinit / Nitcal):
45 g → 40 g → 35 g
= 1.33 g/L → 207 ppm N + 253 ppm Ca
= 1.17 g/L → 183 ppm N + 224 ppm Ca (current)
💧 PK Concentrate (FERMAKOR Base):
30 ml → 40 ml → 50 ml
= 1.00 → 1.33 → 1.66 ml/L
→ balanced 1:1 P:K + light micros (from extract)
💧 Home-made FFJ/FPJ (Fish + Veg):
30 ml
= 1.00 ml/L
Epsom Salt (MgSO₄·7H₂O):
8 g
= 0.27 g/L → 26 ppm Mg + 35 ppm S
💧 Fetrilon Combi 1 (Micros):
0.5 g
= 0.017 g/L
→ Fe 0.7 ppm • Mn 0.7 ppm • Zn 0.3 ppm • Cu 0.3 ppm • B 0.1 ppm • Mo 0.02 ppm
Phosphoric Acid (pH down) + Citric Acid (chelation):
→ First set pH with phosphoric acid
→ Add a little citric only if extra chelation is needed
💧 Target pH: 5.8 – 6.0 (drop test yellow-green)
📦 TOTAL Inputs:
60 ml → 70 ml → 80 ml / 48.5 g per 30 L
= 2.00 → 2.33 → 2.66 ml/L + 1.62 g/L (current)
YouTube Link: https://youtube.com/-m8h?si=A7x4Zlr2kj-_ga31


Likes
3
Share


@Squaregrouper
Follow
This blueberry is amazing tried-and-true easiest cloner almost a hundred percent success rate when cloning with or without clonex

Likes
8
Share


@eldruida_lamota
Follow
Esa familia, abrimos nuevo diario, y os traemos unas candy caramelo fast floración, del banco zambezaseeds.
3/3 un germinado perfecto, ph controlado desde el principio, veremos que tal se comportan bajo un led.
.
Mars hydro ts-600 code discount: an420
No olvidéis que sin ellos esto no es posible 🙏.
Esta semana no usaremos ningún producto, empezaremos abonarlas con advanced nutrients a partir de la segunda semana, mientras os dejo unos vídeos y fotos para que veáis el proceso, un saludo fumetillas.


Likes
12
Share


@WestieWeed
Follow
RUNNING OUT OF ROOM!!!!!!
light is sitting 12 inch from the top of the plants. Had to put another screen down to give me just a little more room. not to sound like im sucking my self off
but i really didnt expect these plants to grow so well so now its a mad panic to save some room. Getting cold during the day and night here so temp control is still and issue.
week posted a day early due to holiday obligations . hoping the stretch last another day or so before bud start producing
Update
but who the F$%^ knows this is all new to me
Update
Three days into week 10 and i had to push down a second SCOG net and push some of the stems down. showing signs of what i think is light burn .... even though im using leds. dont think its nute burn gonna add some pics and maybe you can see it. these little babies shot up fast one night after being pushed down. the white hairs are starting to really show still got 12 inches of room from the light. With everything ive read online my flowering phase seems to be a bit behind the what i would call normal time line but im guessing its just the strain im growing.

Likes
10
Share


@Ksouth1
Follow
Last week went well. She is growing beautifully and is doing great! Can't wait to see what she becomes. Think she will be a decent sized plant for sure. Since last week she has had her lst ties adjusted and a few fan leaves removed. She was also relocated to another spot so she can grow to her potential. Seedsman's autos have been great for me. I recommend them to everyone! This is another great example of their amazing quality genetics! I will update as she progresses. Until next time happy growing to everyone!
