




Likes
37
Share


@Reyden
Follow
Continua la seconda settimana di fioritura per questa tenda Fast Buds e direi che tutto va alla grande! Sto dando circa 600 ml di acqua ogni 3 giorni al momento, quando le foglie più basse sono cadenti e il vaso super leggero, quello è il loro momento, chissà perché si è sempre più tentati a dare più acqua del dovuto? Sempre quella paura che muoiano di sete, no! Loro muoiono affogate di solito che è peggio 😈 sempre asciugare bene il vaso prima di ogni innaffiatura! Non smetterò mai di ripeterlo, perché sono il primo che ancora rischia di sbagliare eheheh

Likes
48
Share


@TheCannaProphet
Follow
~ WEDDING CHEESECAKE FAST FLOWER by FastBuds ~
Well fam, here we go again with another epic strain from FastBuds Fast Flowering stable. After having such tremendous success growing their Gorilla Cookies Fast Flower outdoors last year, I've decided to run another of their fast flowering strains outdoors this year... Wedding Cheesecake Fast Flower!
The best description of this awesome cultivar comes directly from my friends at FastBuds which is as follows:
"A delight for the mind and body: Wedding Cheesecake FF (Fast-Flowering) is a delicious strain that offers XXL yields in a 7-8 weeks flowering cycle. This terpene powerhouse produces loads and loads of mouth-watering vanilla-creamy-cookie-scented terps with hints of citrus and cinnamon. In addition to its delicious aromas, this variety grows very well in both indoor and outdoor setups, yielding up to 650 g/m2 without extra maintenance, making it the ideal strain for beginners as it allows you to maximize yields while minimizing work. This super-fast feminized photoperiod version offers upbeat and energetic yet deeply relaxing effects that are perfect for consumers looking for a heavily focused, motivating, and creative high. It’s the ideal strain for those needing that extra energy boost to start a busy day on the right foot.
Wedding Cheesecake FF boasts chunky, large-sized buds with a thick layer of silvery-white resin and bright orange hairs scattered all over: that just screams ‘quality’. The lime-green flowers sparkle with an array of hues ranging from dark to light green, to magenta and purple, and reek of a delicious aroma that’ll remind you of fresh store-bought cheesecake.
This is an XXL hybrid that grows extremely tall in height, reaching up to 3m with one huge main cola and multiple long side branches that can withstand enormous yields of up to 650 g/m2 with ease. Wedding Cheesecake FF is extremely resilient to the elements and can be grown in almost every climate as long as you’ve got the space and basics covered, making her an excellent choice for those looking for large-scale harvests with a quick turnaround time without much effort."
________________________________________________________________________________________________________________________________________________________________________________________________________________________________________________________________________________________________________________________
The Setup:
This is going to be an outdoor grow, but I have started the Wedding Cheesecake FF indoors as our weather is still too cold to put her outside (nighttime temp's dipping regularly into the 30's℉).
The plan is simple... let her grow inside under a 19/5 light schedule until the nighttime temperatures stay above the mid 40's℉, at which point she'll be moved outside and transplanted into the soil which I have already setup and inoculated with beneficial microbes, and then let the fun begin!🤪💚
________________________________________________________________________________________________________________________________________________________________________________________________________________________________________________________________________________________________________________________
Weekly Updates:
7/20- Sixteen weeks in veg! This huge Wedding Cheesecake Fast Flower by FastBuds has gone crazy and stretched over a foot in a week. There's still no sign of pre-flowering yet but I'm sure it won't be long now as our days are slowly becoming shorter with fall on its way.
It rained all day today, so I skipped watering at all today as the ground got well saturated.
7/22- Our weather continues to be really hot with daytime temp's in the upper 90's Fahrenheit. If it does not rain I am watering everyday with 10g of well water.
7/24- The daily watering routine for the FastBuds Wedding Cheesecake FF continues with 10g of straight well water from the garden hose given at sundown daily with the exception of when we get substantial rain.
7/26- Well there's another week of vegetative growth for the Wedding Cheesecake Fast Flower and, hopefully, she'll be tranitioning into flowering in the next week or two and then thing will be getting a lot more interesting for sure!
Thank you for checking out my diary, your positive comments and support make it all worthwhile! 💚Growers Love!💚😎🙏



Likes
12
Share


@Fubar_420
Follow
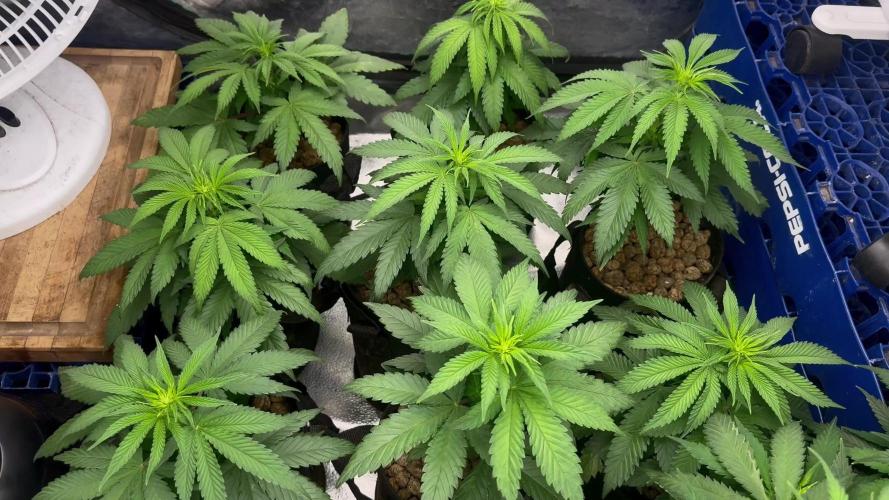
Its been a good week they are smelling pretty strong already. Switched to early bloom feeding. They started to stretch pretty good this week and, were taking up water quicker than i realized so I topped the pots off with some extra soil and started to water heavier they are thirsty.



Processing
Likes
37
Share


@MG2009
Follow
GTH SEED #1 in training, just super cropped on one side to even conopy.
The first site im recording will be a clone,it is on back side of plant and will not produce. #2,#3,#4 pics,#2 is stripped of leaves at about 12 inches.
06/16/18
#4 is showing
pre-flowers,#2,#3, no sign yet. #1 check in the morning.
06/19/2018
Still no pre -flowers on #1,#2,#3, #4 however is female so I Fimmed her to encourage side shoots to grow biggest of wider canopy. #1 reacting well to supercropping 20 tops as of today. Praying she is female🙏🙏. She is a stretchy girl in flower 2 to 3 x her vegged height so trying to be low profile as possible.👍
Likes
13
Share


@UnorthadoxDude
Follow
Hey growmies! 👊
Welcome to week nine for Suzy, the Sweet Zensation XL Auto by Sweet Seeds.
Please check out the sister diaries: Orange Apricot Glue XL Auto & Tropicanna Poison XL Auto
Massive thanks to Sweet Seeds for sponsoring this grow!
###
Week 9 Day 1 11:00 27/8
Photographed. Have been fertigating but not recording/updating due to external factors. Will do a more thorough update later in the week.
###
Week 9 Day 3 17:00 29/8
photographed
###
Week 9 Day 4 06:00 30/8
Fertigated 3l
---
==========
Tent: 120cm x 120cm x 180cm
Light: 600w HID Elite Dual Spectrum HPS + Angel Wing Reflector
Air: 5" duct fan system with carbon filter ~300 m3/hour + RAM 9" floor fan + 4" intake fan
Pots: Air Pruner Fabric Pots 30l - UGro XL Coco + horticultural grade perlite (~20%)
Seeds supplied by Sweet Seeds https://sweetseeds.es
Nutrients supplied by Shogun Fertilisers https://www.shogunfertilisers.com
==========
Likes
4
Share


@Lazuli
Follow
She goes fast and good yield, mine was a bit bushy but still the buds underneath were still hard

Likes
121
Share


@Rangaku
Follow
So Zkittles finally has the place to herself after the Pineapple Express was harvested yesterday ( it’s the fruit ) .
With room to spread her out now she’s loving all that extra light and air flow and is becoming the biggest auto I’ve ever grown with a stench that needs covering up with candles and dryer sheets at the exhaust vent … ( good problems to have ) All going to plan a few more weeks of fattening her up some and it will be a successful grow .
Likes
1
Share


@DCGardener
Follow
I’m loving these yellow training clips I bought off Amazon. Super easy to attach and adjust. Seems to be less hard on the stems vs. the wire I’d been using. Starting to node out big time!
Likes
4
Share

@420DeepGrow
Follow
📆 Semana 10
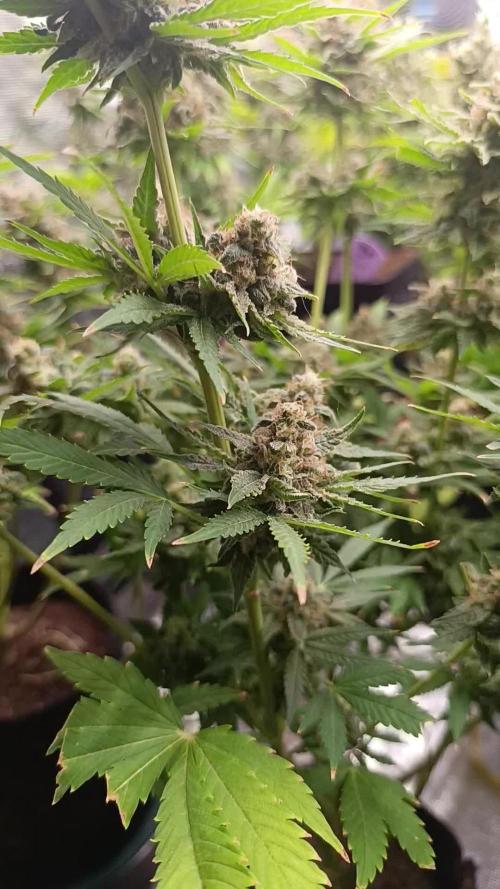
Recta final bien definida, con cogollos completamente compactos, muy duros y cargados de resina. La planta empieza a mostrar ligeras tonalidades que acompañan la maduración, manteniendo una apariencia muy resinosa y brillante.
Los tricomas se sitúan en un equilibrio entre lechosos y ámbar, avanzando progresivamente hacia un punto óptimo de corte en las próximas dos semanas. El aroma se intensifica y gana profundidad, marcando un perfil cada vez más cerrado y reconocible.
La actividad de la planta es mínima, enfocada únicamente en el acabado final, mientras se acentúan los signos de consumo de reservas en hojas grandes.
Cultivo estable, afinado y entrando en la fase decisiva.
Seguimos creciendo fuerte 💪!

Likes
98
Share


@TheBudWhisperer
Follow
I guess I first have to extend a big thank you to James and the folks at RQS. The genetics of their “Northern Light” did not disappoint and this was a no fuss grow across all categories. This will be the only time you hear me refer to Northern Lights in the singular. It’s kinda like calling a “pickerel” a “walleye” - you just don’t do that up here😉.
She took well to training, showed no signs of lockout or deficiency, and we were at the top limits of botanicare’s recommended feeding schedule the whole time. I’d call this typical NL - the scent wasn’t overly powerful, she grew somewhat squat and while I’m actually very surprised at the final weigh (thought it would be much less), the whole grow was typical of the strain in my experience. Possibly her biggest limiting factor was simply space constraints. The photos pretty obviously demonstrate that she got really crowded out by the neighbouring kush and I wouldn’t be surprised at all if she’d have done a little better with some more room.
That said, what isn’t “typical” are the effects. RQS touts this as a cup winner and I can see why. Had the opportunity to sample a little and WHOA! She Hits with a lasting, cerebral and euphoric effect that starts as a light, happy high. Not a crippling or dulling effect at all. Just everything you’d expect from a well rounded strain in general. Perfect. I almost wanna describe it as a classic sativa but I’ve been smoking nothing but a pure indica for so many months now that anything different is gonna feel that way 😂. Thank Christ for some new stash diversity: 1:!
Many, many thanks to all those who cared to comment, suggest or converse on this one. It’s been a pleasure hearing from everyone and I did what I could to keep ‘er interesting : 1:. Next up will be a couple autos on RDWC before the summer outdoor season (and a significant indoor upgrade) is upon us. That said, I still might be outta touch for a little while due to “life developments”. All the best with that quality smoke folks😉: 1:😜! Seeya on the flip side.👊😎0


Likes
7
Share


@Dreamhighersmokingmomma
Follow
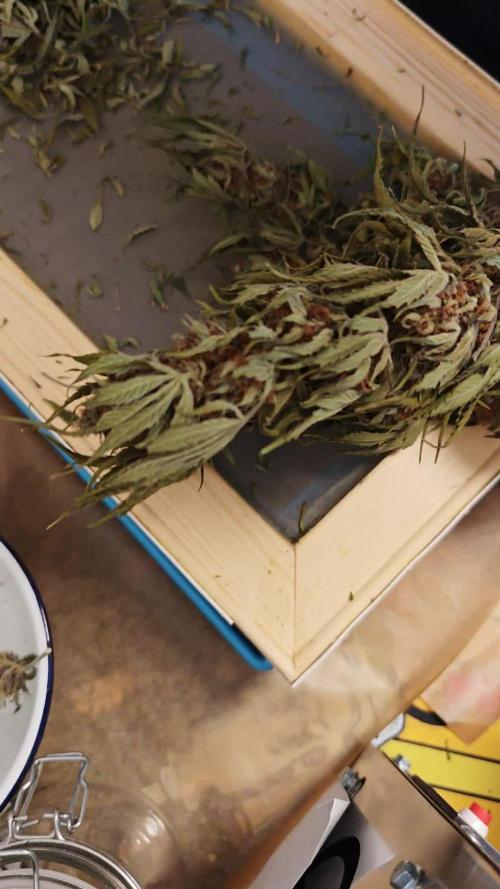
For my first ever harvest to finish. I am proud got 59.85gs for an autoflower and no prior experience I am pleased. I learned alot and want a better finished yield for the future but pleased with this girl an her turn out.
Likes
13
Share


@Oyziphar
Follow
This week wasn't as bad as last week 😊 Nights were cold 😰, but not to much rain 😿 and a few hours of sun 😍
Temperatures in the greenhouse were medium : during the day 20°C 💀; min temp 3.5°C ; max temp 31,7°C 😤
Cookies Gelato has turned completely purple 👍👍👍
I defoliated the plants 😙 and had to remove budrot (especially in the Cookies Gelatoes)😨
I took the prettiest Cookies Gelato outside for a photo session in my garden 😍
Probably these will be the last pictures of the plans, before harvesting ! 👍😄

Likes
6
Share


@Naujas
Follow
for the girl, several yellowed leaves were removed :) everything looks not bad, maybe I would even say very beautiful :) I already increased the light intensity to 85%, I'm a little afraid that there might be a problem due to excessive heat, well, you have to watch :) the girl drinks a lot ,in a week I poured her 12 liters :) I also gave the girl a really strong food mixture with almost 1100 ppm, but I also gave completely clean water with 20 ppm and 6.3 ph :).

Likes
4
Share


@Bread_n_Buds
Follow
Super Boof has a super name, super genetics and consequently we have super expectations.
Remember that we are growing 1 Plant worked with the techniques and one left to grow without cutting techniques only with a bit of LST.
In this diary we find the plant that is growing worked with a typical main lining: topping at the third internode, lst waiting for three internodes, topping again and lst to lower and widen and give air to everything. It is all very compact given the very low internodal distance of this plant but that's fine it will be a basket style plant.
The comparison is the salt of the experience so the plant in the other diary will be worked very differently go and see it to compare them.
We have started the Plagron fertilization program, we are in 100% organic configuration, the soil is recycled Promix + 1/3 fresh soil + 10% Perlite + RQS Mycorrhiza Mix (4 g in the mix, 1 g under the small fiber pot).
We are administering // 1 ml/l Power Roots - 1 ml/l Pure Zym - 1 ml/l Sugar Royal - 3 ml/l Alga Grow
We have sprayed Vita Race Foliare 3 ml/l.
https://plagron.com/en
The doubts about the compatibility between Pure Zym and mycorrhizae have been dispelled, they can get along according to Plagron experts. If someone tells you that enzymes eat mycorrhizae, which in principle may seem possible, explain to them that it is not true.
https://www.royalqueenseeds.it/growing/452-easy-roots-mix-di-micorrhize.html
Leafy's strain of the year ---- // https://www.zamnesia.io/en/13317-zamnesia-seeds-super-boof.html
Zamnesia Short Description // Here's your chance to grow one of the most sought-after strains of recent years: Super Boof, crowned Leafly's strain of the year 2024, and for good reason. Descended from Black Cherry Punch and Tropicana Cookies, this indica-dominant hybrid (70%) takes the already exceptional characteristics of its predecessors to new heights. Grow it at home to find out for yourself.
!
You can find the whole world of growing at Zamnesia and much more take a tour of the site and you will find "all the best that nature has to offer" in various shapes and colors.
The new strains are fantastic and the old ones are no exception...
--- // www.zamnesia.com


Likes
2
Share


@el_cultivito
Follow
Got some sealant to properly seal my DIY CO2 generator and lil maggie seems to like it. Her buds are starting to swell up.
For the CO2 generator I did the following:
2 Liter Bottle -> 1 Liter Bottle -> Fan
(Fermenting) -> (Water Filter) -> (Distribute)
Ingredients:
Sugar - 3/4 Cup
Yeast - 1 Teaspoon
Water - 6 Cups
Step 1:
Add 6 cups of room temperature water to the 2 liter bottle.
Step 2:
Add 3/4 cup of sugar to the water and mix until sugar is fully dissolved.
Step 3:
Add 1 teaspoon of yeast and let sit until bubbles appear in water filter bottle.
Step 4:
Direct the end hose to the plant canopy. CO2 is heavy so it falls, use fan to blow it to the plant canopy.

Likes
9
Share


@Luv2Grow
Follow
Day 39 - Did a little defoliating today, I’m hoping it won’t stunt too much. Last two grows, I just let it go but seemed pretty crowded so want more light deeper.
Day 40 - It appears the defoliation has really stunted her so will keep an eye on her. She’s starting to smell a bit fruity and I’m loving it.
Day 41 - No major changes today, still looks and smells amazing.
Day 42 - Looks and smells good still!