


Likes
Comments
Share


@HikeHigh
Follow
Fun grow, treated each plant with a different growing techniques - Fim, Top, Lst, super-cropping, etc. Surprised on yield using basic $130.00 Bestva. Dry weight over 1/3 of a pound. They hung for 5 days. I put time into flushing and Trichome viewing, willing to sacrifice THC content for a more energetic medicine. I nailed the harvest based off of partly/mostly cloudy trichs(pic above). The weed is gas, top-shelve, better than the 21.5% thca GC I purchase through dispensary. Very, Very pleased with results. Biggest mistakes made on this grow: 1) 2 initial pots too small for 10 week veg requiring a tricky late veg transplant. 2) not using cal/mag in mid Veg. 3) allowing humidity to drop too low while drying buds in tent - final product is a little brittle.

Processing
Likes
11
Share


@MRTHC
Follow
things are still on the go..Looking at the tricomes the are still clear with hints of cloudy.. Coming along pretty well. Im just watering with plain water now and just enough for a light runoff. Ec is low already and I don't think I can get it to anything less. Just doing routine maintenence this week. There has been no change in the colour of the leaves and this is the 11th day of. plain water.. Its all a waiting game.. I also changed the light schedule to a 11-13...... its supposed to help in trichome ripening... I hope. 😀 The vanilla Kush looks ready but I'm not sure. If anyone has an opinion on how much longer please share


Likes
8
Share

@Space_kydebt
Follow
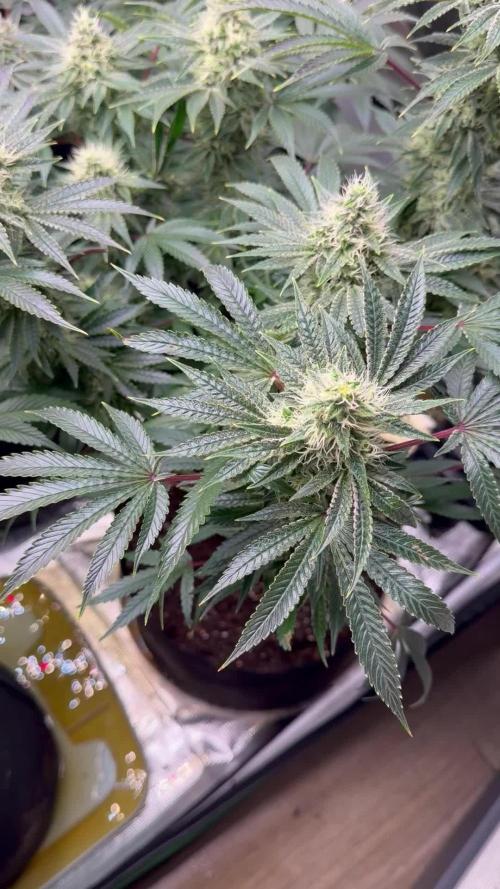
was being greedy yall and basically I put the light to close to them and I gave to much light to them light burn them I feel like a bad parent that dint put in any sunscreen on there babies .. but since I learn about these that there special you can get some pretty dooe stuff out of one pack of seeds but yeah I’m truly impressed with sativa built one in have four of these plants and they did a hell of stretching late flower no body tell you when buds get bigger they stretch even more but yeah these plants are beautiful but I turned up the light intensity and messed my self up so today lesson don’t think every plant needs the same amount of light lol .. but yeah these plants drink a lot also very heavy feeders so yeah love it . At this stage I am feeding high around 1500 ppm and at ph of 6 to 5.9 so yeah hit if you wanna know more ..

Likes
4
Share


@AlpAge_Cino
Follow
Burned tips on clones too... Lot of plain rain water for everyone! Anyway, buds look great : they're long and get fatter.
I tried a wet sample in vaporizer yesterday : it tasted bad but it was potent enough to put a smile on my face... 😋 So I removed a few popcorn buds and put them to dry : it's covered with trichromes and it smells good. I'll vaporize this dry sample later, no doubt it'll taste better.


Likes
17
Share


@stutch
Follow
Heute ging der Grow zu Ende. Ich hätte wahrscheinlich noch eine Woche warten können, hatte aber keinen Bock mehr und will mein neues Autopot System zeitnah installieren. Die Pflanze sieht super aus, die meisten Sonnensegel sind schon im Laufe der letzten Wochen abgefallen. Hab Sie heute 2-3 Stunden nach "Sonnenaufgang" abgeschnitten, umgedreht und aufgehangen. Ziemlich stressfrei, wie der gesamte Grow. Bin gespannt wie viel ich ernten werde und in ca. 10 Tagen sollte es soweit sein. Die Luftfeuchtigkeit wird für die ersten 2-3 Tage auf 55% eingestellt, anschließend werde ich es schön langsam auf ~60% RLF lassen und hoffentlich in ziemlich genau 8 bzw. 9 Tagen beschneiden und einlagern können. Dann gibt es auch ein Update mit dem Gewicht.
________________________________________________________________________________________________
The grow ended today. I could probably have waited another week, but I didn't feel like it and wanted to install my new Autopot system as soon as possible. The plant looks great, most of the fan leaves have already fallen off over the last few weeks. I cut them off today 2-3 hours after “sunrise”, turned them over and hung them up. Pretty stress-free, like the whole grow. I'm curious to see how much I'll harvest and it should be ready in about 9 days. Humidity will be set to 55% for the first 2-3 days, then I'll let it go nice and slow to ~60% RH and hopefully be able to trim and store in pretty much 8 or 9 days. Then there will also be an update with the weight.

Likes
41
Share


Processing
Likes
24
Share


@ElChicoDelaWeed
Follow
21 DÍAS DESDE EASY START.
Maceta RQS 10L.
-EASY BOST ORGANIC NUTRITION.(preparación del suelo con 50g en 10 litros de sustrato con perlita)
-EASY COMBO BOOSTER PACK.
-En la 3ª semana sigo regando las 4 plantas con agua mezclada con la pastilla EASY GROW BOOSTER (la dividí en 4 trozos para la semana 2,3,4 y 5 diluyendo en 1L. de agua la mezcla).
-Las 3 que están en vaso de plástico esta semana le voy añadir al vaso uno granos del EASY BOOST ORGANIC que no le mezclé cuando las planté).
Likes
Comments
Share


@Sativ_420
Follow
Vienen creciendo muy bien. Se nota la diferencia de tamaño entre las que están en 30L y las que están en 50(tienen la tierra por la mitad en maceta de 100. Espero en unos días poder transplantarlas también


Likes
8
Share


@4F1M6
Follow
Clones are nice and rooted threw off some new growth. So its time to rock and roll into flower. Get this breeding underway. Been on 12/12 for couple days now and the male has soared. Definitely gunna be more than adequate height to dump pollen down on my ladies.
I treated with Dr zhymes as s preventative. I also got them on a balanced feed. Hopefully that will get the ladies engines booming. Until next update. Happy growing and stay lit fam.
Update ****
Holy ball sacs! The master kush is piling on the flowers in clusters. What a machine. Definitely bringing quality traits to the table.

Processing
Likes
9
Share


@Luv2Grow
Follow
Day 50 - Started week 8 with a nice drink of water and nutes today. She’s definitely a fat a bushy girl and looking like she’s finally starting to kind of bud up a little bit on the top. I’d really like to do a heavy defoliation but don’t want to do anything to screw this grow up. She’s looking like she’s gonna be a hefty beast when all is said and done. I just placed her back in the tent and tucked everything as much as I could.
Day 51 - Everything’s still looking good and stretched another inch in the last 24 hours. She’s a very bushy plant and a shit ton of bud sites so I went ahead and clipped off a couple of the lower branches trying to develop that are just not getting to the lights.
Day 52 - Not much to say right now, nothing much going on. She’s definitely gonna need some water tomorrow or Saturday. So I just took her out today to give her a once over and placed her back into the tent and retucked the leaves.
Day 54 - She’s still chugging along and still stretching quite a bit each day. She was pretty dry today and definitely ready for some water and nutes. On advice from a friend, I added some molasses to the water as well, so we’ll see what it does for her. I’m ready for her to really start budding up but she’s not quite there yet.
Day 55 - Nothing much new for this girl today. Just took her out and removed a couple of fan leaves and put her back in the tent and tucked the leaves again.
Day 56 - The end of week 8 and can definitely tell this will be a longer grow than I’ve been used to. She’s drinking the water and nutes like a fish so will be giving her more tomorrow to keep her growing. She’s still stretching quite a bit, over and inch the last 24 hours.
Likes
5
Share

@Questpeace
Follow
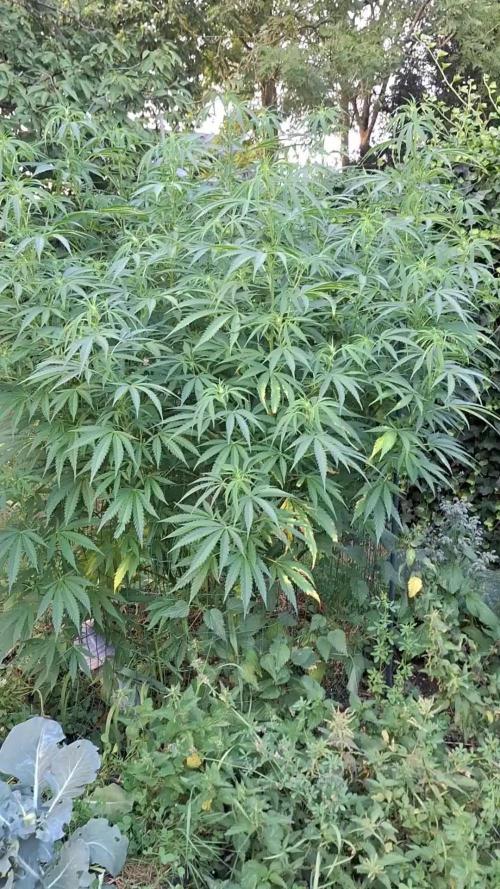
Just got back from summer holidays. Start flowering must be a couple of days ago started. She managed well during my 3 weeks out. It didn't rain for a single day during that time. They didn't receive water or any feeding.
They will get a last foliar spray.

Likes
11
Share


@ButterfliesLittleFarm
Follow
Hello Diary.
The first week of vegetation is over and for now everything is going well.
In order to recognize the plants, they are arranged alphabetically from left to right.
On the left is Apollo, in the middle is the Milky Way and on the right is Titan.
As for Apollo F1, so far so good.
The plant is developing nicely, getting new leaves and has reached almost 10 cm in the first week of vegetation.
Watering was not frequent, considering the size of the pot, there is a lot of moisture in the ground, so I watered it every 5 days with a liter and a half of water.
In the first week, I didn't add any supplements, considering that I mixed a lot of supplements into the soil.
Conditions on the farm are satisfactory.
The humidity is slightly higher than 50% and the temperature is around 25 degrees.
The light is set to 18/6 from the first day of vegetation.
I took pictures on the first and last day of the first week, just to see the difference in a week.
Here's a quick recap of the week.
30/04/2023 - Day 1.
Watering and photography. Officially, the first day of the vegetation.
Prepared 5 liters of water, lowered the pH. at 6.0 and with that amount watered Apollo and his two roommates with about the same amount of water.
Apollo F1 - 6 cm
05/05/2023 - Day 6.
Watering. The procedure is the same as 5 days earlier.
06/05/2023 - Day 7.
Photography. End of the first week of vegetation.
Apollo F1 - 8.5 cm
That's all for this week, see you soon and thank you all for your support.


Likes
35
Share


@Master_weeda
Follow
Bonjour à tous les padawans et les maîtres jedis
Pour cette semaine je prévoit de pratiquer comme technique spéciale le LST et juste un arrosage.
Pour cela comme à mon habitude j'attend le cinquième noeud ou que je juge la plante robuste.
Je profite que cette semaine qui va être relativement calme pour faire un LST appliqué et vous faire un rappel de ce qui est pour moi la meilleure technique pour arroser une autofloraison et la façon dont je pratique le LST.
En suivant ces quelques simples conseils vous obtiendrez un résultat optimal tout au long de votre culture :
Le cannabis est une plante qui n’aime pas recevoir un léger arrosage en continu. Il est impératif de l’arroser en grosse quantité, puis d’attendre que la terre soit bien sèche avant d’arroser à nouveau!
Pour calculer la quantité d’eau nécessaire à chaque plante, suivez cette règle :
Le volume d’eau à donner lors de chaque arrosage doit représenter au moins environ un quart du volume du pot !!
Exemples :
pour un pot d’1L, donnez 0,25L d’eau à chaque arrosage pour un pot de 4L, donnez 1L d’eau à chaque arrosage pour un pot de 12L, donnez 3L d’eau à chaque arrosage pour un pot de 30L, donnez 7,5L d’eau à chaque arrosage !etc…
Pour donner un tel volume d’eau, il est souvent nécessaire d’arroser en deux (voir trois) fois, lentement et uniformément sur toute la surface. Disposez de bonnes coupelles sous les pots, celles ci se rempliront d’eau qui remontera dans le pot par capillarité en moins d’une journée. Il est également très important d’utiliser un bon terreau de qualité, avec une bonne capacité de rétention d’eau mais qui assure également un bon drainage (celui ci doit contenir de la perlite, et/ou de la coco, etc..)
Il vous faut alors maintenant attendre quelques jours en sous-pesant régulièrement les pot avec vos bras. Quand ils seront redevenus très légers, vous pourrez arroser à nouveau !!
En effet, comme l’eau pèse beaucoup plus lourd que la terre, un pot gorgé d’eau pèse plusieurs fois le poids d’un pot d’une plante prête à être arrosée. Avec un peu d’entraînement, vous apprendrez donc très rapidement à sous-peser vos pots pour savoir quand une plante a soif.
C’est une technique à la fois très facile et très efficace, et qui peut être appliquée à toutes les plantes en pots !
En arrosant de cette façon, en général vous devrez arroser vos plantes tous les 3 à 6 jours.
Pour cette semaine 3 au jour 17 ma plante fais 12 centimètres et son cinquième noeud apparaît je décide donc de pratiquer un LST sur ma plante.
Pour ce j'utilise du fil de fer galvanisé que je plante directement dans le substrat en faisant attention de ne pas endommagé les racines car n'oublions pas que ce qui pousse dessus pousse aussi dessous.
Jour 17 je pulvérise du une solution composé d'une cuillère à café de savon noir mou dilué dans un litre d'eau en prévention d'éventuels nuisibles.
Je corrige mon LST suivant la pousse de ma plante ...
Pour ma par c'est la manière dont je procède. Comme promis petit rapel de:
Quand commencer à appliquer la technique LST
De nombreux cultivateurs commencent la manipulation dés que les plantes possèdent entre 3 et 6 nœuds ou une paire de feuilles. Durant cette première étape de la croissance, le tronc encore flexible est pliable sans risque qu’il ne se casse, même si au fur et à mesure du développement de la plante il sera de plus en plus difficile de le plier. Nous pouvons continuer à guider la croissance des branches durant toute la culture, même durant la floraison, ce qui pour cette étape représente un grand avantage face à la taille, qui n’est pas du tout recommandé une fois que la formation des têtes commence, cela stressera en effet la plante, ce qui aura pour effet de retarder la récolte.
Comment appliquer la technique de guidage LST
Si nous sommes prudents, la flexibilité naturelle des fibres du cannabis permet de plier leur tronc et branches avec une relative facilitée, même durant la floraison des plantes.
En utilisant une corde fine, nous pouvons accrocher la pointe de la plante à la base du pot par exemple ou à un tuteur que nous aurons planté dans le substrat. Nous plierons le tronc avec précaution et nous le fixerons avec la corde, à partir de là, nous pouvons augmenter progressivement la tension de la corde, chaque jour un peu plus, jusqu’à obtenir la position souhaitée. Soyez attentif à la réaction de la plante, essayez de ne pas appliquer trop de pression sur la corde et rappelez-vous que la flexibilité des branches peut varier d’une plante à l’autre.
Pour obtenir de meilleurs résultats, il suffit de suivre quelques règles simples. Pour commencer, nous devons choisir une corde fine mais pas trop pour ne pas blesser les troncs au fur et à mesure qu’ils grandissent et qu’ils deviennent plus gros.
Nous pouvons utiliser des crochets en plastique souple ou de n’importe quelle autre matière flexible pour éviter d’endommager les plantes. Spécialement en intérieur, utiliser des cordons en plastique de couleur (voir les diaries de @Silky) est très pratique pour voir facilement les accroches et faciliter le travail au milieu du réseau formés par les cordes, les tuteurs, les mailles ou les supports que nous aurons dans la culture. Bien entendu, en culture extérieure et surtout en guerilla nous ferons juste le contraire et nous utiliserons des matériaux de couleur qui n’attirent pas l’attention pour que notre jardin reste discret.
Pour stresser les plantes au minimum, la mieux est de réaliser ces manipulations le soir ou juste après que les lampes en intérieur s’éteignent, ce qui leur permettra de se remettre durant la nuit. Normalement, le jour suivant nous pourrons observer comme les pointes des branches que nous avons pliées se dressent de nouveau vers le haut à la recherche d’une source de lumière.
Que la force soit avec vous
Likes
12
Share


@K8420
Follow
Good week for the girls. Stretching and growing well.
Was busy this week with work and didn't have time for lots of photos.
More to come next week.

Likes
25
Share


@Anonymus420
Follow
The clone of Ayahuasca Purple have a gap of growing very impressive !! I’m working on it to do my first Main lining for now the results are great her reaction to low stress training and topping are beautifull !
she never stop to grow i love this plant

Likes
2
Share


@KeemBboomin
Follow
Once again these girls don’t really need much just watering when dry but other than that we are on cruise mode. I have been checking trichomes for about a week now and man is she almost there I should be giving them lights out with in another week or two can’t wait

