


Processing
Likes
Comments
Share


@Mr_Gezeta
Follow
-Esta semana simplemente las he regado un par de veces con un litro y medio cada una.
-A una de las GG ya estoy haciéndole el flush final
-Empiezan a enfermarse las hojas. Puede ser falta de calcio, potasio, magnesio...no lo se. Les he echado uns buena dosis de potasio y las que están más afectadas les he echado sgua limpia y un poco de potasio.
-una de las GG le falta poco para cortar. El resto les quedará poco menos de un mes

Likes
39
Share


@Mr_und_Ms_Lue_Roots
Follow
Hallöchen, wir befinden uns am Anfang der 6ten Blütewoche
kurz gesagt, die eine Bubblegum XL weist seit Ende letzter Woche Verbrennung auf. Da wir alle mit gleicher Nährlösung Gießen, wird sie wohl unabsichtlich zu viel bekommen haben.
Die genannte und die SQ1 liefen seit beginn schon sehr ,,scharf,, da wie zu Anfang benannt die Erde per Handgemischt und zwecks der Literanzahl in 2 Gängen gemischt wurden ist, hatten die durchaus mehr Dünger abbekommen. Deutlich wurde dies durch die erhaltenen Messwerte.
Nächste Idee hierzu ein Zwangsmischer, Rührsparten :-)
Auch zu benennen ist, dass die Bubblegum XL für Ihre Schnelligkeit hätte doch noch eher in der Blüte, ins HST/SCROG verfahren gekonnt hätte (nicht mehr so gut darauf angesprungen)
Die Bubblegum XL benötigen wohl auch nicht mehr so lange...
Auch um nur der Erfahrungswerte wegen haben wir in diesem lauf einiges anders gemacht wie vor. Z.b hatten wir jetzt einmal absichtlich die ersten 14 Tage der Blüte 600 Watt statt schon die 720 Watt.
Das Toppen von bis zu vier mal, aber da können wir nur nen Tipp geben, weniger ist mehr. Obwohl im LST- Training könnte es ggf. noch mal anders aussehen (noch keine Erfahrung).
Ein Endgültiges Resultat steht ja noch aus, daher später bestimmt noch mal aufgegriffen.
Ansonsten ist nur noch zu berichten, dass eine nicht so ,,Süße,, uns dann ganz sicher doch verlassen durfte. Wenn die Gutmütigkeit stets zu groß ist, wird man hinterher meist immer belehrt oder wie war das?
Aus anderer Erfahrung hatte ich wohl im Gegensatz zu diesen Zwitter eine recht Süße, aber hier die Pink Mist war echt arg hinterhältig und wurde daher auch entfernt. Wirklich schade, da die Tops nicht ganz so schlecht aussahen... 😪
Allen Growmies eine schöne Woche und viel Erfolg Gewünscht!
Danke auch fürs vorbeischauen VG


Likes
24
Share

@GreenEldritchGardens
Follow
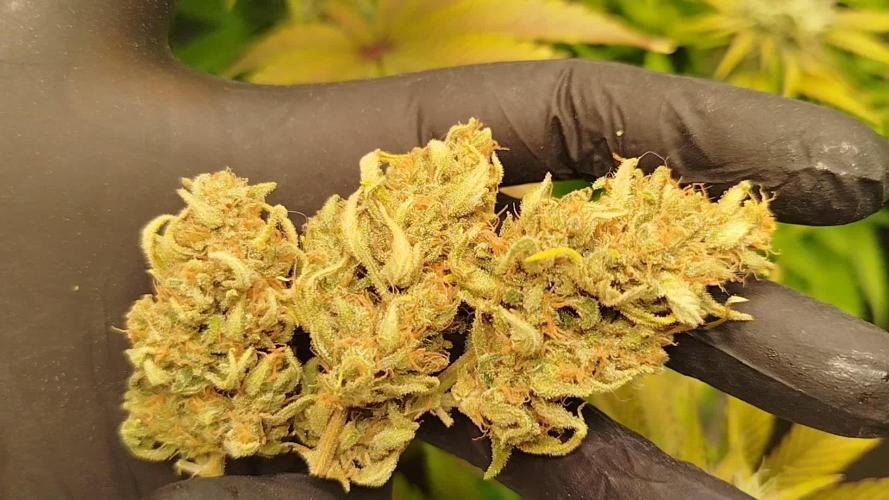
After cutting and hanging her for a 9 days she was more than dry because of a heat wave.
This was a super fun and easy grow, she even endured 12/12 and kept its nice effects and smells!
Definitely an RS11 breed by its recognizable smell with some strong lime 🍋? lineage. Even for people not much found of citrus I could recommend this one if Z and RS11 are the taste the person enjoy.

Likes
74
Share


@KrautFabrik
Follow
Day 66: flush 💦
Pictures are taken on day 70📸
-------------------------------------------------
She is gaining weight ✌️
Happy growing ✌️
Likes
8
Share


@JohnnyBarrel
Follow
Week 24
October 10 - Daylight 11h : 8h20 / 19h20
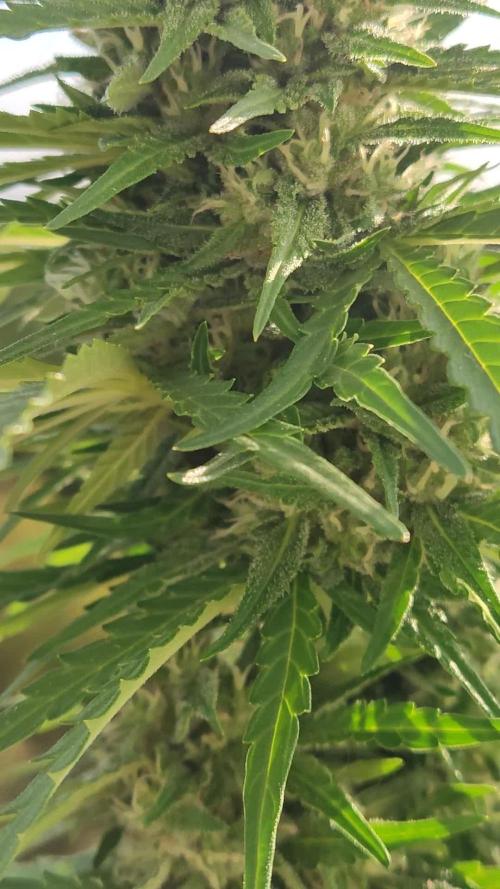
Temperatures 14° C to 23/24°C - globally rainy weather during the end of September and beginning October. Rare sunny moment but cool temperatures: best conditions to develop mold or diseases. Even if the plants are in a protected from rain and ventilated area. It’s why I harvested 2 plants ( Break Pad Breath + Flash Back #2 ) before losing the yield destruct by botrytis.
Royal Moby and GMO x Zombie Kush are still flowering.
RM: interesting sativa flowering, productive and resilient. Lot of resinous flowers; maybe it will be some seeds inside appearing after an autopollination. No mold for the moment.
Impressive refreshing Lemon smell. Ready in 10 days max.
GMO x ZK: ending the flowering cycle in a good way: pretty dense flowers, covered by resin. Spicy and flowery aroma. I had to cut a little bud attack by botrytis. Ready soon.
Last weeks just add pk13/14 + Bud XL and overdrive + enzymes
Start flushing now.



Likes
41
Share

@deFharo
Follow
Bienvenidos cultivadores de marihuana! 🖐️ 👨🌾
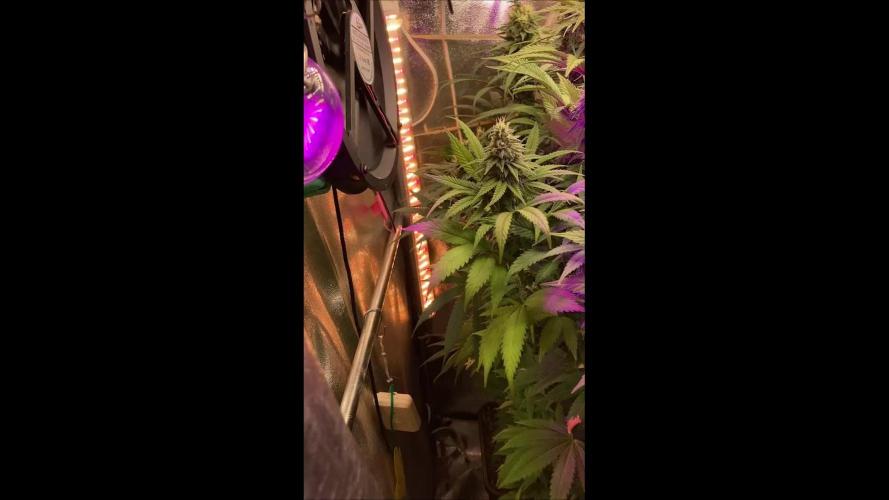
Cinco semanas de floración para esta planta alta y delgada!
La formación de flores delata una tendencia sativa, los cogollos son densos pero la formación de los brotes me recuerdan a foxtails, que normalmente veo en genéticas sativa... no me importa, al contrario, me la fumaré con placer!
Es la planta más alta de mi jardín rebelde, la maceta tiene un perfil bajo, una proporción casi cuadrada, y parece la más pequeña del grupo de macetas, pero he cultivado en ella varias temporadas y siempre me sorprende para bien.
El consumo de agua es regular, riego cada 3 días, lenta y profundamente, en las mezclas de riego para esta planta me he esforzados todavía más suaves que al resto de plantas, no quiero saturar, de ningún modo, el sustrato o las raíces.
Hace unos días he bajado el horario de luz 15 minutos, ahora 12 horas y 15 minutos, dentro de unos días más, bajaré otros quince minutos para definitivamente dejar el horario en 12/12H, con este cambio de horario sutil, pretendo recordarle a la planta que el otoño se acerca, que el final está cerca y que necesita crear muchos tricomas para capturar algún polen perdido, antes de fallecer, y no sabe que eso nunca sucederá, porque este no es jardín para machos!. 😪
😁 HASTA LA PRÓXIMA. SALUD Y SALUDOS PARA TODOS!
=============================
- Esta semilla me la regaló mi compadre canadiense: https://growdiaries.com/grower/1right_angle
- Se trata de una semilla feminizada proveniente de cruce casero entre Northern Lights (100% índica) x Thai (100% Sativa), un espécimen original con el que espero disfrutar mucho durante el cultivo.
=============================


Likes
29
Share


@TheCannaProphet
Follow
----------------------------------
~SEEDSMAN PEYOTE FORUM~
----------------------------------
Characteristics
BREEDER/BRAND: Seedsman
GENETICS: GSC Forum Cut x Peyote Purple
VARIETY: Indica / Sativa
FLOWERING TYPE: Photoperiod
SEX: Feminized
THC CONTENT: 20%+
GROWS: Indoors, Outdoors
FLOWERING TIME: 65 days
MEDICAL CONDITIONS: Glaucoma, Headaches, Migraines, Stress
MEDICINAL PROPERTIES: Yes
EFFECT: Powerful
__________________________________________________________________________________________________________________________________________________________________________________________________________________________________________________________________________________________________________________________________________________________________________________________________________________________________________________
~🤩This run is part of a Seedsman Seeds sponsored PEYOTE FAMILY COOPERATIVE GROW, I'm also cultivating a Peyote Gorilla and Peyote Zkittles that each have their own diaries.💚~
'Peyote Forum is an Indica-sativa hybrid cross between the legendary taste sensation Forum Cookies, a pheno-type of GSC (Girl Scout Cookies), and the highly potent Peyote Purple cannabis strains. This is a must-have strain for your collection which produces very high THC content..
Forum Cookies is a 75% sativa strain which retains the qualities of the original Girl Scout Cookies while adding extra cerebral sativa effects. Despite the dominance of sativa the buds it produces are very dense and rich in resin-exuding trichomes which glisten against the forest green bud-leaves and orange pistils. Some plants may display purple colors in the buds and smaller leaves at maturity.
While yields aren't enormous they are certainly decent and the sheer quality more than makes up for this fact. Flowering takes 65 days give or take. Flavors are pungent and similar to the original GSC showing a pungent Skunk character with notes of nuts and sweet spices and suggestions of earth and pine. THC production will vary between 19 - 28% depending on conditions, lighting intensity and the skill of the grower. The effect is physically relaxing while offering a cerebral twist which is uplifting, relieving stress while also helping with the symptoms of glaucoma, migraines and headaches.
Peyote Purple, however, is an Indica-dominant strain with 90% Indica genetics. Its ancestry can be traced from a single purple phenotype which was back-crossed for several generations in order to stabilize its qualities. This plant takes 8 - 9 weeks of flowering before it is ready to harvest producing average yields of way-above-average weed. The THC content is very high with plants reaching between 18 - 28%. Its name is attributed to its headiness as this Indica offers some pronounced cerebral effects with a relaxing yet uplifting high which can leave smokers sleepy and somewhat unfocused with heavier use. Therapeutically it is recommended for the treatment of chronic pain, cramps, Insomnia, muscle spasms and stress.
Brought together in Peyote Forum growers can expect some very potent, tasty dank buds with high levels of THC and an uplifting high.'
*description credit to Seedsman Seeds
__________________________________________________________________________________________________________________________________________________________________________________________________________________________________________________________________________________________________________________________________________________________________________________________________________________________________________________
THE SETUP:
~Planted into Jiffy Peat Pellets that were hydrated with de-chlorinated water with SuperThrive added then ph'd to 6.0 @ 80℉
~Grown 100% organic in 10g fabric pots with Mother Earth 70/30 Coco/Perlite medium amended with 2tbs/g of Down To Earth 4-4-4 / 2 cups/g of Earthworm Castings / 1tbs/g of Dr. Earth Flower Girl 3-9-4, 1tbs/g of Dr. Earth Bat Guano, 3/4 cup of Down To Earth Azomite and 1 tsp/g Down To Earth Fish Bone Meal.
~24hr light cycle during Germination / 19/5 light cycle for Vegetation and 12/12 for Flower
~Straight water ph'd @ 6.2-6.8 when needed and weekly Compost Tea's.
__________________________________________________________________________________________________________________________________________________________________________________________________________________________________________________________________________________________________________________________________________________________________________________________________________________________________________________
WEEKLY UPDATES:
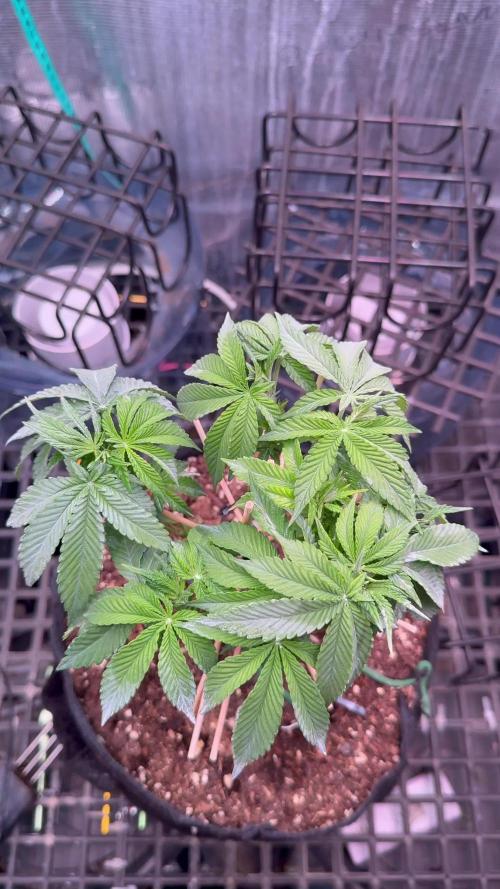
9/27- Week Seven of flower here we go! She's looking good to go with her flowers stacking and her trichome production continuing to coat her flowers!
Today she was given 1.5g of de-chlorinated water which was ph'd to 6.2 @ 72℉ which I gave her half through her drip pan (bottom chuggin), the remainder trough the medium. I also gave her pot a 1/4 turn.
9/29- Yesterday I didn't water her, only turned her pot and checked her over... Wow! She's really ramping up the trichomes making her flowers look like their sugar coated! 🤩
I watered her today with 1.5g of de-chlorinated water with 1 tsp/g of unsulfured molasses added which was then ph'd to 6.4 @ 72℉.
The molasses will give the microbial colony some additional food as well as supplying micro-nutrients to the plant. I finished out the daily maintenance giving her a check over and turning her pot 1/4 turn to ensure she gets light to every inch of her.
10/1- Yesterday was a 'no water' day as her pot was still fairly heavy to lift. Today she was watered with her usual of 1.5g of de-chlorinated water which was ph'd to 6.2 @ 72℉.
Her flowering continues to impress me with her trichome production covering her flowers with 'frost' she's a sight for sore eye's! 😍
The end of next week will be the beginning of her wrapping up with the 'Finish Line' approaching by Week 9, but it will all depend on when she tells me that she's ready to go!
10/3- With Week Seven coming to a close we're going into the last 2-3 weeks for this lady and she's right on track, looking like a Rock Star! 🤩
I watered heavy yesterday and added 1 tsp/g of Unsulfured Molasses to the 1.5g of de-chlorinated water which was then ph'd to 6.6 @ 72℉.
Her pot had some weight to it when I checked today so I'll skip watering her until tomorrow. I finished up today by checking her over and giving her pot a turn.
~Thanks for stopping in! This epic run will be wrapping up in the coming weeks...Stay lifted and be Blessed! 😎🙏~

Likes
30
Share


@CanadianFillmore
Follow
Welcome growfessors to my outdoor 2021 grow! It's been 4 years since my last outdoor grow.
We've got LSD and Green Crack outside, each one in half a 55 gallon container, in pro-mix HP, with Gaia Green 4-4-4 all purpose powder nutrients.
Thanks for stopping by growfessors 👽🌳💚

Likes
37
Share


@Ferenc
Follow
Last couple of days... No watering from today, (Day 129) and the light will be switched off as well from tomorrow (Day 130) so I will harvest them
approx on Day 132
or 133 on the 18th week :)


Likes
10
Share


@GaiaG
Follow
This week seemed to go by very slow. The plants are growing at a slow rate. It’s my first grow abs I was unsure of when to turn the lights on. I had some plants still as seeds and some has germinated. I turned the lights on a day or 2 late I believe so some of my plants began stretching.

Likes
70
Share


@Mosquito_Haarlem
Follow
Het is zover.
Vandaag 27 december is de laatste dag met de lampen aan.
Ze staat nu in het donker en morgenavond 28 december zal ze worden omgehakt en opgehangen.
28 december: de koningin is omgehakt en opgehangen aan de drooglijn.
Oogst rapport komt als de toppen droog zijn
To be continued..... stay tuned........🧐

Likes
52
Share


@Mr_Motalovah
Follow
Hello Growers & Tokers!
As you can see the hunt for those cosmic snacks seem to be on track!
I topped her at the seventh node. I'll let her bounce back from that then comes a good defoliation the switch to flower.
My plan is to have as an even canopy with about 8-10 colas.
That's about it for this week.
Take care out there and happy growing!

Likes
35
Share


@eldruida_lamota
Follow
Esa familia, os dejo una actualización de las red hot cookies que aunque no hay vídeos por problemas técnicos con la página si actualizamos y subimos las imágenes.
.
La humedad anda entre 60/70% la temperatura está entre 23/26 grados, el led es increíble , y como siempre el ph , ya que es de lo más importante,está en 5,8/6,0.
.
AgroBeta:
0,8 ml x L Growth black line , vía radicular.
0,2 ml x L Tucán , vía radicular.
0,15 ml x L Flash Root , vía radicular.
0,05 ml x L Gold Joker, vía radicular.
.
Esto es todo fumetillas, muy pronto las veremos echando flores 💨💨💨 buenos humos.
Likes
8
Share


@ProKush27
Follow
By the start of the week I’ve noticed magnesium deficiency on plant A and B, so I started adding Biobizz Calmag on Froglord’s kind recommendation.
Otherwise I started slow defoliation process and I’m currently removing around two leaves per day.
Plants definitely grew larger than expected but I’m not mad :D. They’re taking a bit longer, but it should be worth it. I’m expecting harvest on plants C and D soon.
Likes
35
Share


@SmokingTiki
Follow
Jamaican Pearl plant was too weak and has been replaced by two Mandarin Punch Auto.

Likes
5
Share


@Bluemels
Follow
Tag 68: Noch eine Woche bis zur Ernte. Zum Glück. Die Blätter sehen auch echt nicht mehr gut aus. Vermutlich war ich beim ph wert einstellen noch zur vorsichtig, und er war noch etwas zu hoch?!? Ich traue mich immer nicht soviel von Säure zum senken rein zu machen 😬