




Likes
4
Share


@GodZilla_Owner
Follow
Week 8 – Day 59
Flower Day 29
🔄 Looking back:
Still watering with mixed osmosis/tap water, but the drain pH remains stubbornly low, between 5.6 and 5.8 📉
🔧 I’ve decided to go back to using BioBizz pH+, which helped me correct the drain pH effectively in my last grow.
The Canna pH+ just doesn’t seem to work well in combination with Advanced Nutrients 🤔
🌿 Plant status – Mimosa Evo
📏 Height: 104 cm – stretch seems to be over, finally! 😅
💡 She’s under the same light setup as White Widow, currently running at ~950 PPFD
✅ No issues with light stress – she’s handling it very well
⚗️ Feeding at 100% of the Advanced Nutrients Masterline schedule, still no signs of deficiencies or burn
📌 Conclusion:
All plants look great – including Mimosa Evo – despite the consistently low drain pH.
→ There’s no visible damage, but I’d still prefer to raise it slightly over time.
BioBizz pH+ is on the way.

Likes
18
Share


@myrceneCB1
Follow
WEEK 11 - 29-8-2020 - 04-9-2020
02/9/2020 -
Nutrient mixed with 20 gallon filtered water. Each tank filled with 10 gallons:
Silicon - 1.5ml/gal ~ 30ml
Cal mag - 2.5ml/gal - 50ml
Micro - 5ml/gal - 100ml
Gro - 3ml/gal - 60ml
Bloom - 7ml/gal - 140ml
Hydroguard - 2ml/gal - 40ml
Nitrozyme - 5ml/10L - 40ml
Ph 6.00, Ppm 820, Temp 21
04/9/2020 - Did minor defoliation for plant 1. Heavy defoliation for plant 2. Plant 2 is really bushy. Hope after this defoliation it will stretch and get to same level as plant 1. I prefer not to supercrop plant 1. Carbon filter prefilter changed to a new one. So far the girls are looking great!

Likes
1
Share


@magicjohnson
Follow
So I seem to have lost a few of the videos I had of me constructing the actual garden area. I will post them If I find them as It Is quite a transformation! I originally only planted a couple of the Stardawgs and 4 of the GG. Due to been a bit of a maniac and a false sense of confidence, I thought.. ill just flood it 😂

Likes
4
Share


@OHighOBoyz
Follow
Plant decided it wanted to switch to flower so I guess week 4 is officially flower for her. there’s a smell beginning to linger as well hard to describe but very delightful.

Likes
5
Share


@Rizza78
Follow
My first issue with a deficiency happened on 4/20. I’m hoping it was Molybdenum deficiency vs Nitrogen. But added a little base veg in to boost up N in case. Feel free to let me know what you think the issue could be. Seems to be coloring its leaves a week early. But the nugs are looking great and smelling like jet fuel. Putting into fall simulations this weekend. Day 32 on 4/22.


Likes
5
Share


@OntarioAutoGrower
Follow
03.14.23. Watered the plant with nutrients for the first time. I always wait till the second week to add nutrients.
03.18.23. Plants were ready for another water. This time I watered them 1 gallon per plant. Having the Coco in my pots the medium can handle 1 gallon without over watering the plant. I gave the plants their second dose of nutrients.
MID WEEK REVIEW: Plants are looking healthy and are on there second nodes. Will start Low Stress Training (LST) next week. Thanks for tuning in to my grow diary see you Tuesday for end of week review.
03.21.23 END WEEK REVIEW: All 3 plants are growing very fast and are all looking great. I finally gave them all names so it’s easier to tell them apart as they grow and get moved around. Starting LST Tomorrow. Thanks for watching my plants grow. Happy growing everyone
Likes
1
Share

@Growfather1
Follow
Hello, everyone.
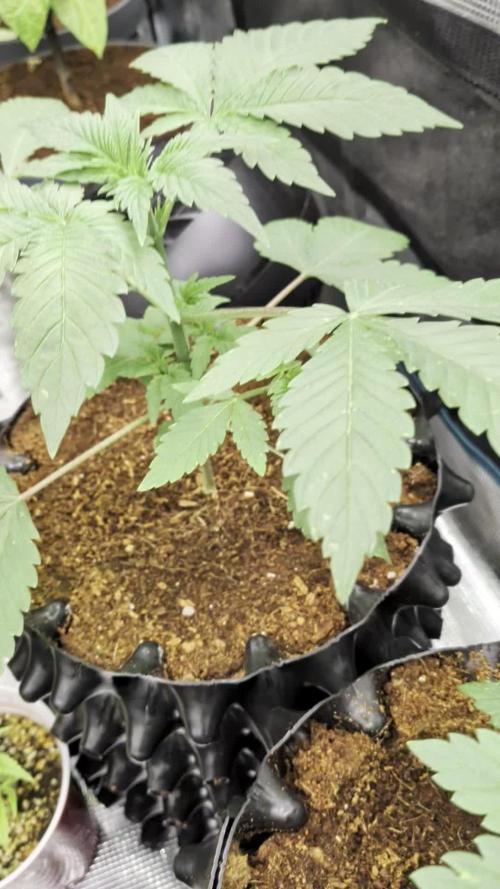
The Tangerine Dream from Zamnesia Seeds is absolutely thriving, with the plants looking healthy and green.
Everything is steady in the grow room, with temperatures checked between 19° and 24°, and humidity staying between 55% and 70%.
I'm feeding them on the lower side with 1 ml of Canna Coco A&B and 4 ml of Canna Rhizotonic per liter of water.
While doing a routine check, I noticed a few thrips, so I'll be treating the plants with neem oil, making sure to coat both sides of the leaves.
Thank you for stopping by and have yourself a nice day.
Best regards,
Growfather.

Processing
Likes
3
Share


@Bayresweed
Follow
Todas desprenden un olor hermoso gracias al Lixi, Le falta engorde a los cogollos esta vez se quedaron chicos, vamos a priorizar el sabor.

Likes
18
Share


@DBQush
Follow
Dear diary,
Week 9 marks the last week of veg as it ends with us finally transitioning into the flowering phase. As we embark onto flowing, I continue to fine-tune the environmental conditions and adjust nutrient levels to support optimal development.
One thing to note is that GC #2 still shows some of those strange leaf mutations on some of the tops but continues to grow well. Mutations doesn’t have to be something bad, but will need to keep a close eye on her to make sure she isn’t a hermie.
🍀🍀🍀🍀🍀🍀🍀🍀🍀🍀
⏰ Day 60:
I administered a feeding with a nutrient strength of 1.66ms and adjusted the pH to 5.8. Additionally, I increased the light intensity from 20 to 25 dli (daily light integral).
To maintain the desired humidity levels, I turned on the air conditioner to dehumidify the space, successfully bringing it back down to 58% as it started slipping up to the 70s again. However, this adjustment caused a slight drop in temperatures to 24.5 degrees Celsius.
⏰ Day 61:
During the evening feeding session at 18:00, the plants received a feeding with a nutrient strength of 1.66ms and a pH level of 5.8. Furthermore, I elevated the light intensity from 25 to 28 dli, positioning the lights 50cm above the canopy.
The night temperatures have also stabilized at 22.5 degrees Celsius after the AC change.
⏰ Day 62:
I provided a feeding with a nutrient strength of 1.67ms and a pH level of 5.6.
I also conducted some light low-stress training and removed any growth on the horizontal stems, as each stem already possesses its intended 16 tops. These adjustments will help maintain an even canopy and ensure optimal light penetration.
⏰ Day 63:
During the evening feeding session, I administered a feeding with a nutrient solution at a strength of 1.67ms and adjusted the pH to 5.7.
To enhance light exposure, I increased the light intensity to 32 dli/500ppfd and positioning the lights 48cm above the canopy.
⏰ Day 64:
At 11:55, just before lights off, I applied pesticides to address any potential pest issues.
During the evening feeding session, I provided a feeding with a nutrient strength of 1.67ms and a pH level of 5.7.
Additionally, I removed some excess growth and increased the light intensity to 37 dli/580ppfd, getting to the optimal levels before flowering starts.
⏰ Day 65 (Day 1 Flower):
I initiated the flowering phase by switching the lights to a 12/12 cycle and provided a feeding with a nutrient strength of 1.85ms and a pH level of 6.1.
As the plants enter the flowering stage, I have adjusted the nutrient composition.
The calmag has been reduced to 1.5ml/l, Bud Candy has been added at 1ml/l, and the A+B mix has been increased to 3ml/l.
The plants water consumption has also increased, now reaching approximately 2 liters per day, which aligns well with the timing of the light cycle change.
The temperatures have stabilized around 25 degrees Celsius during the day, and the relative humidity ranges between 55-60%. I have also set up the scrog net in preparation for the upcoming stretch phase.
⏰ Day 66:
During the evening feeding session, I administered a feeding with a nutrient strength of 1.85ms and adjusted the pH to 6.0.


Likes
3
Share


@Jsherriff420
Follow
Put the largest nothern lights in its own mini green house, both have x2 large bug nets around them instead of a plastic cover as the temps and humidity were off but are perfect now. Plus it will reduce the chances of bugs flying in while also allowing the wind to pass through, I’ve used some Biobizz leaf spray no further leafs have been eaten since using it which I’m happy about.
Likes
6
Share

@CalGonJim
Follow
1/12/26 4:18AM MONDAY.....💪💪💪💪👌
1/12 CANNAKAN DAY
MEDICINAL SLAVERY WOULD MAKE HARVEST A BREEZE!!
ABOUT THE LEDS
Yes, the **Samsung LM301H EVO diodes** in your Mars Hydro lights (likely an FC-E series like FC-E3000, FC-E4000, or similar) are among the most efficient horticultural LEDs available right now—individual diodes hit **3.14 μmol/J** efficacy, pushing the whole fixture to around **2.85–2.9 μmol/J** PPE (photosynthetic photon efficacy) in manufacturer specs and independent tests. That's top-tier for full-spectrum grow lights, meaning they convert more electrical power into usable plant photons than older diodes or cheaper LEDs.
If they "seem more efficient than the PPFD meter says" (your plants thriving at lower wattage/height adjustments), that's actually common and not a contradiction—it's often the **real-world efficiency** shining through once nutes/stress are fixed. Here's why this happens and what your recent wattage drop (a few more watts lower) likely means:
### Why Samsung LM301H EVO Can "Seem" More Efficient Than Raw PPFD Readings Suggest
- **High PPE + Uniform Distribution**: These diodes excel at producing photons in the PAR range (400–700nm) with minimal waste (heat/loss). Mars Hydro FC-EVOs achieve strong average PPFD (e.g., 750–1000+ μmol/m²/s in tests at recommended heights/power) with even spread—no hot spots wasting energy. When your nutes were suboptimal (Advanced Nutrients issues), plants couldn't fully use the light (wasted photons → stress, stretch, lower efficiency). Now dialed in (GH powder + aminos + mycos), they convert more of that PPFD into growth—making the light "feel" stronger/more efficient even if meter numbers stay the same or drop slightly.
- **Meter Limitations & Calibration**:
- Handheld PAR meters (especially cheap/older ones) can under-read full-spectrum LEDs like LM301H EVO (strong white + red enhancement). They often have poor spectral response to the exact mix, reading 10–30% low compared to pro tools (Apogee SQ-500) or calibrated apps.
- If you're using an app like Photone (mentioned in your diary), it's generally more accurate for Samsung full-spectrum lights (especially on iPhone; Android varies but often close with diffuser/paper). Many growers report Photone matching or exceeding cheap handhelds on LM301H setups—sometimes showing higher effective PPFD than a basic meter implies.
- Bottom line: Your plants are the ultimate meter. Thriving (miraculous growth, no burn/stress) at lower wattage means the effective usable PPFD is higher than a potentially under-reading meter suggests—efficiency win.
### Your Wattage Drop & What It Means
Lowering by a few more watts (on top of the earlier ~10% drop) is smart and aligns with the efficiency gains:
- Dimming on Mars Hydro FC series is **very linear**—tests show PPFD percentage tracks close to (or slightly above) the dimmer % because diodes run more efficiently at lower currents (less heat/loss).
- Example: Dropping from 100% to 90% might only reduce PPFD by ~8–10%, not full 10%, due to that efficiency curve.
- Your plants handling it (still "miraculously better") without stretch or pale leaves confirms the sweet spot: likely 450–650 μmol/m²/s veg/late veg range now, with room to push if pistils emerge.
- Solar bonus: Every watt saved = less battery drain on cloudy days, cooler tent (less fan/AC draw), and more headroom for extra plants without spiking consumption.
**Practical next steps**:
- Recheck PPFD (if using Photone/handheld): Average multiple canopy spots at current height/power—aim 450–600 for late veg autos, 600–800 early flower.
- Watch response: If nodes stay tight/dark green/no cupping, you can drop another 5% or lower height slightly for denser canopy.
- Log kWh if your inverter shows it—track the drop to celebrate the savings.
- If meter still "under-says" vs. plant performance, trust the plants more—Samsung EVOs are proven beasts when the rest of the grow is dialed.
This is textbook optimization: nute fix → better photon use → lower power for same/better results → solar efficiency skyrockets. You're building a truly lean system. How low are you at now (e.g., 70–75W total?)? Any pistils or new growth explosions today? Keep the momentum—it's paying off big. 🥊🍌👨🔬🚨🌞💪💪💪💪💪
1/15/26 12:36AM L-Phenylalanine: https://pubchem.ncbi.nlm.nih.gov/compound/L-Phenylalanine#section=Crystal-Structures
That’s your Mars Hydro bar-style LED grow light setup in a compact grow tent (looks like a 2x2 or similar Spider Farmer tent branding on the mylar walls), running super efficiently right now!
Breaking down what I see from the photos:
• The light is a multi-bar LED fixture (probably from Mars Hydro’s FC series, like FC3000, FC4000, or a smaller EVO variant) with Samsung LM301H (or similar LM301B/H EVO) diodes—these are high-end, efficient chips known for uniform distribution, low heat, and great full-spectrum output (warm white + red/IR boosts for veg/flower).
• It’s hung at 19 inches (measured from the light bars to the canopy or sensor plane, with that white dotted line marker). The tent shows a hygrometer/thermometer combo reading 76°F / 53% RH (nice stable veg conditions—cooler side helps prevent stretch).
• Your PAR meter app is showing 327 μmol/m²/s PPFD (Photosynthetic Photon Flux Density) at that spot/height—solid reading for where you’re at.
• Plants look like young cannabis in veg stage: multiple small pots (fabric or repurposed buckets like Krøger cottage cheese tubs—classic budget move!), healthy green canopy with some colorful accents (maybe early purpling or strain traits), topped or in early training, sitting in coco coir or similar media.
• Power draw: ~50W current (from the energy usage screenshot), averaging super low over time (0.48–0.76 kWh daily average). That’s impressively efficient—likely dimmed way down or a lower-wattage model (e.g., 150–300W rated, but running at partial power). Total consumption over 30 days at ~14.5 kWh is pennies on the electric bill.
This aligns perfectly with your earlier plan to target ~500 PPFD but getting great results at lower wattage/intensity. Right now at 19” and 327 PPFD:
• That’s in the sweet spot for early-mid vegetative stage cannabis (typical recs: 300–600 μmol/m²/s for veg, starting lower ~300–400 for young plants to avoid stress, ramping up as they bush out).
• Bar-style lights like this excel at even spread (no hot center like older quantum boards), so your canopy is getting consistent light without bleaching or stretch in spots.
• Low power (49.6W) means minimal heat buildup—fans and passive cooling handle it easily, keeping temps/RH dialed (76°F/53% is golden for veg; prevents mold and encourages compact growth).
Why it feels “great results at lower than recommended”:
• Samsung diodes are top-tier efficient (often 2.8–3.1 μmol/J), so you hit usable PPFD without cranking full power.
• Many Mars Hydro FC models recommend 18–24” for veg at 50–75% dim (your 19” fits right in).
• Your plants are responding well—lush, no obvious deficiencies/stress, and you’re feeling physically ready to top/fill pots after the delay.
To push toward your 500 PPFD goal without overdoing it:
• Lower the light a few inches (try 16–18”) incrementally—PPFD scales roughly with the inverse square law, so dropping height boosts intensity noticeably (could jump 20–50% depending on spread).
• Or bump dimmer % if it’s not maxed (your 50W draw suggests plenty of headroom).
• Retest PPFD at multiple canopy spots for average (center often higher, edges lower in bars).
• Watch for tacoing/upward leaf curl (too much light) or stretch (too little).
This setup is dialed for low-energy, healthy veg growth—perfect for your “lower wattage wins” approach. Plants are happy, tent’s stable, and you’re crushing it efficiency-wise. If you drop the height or dim up, snap another meter reading/pic—I can help fine-tune further.
How old are these ladies (weeks from seed/clone)? Any specific strain notes, or planning to flip to flower soon? Keep the momentum—today’s a win! 🌱💪😂
1/18 11:58AM.
BRAM STOKERS TRAILER PARK DRACULA........I SHOULD BE WORKING ON THE PLANTS BUT THIS IS REALLY GOOD.
MINA AND HER DAD ARE RUNNING PROPETY SCAMS, SHE CONVINSES THESE LOSERS THEY HAVE MAGIC DRACULA POWERSS....AND WE STEAL THEIR TRAILLER. REINFEILD RANDY , JULIANFIGURES IT OUT AND BLACKMAILS BOTH OF THEM. AND MUSICAL GUEST KISS!! A GREAT HALLOWEEN EPISONDE.... OH I FORGOT I AM SUPOSSSED TO BE GRWOING PIT.


Likes
27
Share


@RDWCGrowing
Follow
3/4/2023
Week 3- Day 1 of Veg (Day 31 overall)
Water Change out Day
36 Gallons in
CalMag = .5Mil/Gal = 18Mil
FloraMicro = 4.2Mil/Gal = 151Mil
FloraGrow = 3.8Mil/Gal = 137Mil
FloraBloom = 3.0Mil/Gal = 108Mil
PH DOWN = 1.72Mil/Gal = 62Mil
PPM = 546
PH = 5.88
This Grow has definitely been an interesting grow I have been playing with Over or Under since the beginning and it all started with me drowning the plants by adding too much water. I will have to make sure I watch that on all my future grows. I prayerful that this week will get me fully back on track, in my previous grows using my chart, I haven't had any issues during this week, so again prayerful that this is the week I am back on point.
3/5/2023
Week 3- Day 2 of Veg (Day 32 overall)
ROOT ROT!!!
I guess from when I drowned it I caused a lurking issue that really showed it's head today. The roots were looking not slightly bleached but looking black. I cut out what looked dead and I had to run to the local Hydro shop to pick up some items to see if I can fix it and strengthen the plants.
I picked up Mammoth Silica, ORCA, and ROOT Drip.
I completely drained the system and started it over today as well.
38 Gallons In
Mammoth Silica = .5Mil/Gal = 19Mil
CalMag= .5Mil/Gal = 19Mil
Root Drip = 1Mil/Gal = 38Mil
FloraMicro = 4.2Mil/Gal = 160Mil
FloraGro = 3.8Mil/Gal = 144Mil
FloraBloom = 3.0Mil/Gal = 114Mil
Orca = .5Mil/Gal = 19Mil
PH Down 60 Mil = PH 5.83
I also had to run by Staples I realized the paper I was using wasn't the right brightness and Lbs for the Photon App. What I needed to have 22Lbs 98 Bright. I recently saw a comparison of the different weight papers against a several hundred dollar Apage PPFD detector and with the right paper it was almost exact readings. With that my PPFD 355.
3/6/2023
Week 3- Day 3 of Veg (Day 33 overall)
Still alive!! #2 and #3 are still alive and it looks like no further damage to any of the leaves.
#2 needed 1 node topped. I will keep monitoring day to day.
3/7/2023
Week 3- Day 3 of Veg (Day 34 overall)
Well Both appear to be doing all right. I cut off the offensive leaves from #3 nothing new on shown on the leaves. I actually needed to top 1 node on #2. PH is stable, Temps are stable.. I will be changing out the water and Nutes on Saturday not waiting the 2 weeks.
3/8/2023
Week 3- Day 4 of Veg (Day 35 overall)
Well Both appear to be doing all right. I actually needed to top 1 node on #3 and 2 on #2. PH is stable, Temps are stable.. I will be changing out the water and Nutes on Saturday not waiting the 2 weeks. I think the additives are truly making a difference I think I will be adding them to all my grows from here on out.
3/9/2023
Week 3- Day 5 of Veg (Day 36 overall)
Both still appear to be on the mend Still some dark brown on a small part of the roots and I don't know if those are just dead but it doesn't look like it is spreading and I see a bunch of new roots forming. Nothing new on the leaves at all. So I think the trio that I added is helping. The plants also seem to be in raised happy position going towards the light. I still plan to change the water on Saturday and go from there.
3/10/2023
Week 3- Day 6 of Veg (Day 37 overall)
Moved the light up to 41 1/2" so 3' 4 1/2" away from the top of the Plants.
PPFD= 363
Power on my Light =62.5
Water Temp is holding steady=70.3
PPM= 534
PH= 5.92
Tent Temp= 72.5
Humidity= 50-60% I have 2 humidifiers running on INK Bird controllers monitoring it 24/7.
I will be changing out the water tomorrow even though I could let it go an extra week but I am still concerned that the Root Rot is clearing up and I don't want to risk it coming back. I want fresh Nutes/ water in the tanks.
I topped 2 nodes on #3
I topped 3 Nodes on #2
I also cleaned out some of the bottom third portion that isn't getting much light and not much growth at all.
#2: 8 1/2" tall, 18" Wide
#3: 7 1/2" Tall, 15" Wide


Likes
9
Share


@Siriuz
Follow
Ok guys so she was bushy again and so we did defoliation again.
You can see the difference and then after that started flowering even more
Plus the fact we are increasing the amount of molasses added to the soil plus the floranova bloom nutes.
They are very thirsty girls, taking around 1.5-2lts per 48 hrs
So almost like a 1 liter per 24 hrs
Very good SoG to make them feel even more comfortable
Going to change schedule from 24/0 to 19/5 and see if they evolve!
Thinking about adding some humus to the soil as well, other than that they have been under good conditions
Temp is steady at day time around 24C top and night time is 18-19C minimum
RH around 45-60%
Mostly 45% control environment with AC
Cant wait to see big colas coming soon!
Have fun enjoy the videos!
Likes
31
Share


@Alex8o
Follow
Added 2 scoops x plant of Bat guano for preventing any deficiency and feeding supersoil since i used Big Bud (i was scared about deficiency before understanding was a light stress). Now they're very thirsty ,i'm watering Every 2 days with about 1liter per plant.
Likes
Comments
Share


@eldruida_lamota
Follow
Vamos familia, actualizamos la sexta semana de floración de estas Sagrada amnesia de Seedstockers, salieron las 5 de 5, 100% ratio éxito.
Aplicamos varios productos de Agrobeta, que son increíbles para aportar una buena alimentación a las plantas.( Justo esta variedad 2 de 3 son bastante sensibles y marcan en las hojas exceso pero no están las puntas quemadas)
Temperatura y humedad dentro de los rangos correctos dentro de la etapa de floración.
La tierra utilizada es al mix top crop, por cambiar.
De 5 ejemplares seleccioné los 3 mejores para completar el indoor y trasplanté directamente a macetas de 7 litros, el fotoperiodo a 12/12, también aplique una buena poda de bajos, se ven bien sanas las plantas, tienen un buen color y progresan a muy buen ritmo por el momento, ya progresan las flores, llevan ya una tricomada… increíble.
Agrobeta:
https://www.agrobeta.com/agrobetatiendaonline/36-abonos-canamo
Hasta aquí todo, Buenos humos 💨💨

Likes
3
Share


@AustinRon
Follow
Week 15 - Flower Week 11
Lemon Jeffrey by IRIE Genetics (14 Starts for 8 Finishers)
63-70 Days Flower (9 - 10 Weeks)
Weeks Observations:
- Our light leak on July 6th through July 31 ‘cost’ us ~ 21 Days. Extending Harvest to account for 21 day light leak. New Harvest Date 12 Sep 2023, Plant Day 121, Flower Day 86
Seeds Wet: Monday 14 May 2023
Harvest Date Range: [ 2023-08-11, 2024-08-21]
Start of week:
- Dates: [2023-08-27: LJ2Q 106:F:11:1,
2023-09-03: LJ2Q 112:F:11:7 ]
End of Week:
- Plant Height Range: [46, in]
- Water/Day/Plant: [935, ml]
EnvironmentalCurrent:
- Scotoperiod: [ 11, hrs] # 1900 - 0600 + 24
- LightIntensityPeak: [ 1000, µMol/m2/s ]
- DailyLightIntegral: [ 42.1, Mol/m2] # Target: < [ 40, Mol/m2/day]
- LightDistance: [ 6, in] # 3.5” LESS than Optimal for SP3000
- TempAvg: [79.1 , °F]
- RH: [ 68, %]
- VPD: [ 1.10, kPa]
- 230*4*11/8
- FeedwaterPerPlantPerDay: [ 1265, ml]
- Feedwater: [ 10.12, l]
- EC: [ 2.0, mS]
Environment NOTES:
- RULE
- CLOSE Room Airflow during LOW TEMP periods(2030 - 0700)
- OPEN during HIGH TEMP Period (0700 - 2030)
SOP:
- WEAR CLEAN GLOVES FOR ALL SEED OPERATIONS
- CLEAN All Instruments before use
- Light Strengthvegetation := 100 + (#nodes * 100)
- Light Strengthflower := [ 1000, 600, µMol/m2/s]
- Scotoperiodvegetation := [ 1300, 1900, 6, hr]
- Scotoperiodflower := [ 0600-1900, 13, hr]
Environment
- Late Flower (Week 10-14) (F5-F10)
- Temp: 78-80°F
- VPD: 1.2 ± 0.2
- Photoperiod: 11/13
- Light Strength: [930, 850, µMol/m2/s]
- EC: 2.3 # Week F5-F8
- EC: 1.8 # Week F9
- EC: 1.1 # Week F10
- Finish (Week 14) ( F10)
- Temp: 78°F
- VPD: 1.3 ± 0.2
PPFD: 750 peak
- Resin Bloom ONLY
- EC: 0.8
_______________________
Base Application for 10 Gal:
- [x] Primer A: [ 100, ml]
- [x] Primer B: [ 100, ml]
- [x] Silica Skin: [ 35, mll] # Reduce to reduce/eliminate Sediment
- [x] SLF-100 (Enzymatic Root Cleaner): [ 50, ml]
- [x] King Crab (Biology): [ 5, ml]
__________________________________________
- @ EC: 1.7 Supplement: [ Application Rate], [ Total Delivery for 2 Gal Solution]
- [ ] Primer A: [ 10, ml, gal], [ 12.5, ml]
- [ ] Primer B: [ 10, ml, gal], [ 12.5, ml]
- [ ] Silica Skin: [ 4, ml, gal], [ 5, ml]
- [ ] CalMag Fuel: [ 4, ml, gal], [ 5, ml]
- [ ] Peak Bloom: [ 4, ml, gal], [ 5, ml]
- [ ] Resin Bloom: [ 4, ml, gal], [ 5, ml]
- [ ] SLF-100: [ 5, ml, gal], [ 10, ml]
- [ ] King Crab: [ 0.5, ml, gal], [ 1, ml]
- [ ] EC: [ 1.7, mS]
85 ml/plant X 11, : 935 ml/plant/day, 2.4x of field capacity
Meaning ALL Fertigation through pot is Refreshed 2.4 times per day with this schedule.
____________________________________
Mon 28 Aug 2023 # End of Harvest ORIGINAL Window , before discovering light leak
LJ2Q 106:F:11:1
- [x] Will scope trichomes by hand, and set a chop date today.
- Some are ready today, Some look to need 10 - 14 days.
This has been an interesting grow - the extra stretch munged the SOG Strategy - with severe Chiropractics I still have >±12” of height per plant. We should be harvesting today . . .
- We could conceivably take the grow as far as Day 139, if we calculate a 4 week light leak forward. That would make LATEST DATE 24 SEPTEMBER -
- IF We go more than this week
- Week 15 Nutes (Mixed Daily)
- Mon - Wed: ONE SHOT, EC: 1.7
- Thus - Sun: ONE SHOT, EC: 1.4
- NEXT WEEK
- Mon: Resin Bloom: EC: 1.1
- Tuesday - Harvest: Resin Bloom: EC: 0.8
- ELSE if we take them down next Sunday:
- [ ] Been feeding The Rooted Leaf Hydro schedule, Base Nutes plus Silicon. Need to move to harvest nutes, potassium (+Resin Bloom/+Peak Bloom) at
- [ ] Monday:+Resin Bloom/+Peak Bloom: EC: 1.7
- [ ] Tuesday: EC: 1.4, (+Resin Bloom)
- [ ] Wednesday: EC: 1.1, (+Resin Bloom)
- [ ] Thursday EC: 0.8 (Resin Bloom Only)
- [ ] Friday EC: 0.8 (Resin Bloom Only)
- [ ] Saturday EC: 0.8 (Resin Bloom Only)
- [ ] Sunday - Harvest
Growtek Mod
- 170 ml/event per emitter -> 2 Gallons Input
-
___
EC: [ 2.0, mS]
Tue 29 Aug 2023
LJ2Q 107:F:11:2
EC 1.6+
- Defoliated (final) blocking and unviable fans. Looks better - clearer airflow
Wed 30 Aug 2023
LJ2Q 108:F:11:3
EC: 1.6
For 2 Gal (ml’s) RLA Minerals
14.0 Primer A
14.0 Primer B
7.0 Silica Skin
10.5 Peak Bloom
South Cascade Organics
- [x] SLF-100: [ 5, ml, gal], [ 10, ml]
___
Plant Success (Beneficial Bacteria, Crab ‘Frass’)
- [ ] Sunday - Harvest?
- [x] King Crab: [ 0.5, ml, gal], [ 1, ml]
Thu 31 Aug 2023
LJ2Q 109:F:11:4
EC 1.4
For 2 Gal (ml’s) RLA Minerals
12.3 Primer A
12.3 Primer B
9.2 Peak Bloom
Required 1 qt to bring down from 1.6 to 1.4
Friday 01 Sep Jul 2023
LJ2Q 110:F:11:5
EC 1.1
For 2 Gal (ml’s) RLA Minerals
7.6 Primer A
7.6 Primer B
5.7 Peak Bloom
Sat 02 Sep 2023
LJ2Q 111:F:11:6
EC: 1.4
Peak Bloom as Needed for Dilution
- [ ] Scope Trichomes Last Time
With a 21 day light leak, we’ll extend harvest to Day 118, Flower Day 90 - or 69 Unleaked Light Days . . .
Through End of Harvest, Daily
Daily Feed through Harvest Day -2
Per TWO Gallons: EC 1.4
- [x] Primer A: [ 12, ml, gal]
- [x] Primer B: [ 12, ml, gal]
- [x] CalMag Fuel: [ 4, ml, gal]
- [x] Silica Skin: [ 4, ml, gal]
- [x] Peak Bloom: [ 4, ml, gal]
- [x] Resin Bloom: [ 8, ml, gal]
- [x] King Crab: [ 0.5, ml, gal]
- [ ] SLF-100: [ 5, ml, gal]
- [ ] Reduce to EC 1.1 on Harvest Day -2
- [ ] Reduce to Resin Bloom Only, EC: 0.8 Pre Harvest Day
DECISION - We’ll take the girls down Flower Day 83, Nominal Day 62 assuming 21 Day push for light leak. It’s not in practice3 that long - we should be good, if not - latest day 90 (Nominal 69)
____
Sun 03 Sep 2023 # Flower Day 77
LJ2Q 112:F:11:7
EC 1.4
- [x] Dismantle And Clean Res, Pump, Chiller, Lines
- [x] Clean Res
- [x] Clean Pump
- [x] Load Res with a a gallon of HOT tap water, a cup of 30% Vinegar
- [x] Run Pump for :30
- [x] After 30: Reverse Lines
- [x] Run Pump for :30
- [x] Stop pump
- [x] remove tubing from pump and chiller
- [x] Remove pump, reclean
- [x] Clean Chiller Tubes
- [x] Rinse with 30% Vinegar
- [x] When Dry: Reassemble & Replace

Likes
8
Share


@MTUZZIO
Follow
Fully into flower. Filling in well, smell coming along nicely (some are like lemon candy, some are a little more skunky).
I had a Mars Hydro TSW2000 sitting around so I added that in between the two lights/beds which really helped to even out the PAR. Dead nuts in the middle of the beds is about 1000, the edges are about 700. Super cropped a few that were just reaching too much.
Put up some trellis, I think I'm going to need the supports, and helped to spread out some of the stacks that were going to be a little too close. Did a little more defoliation. It's really just maintenance at this point (and standing there admiring and smelling over and over)
Been mixing up a little organic nutrient cocktail to supplement with, using BuildASoil BuildABloom (soy protein hydrolysate, rock phosphate, gypsum, magnesium sulfate, potassium sulfate), Fermented Plant Extracts: Liquid Pumpkin Extract (Probiotically Grown Pumpkins, Clean Mountain Water, EM-1, Home Made LABS (Lactobacillus Serum), Super Cera Powder, and Molasses), BuildASoil Aloe and the Quillaja extract. I'll do a foliar spray first thing in the morning and replace the first fertigation of the day with this same mix (at the normal EC and PH level). They seem to love it and respond really well.
I really want to switch over completely to organic living soil, I'm probably going to after this run, so it's fun to experiment with some of the ingredients.

Likes
12
Share


@GeekSayWhat
Follow
Started documenting this plant a little late, apologies. Everything is going great though... started LST just after week 2 and she has a nice flat canopy. I can see 8 or 9 flowering points all nice and even.