




Likes
1
Share


@Jmaninthemidde420
Follow
During veg I gave it urine for nitrogen one month after sprouting. Than I gave it a top feeding of compost, and epsom salt. During bloom I gave it a top feeding of epsom salt and a liquid feeding of raw coconut water 2 weeks into bloom and again 4 1/2 weeks into bloom and now I am only giving it water ph at 6.2. Also if u want to keep it totally organic use apple cider vinegar as ph down and baking soda as ph up.
Likes
Comments
Share


@braxat420
Follow
My other grow was growing into the light, so I had to switch them. This light doesn't have the greatest coverage, but it had to be done. The humidifier is still down, and I'm going to have to move house with it on one of the coldest days of the year, so this grow does not have everything going for it. Smells strong, like candy apples and the buds are getting very dense.

Likes
54
Share

@Natrona
Follow
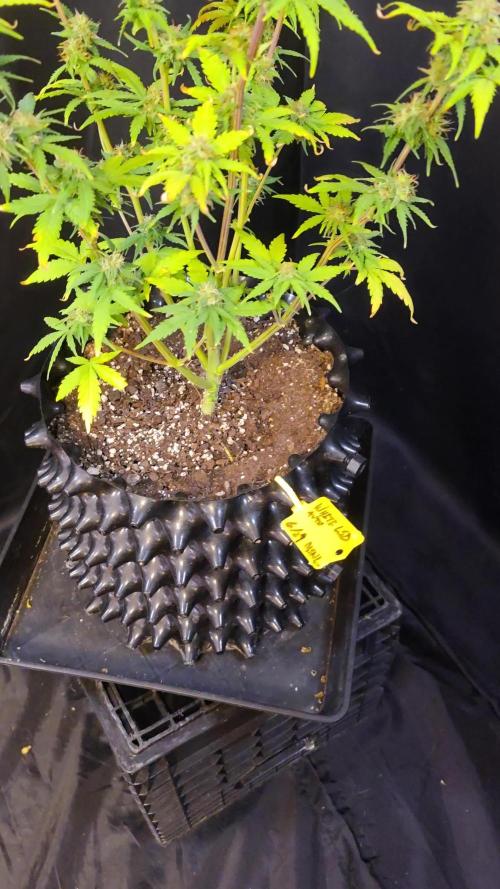
White LSD Auto Feminized Seeds by MSNL
👉Sponsored Grow👈
W7F6 8/4 10-16
Watered at the end of last week and have not watered yet this week. I have been foliar feeding at least once a day with the following blend:
Calmag 15ml
Plant Juice 60ml
GH bloom 5ml
Green Sensation 4ml
Feed was ph 6.37, ppm 784 at 65f.
I ph’d the water down to 6.25 with brought the runoff down to a range of 6.7-7.42 on the plants in the tent. I hope this helps my tent family recover from lockout, but it doesn’t look like it to me. White pushing out more hairs in the buds.
Thank you all for your continued support and encouragement. Your likes and comments motivate me to keep sharing my journey. Let’s continue to learn to grow together!
Stay green, growers love 💚🌿
💫Natrona💫

Likes
28
Share


@MindFlowers68
Follow
Top dressed with some more soil. The top was looking depleted and just want to keep it from completely taking all the nutrients from the soil. Added a mix of power bloom with azomite and glacial rock dust. I watered in with some pure protein dissolved into hot water then added to the water I was using at diluted levels. The second watering they got this week was with molasses. which also does a good job of dropping the ph of my water to the perfect level and a little bit of Epsom salt because I ran out of my cal mag and also want the plant to have plenty of sulfur.
Buds are looking cool and remind me of little pine trees. At first glance it seems like they are starting to foxtail but the buds are fattening once the new growth on top starts to expand more. the main colas are almost a foot long each, but hard to tell because the planetary buds around the main colas are blocking them from getting a good picture. Amazed by how frosty the sugar leaves and even some of the older fan leaves are. Her smells are mostly sweet and candy-like. got a little sneek peak of what her fade should look like from one of the leaves being severed partially with a nice yellow and purple. She put on a decent amount of weight this week but towards the end,I can tell she's starting to slow down. Looks like it will still bulk a little more but noticing fewer white and more orange hairs. hoping all my plants finish around 8-9 weeks. i want to try to harvest them all at the same time if i can.

Likes
9
Share


@Chubbs
Follow
Weekly update on these three. One is ready and will be coming down early this week with the other two probably toward the end. The flower are all nice and dense and smell strong. They've been super easy to grow not requiring anything special besides a good defoliation during Veg and once in flower. All in all Happy Growing
Likes
3
Share

@BabaHase
Follow
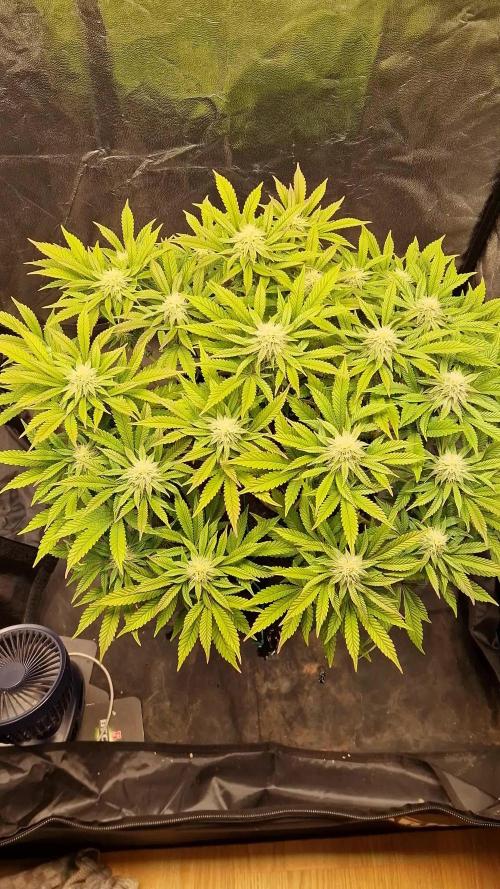
Pink Rozay war mit Abstand das leckerste weed das ich in meiner Zeit angebaut und probiert habe. Ich kann es nur jedem empfehlen diese Sorte mal zu probieren!

Likes
16
Share


@NMGDOC
Follow
Seguimos utilizando los mismos productos que la semana pasada, solo que esta vez aumentando el EC a 1,2.
Hoy 26 de febrero lavamos las raíces. Yo creo que tal vez estaban con un bloqueo de nutrientes, no se ve como si estuvieran sobre fertilzidas porque creo que las hojas estarían más de un color verde oscuro y duras, como cuando parecen casi de plásticos. Ahora las hojas están como caídas, con esas puntas amarillas, lo cual me preocupa. Espero que con el lavado de raíces vaya mejor.
No hemos podido controlar bien la temperatura y ha llegado a 26 durante algunas horas, podría la temperatura causar este efecto en las plantas?
Gracias por leer y cualquier concejo es bienvenido 💚

Likes
18
Share


@cannasaxx
Follow
Alles gut soweit, bin zufrieden mit meinen Fast Buds 💚😎
Dünger kommt später dazu, EC der Erde liegt bei 2,2 Sport frei...
Processing
Likes
12
Share


@HylianGrass
Follow
Starting 3rd week , we should know soon if im lucky and my strong looking plants are females!
Fingers crosed! 2 out of 4 are looking good one is a slow grower and the other one is all mesed up , i guess the rooting process did not go well for this one ☝️
Likes
25
Share


@OZDAOgrow
Follow
During this week, I have only occasionally defoliated to get better light on the inflorescences.
I don't know when to put it into flower yet, as the smallest bush (Fruit Diesel) is looking quite pitiful, having just turned a month old. Other bushes are a couple weeks ahead of Fruit Diesel.
What do you think, should I give it another week of vegetation or should I switch it to flowering at the end of the week?
Likes
23
Share


Likes
17
Share


@bsplayerone
Follow
Week 1 (I think kinda confusing to a newbie) plant seems to be doing fine. Once the second set of leaves came in I moved outside for morning sun. By day 8 it spent the whole day outside. After day 9 it is officially an outside plant. I only put it in the green house at night and when it’s raining.
Likes
28
Share


@SooSan
Follow
Dans l'ordre :
Blueberry
Dutch Passion
Blueberry
00 Seed
Blueberry
PEV Seed
Blueberry
Bulk Seed
Animal Cookies x Blue Monkey
Exotic Seed
Red Hot Cookies
Sweet Seed
DoSiDos x Purple Punch
PEV Seed
Purple Shot
Exotic Seed


Likes
23
Share


@SonomaSungrown
Follow
There are simply beautiful plants.
Starting to see signs of flowering now... especially with the Pineapple Meatball.
I have noticed some yellowing of 5-10 lower leaves on the FM and CB, but none on the pineapple meatball.
I top dressed everything a week ago and also did another top dressing of crab meal and neem seed meal (about 3/4 cup of each on each plant).
Should be plenty of Nitrogen in there if the plants need a bit of a boost.
I've also caught just a few adult aphids sniffing around the chem brulee plant.
My brussels sprouts are nearby, and I'm battling aphids heavily with them.
IPM
Sprayed with Canncontrol (basically thyme oil) and top dressed with neem seed meal.


Likes
33
Share


@SAC87
Follow
Day 29 fm seed/Week 1 flower: I did some LST/HST to the plants to try to even out the canopy. The light is set to 80% and is creating some good growing conditions. Flower has started and most of the plants are showing little bud clusters and pistils. They are starting to smell already, just mild skunkiness. I say this every time, but there are some super short plants like the skunk and tall lanksters like the Blackberry. There is some stacking on some and mega stretch on others, such is the case when you grow 7 different genetics. It’s all good tho, we’ll train them up. Did some leaf tucking and removed a couple beastly light and site blocking fans. Other than that we’re just gonna watch and see how this plays out. 👍🏻👍🏻👍🏻
Happy Growing 🌱
Likes
38
Share


@dalemac
Follow
Well I decided I had to pull the plug on this girl with all the weird weather we've been having. I've been pulling yellowing fan leaves off her for a couple weeks now and with our 2nd heat wave and all the smoke & ash thrown in for bad measure... it's been truly weird. Yesterday was a day for the record books around here - it was so dark I could tell my pets were spooked. Even they knew it wasn't supposed to be this dark in daytime. Probably how animals react to things like a solar eclipse. If they haven't got somebody nearby to reassure them of some sense of normal - the alarm bells start going off.
I hadn't really gotten the impression this girl was all that fragrant during the flowering process UNTIL I was washing all that ash off her this morning - then I was like - WOW this stiff is pretty intense in the nose. One thing I'm pretty sure of is that the sun ain't coming out for a couple more days the ways the smoke be flowing around here. We'll see. Two more plants on the patio but they aren't far behind.
September 13 >> Debudded the Widow late this afternoon to make space in my shed to harvest Jack Herer in the morning. She was still a little moist as I harvested her 3 days ago - but it hasn't been that hot. The smoke is still hiding the sun and the atmosphere is labeled "unhealthy". Hung her up in my front bedroom to finish the drying process.
I should note the passing of reggae giant (many say inventor) Toots Hibbert, of Toots and the Maytals last Friday. I went looking for some pics of the last show I saw him at and coincidentally it turned out to be one year ago today, September 13, 2019 at the Independant in San Francisco. I was lucky to have seem him a few times. So I uploaded about 30 seconds worth of Pressure Drop from that show. RIP Buddy. 😪
======================================================
September 21 >> Finished hand trimming the Widow yesterday while mostly listening to the last round of the US Open. In September... while they're playing Stanley Cup playoffs too. Very weird time.... both these things normally happen in June every year.
The buds weighed in at basically 8 ounces (227 grams). The trim came in at 325 grams - and in this case I use the Trimbag - although I don't think she was really dry enough to get proper function outa the bag. I still spent over 6 hours hand trimming the remainder AFTER the Trimbag in this case. It wasn't really a problem because I had like 10 hours of US Open coverage for 4 days to burn thru.
In the process of turning all that trim into hash at the moment... because I'm all configured to go at the moment after making Wonder Pie hash last week. I'll stick it in the garage to dry for a few days and add the weights later.
One thing I've noticed that's probably pandemic-related is 90% isopropyl alcohol has become very hard to find (haven't had to look for like 6 months because I had a couple bottles that lasted). I've used it to clean my glass bong/dab rigs for years. 70% is there - but even that now it's like you have to ask for it. Times change.
======================================================
September 26 >> Weighed out the hash collected from the trim... 12.94 grams
120+160 micron = 1.47 g
73 micron = 5.50 g
25 micron= 5.97 g

Likes
11
Share


@AestheticGenetics
Follow
3/28/25 chopped and humidity was a little high starting off
3/30/25 have them drying at 60% and 70°
4/3/25 Still needing a day or so of drying to be at a stable humidity
Beautiful plant. Fan leaves with Triched out patterns visibly everywhere.
Even though i chopped quite a bit off of the plant, i still got quite a bit bigger yield than i expected. All sizable nugs.
Pulled 65 grams.

Likes
7
Share


@Sunstonedgrows
Follow
We are going strong and I honestly can't complain. So far this plant has been pretty hard and hasn't suffered much if at all being in such a small pot. I'm keeping an eye on water but every other day or so still works.
Cheers til next time
-Dj Sunstone

Likes
294
Share


@Ju_Bps
Follow
To start I would like, give big thanks to Royal Queen Seeds ❤️❤️ and @James , ❤️❤️ to try their products one more time #RQSLOVER,
also to @marshydrococo2 and Mars Hydro for the FC 3000 and the fan filter kit ❤️❤️
And another thanks for the GD community, for likes, comments, follows.
This 2nd F1 strain run was great, Easy and beautiful, very similar with Epsilon 💚
Flower/herbal smeel 👨🌾🌲🌲
⚖️ Wet yield 262g
