




Likes
19
Share


@proud_to_grow_loud
Follow
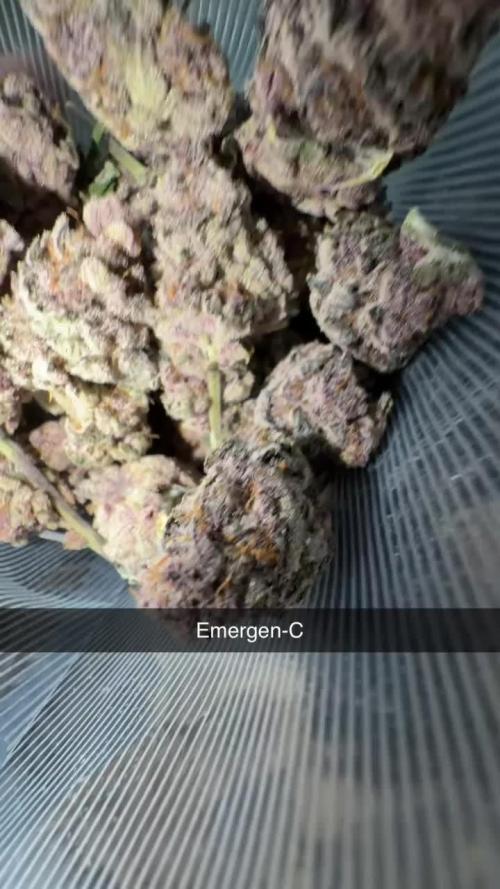
Fun to grow and took to lst and supercropping very well. I am keeping a mother of the stinkiest pheno I got. I made some other seeds that I will be growing out after Jinxproof's pheno hunt. I will be doing a few grows coming up here and its going to be gnarly! Stay tuned in for modern genetics that have been tested and stabilized. These were bag seed from regular seed of LA confidential given to a friend that won them in a giveaway from DNA Genetics.


Likes
5
Share

@BlackForestGrower
Follow
It was a great last run.
It’s been a beautiful time.
My time here done now.
BlackForestGrower out. 🌲✌️

Likes
6
Share

@Brotanical
Follow
Update: Watering & Feeding Log
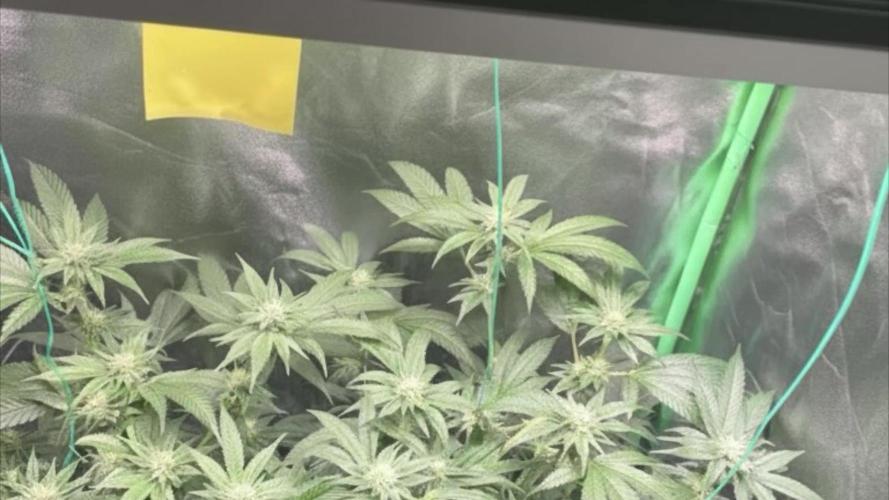
"Today, I watered the two Bruce Banner 🥦 in the back with 2.4 liters each. The water was pH-adjusted to 6.34. As a preventive measure against pests, I added 1 million SF nematodes to the solution.😤
Nutrient Schedule (per Liter):
• Hesi Bloom Complex: 2.3ml / L
• Hesi Phosphorus Plus (PK): 1.2ml / L
• Hesi SuperVit: 1 drop (as per instructions)
• Plagron CalMag Pro: 0.8ml / L
I skipped the Alfa Boost this time because it tends to lower the pH 🍋further than desired.
Environment & Lighting:
• LED Power: 88% 💡
• Light Intensity: ~730-825 PPFD
• Distance to Canopy: 34cm"
#Viparspectra
#LED Grow


Likes
2
Share


@Bread_n_Buds
Follow
We are ready for our favorite time of the year, which will culminate in a harvest during the ideal autumn/winter window—keeping in mind that autumn lasts a long time in southern Spain.
Starting at Day 6: the first week kicked off with the germination of Tropical Mintz OG F1 HYBRID Auto seeds from Zamnesia Seeds. Both seeds germinated quite rapidly; after soaking in water for about 24 hours, they were ready to be transferred directly into the soil. We placed them straight into their final pots, avoiding the need for further repotting and giving the young plants plenty of room to develop their root systems right from the start.
For the grow, we are using Plagron ProMix—specifically, a substrate that has been recycled and reactivated with Florea’s Myko+ and a "secret ingredient" we’re keeping under wraps, just like grandmas do with their recipes. The goal is to start with a well-structured soil while fostering beneficial microorganisms and robust root development.
Regarding nutrition, we’ve opted for Plagron fertilizers, using Power Roots, Pure Zym, and Alga Grow for the time being to support the plants during their early growth stages.
Soil x Feeding - www.plagron.com
Myko+ - https://www.florea.bio/
As for the light cycle, we’re starting aggressively with 23/1—just enough to give the plants a brief rest and allow for foliar spraying away from direct, intense light once the first week has passed.
For the grow environment, we are using the Zamnesia Ecosystem 120x120; it’s proving to be a durable, well-constructed, and high-performing grow tent. Another major plus is the comprehensive accessory kit, which ensures a well-organized setup right from the get-go. Lighting is provided by a 480W Phytonaut LED, while a clip-on fan handles air circulation. Extraction is managed by a powerful 150mm exhaust fan paired with a matching filtration system. A branded filter cover completes the setup—a detail that helps keep the filter clean and extends its lifespan.
PPFD levels are controlled to ensure the right amount of light at every stage, starting around 300 μmol/m²/s; as the vegetative phase progresses, I am gradually increasing this to 600 μmol/m²/s, and eventually up to 1200 μmol/m²/s during flowering with CO2 supplementation—all professionally monitored using a Phantom Photobio photon flux meter.
https://photobio.com/
Over the following days, both seedlings emerged. Being in their very first days of life, they are naturally small, and their development has only just begun. Nevertheless, both appear healthy and in good shape, looking uniform and showing no particular signs of stress.
This first week was therefore dedicated primarily to germination and the start of growth. The two seedlings seem to have adapted well to their environment and are progressing without any issues so far. The combination of the new grow environment, the reactivated substrate, and the nutrient program gives us a solid foundation to start from.
The coming days will be interesting as we watch the first true leaves unfold and vegetative development begin.
You can find this fantastic strain, the fertilizers, and an incredible range of products at:
www.zamnesia.com

Likes
4
Share


@victortripp
Follow
Week 3 Plant Growth Summary:
Lighting: Increased PPFD from 250 to approximately 350 µmol/m²/s midway through Week 2, aligning with recommended levels for the vegetative stage.
Watering: Conducted three wet-to-dry cycles.
Soil Testing: A slurry test on Day 6 indicated a pH of 6.39 and an EC of 2.9 mS/cm.
Nutrient Introduction: Began adding nutrients at 50% of the manufacturer's recommended levels during the third watering on Day 6. The nutrient solution had an EC of 0.53 mS/cm and a pH adjusted to 5.2. Runoff measurements showed a pH of 6.5 and an EC of 1.97 mS/cm. Optimal pH for nutrient uptake in hydroponic systems typically ranges from 5.5 to 6.5.
Plant Training: Planning to top all plants near the end of Week 4.
Irrigation System: Received all Tray2Grow components. With leaves now reaching the pot edges, plan to activate the system on Day 2 when plants require watering.
Overall, plants are progressing well, with environmental parameters maintained within optimal ranges.


Likes
3
Share


Likes
5
Share


@UhhDoiigreen
Follow
Perfect to this point dense even colas. Smelling great covered in 💎 last week has been compost teas last one given today. Only water for the next 7-10 and nothing after that till harvest besides 36hr of darkness
Home stretch time


Likes
11
Share


@CanadianFillmore
Follow
Start of flowering week 1. This girl is already bigger then her round 1 sister and she's starting to stretch after just a few days of 12/12 light. The only nutrient difference this grow, will be the addition of sensizym, hopefully it helps pack on a few more grams per plant.

Likes
49
Share


@Roberts
Follow
RSV11 was starting to get a little pale and lighter colored this week. I did a solution change today. She is starting to bulk. Colas are collecting some resin around the sites. Everything is looking okay at the moment. Thank you Terpyz Mutant Genetics, and Spider Farmer. 🤜🏻🤛🏻🌱🌱🌱
Thank you grow diaries community for the 👇likes👇, follows, comments, and subscriptions on my YouTube channel👇.
Thank you Happy Growing 🌱🌱🌱
https://youtube.com/channel/UCAhN7yRzWLpcaRHhMIQ7X4g

Likes
24
Share


@Weed_marseille
Follow
Cette semaine les plantes grossissent, il y a de beau sujet. 💚J'ai encore un peu de difficulté pendant la germination et cela se voit. J'ai installé l'ensemble des lumières pour la dernière semaine de végétation.🌱
Attention aux tubes d'irrigation ils peuvent se boucher, nettoyer les buses.👨🌾🏼

Likes
9
Share


@pareto
Follow
She had her issues and is not a big yielder. But she makes up for it in beauty and aroma!
The trichomes look absolutely awesome!
--------------------------------------------------------------------------------------------------------------------------------------------------------------------------------
Set up cost (fixed costs)
-Lamp: 40€
-Timer: 3,5€
-Pot: 4€
-Total fixed costs: 47,5€
Given 5 years (or 15 grows) usage time translates to around 3,17€ per grow in materials.
Variable costs:
-Seeds: 6,33€
-Soil: 6€
-Fertilizer: 3,50€
-Power: 20,22€
-Total variable costs: 36,05€
-Total costs per grow: 39,22€
Likes
36
Share


@The_Projexx
Follow
Things are going well in this grow . The plants are growing a little slower then I would like them too but they are still alive and kicking and thats what I like too see . CheesyHeadband#2 seems to be doing some funny things she hasnt come out with her whole set of leaf yet makes me wounder if shes stunted of possibly dwarfed only time will tell tho ! Other then that no complaints coming from me this week things are going well and Im starting to look forward to these lady's growing up :)
I'd like to thank everyone for stopping in and checking out the diary . A special thank you goes out to all my followers , you guys rock and I really appreciate that you guys come in daily and weekly to check out the updates ! So keep on keeping on !!!
Remember to check my diaries daily for updates and weekly for video updates . Stay tuned !!!!!
-Happy Growing!

Likes
63
Share


@AsNoriu
Follow
Day 126. She is down.
That girl lived 90 days from seed touching soil. Its part of my Control Garden for proving/finding RQS strain issue.
For 3 weeks veged bag seed plant who spent 75% of his life not under direct light, sometimes even in shade and under most intense air fan , she is GOLD !
Cure day. She could go two weeks longer, but ... 96 g ;))) again, i can only look and admire. Crazy strain. Update on night shift ;)

Likes
Comments
Share


@Pixie
Follow
Still not started to flower pistols are shouting out everywhere tho can't wait to see it flower iv never grow weed before so it's going to be good having a ganja plant

Likes
11
Share


@goeser
Follow
More details and photos are coming when all buds are dried in about 6-7 days00


Likes
17
Share


@JuicyFruit
Follow
Hi! Thanks for checking out my Royal Dwarf grow!
Please comment on how healthy you think the plant is or any thoughts.
In less than 2 weeks I have learned so much from you guys and i want to make a point of thanking you as this medicine allows me to live what I would consider a normal day to day life! :)
So... Beginning week 2 and from the first few pictures and videos I think the plant is getting healthier, Getting a ph meter this week also, will probably resolve any issues I think I'm having.
Day 7/8
I was going to switch from the Vitalink Plantstart + Canna Rhizotonic schedule to Canna A, B, Rhizotonic and Cannazym. I have not gotten around to doing so yet as I think I've been overwatering the plant. stopped watering and started using the spray bottle to keep the moisture up. will water with the new nutrients once the plant has dried out a bit.
Day 9:
Transplanted from a 1L to a 19L/5Gallon, the top half of the 1L container was dry and had what looks like well developed roots and the bottom half was wet and the roots were hanging out when transplanting. I definitely should have let it dry out more.
Day 10: Rhino pro 200/600 Carbon filter arrived and it's the 1100cfm/overpowered version as I read it was better to get a filter with a better CFM rating than what your fan can move. The fan is an Isomax 900cfm or is it m3/hr ?
I added a short video after the pics so you can get a fairly good view of the setup.
I got 5m acoustic ducting and connected it up as best I could with the space I had. I Was covered in rock wool, didn't have wire cutters and had to go buy some to finish the job 😅. Talk about a nightmare!
I left 1mtr spare ducting for the intake fan in future grows.
I think it's worth mentioning that the 6 fans on the back of my grow light are louder than the filter/ducting/fan/ducting (in order).
Noise level of light and fan combo is between a really expensive/good quality bedroom fan and a hairdryer as a comparison.
As I don't have my intake fan yet Im using passive intake and my fan has a 3 speed controller so I have it on speed 1 and there is negative pressure.
Finally i mixed up the canna nutrients and changed ph from 7 to 6, I'm not sure what's ideal for autos but I read that anywhere between 5.8 and 6.3 is good for autos? Let me know!
Day 11 (update)
As I have now realised how to edit my weeks in the diary I will start doing so!
Read that a fluctuating PH is good between 5.5-6.5 so I'm gonna stay at ph 6 and let it do its thing.
The plant seems to like this a lot more than ph7 although it is still stressed from transplanting (1ltr-19ltr) it's still growing new leaves but growth appears slower.
Finally after a few cold showers I have recovered from being covered in rock wool! (thank god😂) also I started a RQS Quick One as a backup for the dwarf and RQS Fast Eddy as Im eager to see if medical marijuana has a better effect on my depression, anxiety and sleep problems than regular high thc low cbd strains. Check out my profile (JuicyFruit) to see my diaries for these strains!
Day 13-
my dwarf still seems stressed from the transplant, its growing some new leaves slowly but is still drooping from transplant. gonna be a dwarf-dwarf by the sounds of it! 😆 and i was doing some research on optimal hang heights for my Phlizon "3000w" COB LED, it seems that 40 inches is good to start from.
i also read another users opinion that the switch on the fixture labelled VEG&BLOOM is mixed up with the other switch that is labelled STRONGER.
The VEG&BLOOM switch is LEDs along with IR. (i read that the IR is probably further stressing my transplanted dwarf) and the STRONGER switch is COBs.
i took a minute to think about this but after realizing that the plants can probably handle the COBs (STRONGER) at the right distance i may aswell use them for veg and switch the LEDs and the COBs on 1 or 2 weeks before flowering for full flower power!
after reading all that i went straight over and switched the LEDs off and put the COBs on. il post pictures in the morning to show how the plants reacted.
fingers crossed people!
Please comment on anything you think i could improve on or any advice to help this plant grow better as it is much appreciated!
Peace!
Day 13 Update:
took some photos and it likes the COBs, although they are very hot combined with a sunny day reaching high temps of 29c. turned the fan up and opened another passive intake on the tent. finally im going to get some calmag and a oscillating fan for the leaves and hot spots in tent :)