Likes
Comments
Share
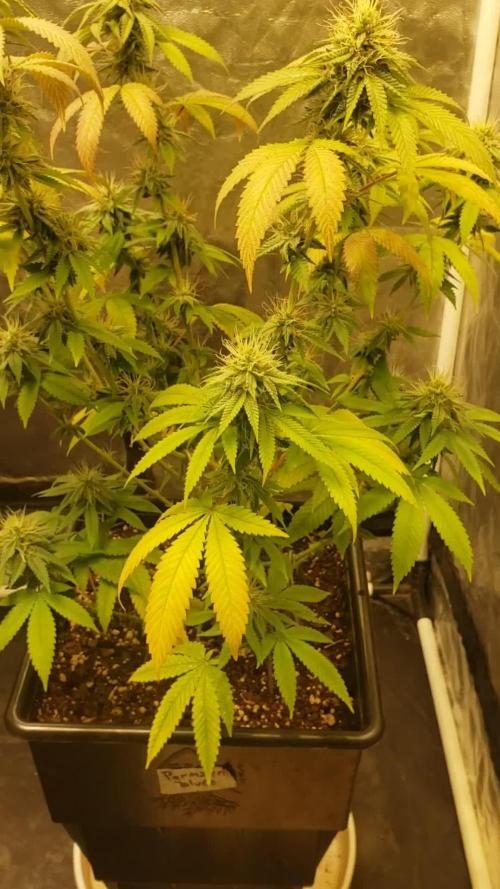
I took a sample off the bud to see how it’ll look dried, so the plan is to cut the plant off Sunday! All I wanted is something to smoke and at this point I’m happy that seems to be the reality after the drying&curing process! Amazing feel! Some powdery mildew starting but shouldn’t be a problem if I cut soon!
Likes
20
Share
@Steno
Follow
The strain is really strong to various stress, it's felt a difference between the two phenotipes, their are both delicious but one more berry flavoured and the other more exotic one. At the moment the best strain I've ever grow! 💐🍧
Likes
4
Share
@Trichoma
Follow
@ 1.1 kPa Harvest time now... refreshed soil with an amendment mix.
Likes
4
Share
@Aleks555
Follow
🚀 Dutch Passion - Melonads Runtz 🚀 100 days from seed and 52 days into flowering, and what a journey it's been! This beauty has developed into an absolute showstopper, with dense, trichome-covered buds that are sparkling from top to bottom. The sheer volume and frostiness of the buds are simply incredible – even the leaves surrounding the flowers are dusted in sugar, giving them an almost magical appearance. We’ve been feeding her with the trusted Xpert Nutrients, and the results speak for themselves. The balanced nutrition provided by Xpert Nutrients has allowed the plant to thrive, stacking on weight and producing massive, resinous buds that are not only a joy to look at but also promise a strong and flavorful smoke. At this stage, we're continuing to give her all the love she deserves, and she keeps rewarding us with impressive growth. We couldn't be happier with how this Melonads Runtz has turned out, and a huge shout-out goes to Dutch Passion for such an exceptional strain and Xpert Nutrients for making it all possible! 🌱💪🏆
Likes
21
Share
@NSABND
Follow
today was the day 🙏 time was running out and i have to harvest "Hilde" 😏 summary of "Hilde" 92 days in under 3 min. enjoy 😅🙏 I dry the plant in the boiler room because the climate there is very good. I also darkened the room so that no sunlight disturbs the drying process.😏 "Darkroom" Day 2 for "Hilde" 😏😄😜
Likes
40
Share
@Chubbs
Follow
420Fastbuds FBT2314/Week1 Week 1 update on these new sprouts. Been a week since they sprouted and so far seems good. I did switch from misting the top soil with my sprayer to feeding 500ml of water and 1/4tsp/gal strength General Hydroponics Calimagic about every other day. Over all Happy Growing
Likes
4
Share
Got a couple more days until day 56 (week 8) but just wanted to add a few things from this week. The flush is coming along nicely and getting some really nice colors to come out, Really excited for the finish. Just uploaded the day 56 pictures, shes looking beautiful!
Likes
22
Share
Just started to give them full dose of cal mag, mammoth p and recharge. Their leaves got a dark green shiny, yellow tips and curling down, I think my ppms are too high and I will start flushing it out to 1500. I am growing in organic and only feeding cal mag, mammoth p, molasses, recharge and every other week a compost tea with living soil girl flower power full dose. Ph Is around 6.7 and giving it 6.5. Hopefully the next time they are read for a flush I’ll fix these.
Likes
5
Share
Gorilla Cookies are doing great, they are stacking very nicely. I am liking the nose spacing on these girls so far. Introduced some more of the Bonnie nutrients from Cronk not too much though, this is a potent nutrient mix and I would recommend using 1/4 of what they say to start with and see how the plant responds. RH and temps have been consistent, trying to make them comfortable as to get a week or two more of veg before they flower. Happy Gardening 🇨🇦👊❤️
Likes
38
Share
Utopia Haze is a rare heavily sativa dominant hybrid (90% sativa/10% indica) strain created through back crossing Brazilian Sativa strains. This tasty little bud took home 1st Place for Best Sativa in the 2008 High Times’ Cannabis Cup and for good reason – with its potent 18-22% average THC level and long lasting cerebral effects, Utopia Haze is one powerhouse smoke. The Utopia Haze high comes on soon after you finish your first toke, hitting you with a strong cerebral lift that infuses you with a sense of hazy relaxation. Type: Feminised/Photoperiod Cultivation: Indoor/Outdoor Flowering Time (days): 70-75 Indoor Yield (g): Up to 650 Feminised Outdoor Harvest Month: October Feminised Outdoor Harvest Month Week: 3rd-4th week Aroma: Citrus, Woody, Pungent, Mint Effect: Cerebral Lift, Hazy Relaxation, Sleepy Welcome Everyone to the Final Entry of my Utopia Haze Grow ! There is so much to discuss ! I have been extremely busy as of late trying to get this Harvest together, but i am happy to have it here for you now ! I Seriously under estimated the amount of time, help from others, and my own necessary skills to pull this off.. and i still kind of screwed it up lol ! But its worth noting i have never actually done this before and trying to document it during....was extremely hard. It is next to impossible to work an iPhone with rubber gloves on ! First I want to discuss everything step by step so before you jump straight into the comments on how the end product is so small in "quantity" Rest assured i am happy with its"quality"...and thats all that matters to me because Life is a journey not a destination! and i have learned so much from this grow that I couldn't be any happy even if i messed some things up :) But at the very least I hope you read through this entry in its entirety with an open mind and focus more on the process, rather than just the outcome! I ran out of Ice & i was only able to wash three times..(normally I've heard you should go sometimes 5-6 washes) Preparation is Key & things will be much better next round :) Photos 1-22 These are pretty self explanatory but for those of you just tuning in now.. this is what happens to a very happy plant when you don't have the necessary tools to monitor key components of growing cannabis.. Ph, as well as EC levels play a very key role in the outcome of your grow lol that being said I was just able to save this plant by purchasing both tools but that doesn't mean the plant didn't suffer because of the prior events.. This was a Huge reason behind me choosing to turn this harvest into what i would consider "Solventless Hash Rosin" from "Ice water extracted Bubble hash". Pictures 23 The idea here is the process of using "fresh Frozen Cannabis" this has been discussed many a time online on such sites as instagram and here on grow diaries as well.. I personally have Never tried the process so i decided to try it out and make a judgement for myself.. Video 24 The Cannabis has now been in the freezer for 72 hours making it very well frozen.. as you can tell i struggled getting it all into the 25u Screen Wash Bag. One thing of note i would do differently is i will de-stem my next batch as i also believe this played a part in the amount of plant matter that escaped through the sieves. Photo/Video's 25-28 The idea here is "ice water Seiving" & especially with the bags that I am using here that are only have screen material on the bottom portion of the bag it is very important to have spaces in-between the screens to allow the water to pass directly through the screens into the bottom bucket with the least amount of resistance.. because the hash is so extremely temperature dependant if it gets warm on the side of the bag.. it will stick there and not make it to the bottom to become use able product.. 29 You do not need to use as much Ice as i used here lol... the idea is to keep everything very cold..i certainly achieved that but at the sacrifice of using so much that i ended up grinding product and producing "contaminants" but in the end they are just plant matter that i would be smoking when i rolled up my joint either way so.. I'm not super disappointed.. But it should be noted that what you want to achieve here is a Layering effect where you have the wash bag between two small layers of ice while the "water current" washes the Trichomes away allowing them to be separated by the screens setup below :) Before Starting the machine you should allow some time (i.e.;10-12minutes pre soak to allow the product to become saturated) before the first cycle. By video 32 I have just ran out of ice lol.. Video 33-34 Here I have a tip for you.. to separate the screens that you sieve through.. cut 5 gallon buckets to stretch them across nice and tight.. it'll make scooping your Bubble that much easier ! i learned this from the many "Frenchy" videos I have watched :) Picture 35 Here in lays the problem for most people.. drying your hash without loosing vast amounts of "Terpenes" whilst also stay ever vigilant against mold ! Thanks to all those videos I've watched on youtube.. id like to think this was one of my most successful parts of this process.. Things to Note; Terpenes start to seriously evaporate at temperatures 68F or 20C you need to stay as cold as possible whilst bringing the Relative Humidity in the space down into the 40-30% to stay away from that nasty mold ! I used my cold storage room in the basement.. with a dehumidifier running to keep the space at 45% RH & staying at a constant 15c. All while spreading the hash as thin as possible across parchment paper, on top of the white screens with a fan moving air across both sides of the paper. Pictures 36-38 These are some macros i took in the middle of my drying session I fell in love with the colour. Yes i know the black spots are plant material but they will get caught when i bag the hash & squish the oil out. Thing to Note; at this stage it is important to ensure you 'micro plane" the hash down as fine as you can whilst staying weary of the temperature... any "chunks" will hold pockets of moisture.. that lead to potential problems..ie; mold ... Picture/Video 39-41 Successfully planed bubble hash ready to be bagged and Squished ! Picture 42 Ive decided to follow Pedro.. from Pedros Grow Room and double bag to be on the safe side so i don't have any blow outs. So thats One 25u bag inside one 160u bag ! :) Pictures 43 This is almost 3 grams of the bubble hash from above, already melting in the bag.. this is where i ran into trouble again lol things started getting to warm in the house and i was only able to get one of the three squish's i did on video :( things started getting sticky. Picture 44 This is basically just a photo of the equipment I'm using; 3x5 LowTemp Cage in the frame I built myself, with a 20Ton bottle jack. Something to note here is this is an older Lowtemp model with only a single heating zone which is which i have it closed here heating Both sides of the press :) As well as the importance of having adequate pressure on your plates.. my rig is very overkill for the size of hash bags..lol Video 45 Here is the lovely press video.. its didn't quite work the way i wanted either lol my directional folding wasn't quite tight enough for a big "drip" :) &the Press was set to 65°c Photo's 46-50 are pretty self explanatory :) I had a blow out.. but still managed to pull an 80% return from the hash once squished...& yes it tasted amazing :) Was it worth it in the end... that could be debated.. for some..i understand..its not your thing, but for those of us that are interested in making our own concentrates.. free from Solvents... I wouldn't make it any other way :) If even ONE of you reading this diary finds it helpful to reference for ANYTHING.....even if its "what not to do" ill consider it a success ! Thanks again for tagging along on this garden adventure.. its been one heck of a journey ! Much Love from B.C. Canada, Until Next time, Cariboo
Likes
13
Share
Likes
14
Share
@Lazuli
Follow
The pictures and video are from day 15 since the flip. however i think the plant is now really in day 7 flower as i flipped early to keep the flower space under one square meter. so the plants vegged another week after the 12/12 anyway as you can see they have 0 defincies and a very nice even cannopy, not much space between the nodes is what i like a lot.
Likes
10
Share
@Coopmc
Follow
Man nice cherry smell 😊
Likes
2
Share
@EtnoGrow
Follow
here we see how the girls are advancing, the buds are becoming clearer and clearer which makes us feel that it will be a decent harvest at least, we cross our fingers.
Likes
14
Share
Final Report: Grow: The plants has grown very beautiful and healty without pests and diseases. They grown bushy and with medium height during the vegetative stage. I had try to use LST in third veg week but i did't made correctly and after that i dicided to return to grown normally without any particolar tecnique. I used a littel more fertilizer then mine usual and that made the plants grown fast without any problem. In the first two weeks of flowering stage the plants started grow taller and the number of the branches increase, in this phase i only defoliated when the fan leaves turn yellow in late stage. Form the start to the end the flowers grown dense and bigger every day and this time i waited until almost all of them were mature before harvest the plants. I changed the plants from one grow room to another(in the sixth week) when they became too high and they couldn't stay more in the smaller grow box(nothing changed in the enviroment between the two boxes). Equipment and grow box: The enviorment of grow box has been optimized every stage with the right temperature, umidity and air flow. Vegetative temp/umidity --> 23-29 °C/45-55% Flowering temp/umidity --> 20-26 °C/40-50% The air flow was created by two pc fans and one big fan. Harvest: This time i harvest a big numeber of beautifull dense buds and i just discarde only few fluffy buds in the lower branches. The result of this grow is amezing compared to my old expiriences. I harvested the flower and i made a fast curing process after i washed the crop and i let them to dry with a fan on it. After five days a take the branches which were to dry and i did the final trimmig before put all the harvest in a open jar for finishing to dry. I collected all the leaves, fluffy buds and trimming scraps in a bag and i let them dry. Later i put the bag in the freezer and when i collect and dried all the scraps from OG Kush and Dandoverde Haze i did some Ice-O-Lator hash. I used 250g of trimming stuff and i made 11.50 g of hash, I had use a set of 5 bag and i take the resin from the 160µ - 120µ - 73µ- 25µ bags. I pressed all the resin in a great block of tasty strong hash. Always better every time 😊💪 Total harvest ---> 90g only of dense buds and 11.50g of hash.
Likes
5
Share
Sind schön weiter gewachsen. Mein Bonsai Experiment schreitet voran 🌱🍃👌
Likes
2
Share
Welcome to Flower Week 1 of Divine Seeds Auto Black Opium I'm excited to share my grow journey with you all as part of the Divine Seeds Autoflowering Competition 2025. It's going to be an incredible ride, full of learning, growing, and connecting with fellow growers from all around the world! For this competition, I’ve chosen the Feminized Automatic strain: Auto Black Opium Here’s what I’m working with: • 🌱 Tent: 120x60x80 • 🧑‍🌾 Breeder Company: Divine Seeds • 💧 Humidity Range: 50 • ⏳ Flowering Time: 60-63 Days • Strain Info: 25%THC • 🌡️ Temperature: 26 • 🍵 Pot Size: 0.5l • Nutrient Brand: Narcos • ⚡ Lights : 200W x 2 A huge thank you to Divine Seeds for allowing me to be a part of this amazing competition and Sponsoring the Strains. Big thanks for supporting the grower community worldwide! Your genetics and passion speak for themselves! I would truly appreciate every bit of feedback, help, questions, or discussions – and of course, your likes and interactions mean the world to me as I try to stand out in this exciting competition! Let’s grow together – and don’t forget to stop by again to see the latest updates! Happy growing! Stay lifted and stay curious! Peace & Buds!
Likes
10
Share
@Raizativa
Follow
Hola Riego en el día 16: 250ml c/u 0.5 Micorizas @colectivo 1ml Calmag 1ml Bio Grow 1ml Bio Heaven Riego día 21 250ml c/u 1ml calmag
Likes
24
Share
Buena cosecha, nos costo un poco mantener la alimentación ya que con 1.6 Ec pedían más , les subimos algo en las últimas semanas y dio resultado. El panel.es muy potente les mete mucha carga lumínica. Estas GELATO-K han ofrecido varios fenotipo con sabores muy dispares.. aún así todos bastante buenos. Ha sido un buen aprendizaje. Gracias a todos los que pasan a visitar mi perfil. En breves volvemos con más! Saludos
Likes
27
Share
1/20/2023- So much to do pre grow and over the next 16 days, absolute first order of business is that I have to take down my current Grow---TIMBER-- Then I have a list of things I have to get done in order to be ready to start this grow 1 Feb. With that said T - 2 days until start 48 hour Flush T - 2 days until Start 48 hours of Light T - 4 days until TIMBER!!! Items that need to be done before 1 Feb 2023 1. I need to clean the tent out 2. I need to clean the equipment- Proper Sanitization between grows in Hydro is a must!!! 3. I need to get the hole in the ceiling above my tent repaired- For my last grow I had a deep sink installed in my grow room, to make Hydroponics a little bit easier and have a water source in the same room. The seals on the pipes they were installing broke and leaked through the ceiling causing some damage all the way across my grow room, I was already weeks into my grow and couldn't risk them working above my tent and it would have been very awkward positon for them to be working in as well, so have to get this done quickly between chop and germination. 4. I have to install my new light- I was using a Vivosun 4000 and for this grow I am switching up to a Spider-farmer SF 7000. 1/20/23- For this upcoming grow I am working with M/F photo seeds so I ordered 4 Sex determination kits. I recieved my my 4 Sex determination testing kits from Rimrock Analytics today. I will be using these to test my plants at week 2 of Veg so that when/if I take clones I know I am taking them off females. As well as I don't want to accidently pollinate my tent during this grow I am looking for big beautiful buds not seeded buds. :-) 1/24/2023- Harvest of current grow- Started at 2:00pm and finshed wet trim and firt batch into the freeze dryer. 1/25/2023- Next batch into the freeze dryer and cleaning all my equipment for this Grow. T-1 Day until the workers are supposed to be here to fix the hole in the Grow Room. T-3 days until I instll my new Gorilla Grow Tent and my New Light Spider Farmer SE-7000 for this grow. T-7 Days until Start of Germination 1/26/2023- Harvest is done ran through the Freeze dryer and dry tim completed. 1/27/2023- Grow Room repairs completed. Hole is gone Letting the paint dry before I install the new tent. T-2 days until Install the New Gorilla Grow tent and the new Light T-3 days until I put the hydro equipment in the new tent T-5 days until Germination 1/29/2023- Day 0- Final Pre Germination activities Germination Start T-3 days The paint on the ceiling was dry and it was time to finish prepping for Germination. I got the following items knocked off my list. New 4X4 Gorilla Grow Tent is up and ready New Spider Farmer SE-7000 Light is installed- Thanks Moony Grows for the suggestion and for the Code that got me some money off and free shipping (Moonygrows)!! I turned the lights all the way up to max and set the timer to 18/6 0600-0000. I will keep an eye on the temperature and humidity without my plants and see how hot it gets with the new light. I put my Hydro system back together and put in 40 gallons of water into it, time to monitor for leaks the next few days. I Setup my cloning machine for Germination Days 3-11 1/30/2023 let me break down the situation, ROOM in the TENT.. Enough said.. No really I tried putting my exhaust system up in the new tent with my new light, The light is so big corner to corner that it really didn't give me enough room for the lights be be raised, with the exahust hanging the buckets my plants are Starting in are 2 and 1/2 feet off the ground, great for plenty of room for roots but not so great for upwards space for the plant to grow. In a 6' 11 tent with the exauhst in side and hanging that only gave me a little over 4 feet of grow room to play with. My last grow if you saw my diary, anyone could tell I was struggling to keep the buds off the lights. No good, Since space was such an issue I was running my carbon filter inside on the ground but It really needed to be up sucking the heat out not shooting the cool out. With that setup I was sucking air through the filter and pushing it out the tent at a bottom exhaust hole cold out. Wasn't doing me any good for my heat. I was hitting temps of up to 85 degrees. I bought a portable AC unit and have been running it in the grow room to try and keep temps below 85 and I have had to lower the power on my lights during grow also not ideal.. With that said a friend of mine MoonyGrows (Check out his diary) took the time to look at my issue send me a picture of my grow tent setup with detailed instructions on how to suck the air out from the top but putting my filter and fan on top of my tent so no room issue and I am sucking the air out from the top where the heat is instead of pushing the air out from the bottom where the cool is... THANK YOU MoonyGrows For taking the time to help me get this straightened out.. Now I have room and I have the exhausts working right and now my temps with everything at 100% are topping out at 80 this dropped the temp by 5 + degrees at 100% max. T-2 days until Start of Germination Prepped my seed tray with humidity dome Prepped my Rapid Rooter plugs. I Used RO water, and I added a few drops of Hydrogen peroxide to Oxygenate the water. I then PH balanced between 5.7-6.0 the same that they will be getting in the Cloning Machine and when they get to thier final grow pod. I perfere the 5.8x range and I hit 5.84 for these rapid rooters. If you want to see a complete video on the process HowWeedGrow has an amzing video that shows step by step how to do it and explains it better than I ever could including how to plant the seeds. Which I will cover when I get to that step on Wed. https://www.howweedgrow.com/how-germinate-weed-seeds-cannabis-rapid-rooters/ 1/31/2023 T-1 day until Germination Start All set and ready have my Rapid Rooter plugs ready to go have my seeds out.. Have my seed tray warming up tonight. Tomorrow morning right into the Rapid Rooter then strait into the tray. I will spray the dome to start the humidity in there. 2/1/2023 Germination Day!! Let the games begin! 0600am Put the seeds into the Root Riots. And then put the seeded Root Riots into their first home the Seed tray. I have them under the light 24/7. Sprayed the dome 7:30pm Sprayed the Dome to keep humidity going on the dome. 2/2/2023 Day 1 of Germination Sprayed the Dome in the morning Sprayed the Dome in the evening 2/3/2023 Day 2 of Germination Roots are starting to come out the bottom of the root riot plugs and the heads are slowly popping out of Number 4 just below the surface. Afternoon- Number 4 has popped up Evening- Number 3 has popped up as well. Happy Dance!! 2/4/2023 Day 3 - Germination Surprise Surprise Surprise- all 4 have now poked their heads up.. Happy day!! 100% Germination succeeded. Now major milestone to track is how many are female and how many are male. I will take look at the roots this afternoon/evening and see if they have enough root to go into the cloning machine for the next 7 days before they go into their Hydro Pods. Day 3 - Germination - Evening.. Roots looked good and they were tall enough to make it into the cloning machine. Now that they are all in the cloning machine I have switched the lighting to veg state 18 on 6 off. 2/5/2023 Day 4 - Germination - Morning All the Ladies (fingers crossed) looking great stretching nicely and look nice and green, Photo synthesis underway.... UPDATE!! After a very interesting POD cast on FSTS by Dr. Bruce Bugsbee from Utah University, I have shifted my lighting to 24 hours on through seedling and then I am going to shift to 20 hours on the rest of Veg. 2/6/2023 Day 5 - Germination While Checking on my conditions inside the new tent last night, I found that the Humidity was down to 39 Percent. I added an AquaOasis Cool Mist Humidifier, the reason I selected this humidifier is that I needed one that could be turned on and off utilizing my Inkbird Humidity Controller IHC200 that I have my Pro Breeze Dehumidifier currently running with. Root structures are starting to get there about 1/4 of an inch. 2/7/2023 Day 6 - Germination Everything seems on track more roots poking out of each today. They are each getting a little taller as well. Checked in the evening and number 3 was drooping the Root riot plug on the bottome was dry and the roots were not in the water yet. I raised the water just enough that the longest root that was sticking out is now hitting the water. 2/8/2023 Day 7 - Germination Everything looked good while checking in on them this morning number 3 is now full up and no droop again. 2/9/2023 Day 8 - Germination T-2 days until Plant into Forever Pods and we start week 1 of Veg .. :-) Surprising thing to me is that number 1 and 2 were later in popping then 3 and 4 but the roots are growing longer in 1 and 2. 2/10/2023 Day 9 - Germination Number 1 and Number 2 are definitely ready for transplant today.. Based on how they were yesterday and where they are today I am hoping by tomorrow 3 and 4 are ready. Today they look to me where 1 and 2 did yesterday.. I really hope 3 and 4 catch up by tomorrow since.. T-1 day until transplant to new/ final home for grow. Need the roots long enough to have some clay down in the basket to keep the root riot out of the water and only roots in the water.. 2/11/2023 Day 10 - Germination Today they got placed in thier forever Home, 7 days from Sprout and 7 days until Week 1 Start. PPM- 180 this is water out of the Tap Temp Water: 70.7 Temp Tent: 77 Humidity: 40% I have a humidifier going 24/7 to try and bring this up.. I also have Humidity Domes on each plant. 2/12/2023 Day 11 - Germination Sprayed the domes, all are looking good.. Nothing much to do at this phase but Keep monitoring the PH level in the system and making sure they have a comfortable home. T-6 days until Week 1 start 2/13/2023 Day 12 - Germination Sprayed the domes, They were looking a little yellow today so I moved the light down to assist. Nothing much to do at this phase but Keep monitoring the PH level in the system and making sure they have a comfortable home. T-5 days until Week 1 start 2/14/2023 Day 13 - Germination Sprayed the domes, They were looking a little Florissant yellow today, with what looks like slight burn on the tips, I talked with a fellow grower and we agreed that It was probably that I was drowning them, Yes you can drown you plants even in Hydro, but only early on.. :-) It usually happens with the water being too high, which soaks not only the roots but the medium (root Riot plug in this case). I lowered the water from touching the bottom of the pot to about 1" away. This will probably take 3-4 days to resolve. I will continue my daily monitoring. T-4 days until Week 1 start 2/15/2023 Day 14 - Germination Sprayed the domes, continue my daily monitoring they look a little darker green instead of lime green now that I lowered the water levels in the system, so I think that I might have resolved the issue but it will take a few days for recovery to happen. T-3 days until Week 1 start 2/16/2023 Day 15 - Germination I looked in on them this morning, 3 and 4 look like they are doing well and recovering nicely. Number 1 not so much it has brown spots on the leaves, this very well can still be a side effect of the overwatering but I decide to go ahead and add Nutes earlier than I was planning just incase. I was going to wait until Saturday but I think intervention is necessary now especially after drowning them early on. I added 1/2 what I am planning on adding for week 1 start. I also think I am going to adjust my chart to add 1/2 2 days after plant from now on. I don't think it would hurt it to have some Nutes to pull from. .25ml/Gal Calmag = 12.5ml 1ml/gal GH FloraMicro= 50ml 1ml/gal GH FloraGro = 50ml 1ml/gal GH FloraBloom = 50ml T-2 days until Week 1 start = I will drain the system and start it over on Saturday with Week 1 Nutes. 2/17/2023 Day 16- Germination I didn't even want to post today after looking in on them this morning, 3 of the 4 are now showing signs of dronwing.. Brown spots on the leaves, the water levels were still too high.. I drained about another inch out of the tanks.. Will see how quick they recover.. I start week 1 tomorrow and will have to ensure my water levels are at least 1" away from the basket on this round.
Likes
2
Share
Hello everyone, I don't know what is happening with one of my Afghan skunk plants she is flowering under 24 hours of light per day that should not have happened she sits in a 10 gallon pot and i wanted to keep her in vege for 2 more weeks. The other two are transplanted this week and I hope they will stay in vege for 2 more weeks. Thanks for stopping by and have a nice day. Growfather