Likes
1
Share
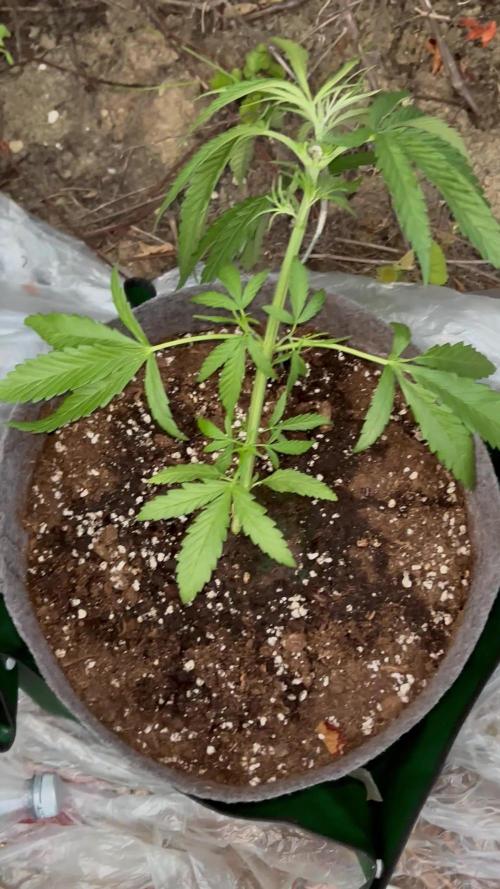
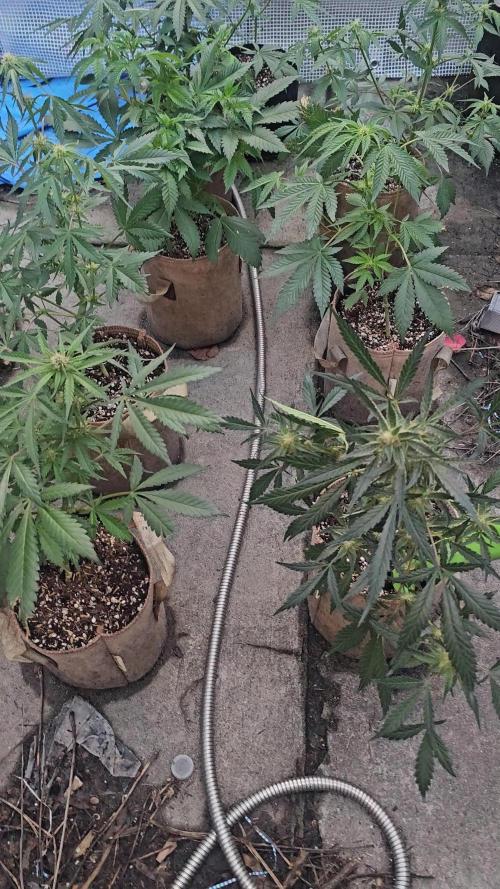
I have transplanted these 3 girls into bigger fabric pots after they healed up a few days from topping.They have been doing great in the new pots even though I did lose some roots that grew thru the bottom of the air pots searching for water I didn’t remove 🤦‍♂️.So far so good and looking very healthy developing some colas :)
Processing
Likes
61
Share
@Dunk_Junk
Follow
20cm vertical growth this week. Not quite gone into flowering yet but she is very close. This will be her last veg week for sure.
Likes
58
Share
Hey everyone :-). On the 63rd day of flowering after the time change to 12/12 the harvest was carried out after 48 hours of darkness 😍. I love this black pheno 👍. After the harvest, everything was laid out on nets where it is allowed to dry at 62% for the next 8-14 days before fermenting with 62% boveda packs in glasses 😍. The entire system was cleaned immediately for the next round. I wish you all a lot of fun with the interim update and we'll see you at the end 😅👍. Stay healthy and let it grow 🍀 You can buy this Strain at : www.Zamnesia.com ☝️🏼☝️🏼☝️🏼☝️🏼☝️🏼☝️🏼 Strain Gelato clone from mother (Zamnesia ) ☝️ Genetics: Wedding Cake x Gelato x Gelato 33 👍 Vega lamp: 2 x Todogrow LED CXB3590 COB 55 W 1 x Sanlight S2W 62 W 💡 Flower lamp : 2 x Todogrow LED CXB3590 COB 55 W 1 x Sanlight S2W 62 W 💡 ☝️ Grow Aero System : Growtool 0.8 ☝️ Fertilizer: Canna Aqua Vega A + B , Canna Aqua Flores A + B , Rizotonic, Cannazym, CANNA Boost, Pk 13/14, Canna Cal / Mag, Canna Ph - Grow, Canna Ph-Bloom ☝️🌱 Water: Osmosis water mixed with normal water (24 hours stale that the chlorine evaporates) to 0.2 EG. Add Cal / Mag to 0.4 Ec Ph with ph- to 5.2 - 5.8 💦 💧
Likes
17
Share
Hard to believe the pineapple muffins is half way done at this point. The buds look and smell amazing, brush one branch and you instantly smell the pineapple. The gorilla zkittlez is clearly done adding height and is focused on bud production now. She also isn’t nearly as stanky as the muffins but still looks good and healthy. Overall very satisfied so far.
Likes
41
Share
@Tower84
Follow
🇩🇪 Woche 8 – Mentha de Croco (Terpyz) 🌱🔥 Diese Woche war ein großer Schritt für die beiden Mentha de Croco 🌿🚀 Seit Dienstag stehen beide endlich in ihren finalen 30L Endtöpfen draußen und wurden in Bio Hanferde von Sonnenerde eingepflanzt 🌍 Dazu etwas Great White von Plant success an die Wurzeln. Beide Töpfe wurden zusätzlich mit Biofaser von Sonnenerde gemulcht, um die Feuchtigkeit besser zu halten und das Bodenleben zu unterstützen 🍂🔬 – perfekte Living Soil Bedingungen. Die Pflanzen haben den Umzug problemlos verkraftet und sehen weiterhin topfit aus 💪💚 Mit aktuell 66 cm und 58 cm Höhe entwickeln sich beide sehr kräftig und robust. Die Blattfarbe bleibt sattgrün und insgesamt wirken die Pflanzen absolut vital ☀️🌱 Heute am Samstag gab es die erste Runde selbst angesetzten Komposttee ✨ Dafür wurde 24 Stunden lang ein Beutel mit zwei Händen Wurmhumus und etwa einem Esslöffel Kelp in einem Eimer Wasser mit Luftpumpe und Sprudelstein belüftet 🌊 Der Tee wurde anschließend pur gegossen, um das Bodenleben direkt nach dem Umtopfen zusätzlich zu aktivieren 🔥🌿 Bis jetzt läuft alles genau nach Plan und die Pflanzen scheinen sich im neuen Setup richtig wohlzufühlen 🙌🌳 ⸻ 🇬🇧 Week 8 – Mentha de Croco (Terpyz) 🌱🔥 This week marked a big milestone for the two Mentha de Croco plants 🌿🚀 Since Tuesday, both have been transplanted into their final 30L outdoor pots filled with Bio Hanferde by Sonnenerde and a little Bit of great white from plant success 🌍 Both pots were also mulched with Sonnenerde Biofaser to help retain moisture and support microbial life 🍂🔬 – perfect living soil conditions. The plants handled the transplant without any issues and continue to look fantastic 💪💚 At 66 cm and 58 cm tall, both plants are growing vigorously and appear very robust. The foliage remains deep green and overall vitality is excellent ☀️🌱 Today, on Saturday, they received their first homemade compost tea ✨ The tea was brewed for 24 hours using two handfuls of worm castings and about one tablespoon of kelp in a bucket of water, continuously aerated with an air pump and air stone 🌊 It was applied undiluted to help boost soil biology after transplanting 🔥🌿 So far, everything is going exactly according to plan and the plants seem very happy in their new setup 🙌
Likes
5
Share
Our Zamnesia Georgia Pie #1 is almost ready. I harvested one of her taller, slightly disproportionate little sisters without the aid of any techniques. This one was mainfolded and is very balanced and regular. The flowers are firm and resinous, not very large in the cluster style of any genetic, which doesn't mean it requires less attention; these flowers are usually very heavy. I'm using a 20-liter airpot. Techniques chosen: the plant was topped with 16 toppings, and almost everything seems in place. We're 100% organic and 1000% Plagron, as always. The soil we've chosen is the recently released Plagron Bio LightMix, which will allow us to get off to a good start. Now, however, we're at the end of the day, so let's wash the soil to reuse it with a flush, which everyone says is useless lately. I love washing the soil anyway, and I listen to the debate from a distance. There are too many fake debunkers and bad advisors these days. Gain experience and listen above all to her. Choose your favorite style and calculate your results on the website: www.plagron.com Our new 720W Spider King lamp from Vanguard Hydroponics is now at 80% power. Z - https://www.zamnesia.io/en/531-growshop I can almost hear Ray Charles singing... Georgiaaa, try it. Z - https://www.zamnesia.io/en/11085-zamnesia-georgia-pie-semi.html Z - Spice up your grow with this delicious US hybrid. Originally developed in San Francisco, Zamnesia breeders worked hard to trace and stabilize the Gelatti x Kush Mints genetic line that gave rise to the original Georgia Pie. The result? A 50/50 indica/sativa hybrid that grows beautifully both indoors and outdoors, quickly producing dense buds with deliciously sweet terpenes and a powerful effect. Combining the genetics of two fantastic parent strains (Gelatti and Kush Mints), Georgia Pie is both productive and easy to grow. During the vegetative stage, plants grow vigorously, developing moderately spaced internodes and fairly broad fan leaves. Expect noticeable stretch during the transition to flowering: mature plants can reach 130 cm indoors and up to 200 cm outdoors, with numerous side branches that will develop large buds. Thanks to its exuberant leaf growth, Georgia Pie responds very well to regular pruning, defoliation, and training. These interventions will open up the plant's canopy, exposing even the lowest buds to light. Indoors, Georgia Pie typically requires 8-10 weeks of flowering to produce up to 500 g/m², while outdoors, plants are generally ready for harvest around mid-October, producing up to 500 g/plant. You know it, but I recommend it: here you will find so many wonderful things, practically "all the best that nature has to offer." Z - www.zamnesia.com Music // www.radionula.com + Feng Shui Music + Frequencies 432 Hz Translate
Likes
54
Share
@Mr_Horse
Follow
Starting autopot system and root aeration this week. Stay posted for updates. Day 1 You remember that movie "Training Day"? It's sorta like that. With a light trim for the buried leaves on lean. Day 3 continued lst, also some defoliating to encourage growth and light up the nodes. Day 7 did a final pin for the week. #5 and I had a tug of war, We both lost. Start somewhere other than the top when tieing. But otherwise I am real proud of my pinning and hope it's right on the money.
Likes
21
Share
Flowering day 34 since time change to 12/12 h. Hey guys :-) The buds have developed incredibly nicely this week. The smell is getting more and more extreme :-) . The growth has slowly stopped as the full energy goes into the production of the buds. Watering was done twice this week, each time with 1.2 l (nutrients see table above) They were individually inspected and checked for their health. Osmosis water for the coming week was refilled in a 100 l tank 👍. Have fun reading the diary and stay healthy 💚🙏🏻 👇🏼👇🏼👇🏼👇🏼👇🏼👇🏼👇🏼👇🏼👇🏼👇🏼👇🏼👇🏼 You can buy this Nutrients at : https://greenbuzzliquids.com/en/shop/ With the discount code: Made_in_Germany you get a discount of 15% on all products from an order value of 100 euros. 👇🏼👇🏼👇🏼👇🏼👇🏼👇🏼👇🏼👇🏼👇🏼👇🏼👇🏼👇🏼 You can buy this strain at : Clearwater Seeds Water 💧 💧💧 Osmosis water mixed with normal water (24 hours stale that the chlorine evaporates) to 0.2 EC. Add Cal / Mag to 0.4 Ec Ph with Organic Ph - to 5.8 - 6.5 MadeInGermany
Likes
30
Share
J'ai lancé la floraison le 24 avril !! J'espère que mes plantes vont faire de belles fleurs 🌱🌴
Likes
Comments
Share
@Ensign420
Follow
|»» LOG DISCLAIMER: Not intended as a grow guide. Grow log entries are usually posted 3 weeks later and are for my learning reference. ««| Introduction - Week 15 Summary - Ensign's log, stardate 17711.1, Been a great week in the garden! Wow the 4x4 tent is thriving and the canopy is full of tops! By the end of the week, all phenos have begun to show signs of flowering! Growth has continued to stretch so added the second scrog frame and netting. By the end of the week, the canopy has stretched through the second layer and looking green and healthy! In the veg tent, been tending to solo cup waterings as needed. Also up-potted Chill Out OG into a 3-gal pot (with BluMat watering). Took more veg cuttings and now have them in Coco Coins rooting and looking healthy! Onwards to next week! [START OF WEEK 15] ========================================================== ---------- [ 3x3 VEG TENT - GR7 / GR3 ] ---------- TKO #2 - WEEK 07 - Full Veg Gorilla Goat #1 - WEEK 07 - Full Veg Chill Out OG #3 - WEEK 04 - Full Veg Chill Out OG #2 - WEEK 00 - Transplant ---------- [ 4x4 MAIN TENT - GR30 ] ---------- Chill Out OG #2 - WEEK 15 - Full Bloom Wk1 TKO #2-2 - WEEK 09 - Full Bloom Wk1 Heady OG BX1 #1 - WEEK 11 - Full Bloom Wk1 02/09/26 → 02/15/26 [WEEK 15] This Week's Estimated Goals ---------------------------------------------------------------------------------------------- DLI: ~13 mol/m²/d PPFD: ~300 μmol/m²/s VPD: ~1.2 kPa This Week's Meter Readings & Averages ---------------------------------------------------------------------------------------------- Light On/Off: 16:00 - 10:00 | Wattage: ~386.3W [LV05] Distance From Canopy: ~[22”, 13”, 13”] Plant Height: ~[30”, 39”, 39”] Max Plant Height: ~52” [Lamp-to-Soil Distance] DLI: ~16.80 mol/m²/d PPFD: ~389 μmol/m²/s VPD: ~0.89 kPa Soil %: ~[47.9, 47.1, 43.3, 53.0, 48.3, 63.4, 47.1, 61.9, 48.6, 72.3] ========================================================== Day 01 - Monday - 02/09/26 - Total Days: 096 ----------------------------------- Daily Averages ~[+01:00] - Temps: 81.1°F [27.3°C] - Humidity: 74.4% - VPD: 0.92 kPa - Soil %: [48, 47, 44, 51, 49, 66, 48, 65, 50, 75] ----------------------------------- - [22:14]: Night check on the 4x4 tent. --- Garden is full of tops and the canopy is getting taller! --- Chill Out OG #2 is getting taller, but is staying shorter than Heady OG BX1 #1 and TKO #2. --- The under canopy is looking clean and all pots are clean and no signs of flooding. - [22:17]: Checked on the BluMat soil moisture sensors: ------ Chill Out OG #2 » 46mbars ------ Heady OG BX1 #1 » 42mbars ------ TKO #2 » 49mbars --------- Watering Range: [Too Wet] ~25mbars «| [Ideal Target] ~40-80mbars |» ~125mbars [Too Dry] --------- BluMat Max Values: [10mbars «||» 750mbars] - [22:24]: Checked the Ecowitt soil moisture sensor data: ------------------ [ 3x3 VEG TENT – GR7 / GR3 ] ---------------- ------ 45% - [CH01 » M1 » VBL – TKO #2] ------ 46% - [CH02 » M2 » VBR – Gorilla Goat #1] ------ 44% - [CH03 » M3 » VFL – Chill Out OG #3] ------ 51% - [CH04 » M4 » VFR – Dry Soil] ----------------- [ 4x4 MAIN TENT – GR30 ] --------------- ------ 49% - [CH05 » P1 » FLT – Chill Out OG #2] ------ 66% - [CH06 » P1 » FLB – Chill Out OG #2] ------ 47% - [CH07 » P2 » BLT – TKO #2-2] ------ 64% - [CH08 » P2 » BLB – TKO #2-2] ------ 51% - [CH09 » P3 » FRT – Heady OG BX1 #1] ------ 75% - [CH10 » P3 » FRB – Heady OG BX1 #1] --------- Veg: ~38%-45% | Flower: ~45%-55% --------- General: ~30% [Dry] «| ~45-60% [Moist] |» ~70% [Wet] - [22:27]: Checked the 3x3 veg tent. --- Wow the veg garden is blowing up with growth! --- All mothers and clones are perky and getting tall! Definitely need to top soon, but not today! --- A Chill Out OG #2 clones needs watering! - [22:33]: Here is the starting initial watering range: ------ Chill Out OG #2 » 267.3g → 301.0g --------- General Weight Range: [Dry] ~275g «| [Dryback] ~300g |» ~325g-400g [Wet] --- Been 2 days since the last watering. --- Took the starting weight before watering, ------ Chill Out OG #2 » 289.2g --- While on a scale, --- Evenly misted the top of the cup with RO water. --- Did not spray the top growth. --- Misted 10-20 sprays. Waited a moment, then misted again. --- Repeated this process until the cup weighted at least 300g. --- There was no runoff. - [22:44]: Took the saturated weight after watering, ------ Chill Out OG #2 » 390.7g --- Updated the wet weight and watering date. --- Placed the cup back into the tent. --- All veg clones in the propagation tray look great and no need to water! - [22:53]: Checked the humidifiers. --- Tanks are still full and no leaks found. Day 02 - Tuesday - 02/10/26 - Total Days: 097 ----------------------------------- Daily Averages ~[+01:00] - Temps: 81.0°F [27.2°C] - Humidity: 76.9% - VPD: 0.83 kPa - Soil %: [50, 47, 44, 51, 49, 64, 47, 63, 50, 74] ----------------------------------- - [21:06]: Night check on the 4x4 tent. --- Ca-Caw! Wow the garden soaring upwards with healthy tops! --- Heady OG and TKO are stretching up at equal heights and are almost tall enough to begin the second level or netting. Nice! --- Chill Out OG is chilling and staying squat, but looking perking! - [21:12]: Checked on the BluMat soil moisture sensors: ------ Chill Out OG #2 » 48mbars ------ Heady OG BX1 #1 » 44mbars ------ TKO #2 » 56mbars --------- Watering Range: [Too Wet] ~25mbars «| [Ideal Target] ~40-80mbars |» ~125mbars [Too Dry] --------- BluMat Max Values: [10mbars «||» 750mbars] - [21:16]: Checked the Ecowitt soil moisture sensor data: ------------------ [ 3x3 VEG TENT – GR7 / GR3 ] ---------------- ------ 47% - [CH01 » M1 » VBL – TKO #2] ------ 49% - [CH02 » M2 » VBR – Gorilla Goat #1] ------ 43% - [CH03 » M3 » VFL – Chill Out OG #3] ------ 51% - [CH04 » M4 » VFR – Dry Soil] ----------------- [ 4x4 MAIN TENT – GR30 ] --------------- ------ 48% - [CH05 » P1 » FLT – Chill Out OG #2] ------ 64% - [CH06 » P1 » FLB – Chill Out OG #2] ------ 47% - [CH07 » P2 » BLT – TKO #2-2] ------ 63% - [CH08 » P2 » BLB – TKO #2-2] ------ 51% - [CH09 » P3 » FRT – Heady OG BX1 #1] ------ 74% - [CH10 » P3 » FRB – Heady OG BX1 #1] --------- Veg: ~38%-45% | Flower: ~45%-55% --------- General: ~30% [Dry] «| ~45-60% [Moist] |» ~70% [Wet] - [21:21]: Checked the 3x3 veg tent. --- Woah! The veg garden is stretching upwards and has reached the grow light! --- Time to top! --- Also going to take more Gorilla Goat clones. Not too sure on the current one in the tray, so cutting a couple more just in case. - [21:33]: Filled a measuring cup with 2 cups of RO water. ------ Added 1/8tsp of Horticultural Aloe --- Mixed the solution and poured it straight into a clear solo cup. --- Made sure the PVC tube on the rig had the correct names marked. --- Placed the rig into the cup just above the aloe water. --- Okay! Time to take the cuttings! --- Using a pair of clean trimmers, - [22:05]: Topped and defoliated each mother plant. --- Removed a decent amount of growth (a good 7-8 inches of top growth). --- Mulched the trimmings. - [22:07]: Also cut several Gorilla Goat #1 clonal cuttings. --- Made sure to trim most of the branches leaving a top node or two. --- Did not cut any leaf fingers and made sure to cut the tip of the stalk (about 45-degree) before placing each cutting into the cup of aloe solution. - [22:09]: Placed the cup into the veg tent. --- Have the cup resting on top of the drip tray (front left pot). --- Okay! Let the soaking begin! - [22:10]: Decided to cull the Gorilla Goat #1-2 clone in the propagation tray. --- Mulched the entire cup. - [22:18]: Checked the humidifiers. --- Tanks are still full and no leaks found. Day 03 - Wednesday - 02/11/26 - Total Days: 098 ----------------------------------- Daily Averages ~[+01:00] - Temps: 81.7°F [27.6°C] - Humidity: 76.9% - VPD: 0.85 kPa - Soil %: [47, 47, 43, 50, 48, 64, 47, 62, 50, 74] ----------------------------------- - [16:09]: Evening check on the 3x3 veg tent. --- Veg garden is looking nice and clean! --- The growth is still recovering from the topping, but all mothers and clones look great! - [16:22]: Okay! Time to transplant Chill Out OG #2 into a 3-gal pot! --- The 3-gallon pot has been already pre-amended and prepped for a fresh transplant. --- Will also be installing the BluMat watering carrot before connecting it to the water source loop. - [16:46]: Took a 3-gallon pot out of the veg tent and set it on a drip tray. ------ Removed the drip tray and Ecowitt soil sensor. --- Loosened the soil and made a hole in the center of the pot. ------ Set a clear cup into the center of the pot. --- Tucked the sides of the cup in snug with the surrounding soil. --- Gently removed the clear cup from the fabric pot leaving a perfect hole. ------ Sprinkled 1/16tsp of Great White ------ Sprinkled 1/32tsp of Beauveria Bassiana Plus - [17:06]: Dusted the sides of the hole. --- Also sprinkled a bit around the top soil. --- Great! Time to transplant! --- Chill Out OG #2 weighed 291.2g and was watered 2 days ago. --- To loosen and unstick the rootball from the cup, I gently squeezed the sides before pressing the bottom upwards. - [17:14]: Once fully loosened, I simply Vulcan-gripped the base of the plant before flipping her upside down. --- Ooo yea! Nice pearly white roots! --- She’s more than ready for a larger pot! --- Did not break up the rootball. - [17:16]: Gently set her straight into the pre-inoculated hole. --- Pressed and evened out the top soil. - [17:22]: Using fresh BuildASoil Organic Straw Mulch, --- Covered the top soil with straw. - [17:35]: Then using a fully filled 5" BluMat watering carrot (pre-soaked and set to gold for gravity feed) along with a 5" drip ring, --- Placed the drip ring around the base of the plant. --- Then gently inserted the BluMat carrot into the soil near the drip ring's fill tube before connecting it with a 3mm connector. - [17:58]: Also set the Ecowitt soil sensor back. --- Placed the fabric pot back into the Veg tent. --- Shut off all flow-valves and made sure the (8mm) water source loop had no water pressure. --- Then cut the tubing and installed an RO valve-rig (with 3mm T-fitting). - [18:12]: Finally connected the watering carrot's 3mm fill tube to the valve-rig before turning all flow-valves back on. --- Ca-Caw! Done with the transplant! --- The soil moisture was pretty wet so decided to not water. --- Will continue to check and will water if needed. - [18:20]: Decided to also cull the extra Heady OG BX1 clones. --- Mulched the trimmings and soil. - [18:54]: Checked the Ecowitt soil moisture sensor data: ------------------ [ 3x3 VEG TENT – GR7 / GR3 ] ---------------- ------ 52% - [CH01 » M1 » VBL – TKO #2] ------ 50% - [CH02 » M2 » VBR – Gorilla Goat #1] ------ 43% - [CH03 » M3 » VFL – Chill Out OG #3] ------ 56% - [CH04 » M4 » VFR – Chill Out OG #2] ----------------- [ 4x4 MAIN TENT – GR30 ] --------------- ------ 48% - [CH05 » P1 » FLT – Chill Out OG #2] ------ 64% - [CH06 » P1 » FLB – Chill Out OG #2] ------ 47% - [CH07 » P2 » BLT – TKO #2-2] ------ 62% - [CH08 » P2 » BLB – TKO #2-2] ------ 51% - [CH09 » P3 » FRT – Heady OG BX1 #1] ------ 74% - [CH10 » P3 » FRB – Heady OG BX1 #1] --------- Veg: ~38%-45% | Flower: ~45%-55% --------- General: ~30% [Dry] «| ~45-60% [Moist] |» ~70% [Wet] --- Also updated the soil sensor names a bit. - [19:07]: Checked the 4x4 tent. --- Ooo yea! The garden is thriving and the canopy is still stretching upwards! --- All phenos are looking great and will need to set the second scrog frame layer soon. Nice! --- Not too sure if Chill Out OG will make it to the second netting, but she’s looking healthy and perky so not a big deal. --- Stoked that the under canopy is clean and looking healthy! - [19:17]: Checked on the BluMat soil moisture sensors: ------ Chill Out OG #2 » 51mbars ------ Heady OG BX1 #1 » 46mbars ------ TKO #2 » 53mbars --------- Watering Range: [Too Wet] ~25mbars «| [Ideal Target] ~40-80mbars |» ~125mbars [Too Dry] --------- BluMat Max Values: [10mbars «||» 750mbars] --- All veg clones and cuttings are looking great! --- Need to change the Gorilla Goat cutting’s aloe water out. Also a couple clones need watering. --- Filled a clear cup with fresh RO water (1.5cups). - [20:21]: Gently lifted the PVC rig out of the cup of aloe water and set it gently into the RO cup. --- Going to let these soak for another day before transplanting into Coco Coins for rooting. --- Two clones need watering! - [20:34]: Here are the starting initial watering ranges: ------ TKO #2-1 » 290.7g → 340.5g ------ Gorilla Goat #1-1 » 279.9g → 340.6g --------- General Weight Range: [Dry] ~275g «| [Dryback] ~300g |» ~325g-400g [Wet] --- Both cups were last watered 8 days ago. --- Took the starting weight of both clones before watering, ------ TKO #2-1 » 289.8g ------ Gorilla Goat #1-1 » 295.6g --- While on a scale, --- Evenly misted the top of both cups with RO water. --- Did not spray the top growth. --- Misted 10-20 sprays. Waited a moment, then misted again. --- Repeated this process until both cups weighted at least 300g. --- There was no runoff. - [21:06]: Took the saturated weight of both cups after watering, ------ TKO #2-1 » 355.5g ------ Gorilla Goat #1-1 » 355.4g --- Updated the wet weight and watering dates for both cups. --- Placed both cups back into the tent. - [21:36]: Checked the humidifiers. --- Tanks are still full and no leaks found. Day 04 - Thursday - 02/12/26 - Total Days: 099 ----------------------------------- Daily Averages ~[+01:00] - Temps: 81.5°F [27.5°C] - Humidity: 75.3% - VPD: 0.91 kPa - Soil %: [49, 48, 43, 56, 47, 63, 46, 62, 50, 73] ----------------------------------- - [16:01]: Evening check on the 3x3 veg tent. --- Veg garden is looking incredible and growth is recovering nicely! --- Also veg clones and cuttings are looking good! - [17:03]: Okay! Time to start the rooting process! --- Filled a measuring cup with 1.5 cups of RO water. ------ Added a pinch of Quillaja Saponaria Extract [60] ------ Added 1/64tsp of Horticultural Aloe ------ Added 1/32tsp of Mycrobe Complete --- Mixed the solution thoroughly. - [17:04]: Dropped 2 Coco Coins into the measuring cup. --- The coins immediately started to expand. ------ [» ~5 MINUTES LATER «] --- Placed each fully saturated Coco Coin into half-cut solo cups. - [17:25]: Using a squeeze bottle filled with Clonex, --- Gently filled each pre-made hole with Clonex rooting gel. - [17:38]: Time to plant the cuttings! --- Using a pair of clean trimmers, made a final 45° cut. --- Also stripped and scrapped some of the stem’s outer membrane. --- To help with planting, gave each Coco Coin a squeeze to loosen the coco. --- Made sure to insert each stem straight and snug with the tip about a 1/4 inch from the bottom of the Coco Coin. --- Also secured the stem by pinching and pressing in the top of the Coco Coin. --- Once each cutting was planted, - [18:11]: Placed each Coco Coin into the propagation dome’s tray. --- Made sure to keep each cutting properly tagged. --- Did not spray the top growth with any water, but did fill the bottom of the tray with RO water. --- As far as PPFD, --- At the lowest light intensity (and raised ~14 above the tray), the PPFD is around 42 μmol/m²/s which gives a DLI of 2.72 mol/m²/d under an 18/6 light cycle - [18:18]: Decide to cull TKO #2-2 along with the spare Gorilla Goat cutting. --- Going to mulch the trimmings, but going to add something more to the mulch pot. - [18:23]: Since I also make and drink my own F1 kombucha (helps to maintain healthy gut bacteria along with a great way to lose weight), I have a decent amount of spare scobys. --- Placed a few spare scoby pellicles into a plastic bin. --- Using scissors, chopped up the scoby pellicles into smaller chunks and added the soil and trimmings from the culled clone and cutting. --- Set the container aside. Will top dress the mulch bin in the main tent later. --- Might move the mulch bit to the front of the tent for the next cycle and am thinking about turning it into a potential worm bin. --- Anyways! - [18:41]: Checked the Ecowitt soil moisture sensor data: ------------------ [ 3x3 VEG TENT – GR7 / GR3 ] ---------------- ------ 49% - [CH01 » M1 » VBL – TKO #2] ------ 45% - [CH02 » M2 » VBR – Gorilla Goat #1] ------ 43% - [CH03 » M3 » VFL – Chill Out OG #3] ------ 55% - [CH04 » M4 » VFR – Dry Soil] ----------------- [ 4x4 MAIN TENT – GR30 ] --------------- ------ 47% - [CH05 » P1 » FLT – Chill Out OG #2] ------ 63% - [CH06 » P1 » FLB – Chill Out OG #2] ------ 46% - [CH07 » P2 » BLT – TKO #2-2] ------ 62% - [CH08 » P2 » BLB – TKO #2-2] ------ 50% - [CH09 » P3 » FRT – Heady OG BX1 #1] ------ 72% - [CH10 » P3 » FRB – Heady OG BX1 #1] --------- Veg: ~38%-45% | Flower: ~45%-55% --------- General: ~30% [Dry] «| ~45-60% [Moist] |» ~70% [Wet] - [19:05]: Checked the 4x4 tent. --- Ca-Caw! Let’s go ladies! Wow the garden is looking incredible! --- Growth is ramping up and the canopy is definitely in full stretch! --- The under canopy is looking clean and pots all look great! - [19:09]: Nice! All phenos are showing clear signs of bud crowning! --- Chill Out OG seems to be further along than the rest of the cultivars, flower has officially begun! --- Heady OG and TKO has slight signs of crowning, but will continue to stretch for a few more days. I think. --- Anyways! - [19:17]: Quickly checked on the RO reservoir and auto-watering system. --- Reservoir looked good and no leaks detected. - [20:14]: Took the kombucha top dressing from earlier and spread the mix top of the mulch bin (in the back right of the tent). --- Spread the top dressing out evenly. Since kombucha is naturally and acidic ferment, going to let the top dressing dry out a bit (smells great too). --- Will continue to add leaves and trimming on top after defoliation and toppings. - [20:21]: Okay time to build the second scrog frame layer and re-string the second level of netting! --- Prepped and built the PVC scrog frame outside of the tent. --- Using mason string, restrung the netting and double-looping each screw. --- Once the frame was fully assembled and re-strung, - [22:21]: Placed the PVC riser poles and installed the second scrog frame into the 4x4 tent. --- The first scrog layer is currently about 18.5" from the top soil. --- The second scrog layer is currently about 35" from the top soil. --- Done! - [22:59]: Checked the humidifiers. --- Tanks are still full and no leaks found. Day 05 - Friday - 02/13/26 - Total Days: 100 ----------------------------------- Daily Averages ~[+01:00] - Temps: 82.2°F [27.9°C] - Humidity: 75.7% - VPD: 0.91 kPa - Soil %: [46, 47, 43, 55, 47, 63, 46, 61, 48, 71] ----------------------------------- - [21:16]: Night check on the 4x4 tent. --- Wow the garden is raging with growth! --- The second layer is almost pretty much already full! --- Chill Out OG is chilling in between the netting and looking healthy with signs of bud crowning starting to swell up! --- Both Heady OG and TKO are also continuing to stretch with slight signs of crowning. Nice! --- Let’s go my girls! - [21:24]: Checked the Ecowitt soil moisture sensor data: ------------------ [ 3x3 VEG TENT – GR7 / GR3 ] ---------------- ------ 46% - [CH01 » M1 » VBL – TKO #2] ------ 50% - [CH02 » M2 » VBR – Gorilla Goat #1] ------ 43% - [CH03 » M3 » VFL – Chill Out OG #3] ------ 55% - [CH04 » M4 » VFR – Chill Out OG #2] ----------------- [ 4x4 MAIN TENT – GR30 ] --------------- ------ 47% - [CH05 » P1 » FLT – Chill Out OG #2] ------ 62% - [CH06 » P1 » FLB – Chill Out OG #2] ------ 46% - [CH07 » P2 » BLT – TKO #2-2] ------ 60% - [CH08 » P2 » BLB – TKO #2-2] ------ 48% - [CH09 » P3 » FRT – Heady OG BX1 #1] ------ 71% - [CH10 » P3 » FRB – Heady OG BX1 #1] --------- Veg: ~38%-45% | Flower: ~45%-55% --------- General: ~30% [Dry] «| ~45-60% [Moist] |» ~70% [Wet] - [21:26]: Checked the 3x3 veg tent. --- The veg garden is looking nice and perky with healthy growth! --- A Garlic Budder clone needs watering. Let’s go Ensign! - [21:37]: Here is the starting initial watering range: ------ Garlic Budder OG#1-1 » 299.1g → 340.6g --------- General Weight Range: [Dry] ~275g «| [Dryback] ~300g |» ~325g-400g [Wet] --- Been 8 days since the last watering. --- Took the starting weight before watering, ------ Garlic Budder OG#1-1 » 298.5g --- While on a scale, --- Evenly misted the top of the cup with RO water. --- Did not spray the top growth. --- Misted 10-20 sprays. Waited a moment, then misted again. --- Repeated this process until the cup weighted at least 300g. --- There was no runoff. - [21:43]: Took the saturated weight after watering, ------ Garlic Budder OG#1-1 » 355.6g --- Updated the wet weight and watering date. --- Placed the cup back into the tent. --- Gorilla Goat cuttings are looking great in the propagation tray! No need to spray or water. Great! - [22:04]: Checked the humidifiers. --- Tanks are still full and no leaks found. Day 06 - Saturday - 02/14/26 - Total Days: 101 ----------------------------------- Daily Averages ~[+01:00] - Temps: 80.9°F [27.2°C] - Humidity: 75.7% - VPD: 0.88 kPa - Soil %: [48, 47, 43, 54, 48, 62, 47, 60, 47, 70] ----------------------------------- - [19:01]: Night check on the 4x4 tent. --- Ooo yea! The garden is looking healthy and looking great! --- Ca-Caw! Heady OG is still raging upwards and stretching through the netting - [17:14]: Checked the Ecowitt soil moisture sensor data: ------------------ [ 3x3 VEG TENT – GR7 / GR3 ] ---------------- ------ 52% - [CH01 » M1 » VBL – TKO #2] ------ 50% - [CH02 » M2 » VBR – Gorilla Goat #1] ------ 43% - [CH03 » M3 » VFL – Chill Out OG #3] ------ 54% - [CH04 » M4 » VFR – Chill Out OG #2] ----------------- [ 4x4 MAIN TENT – GR30 ] --------------- ------ 46% - [CH05 » P1 » FLT – Chill Out OG #2] ------ 61% - [CH06 » P1 » FLB – Chill Out OG #2] ------ 46% - [CH07 » P2 » BLT – TKO #2-2] ------ 60% - [CH08 » P2 » BLB – TKO #2-2] ------ 47% - [CH09 » P3 » FRT – Heady OG BX1 #1] ------ 70% - [CH10 » P3 » FRB – Heady OG BX1 #1] --------- Veg: ~38%-45% | Flower: ~45%-55% --------- General: ~30% [Dry] «| ~45-60% [Moist] |» ~70% [Wet] - [19:18]: Checked the 3x3 veg tent. --- Veg garden is looking great and growth is healthy and green! --- A Garlic Budder clone needs watering! - [19:25]: Here is the starting initial watering range: ------ Garlic Budder OG#1-2 » 279.2g → 340.3g --------- General Weight Range: [Dry] ~275g «| [Dryback] ~300g |» ~325g-400g [Wet] --- Been 9 days since the last watering. --- Took the starting weight before watering, ------ Garlic Budder OG#1-2 » 297.3g --- While on a scale, --- Evenly misted the top of the cup with RO water. --- Did not spray the top growth. --- Misted 10-20 sprays. Waited a moment, then misted again. --- Repeated this process until the cup weighted at least 300g. --- There was no runoff. - [19:40]: Took the saturated weight after watering, ------ Garlic Budder OG#1-2 » 355.5g --- Updated the wet weight and watering date. --- Placed the cup back into the tent. - [20:01]: Checked the humidifiers. --- Tanks are still full and no leaks found. Day 07 - Sunday - 02/15/26 - Total Days: 102 ----------------------------------- Daily Averages ~[+01:00] - Temps: 80.8°F [27.1°C] - Humidity: 76.2% - VPD: 0.85 kPa - Soil %: [47, 47, 43, 54, 50, 62, 49, 60, 45, 69] ----------------------------------- - [19:04]: Night check on the 4x4 tent. --- Ooo yea! Let’s grow my ladies!! --- The canopy is packed with bud top crowns and the mid canopy (in between the netting) is getting really dense! --- Plan to do a deep defoliation soon, but going to let everything grow and stretch upwards for now. --- Grow strong my girls! - [19:11]: Checked on the BluMat soil moisture sensors: ------ Chill Out OG #2 » 38mbars ------ Heady OG BX1 #1 » 93mbars ------ TKO #2 » 43mbars --------- Watering Range: [Too Wet] ~25mbars «| [Ideal Target] ~40-80mbars |» ~125mbars [Too Dry] --------- BluMat Max Values: [10mbars «||» 750mbars] - [19:14]: Decided to make a slight adjustment to Heady OG’s watering carrot. --- Using the provided allen key, increased the water moisture by turning the BluMat’s tension cap slightly counter-clockwise. - [19:18]: Checked the Ecowitt soil moisture sensor data: ------------------ [ 3x3 VEG TENT – GR7 / GR3 ] ---------------- ------ 44% - [CH01 » M1 » VBL – TKO #2] ------ 47% - [CH02 » M2 » VBR – Gorilla Goat #1] ------ 43% - [CH03 » M3 » VFL – Chill Out OG #3] ------ 54% - [CH04 » M4 » VFR – Chill Out OG #2] ----------------- [ 4x4 MAIN TENT – GR30 ] --------------- ------ 51% - [CH05 » P1 » FLT – Chill Out OG #2] ------ 63% - [CH06 » P1 » FLB – Chill Out OG #2] ------ 50% - [CH07 » P2 » BLT – TKO #2-2] ------ 60% - [CH08 » P2 » BLB – TKO #2-2] ------ 45% - [CH09 » P3 » FRT – Heady OG BX1 #1] ------ 69% - [CH10 » P3 » FRB – Heady OG BX1 #1] --------- Veg: ~38%-45% | Flower: ~45%-55% --------- General: ~30% [Dry] «| ~45-60% [Moist] |» ~70% [Wet] - [19:22]: Checked the 3x3 veg tent. --- Veg garden is looking great and all top growth is green and perky! --- Clones are also looking good and don’t need watering. Nice! --- Gorilla Goat cutting in the propagation tray look green and healthy! --- Easy night in the veg garden! - [20:15]: Checked the humidifiers. --- Tanks are still full and no leaks found. --- Another grow week done! --- The main tent has begun to flower and the stretch has started to slow down for the most part. Almost time for a top dressing! --- Probably need to defoliate again soon. Just stoked that growth is all around healthier than ever! --- As for the veg garden, there’s work to be done and plan to overhaul the veg garden to be able to better preserve my current (and future) genetics. --- Anyways, onwards to next week Ensign! [END OF WEEK 15]
Likes
41
Share
@Cannaguy
Follow
Another week of pretty consistent rain, haven’t had to water much. The plants definitely seem to be entering the flowering stretch as the branches are filling out and stretching towards the sun. Continuous rain has led to overall damp soil, will treat top soil with trifecta to help against bugs laying eggs in soil due to moisture
Likes
Comments
Share
end of week 5 flower 🏻| all looking god | very strong rotten fruit smell | its gerring purple!
Processing
Likes
150
Share
I welcome all my like-minded people who are in different parts of the world. I thank everyone who provides moral support to Russian plant growers. 👍 It's me again-an underground Russian grower with some experience with different strains of cannabis. Subscribe to my diary if you want to follow my progress and learn a lot about the life Of Russian growers, and the difficulties they face every day👊 Today my have my plants 62 day life. 9 weeks. today I visited my underground production. As I will have difficulties in financial investments, I had to collect from improvised materials additional ventilation and air filtration. In addition, I installed forced ventilation at the entrance with a computer power supply. Bubblelicious Auto-with the genetics of this cannabis variety I was familiar before, so knew what to expect from these plants. I can say one thing, it is the most delicious and sweetest sort of marijuana I grow. Also, it produces a lot of oils which I think it is suitable for extraction or cooking cannabis food. I look forward to the harvest Neville's Haze Auto - this variety of cannabis shows an unprecedented strength in growth, its flowering only in the early stages, and should take a long time before its full sexual maturity. In addition, I made my girls an intimate haircut, so that their genitals become like full-fledged women. In General, I'm doing well, thanks to this resource and the advice received here, I manage to fight with the stench, I'm free and I'm not going to finish my activities. Until next time. 😉
Likes
2
Share
I stayed on the same conditions because I don’t want to accelerate growth right now. In 4-10 days they will move to the bigger space. So far so good … they are prey thirsty. 3 Liters per day. I hope the 2 small plants will catch up a bit. Did nothing with the plants. Just keeping Nutrientsolution in the reservoir. Right now I’m not sure if I keep all of them or if i dump 2 of them and just scrog the others bigger. Conditions of the Grow: 💡 PPFD: 500 umol/m2/s ☀️ DLI: 32.4 mol/day 🌓 Lightcycle: 18/6 h 💨 Humidity: 55-60 % 🌡️ 🌞Daytime Temp.: 25-26 *C 🌡️ 🌙Nighttime Temp.: 21-22 *C 🌡️🌱Leaf Temperature: 23 *C 🌡️💧Water Temperature: 19-21 *C Water TDS: 900ppm | EC: 1.8 us/cm 🚰Watersource: Rainwater (TDS: 15ppm | EC: 0.03 us/cm Vegetation Equipment: 🔦 Lamp: Pro-Emit DIY-M-KIT 300W 📤Container: 2x DIY 63L Euro-Box with lid Pot: Netpot 2 inch 💦Pump: M.R.S. Standard Whisper Powerpump 8.5 bar 🚿Nozzles: 12x 0.2mm 🫧Waterfilter: 150 microns 🌬️Fan: 2x Clipfan 🌪️Duct-Fan: AC Infinity 100 mm with Controller and no Filter 🍶Nutrient Brand: Terra Aquatica 🔬Sensors: Waterstation (EC, TDS, Temp, PH, Salt), CO2, Air Temp. & Humidity (VPD), Temperature-Sensor Root Container
Likes
2
Share
As duas plantas da direita avançaram mais rápido para floração, o cheiro começa a ficar bem forte e as flores muito resinadas, elas seguem se alimentando muito bem, reponho 8 a 10 litros diariamente
Likes
29
Share
@Sidbank
Follow
25.05 As can be seen in the attached images, they are not ready to be switched yet. They still need another week. I have spread them across the entire surface of the tent and turned on the second lamp. I set them at 40% power, applied Soil Attack, a minimal dose of Nitrogen using Organic Grow BAC, and liquid mycorrhizae. This time, I adjusted the pH to 5.9 using an organic pH regulator. By the end of the week, I will remove four more plants, keeping a total of 25. Unfortunately, I will have to leave again for a week, which I'm concerned about because all the efforts might go to waste. :P. Keep your fingers crossed for the success of this cultivation! Wszystkich polskojęzycznych obywateli planety ziemia zapraszam na serwer Breedbros na discordzie o uprawie! https://discord.gg/NjTyKJ7E 27.05 Today, I added homemade NPK 10-8-10 fertilizer tablets to my plants - two tablets on each side of the stem, 5 cm away from it. From now on, I will only water them until the end. After switching, I will also introduce mycorrhizae and provide foliar feeding. Depending on how the flowers develop, I might consider adding a bloom stimulator. 30.05 I;m waiting to the end of the week and switch them on 12/12
Likes
Comments
Share
@cannamite
Follow
I've already cut a few buds this week, so that the effect is not too deadly and suitable for work
Likes
5
Share
@Deli_Weed
Follow
Esta fue su última semana con nutrientes, no engordo mucho, creo que mi error fue excederme con los nutrientes a lo largo de su ciclo, yo aproximo que me dará unos 50 gramos masomenos, no es mucho pero es trabajo honesto jaja 😆 la próxima semana será de puro flush ya para darle corte
Likes
10
Share
@3lementa1
Follow
The colas keep filling out and getting longer and smell amazing. It's been warmer and more humid outside so RH in the tent has gone up. I added a mini air purifier I wasn't using (no ozone) as an extra precaution against mildew. I woke up in the middle of the night on Monday and realized that the air purifier has a light on it so I got up and turned it off. I was worried that I'd messed with the dark cycle so I left them in darkness for an extra 2.5 hours. My cool tube fan fell off the next day, onto my plants. They look undamaged. I taped it up again and set up a safety wire like the filter and fan have. I need a better solution for next cycle. The buds are beautiful and having an even canopy is great. It's hard not thinking about the end result. The buds still look small compared to the big colas of a traditional grow shape but there's still a couple weeks left. There is some bud formation under the canopy but it's a little light. The tops of the colas are fat but short on the 7 gallon plants and taller and thinner on the 5 gallon plants. I did leave a couple offshoots on that developed in late veg/early flower. By the time I caught them, I felt they were too mature to chop and I thought they helped fill out certain areas. But those ones have fewer bud sites and tend to be just a cola on a branch that shoots straight up which is still good. I do wonder if less crowding would have given me bigger buds, but I think it has more to do with pot size. This is week 7 of flower. I switched to half strength nutes and started adding fancy molasses (18ml/gallon). I broke my pH tester and didn't replace my SCROG net until after I finally watered the next day so the canopy changed a bit. I took the opportunity to rearrange the plants a bit. Crystal formation increased a crazy amount the day after I started adding molasses. I think I'll keep adding molasses even during flush. The CBD Blue Shark has this really beautiful white glow. The pistils are very strong and white and the trichromes reflect back this silver light. The leaves are a nice semi-glossy dark green which gives great contrast. It's just a beautiful plant. The Wedding Cake has a lot more colour with lots of red hairs and some yellow tones in the pistils. The fan leaves are more prone to yellowing and death than the leaves on the CBD BS. The buds seem more structurally dense and are really working on these pyramid shapes that look like delicious orange and green snacks. The buds on the CBD Blue Shark are more symmetrical and kind of otherworldly like some kind of sea creature.