


Processing
Likes
Comments
Share


@snowybudz
Follow
Things seem to be going well. Really good bud development for only the end of week one. Not much stretch happening.but that's a good thing because I'm basically out of floor space

Likes
2
Share


@inversi0n
Follow
Hello growers!
Tonns of defoliation and branch management this week. I added 2nd pack of stretching wires
I actually don't know how to manage THAT amount of branches
Shall we count this stage as a flower or veg. Well, it's transitioning
At the beginning of the week PPM was 1040, by the end it's 1700+
It's hard to maintain correct level, when we add water, not changing it, i wanted to add more bloom nutrients. And she dinks well now.

Processing
Likes
56
Share


@autoseedsman
Follow
So week two finished and I think she is looking well, this is my first ever grow so anyone sees anything I'm doing wrong do let me know as im here to learn, my next thing im pondering for this week is she ready to be tied down (LST)? She is standing around 5.5 Inches and has leaves and shoots coming off everywhere.. lets see what week 3 brings hopefully she carries on as she has been doing.

Likes
22
Share


@Ctrellis90
Follow
Alright, so here we are again!
At the end of week 8 and this little lady ain't so little no more!
Sheesh! She's a monster! And a mother lol to some beautiful clones, which we cut last week. Can't wait to see how they do in comparison to her.
I did a little defol as well and will continue to do so as I wait for my young plants to veg. This is going to be the longest veg I've ever put a plant through so wish me luck.
Thats why I'm loading her up with mag. She already has an abundance of Calcium...BAS does a really good job of loading their nutrients with it.
I also gave her some Gaia rock dust and some LABS and JMS solution as a probiotic for the plant and it also brings more microbes to the living soil!
Good stuff! Highly recommended!
Nothing like homemade bacteria and microbes to give you that extra advantage 😉.
Well thanks for stopping by. See ya next week.
Processing
Likes
9
Share


@YD_59
Follow
one of the plants is flowering and the buds on it look nice so far but like said last week, it also has some seeds/pollen sacs, so I'm hoping there'll still be some buds on it by harvest, the other two haven't started flowering much yet, I've only taken videos because I don't have a light and I couldn't see what I was taking a photo of
Likes
10
Share


@eldruida_lamota
Follow
Que pasa familia, otra vez estamos actualizando otra semana más y es que es la primera semana de floración, ahí van todos los ejemplares echando ese último estirón.
Al tener varios tamaños decidí poner otro armario y estarán en 2 armarios uno de 150W y otro de 100w todo Mars hydro.
Añadí big bud y bud candy a las dosis de riego , así fomentaremos y estimularemos la floración de los ejemplares.
El ph siempre regulado y de margen entre 6.2 /6.5 por lo demás nada nuevo.
Nada más hasta aquí es todo , buenos humos 💨💨💨.
Likes
6
Share


@Cultivandomedicinanatural
Follow
Hemos empezado un cultivo con semillas del banco Sweet Seeds y toda la gama de nutrientes y coco premium de Plagron.
Es nuestra primera vez con coco y esta marca de nutrientes pero nos va a sorprender para bien!
Primero diluimos siete gotas de seedbooster plus en un litro de agua y dejamos la semilla en esa dilución 12 horas. Esa misma agua la usaremos para empapar el papel donde pondremos a germinar las semillas. Al segundo día ya tenemos las semillas nacidas, y los líquidos de riego los haremos a un ph de 5,8 y usaremos power roots, silice rock y pure zym para cada riego con una EC de 0,5.
Una vez a la semana haremos una pulverización de vita start y otro día a la semana vita race. Hacemos una dilución de estos mismos de 1 ml por cada litro de agua para pulverizar dejando bien empapadas las hojas. Vita start nos aporta un npk bajo para nuestras pequeñas y vita race le aporta hierro, de manera que con ellas conseguimos un mejor enraizamiento, ramificación y un color sano de nuestras pequeñas en sus hojas. Tendremos que ir subiendo el nivel de la Ec, ya que pecaremos de cautos en comida al no haber usado nunca coco antes.😎

Likes
21
Share


@Cali_Grown_420
Follow
Start of week 3, the three survivors are doing great! I did happen to find some algae growing on top of one of the rockwool cubes. (This was my fault for not fully covering the tops of them with hydroton to block out light.) As an attempted fix, I cut some square pieces of black cloth that I laid of the top of the cubes to block out the light completely. Hoping removing their light source, the algae will die off and discourage any further growth. If it gets any worse I’ll try using a hydrogen peroxide solution.
Day 17, the three ladies are looking nice. Starting to see some nice healthy roots populate inside the buckets. I went ahead and upped their nutrients today. We will see how they are doing in the morning.
-FloraFlex - 1.5g/gal of each V1 and V2.
-Advanced Nutrients - 1/2 strength MGB and hobbyist additives.
**Algae update: seems like using the black cloth to block out all the light has killed off that algae growth and I don’t see anymore so it’s working!**
Day 18, I thought one of my plants had root rot. Which was weird for it to happen that fast in less than 24 hours since changing the res. Come to find out it’s just nutrient stain from the Advanced Nutrients, so thank god. #1 and #2 which are growing with FloraFlex got FIMmed today. I’ve topped plants before but never FIM. Not sure if I did it right, but that’s the fun in all this, is experimenting to see what works.
Day 20, #1 and #2 are responding well after being FIMmed couple days ago. I decided to FIM #3 as well. I also decided to leave the 4th one out of this diary from here on out since she’s behind. We will stick with the original three that survived from the start.
So far I’m really loving their bushy appearance and thick leaves. Their roots are coming out super nice as well! Pretty soon these babies are going to just take off!

Likes
13
Share


@Dunk_Junk
Follow
She only grew 1cm this week. She's really charging through flowering. Trichome production has been high this week.
I wish there was a way to view the pictures in hi-res on a desktop pc instead of the small window.
Timelapse this week is almost useless.
No input from me other than watering/nutrients.


Likes
34
Share

@TrickzCutz
Follow
Servus Moin!
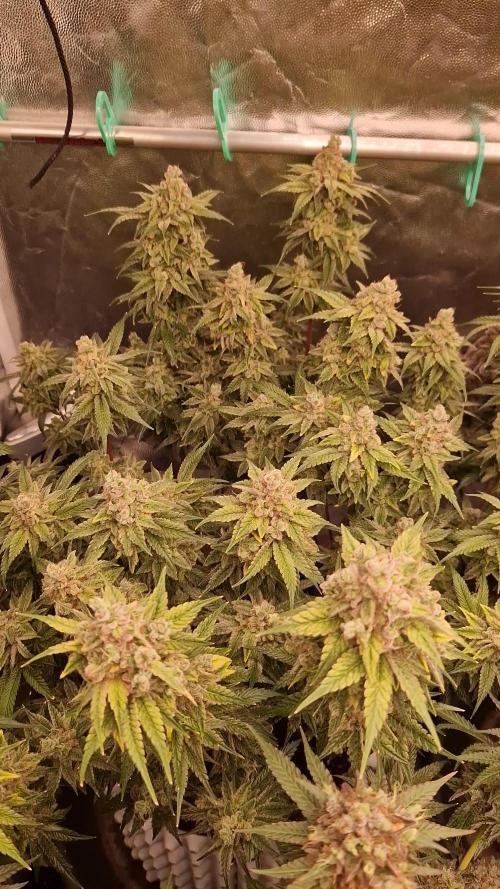
Die Pink Poochie ist fertig, sie bekommt jetzt nochmal 2 Tage Licht, dannach 2 Tage Dunkelheit. Sie wird dann zum trocknen im Zelt aufgehangen.

Likes
16
Share


@TherealNICOGREEN
Follow
ER NÆSTEN SOM OM HUN ER GÅET I STÅ! MEN DET er efter hun er begyndt, at få PLAGRON power roots, sætter hun jo nok sin energi i at få rødderne bygget op, så jeg er sikker på hun STADIG HAR DET GODT 😊 💚☮️😇🤩og hun er VIRKELIG SMUK 🤩. Jeg ved godt hun ikke er det største! Men jeg kan se hun er sund i toppen 😉☮️😇💚SÅ MON IKKE HUN OGSÅ ER DET I BUNDEN 🙏🏼💚😇☮️👌😉HUN HAR IKKE NOGET DER TYDER PÅ ANDET. Jeg tænker hun kommer i en 14 liters potte i løbet af ugen. PEACE,LOVE, AND UNDERSTANDING FROM NICOGREEN 💚💚🇩🇰💚💚☮️
Likes
9
Share


@I_Identify_As_A_Dan
Follow
Week 3 for Black Lebanon,
She really took off massively after being moved to the 5L pot last week, was a good move.... She was also topped tonight after the pictures were taken. Shas got a lot of space between her internodes so i have moved her to the middle of the tent.
But overall happy with her growth considering her age. She will be going in the big 250L pots outdoors when shes a little older.
She was also fed FPJ today in her watering.


Likes
3
Share

@Bread_n_Buds
Follow
Our Zamnesia Critical Cheese Automatic has a distinct, predominantly sativa appearance. What a plant guys, I cleaned the ugly flowers very very well and I can really say that I am very happy with this plant. Swollen buds, well aligned and looks super healthy, can't wait to smoke this.
Techniques chosen: Here, we applied LST to a plant with short internodal spacing; it's not ideal, but we wanted to give it a try.
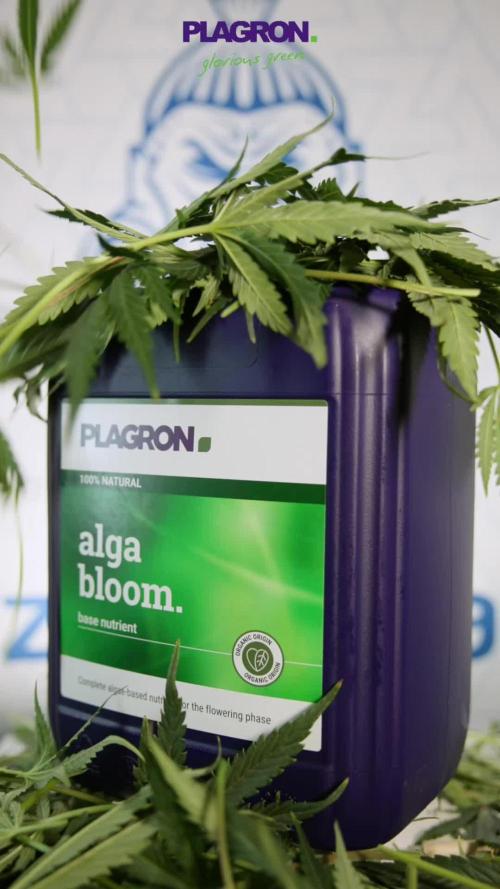
We're 100% organic and 1000% Plagron, as always.
The soil we've chosen is the recently released Plagron Bio LightMix, which will allow us to start flowering more smoothly and reliably, without the sudden changes that liquid fertilizers can cause. A week is more than enough, so don't overdo it.
We're in the final flowering stage and things are starting to get serious, so we're adding our legendary bloom booster Green Sensation and starting the late flowering phase.
- Green Sensation 1 ml/l
- Pure Zym 1 ml/l
- Silic Rock 1 ml/l
- CalMag Pro 1 ml/l
- Sugar Royal 1 ml/l
- Power Buds 1 ml/l
- Alga Bloom 0 ml/l Just booster and soon in flush
Choose your preferred style and calculate your results on the website:
www.plagron.com
Z - https://www.zamnesia.io/it/531-growshop
A great strain, not tall but very bushy! Give it a try!
Z - https://www.zamnesia.io/en/3334-zamnesia-seeds-critical-cheese-automatic-feminized.html
Z - Not content with what they already had in their hands, the expert breeders at Zamnesia Seeds wanted to embark on a journey into the world of autoflowering genetics, aiming to improve upon a great British classic... the Cheese cannabis strain. They crossed Critical with a high-quality Cheese specimen, enriched with a significant amount of Ruderalis. The result is an extremely potent, therapeutic, and easy-to-grow autoflowering version. This new, improved strain has been named Critical Cheese Automatic.
Critical Cheese Automatic embodies everything that made the original Cheese so famous, acclaimed, and loved around the world. We're, of course, talking about the Skunky flavors and pungent aromas this strain releases, not to mention the overwhelming effects it induces. Lovers of the original Cheese will surely appreciate this feminized reincarnation. Smoking Critical Cheese Automatic produces exceptionally potent sensations for an autoflowering strain. Its effects are quite strong and highly physical, both in intensity and duration. With these properties (or "body") in mind, it's no wonder many medical users are the first to want to get their hands on this "skunky" plant. Those suffering from chronic pain, inflammation, stress, anxiety, and migraines (to name just a few of the ailments it can alleviate) will notice their symptoms diminish, if not disappear completely, thanks to the potency of this strain. With this autoflowering "upgrade" of the Cheese strain, even novice growers can achieve excellent results. It's a vigorous plant, incredibly easy to grow, and requires little maintenance.
Commercial growers looking to generate income will appreciate Critical Cheese Automatic primarily for its life cycle: from germination to harvest in just 10 weeks. When grown properly, it can produce yields of 120-150g per plant. In addition to its excellent yields, Critical Cheese Automatic reaches a rather compact size (1 m), making it highly suitable for any type of grow. That said, Critical Cheese Automatic only thrives when grown outdoors in warm climates (like those of Spain or Italy).
So, in conclusion, whether you're a beginner, veteran, or commercial grower, Critical Cheese Automatic offers great satisfaction to everyone.
You know it, but I recommend it: here you'll find so many beautiful things, basically "all the best that nature has to offer."
Z - www.zamnesia.com
Z - www.zamnesia.com
Music //
www.radionula.com
+ Feng Shui Music

Likes
26
Share


@Rock_n_Roll_Randy
Follow
FINISHED THE FIRST WEEK OF FLOWER, THEY REALLY FILLED OUT NICE FROM THE MAJOR DEFOLIATION I DID 3 WEEKS IN A ROW
.SEEDS PUT INTO THE SOIL ON JUNE 22ND
SORRY TO EVERYONE WHO TRIES TALKING TO ME....I STILL CANT TALK TO ANYONE BECAUSE I TRIED CHANGING MY EMAIL ON HERE AND IT MESSED EVERYTHING UP. I CANT LIKE ANYTHING OR COMMENT ON ANYTHING. THE WORST IS I CANT JOIN CONTESTS
STRIVE NUTRIENTS IS THE BEST IVE EVER USED. A MUST TRY AND I BUY IT MYSELF. GOT A SAMPLE LAST YEAR AND ITS SO GOOD I BOUGHT MORE. ITS A 2 PART POWDER NUTRIENT THAT DISSOLVES IN MINUTES AND YOU MIX THE SAME STRENGTH OF THE 2 PART NUTRIENTS FROM WEEK 2 UNTIL THEY ARE FINISHED (BESIDES THE FLUSH), NO MORE BULLSHIT OF SWITCHING TO BLOOM FERTILIZER. THATS MY FAVORITE THING BESIDES THE RESULTS.
CHECK EM OUT AND BELIEVE EVERYTHING YOU READ BECAUSE ITS NO BULLSHIT, AWESOME FRIENDLY AND HONEST PEOPLE
Likes
7
Share


@Do_it_Dan
Follow
All I can say is the tops... they're everywhere! It's been a good week tbh I forgot to feed her so she's looking abit pail but gave her some nice scran for the week so she should perk up a little, overall I'm happy 😊 so remember happy growing and stay green ✌️ 💚 👌
Likes
35
Share


@The_Bearded_Grower
Follow
Day 80 Harvesting was a bit of a trick with this one because I used to Trellis Nets but it went very smoothly no accidents and in the end I ended up with a staggeringly large amount of wet weight. My wet weights have a minimal amount of stock so that they more accurately represent the actual weight of the flower itself. In three days roughly I will be putting in the dry weight and then putting all the flowers into curing.
welcome to Day 83 this will be my last update i have now done my final trim and got my dry weight 362.30 gram's !! off one plant. that's 12.77 ounce's i don't sell but my god if i didn't care about laws lol, For a plant thats no cured i will sat it tastes smooth AF and has a nice head high that i didn't really expect from her being that its not cured and didn't really look like she had tones of trichomes. This baby is going to be nice in a month.
I'd like to thank everyone that followed this grow and asked questions as always my friends keep your stick on the ice

Likes
93
Share


@Ferenc
Follow
Okay, so the plants were still in seedling stage only thing I changed was the environment that I have placed them to the grow tent. They started growing faster and from the 2nd week, I started watering with 30ml water 2 times a day in the morning and in the evening, so one plant gets 15 ml 2 times approximately 12 hours difference the first 3 days and then 100ml (50ml morning, 50ml at night) so 25 ml/plant 2 times a day in the next 4 days. I also used the trigger spray to keep the soil moist and the humidity high as the seedling stage requires. No ventilation yet. No fertilization. It looks they feel okay, so far everything is alright. :)

Likes
2
Share


@dwotTV
Follow
Moving right along, tucked inside out of the weather for a couple days but back outside and happy now.
Processing
Likes
4
Share


@Green_Thumb
Follow
My o my, what can I say... These ladies are gorgeous! Along with adding in the 2000W along side my 600W, I cut out the grow solution in my nutes contrary to the instructions and my ladies are booming! We'll see how the rest of the week continues! I started a majority bloom with some added glucose for my feed to help with bud weight but they are really packing on. Hopefully next week will be my last week of feeding as trichrome production increases and I can start my 2 week flush!