





Likes
6
Share


@vilby_micro_grower
Follow
a girl seem to like advanced nutrients ph perfect fertilisers. I'm glad I have those bottles 😊
Day 8. Advanced nutrients.
Day 10. Advanced nutrients.
Day 11. olant is 21,5cm high and got over 57000lux. 😎
Day 13. Time-lapse
Likes
4
Share


@Kielon420
Follow
Soil: BioBizz All•Mix
Almost all products I use are from BioBizz.
About a month before germinating I have wetted the soil to let the microbes start working. On January 1st I put some of this earth in 3 plastic cups with holes on the bottom. I wetted them with ph regulated water with H2O2 to kill most microbes, fungi and diseases.
I inserted the seeds about 2cm deep and poured ~3ml water directly on top. I have a plastic dome that I wet 2 to 3 times a day to keep the humidity above 60%.
It’s now day 5. I don’t water the soil, because it’s still very moist.
Currently waiting for the roots to reach the bottom of the cups.


Likes
27
Share


@w33dhawk
Follow
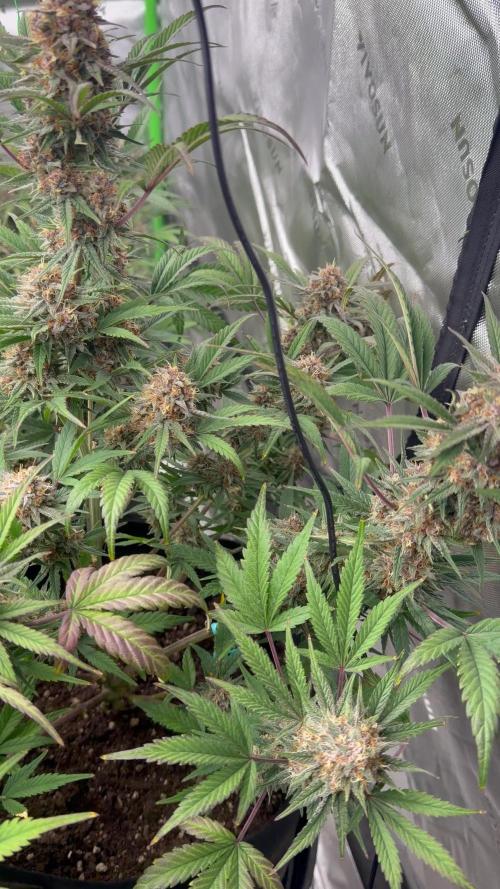
Moin moin an alle, als erstes möchte ich diese Woche djiny danken der hat mich auf die Idee gebracht mal mein Lemon kick von plagron über Nacht zu testen (1 Liter Wasser mit lemon kick von plagron fertig gemacht eingestellt auf Ph 6,0 und einen weiteren Liter mit Ph down von hesi) am nächsten Morgen habe ich den Ph Wert von beiden getestet und dabei is der Ph down von hesi stabil geblieben war nach 1w Std immer noch auf 6 und nach 24 Std ebenfalls auf 6, das lemon kick von plagron is mir nach 12 Std schon wieder auf fast Ph 7,0 geklettert und nach 24 Std war es bei 8,3 wow das ist mal instabil hab ich mir gedacht ich glaub djiny hat mein Problem gelöst also djiny danke dafür. Indoor Sehen die Pflanzen nicht so toll aus immerhin fallen die Blätter nicht mehr einfach so ab nach dem ich jetzt 2x mit hesi ph eingestelltem Wasser gegossen habe aber sie produzieren gut Zucker und riechen so heftig nach süßem Kaffe mit Ur typischer Gras Note. Zu den steckies die ich outdoor zu zweit in einem Topf halte ich persönlich finde das sie nicht schlecht rüber kommen wir haben in den letzten 3 Wochen hier im Norden so beschissenes Wetter mit Sturm und Regen ich glaub es waren 3 oder 4 Tage mal schönes sonniges Wetter ind den letzten 3 Wochen finde aber dafür das es nicht so schön draussen war und ich mich kaum um die Ladys kümmere (wenn das wetter schlecht ist nutze ich mein zweites hobby rocket Leauge auf xbox series zocken, is halt in den letzten 3 Wochen viel gezocke gewesen 😱😱😱😱😱😎😎😎😎ups.... Mann gönnt sich ja sonnst nix) euch noch nen erfolgreichen Grow und das ihr alle schlauer seid als ich und diesen Kinder-Garten Fehler nicht begeht oder ihn schneller findet als ich



Likes
86
Share


@AsNoriu
Follow
Day 85. Girls are happy , but small ;))) development for such time is like two weeks minimum behind. Loads of leaves shadowing buds, will do new defoliation session next week.
Checked light spread and intensity with mobile and simple lux meter app. Results are weak, but better than cheap red/blue generation. Still get like 25k max feet away.
I will grow those strains in main tent , really want to see why are they so slow in development...
But smell after touch ... Now Kush is my fav ;)))
Girls on water-feed-water-feed schedule.
Bio Grow is out. Next week Cal Mag out.
Day 88. Lucky day for screw ups ?!?!?!?? ;)))
Made first time defoliation when in last round you take all shadowing leaves away, hopefully it won't stress them much ..
Usually i was leaving top two fan leaves, now everything shading something and has stem to cut - is out !!! :)))
Happy Growing !

Likes
229
Share


@OrganicNature420
Follow
Germination date 🌱 12/07/2021
Day 85 08/10/2021
Strain 🍁 SinCity seeds Frosted Biscotti
(Biscotti Sundae x Whitenightmare)
THC% • Unknown
💡 Mars Hydro FC4800
• Power draw 480W + 5%
• Max coverage 5 x 5
• LED 2070pcsSamsungLM30B1&Osram660nm
• Max Yield 2.5g / watt
• Noise level 0 DB
• Removable Driver +2m cable
• Daisy chain (multiple lights)
https://marshydroled.co.uk/products/mars-hydro-fc-4800-led-grow-light-samsunglm301b-commercial-greenhouse-medical-indoor-kit 🇬🇧
https://www.mars-hydro.com/buy-fc-4800-480w-4x4-energy-saving-full-spectrum-commercial-led-grow-light-mars-hydro-for-sale 🇺🇸
PROMO CODE • (ORG420) DISCOUNT 👍🏻 marshydroled.com
⛺ Mars Hydro 120 x 120 x 200cm
📤📥 AC infinity 6inch
💧 10lt dehumidifier
❄️ 3.1kw air con system
💉 Nutrients GreenBuzzLiquids
Organic Grow Liquid • 1-4ml until 2wk flower
Organic Bloom Liquid • 2-4ml flower stage
Organic More PK • 2-4ml +wk3 of flower
Organic Calmag • 1-2ml/lt whole grow
Fast Plants Spray • first 3days at night lights off
More Roots • 2-5ml veg +2wks flower
Fast Buds • 5ml +wk2 of veg until 1wk flower
Humic Acid Plus • 2-5ml whole grow
Growzyme • 2-5ml whole grow
Big Fruits • 2-5ml flower stage
Clean Fruits • 5ml flush 1wk
Ph powder
Root Gel
Living Organics
https://greenbuzzliquids.com/
PROMO CODE • organicnature420 15% off ✌️🏼
🥥 Growing Media • Coco Coir
Notes 📝
Sorry for late update but I've been away for my birthday 🎈 left my sister in charge and she's done a grand job. Look a little over watered but nothing to worry about. Just check the frost out ❄️❄️❄️ I have stuck a little extra big Fruits, bloom and calmag to raise my ec as its only at 1.0 with ro water
Discount codes in bio for Mars and GreenBuzzLiquids 👍🏻

Likes
6
Share


@Young_agronomist
Follow
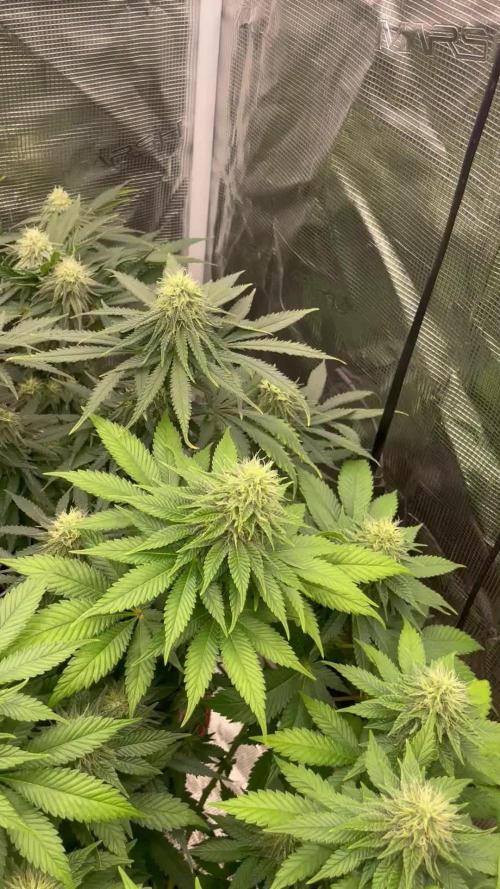
23.09.23- 85 день жизни .
Глобальных изменений не происходит , шишки продолжают толстеть и оплакать глаз . Это самое большое растение из тех , которые мне доводилось растить !
На данном этапе ее рост около 180-185.
Сегодня я подвязал и распределил все толстые ветки под лампы , из-за своих размеров они прогибаются под своим весом .
Теперь она получает все 300 w
28.09.23- 90 дней от прорастания !
Изменения идут медленно , цветы растут а листья желтеют . Думаю еще 2 недели и финишь !
Сейчас она очень огромная , а ее цветы размером с бутылку ✨🍁



Processing
Likes
45
Share


@Homegrown79
Follow
This is her 3rd week now, and I cannot believe how fast she is growing.
I am only putting in half the recommended dose of nutrients due to previous issues.
I will increase the dose in about a week.
This is becoming a real pleasure to grow.


Likes
13
Share


@GhettoGrowShow
Follow
This grow is just a fun little experiment. JUst to see what I can get with minimal resources. Soil mix is cheap miracle gro garden soil mixed with play sand. Nutrients are osmocote plus controlled release prills mixed directly into soil mix. THe light bulbs are 9 watt led bulbs from the dollar tree lol. WIsh me luck. 12 plants currently hope to be left with around 6 females and to yield a gram per plant.
Likes
26
Share


@DisTentAint4Campin
Follow
Growing great in week 8 day 2 bloom fed her the last time going to do winter frost and straight water out the gate I started supplementing phosphorus and it fatned them buds up some these girls are heavy eaters

Likes
21
Share


@Le_Duc_Du_Bud
Follow
11/05 -> Début 7e semaine floraison 👍
12/05 -> Arrosage 500ml/pot + nutriments.
17/05 -> Arrosage 500ml/pot + nutriments.
17/05 -> Fin de la semaine 7 de floraison 👍

Likes
140
Share


@MrJones
Follow
mrjones - Slurricane #7 S1
🌱Slurricane #7 S1
@inhousegenetics_official
👨🌾🏽GD Grower: MrJones
🔹🔹🔹🔹🔹🔹GOALS🔹🔹🔹🔹🔹🔹
🌞Environment - 75/80℉ and 55% Humidity
💧 Feeding - Advanced Nutrients Organic
⚗️Soil - 50% Ocean Forest / 20% Tupur Royal Gold / 10% Earth Worm castings / 10% lobster Compost / 10% Additional Perlite
🍃Training / HST, Will be topping, Cloning, and creating larger plants, and placing to flower under a trellis
🕷️ IPM - Will be using Green Cleaner" 1 OZ per Gallon, and CannControl from Mammoth alternating between product each month for Integrated Pest Management.
💡Mars Hydro LED / Veg Geeklight Monster Board 480W V4 / Flower 480W FC 4800
🔹🔹🔹🔹🔹🔹🔹🔹🔹🔹🔹🔹🔹🔹🔹
📜 Rambling - With the start of week 5, did some serious HST, super cropping, along with a full stem massage, Jushman Chropratic Style. Let's see how a week progresses and how they look at the week's end,
🔹🔹🔹🔹🔹🔹🔹🔹🔹🔹🔹🔹🔹🔹🔹
▶️ Sunday - 03.07.21- The ladies are loving their new 5 gallon buckets, may be able to feed less per day or just less frequently, the new Pro-Mix HP is really nice.
Super cropping is a high-stress training technique that involves pinching and bending branches to damage the inner fibers while leaving the outer lining intact. ... On a secondary level, super cropping is a way to manipulate how your plants grow
▶️ Monday - 03.08.21- Checked in on these ladies this morning, fed each plant with 40 ounces w/ nutrients, they were looking a little wilted, I also lowered the plants down (removed milk crates from under the drain tray) about 40 inches now from the lights, plenty of room to develop their legs. Will post some pictures later this evening. UPDATE - these ladies are already bouncing back! They are thriving!
▶️ Tuesday - 03.09.21- So after Sunday's session with HST/Super Croping these girls are bouncing back and looking great! They are creating amazing bushes and will be choosing one for mother plants, and transplanting the other 4 outside.
▶️ Wednesday - 03.10.21-these ladies are looking so nice but different, I am learning words likening the thicker ones versa the single Sativa looking 1! All good tonight will feed in the AM.
▶️ Thursday - 03.11.21- Fed full 40 ounces this morning.
▶️ Friday - 03.12.21- Tonight just a close inspection, they are looking great, will be doing a fill IPM on all plants in the morning.
▶️ Saturday - 03.13.21-- Fed full 40 ounces this morning.
🔹🔹🔹🔹🔹🔹🔹🔹🔹🔹🔹🔹🔹🔹🔹
📜 Cultivar Information - In House Genetics - Slurricane #7 S1
🔹🔹🔹🔹🔹🔹🔹🔹🔹🔹🔹🔹🔹🔹🔹

Likes
32
Share


@BreakingBud
Follow
Will post bud shots this evening. Overall royal queen seeds critical kush is a great strain! Would grow again. 0
Likes
20
Share


@HisHope
Follow
11/10 Week 7
Coloring is deepening, hairs stand straight no ambering, leaves are beginning to fade so meh couple of weeks maybe?
11/14 Feeding day
1 gal at 6.5PH with 5ml Cal Mag , 5ml Bio-Bloom, 5ml Fish Sh!t
Likes
66
Share


@Earthling37
Follow
58 Days have passed in flower.
Cheese left, Gorilla Girl right.
The "Just water no pH" experiment has failed me around week 5 of flower.
I have not done anything to keep the soil biology alive so thats probably the issue.
Its all good though, it was fun while it lasted and definitely worth a try.
I have let the soil dry as much as possible and then i watered in a tablespoon molasses per gallon water.
pH'd to 6.6.
I just need atleast 3-7 more days of flower and hopefuly the buds will mature a little more.
I took a snip of the bottom leafs to check for trichomes maturity, those are the weakest of trichomes on the plants.
---1st time growing with FLO - Florian Living Organics.---
They claim that there is no need to pH when watering and that their living fertilizer is the only thing that i will need throughout the whole grow so i only need to mix with soil and just water with plain water.
If this stuff works then it can simplify my future grows ALOT!
Happy growing. 😎

Likes
13
Share


@Enki_Weed
Follow
Die letzte Woche vor der Ernte gibt's nur noch Wasser, CalMag und einen Tropfen SuperVit.
Die Buds sind so schwer, dass die Pflanze schon schräg hängt, und der Duft ist einfach mega lecker!😋
The last week before harvest will only involve water, CalMag, and a drop of SuperVit. The buds are so heavy that the plant is already leaning to one side, and the scent is just incredibly delicious!👍