




Likes
12
Share


@CanarianGrow92
Follow
This week the plant almost doubled in size, i must add that we had very nice weather and stable temperatures, shes getting sunlight from around 7AM to around 15PM-16PM and after that just daylight, i dont think i can harvest before the competition ends so bad luck, but its still great to grow this strain, cant wait to see her full of buds, hopefully they get fatter than my last balcony grow, but of course i had some bad weather with my last balcony grows also this one is in a much bigger pot which i really notice 👌😀
22 august: nothing
23 august: nothing
24 august: water
25 august: nothing
26 august: nothing
27 august: water
28 august: nothing


Likes
29
Share


@Naujas
Follow
it looks great!!!!! although the upper leaves "burn" from the strong light, but the flowers are developing well:) Palgron nutrient fertilizer waste does its job :) I like it:) also visited the quality control - "cat" no violations were noticed !!!:) I moved my suitcase to another room :) now the daytime temperature is only 28° ;) I managed to reduce it by 4°, which will definitely benefit her :) good luck to everyone :)

Likes
13
Share


@gadjoo
Follow
🔵⚪️🔴
Quand est-ce que la plante va arrêter de grandir ? La légende dit "Jamais". Je ferais la défoliation cette semaine je pense. Le bio-filtre est installé. Je monte l'engrais Bloom à 4ml/L. Pulvérisation du "Blooming H", un stimulateur de floraison, hâte de voir le résultat, surtout vu les prix des boost chez cette marque. J'utilise un "nano spray gun" pris sur Aliexpress pour 13€. Le PPFD va de 400 pour les têtes les plus basses à 1500 pour les plus grandes. J'espère que les photos vous plaisent !
🦅🇺🇸/🇬🇧🦁
When will the plant stop growing? The caption says "Never". I will do the defoliation this week I think. The bio-filter is installed. I increase the Bloom fertilizer to 4ml/L. Spraying "Blooming H", a flowering stimulator, looking forward to seeing the result, especially given the prices of boosts from this brand. I use a “nano spray gun” bought on Aliexpress for €13. The PPFD ranges from 400 for the lowest heads to 1500 for the largest. I hope you like the photos!


Likes
13
Share


@Growgrow27
Follow
Things are starting to frost up now , smell is so strong 💪🏽 swelling is going well too had a slight issue but all fixed and back to it we go

Likes
26
Share


@pifflestikkz
Follow
Day 64
02/09/24 Monday
Feed today using de-chlorinated tap water pH 6 with calmag.
Day 66
04/09/24 Wednesday
De-chlorinated tap water pH 6 today only. Smell is really coming on strong now!!
Day 68
06/09/24 Friday
Feed again today using de-chlorinated tap water pH 6 only.
Day 69
07/09/24 Saturday
De-chlorinated tap water pH 6 only today.
Mould 😔🤦♂️
Absolutely gutted!! Had a very humid past 3 days, wet with no wind... 2 plants have suffered...
Auto Orange Bud has lost a side branch.
Auto critical orange punch has lost her main colar, and 2 sides, the yeild is going be to now be appalling, but this is due to environmental, not the seed or genetics, as far as they go this was one of the strongest and biggest in the group
Day 70
08/09/24 Sunday
(END of week)
Feed today using de-chlorinated tap water pH 6.
☠️ Auto critical orange punch 🍊👊
Had to remove completely, after isolating the rest of the greenhouse, mould persistently grew on her. The remaining plants after 2 days isolation have been moved indoor to finish underground 600w hps and a more controlled environment.


Processing
Likes
16
Share


@Organic_LarF
Follow
Hello,
Green gelato, she's growing very very vigoreous. As the entering date is still a long way to go(15 july), and she will be joined by the Durban prison, there is like a lot of space to fill one's they get in the tent(150×120). Now she's bended, and allready into the final container(No soil, just to have a bending that suits the final pot) and I continue doing LST until they enter the tent.
Taking a quick look at the bottom of the gelato, roots are growing out of the bottom, so thats allmost ready for the final transplantation. 9liters to 43liters?
Thats it for this week
Grow safe
🍀🍀🍀

Likes
17
Share


@Chucky324
Follow
Hello. This is the end of week 10 and the beginning of week 11 of flowering.
The first pictures are of the tent opening in the morning. And I put it back each night. That allows me to go into flowering when I want.
One more week of veg to go, before I turn it over to flowering. And it will be around August 7th to August 15 when I'll harvest.
The plants have filled out their space now. and most are growing over the edges of the table.
I plan to get growing tips going up this week. with a big prune/trim about 3 days before I switch.
I like to let the plants heal for 3 or 4 days before going into flowering. To get over the shock I caused by trimming them up.
Then they can go into flowering easier and turn over faster if they don't have to heal first.
The smell when I open the tent is like slightly metallic, a bit sour ish, like some good Afghani hashish smells.
Each plant got an extra minute of nutrient solution in the morning this week with no leaking out the bottom this week.
And they will get another minute in a couple of weeks. That will make 4 minutes a day of food, and I feel with my fingers, when they feel dry around the edges they get a gallon or 2 of rainwater.
They look healthy. No signs of bugs or pest. When I was opening the tent a few days ago I saw a ladybug, just sitting under one of the lights, getting warm 😉 and helping.
My friend Jerry, who you've seen in other diaries, gave me lots of bamboo, some 7 feet long, to make a sort of netting to hold up the buds rather than tie them to the tent pole roof.
OK. Stuff to do. See ya later.
Chuck.


Likes
Comments
Share

Likes
43
Share


@sleeve
Follow
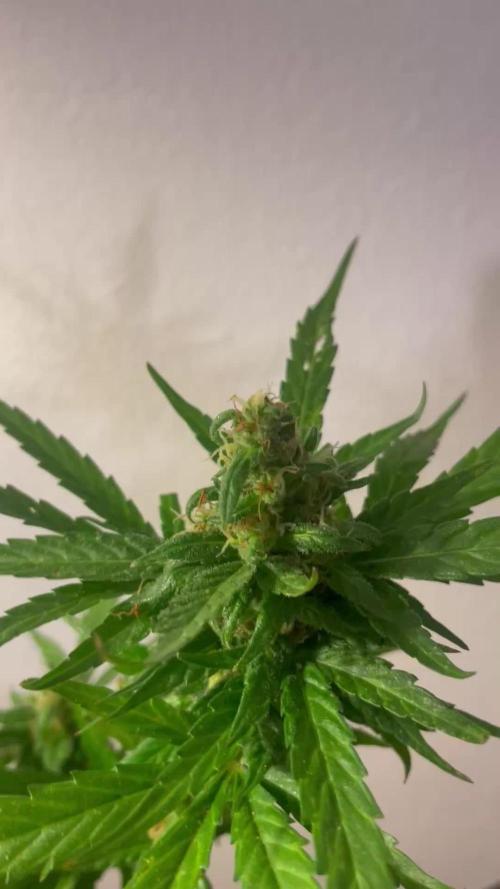
This chocolope took to the LST well. The buds have swelled to massive proportions, I am more than impressed with my first dedicated photo grow. I am definitely a dna genetics fan for good!


Likes
1
Share


@BlaBlaGrower
Follow
Es gab Probleme mit der Osmoseanlage. Ich musste die Lösung mit Wasser aus der Stadtleitung verdünnen, was sich negativ auf die Pflanzen auswirkte. Heute ist alles repariert und ich spüle es mit klarem Wasser ab.

Likes
6
Share


@Shefman93
Follow
Day 3 of flower now and stretching has been minimal. Expect weekly updates. Day 7, plant stretch has been even and manageable, foliage is dens tho, so at day 21 it will get an heavy defoliation and the lower growth cleaned up again.

Likes
24
Share


@Basementganja
Follow
Cloning procedure:
Immediately place into water upon cutting.
Remove bottom nodes at base of stem, scratch stem gently with scissors + cut small slit on end of stem.
Dip stem into water, then dip into rooting powder, then firmly plant into moist soil.
Cover with Ziploc bag (humidity dome).
Solo cups have 4 holes in the bottom (Melted gently with a lighter)
(same soil as shown in diary for germination)
The soil was pre-moistened before the seeds were planted. (lightly watered, then top half of solo cup was stirred, to promote absorption (very dry soil))

Likes
6
Share

@AestheticGenetix
Follow
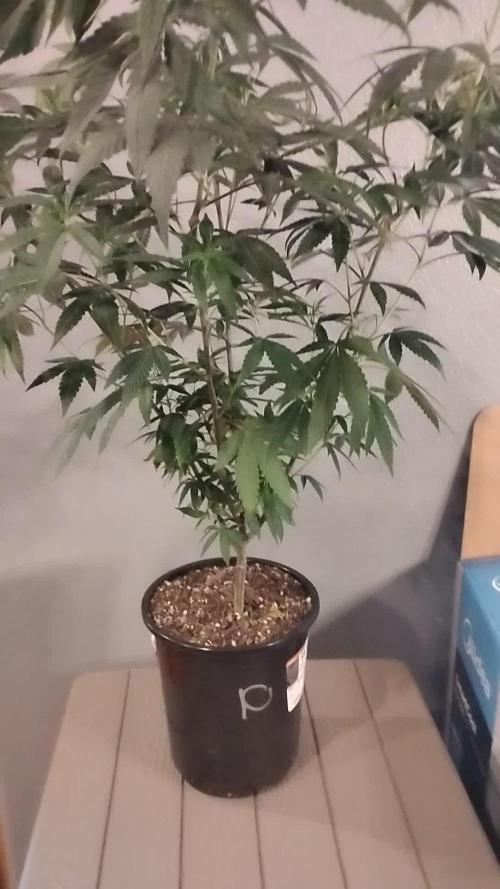
Just pinch her here and there and she shoots out crazy side branching. I feel like this plants got to be a good yielder
Likes
8
Share


@DaddyPrime2
Follow
9/14/24
9/16/24 plants growth is starting to take off. i will transplant soon. i also need to get her onto a proper feeding schedule.


Likes
49
Share


@masterofsmeagol
Follow
7/11 Got half in of rain last night. Glad I didn't water. Ph of rain water is very acidic. Added supports to the blueberry cheese in the 50. I just used string and went diagonal and attached to the cage. Wrote a ton but it disappeared. Anyway looking at previous diaries I was wrong about senescence. It wad the life cycle of those earwigs that did that to my plants (see other diaries). This soil mix is amazing. These plants gave only gotten like two small feeds of big bloom. I showed my commercial buddy and I'll keep it between us what was said but it made me feel really good. I'm considering either expanding the cage in one direction with some lumber I already have or moving a couple outside tge cage. That way I have more room. He said he's seen plants structurally similar reach huge heights (14f) so I'm just trying to avoid future problems. I at least need to get the trellis on. I hope poor that's food enough. Did a real nice video this morning but nothing wanted to upload and it just uploaded the same one twice. I'll try again and hopfully it will go up. If not I'll put it up tomorrow.
7/12 Dad has surgery this morning. I did a quick video and took some pictures. I need to do some rearranging with the plants and cut a pallet to fit in the back. Then I can put a vertical trellis up. Haven't decided if I'll add on to the cage, remove a couple plants or just rearrange things but I'm leaning towards the later. They will need water again and I'm wondering if I should start nutrients but everything looks so good. By this time on past diaries I'd be losing all my leaves bu now. MI think it wad part ear wigs and part to many nutes. This soil mix is taking these plants through veg. I'll probably do a feeding soon but it will be organic and it will he small like a big bloom or ancient amber. Im leaning towards not using growbig this year as my plants seem to be doing great without it. We'll see. I'll keep this updated.
UPDATE: Went back over and gave plants a full watering. Some were slightly drooping. I was going to add nutes but decided against it as I didn't see any deficiency. So far NO Earwigs! I comed through the plants and I did find a jpn beetle which I happily killed. I mixed up 8 gallons of water and gave it to the 11 plants so it wasn't quite a gallon a plant. I need to rearrange the plants so I have room to move around. I also need to cut another pallet and use the spaces I'm not. Trellis needs to go up.
7/13 I think I've got the watering amount down. Now just to find how often which will depend on weather. I've watered very little this year. They loved that gallon. I was going to use big bloom and kelp me/you but looking at my garden I decided not too. My buddy asked what i was addingvthings for and to wait fir what i added to do what I wanted it to do. I see no nutrient deficiencies so why add anything? I think this soil mixture will get me all tgexway through veg. I dont plan on using much in fliwer either. Definitely good genetics. I really need to cut that palley and move the 1 10gallon to the far back coener. It will open thibgs up so much better. The garden looked so beautiful this morning. Getting very aromatic. I started untangling trellis netting but had to leave. I'll update what I do. Happy growing folks
UPDATE: Went back over as I had a slight intuition that I needed to check the garden. I found and killed at least 7 jpn beetles. That's what's been making holes. They tried to escape and bounced off a tarp but I got it. I went through the interiors and found two pillars. If these beetles are gonna be around I'm ordering a net. I'm also close to positive I'm going to extend my cage in the back a few feet. Things are getting unmanageable in here. My buddy said I'll be having problems soon if I don't do something. I'll document what I decide to do.
7/14 Found ONE jpn beetle in the garden this morning. I can manage those well enough. The birds help too. I check my garden multiple times a day so I manually remove many pests. However I've noticed some thrip damage on a leaf and a leafhopper damage on "A" leaf so there are "some" pests around but not enough to spray shit. A couple wasps were doing there job while I was there. Supposed to get thunder storms after three and tonight. Supposed to get over a half inch of rain tonight. I lifted the bags and decided to hold off and let mother nature take care of it as the bags weren't totally dry. Only problem I really have is space. I AM moving that 10gallon (that's the same size as some 20's) in the back. There's 27in not being used and a few feet the other way. My buddy cautioned me that I'm going to have problems since my plants are so crowded. I agree with him. I spoke with me father and we have most materials to extend my cage four feet in the back. I think that's my plan. I'll extend the structure before the stretch then I can put up the supports. We'll see how this goes.
UPDATE: Went back over to check the girls as I had a feeling I ought to. When I got there I saw that a couple of the blueberry cheese were pretty light (liftng the smart pot) but the others seemed to be fine. ONE 10th planet was light like that and the purple punch in the 10 gallon was as well. Each plant thar needed it got at least a half gallon of water. I'm waiting to see if we get the thunderstorms and the half inch of rain. I watered the MASSIVE blueberry cheese in the 50 but I only gave it 1 pitcher which is like 1/4 gallon or so. Don't know why I even gave it that. Looked fine but the soil WAS pretty dry. Next year I'm giving myself way more room. I was running trying to chase these jpn beetles. This time I have the dawn and water and a measuring cup to knock them in. This ain't my first rodeo. I did notice some bright yellow streaks on a leaf edge and I'm hoping it's not septoria. I doubt it but I have an anxiety disorder and I worry. I hope I can get the cage extended sooner rather than later. It's getting hard to move in there and more importantly I can't take any more plant pathogen problems. I'm considering starting a plant doctor regimen just to be safe.
7/15 Got a bunch of rain last night. No jpn beetles in the garden and not really much damage. I did notice this (I think it's leaf hoppers) that leave those dots close together on a leaf so it appears I've got a variety of pests. I'm considering how to approach this. I mean the damage is very minimal but I don't want it to get out of hand. Another thing I need to look out for is leaf septoria or any other fungal pathogens. I believe that has been part of my problems in the past. I think that's what caused my earlier grows to drop all their leaves so quick. I think I'm being overly cautious but its very crowded in there. With my father just getting out of surgery the girls will need to wait a little bit before before I can extend the cage. I could still cut the pallet and move the 1 10gallon and that would give more room. I rearranged a LITTLE BIT so they have a little more room but I've really got to get this cage extended.
UPDATE: IT Rained so hard I had to pull the car over. We hydroplanned the whole way home. After working ob my house I went to see what the damage would be like. NOT A SINGLE BREAK THAT I COULD SEE. I took a video but since the wifi here sucks I'll have to upload it tomorrow. Walking around in the cage even if I cant get it extended I think I'll be OK. It obviously will open me up to lots more issues but at the very least I can reorganize before I build on. The 10 gal purple punch would fit perfectly in the back and I have a pallet I can cut to fit it in place. Putting that one back and pulling the others forward will be much better than what I've got going on now. I'm also thinking about running an extension cord and putting fans under the canopy or at an angle to keep the wind moving. Just thinking outloud. However after that storm the girls looked as happy as I've ever seen them. All happy praying to the sun, thankful for the much needed rain. Mother nature does a pretty good job with out me messing with it. I've noticed a couple interior lowest leaves turn yellow and die like a nitrogen deficiency but everything else is fine. Also noticed a leaf that looked like a p deficiency but again, it was the VERY bottom leaf on ONE plant. Again the rest of everything looks fantastic. I'll keep an eye out for anymore nutrient deficiencies and if anyone that reads this sees some please let me know. I should've taken stills since they looked so good but I got it on video.
7/16 It POURED last night and throughout the day. TORRENTIAL rain. The branch breaking sheet rain that us outdoor growers learned to fear. My plants aren't trellised currently. I know what I need to do now. I have a pallet to put in the back corner and I'm moving the purple punch in the 10 there. And pulling others forward where there's more room. Then when I extend it (it's gotta be done this week) everything g will be in their proper place and I can just throw on a vertical trellis. I also noticed more (leafhopper) damage on a leaf. Different leaf of the same plant so I'm considering spraying something. I have a number of products but I was trying not to use them. Luckily I have these diaries so I can look back and see certain plants reactions to certain nutes or fungacide/insecticide/nutes and the doses used. I haven't been using much but if my plants will remain cramped I'm going to start the plant doctor. I'm seeing more pillar damage too but BT is super narrow so I'm thinking when I fo spray for pests I might use cap jack and be done with it. Then I can apply the BT in flower if it's necessary. I took a video but I have to wait until tomorrow to upload. I took a quick snapshot though.
7/17 Despite the torrential rain I don't have any breaks. I'm noticing more pest damage though. Another leaf on the same plant had those closely shaped round circles. I forget what pest it is but it's there. Caterpillars are there I'm sure so I may do a preclcentative spray. Just unsure what I'm going to use. I lost a COUPLE very bottom interior leaves that look like they just got used up. After this rain I think think the plants might benefit from a feeding. Probably next water after they dry out. I REALLY need that cage extended. I expressed that today and it should be done this week. I'm looking for pallets today. I have the little one that I can put in the back which will allow me to move the 10 gallon and move the other forward. That will help some but I need more room. I'll update as I go.
UPDATE: GOT A SMALL PALLET AND IT FIT PERFECT IN THE BACK ROW. I MOVED THE PURPLE PUNCH IN THE 10 GALLON ONTO IT. I SHIFTED A BUNCHVIF THINGS AROUND. I ROTATED ON BLUEBERRY CHEESE 180 DEGREES SO IT WOULD FIR BETTER. CROP ROTATION IS GOOD ANYWAY. I TOOK VIDEOS AND YOU CAN NOW SEE THE ROWS MUCH BETTER. 2 WITH 3 and 1 WITH 4. IT'S SIGNIFICANTLY BETTER THAN IT WAS. I CAN GET AROUND ALL SIDES OF EVERY PLANT NOW. GRANTED THE LARGE 50 IN THE BACK IS GOING TO HAVE SOME TROUBLE BUT ILL JUST STAKE IT TO THE CAGE. IT WILL GROW TOWARDS THE SUN ANYWAY. IM SUPRISED I DIDN'T LOSE A BUNCH OF LEAVES AFTER THIS RAIN. MOVING THINGS AROUND AND LOOKING ON THE INTERIOR OF PLANTS I FOUND A COUPLE LEAVES THAT HAD BEEN USED UP. I REMOVED A COUPKE LEAVES THAT HAD DONE THEIR JOB. I'LL UPDATE AS I GO ALONG.