


Processing
Likes
Comments
Share


@Naturalist
Follow
Topped Gelato #1 on day 30. Upped to 2ml/1ml FP/PT on the last water, will be repotting to final 5 gal pots over the next weekend.

Likes
50
Share


@AsNoriu
Follow
Day 73 since seed touched soil.
Sparkles as THC BOMB should be by name ;)))
See few foxtails starting. Girl started to gain weight, but buds will be small, VERY small ;))) hopefully dense !!!
Tried to wave biggest top to feel how heavy it is - air ;))) BUT , OMG OMG OMG , how lovely she smells , gassy stinks and have few more aromas, mix of Kalini Asia and some good Girl Scout Cookie maybe ... anyways, even if she will be in 50g area - i will still LOVE HER, can guarantee it NOW !!!
Would love to push her at least 14 days more,but looks like she has less in her ...
Mars TSL2000 blasting them really nice, i liked that light, if good air movement and temp control is in , she will deliver LOADS ;)))
Happy Growing !!!

Likes
22
Share


@Prilyfe13
Follow
June 30, 2024
This week is the end of mid flower. Next week we should be in the final stages of flower. Maturing as it's called. So we will focus on watering this week. Lighting doesn't need to be observed. So I'll be skipping that report unless something changes.
Sour Diesel A is drinking next to nothing. Her reservoir is more than half full where the rest of the plants are nearly dry. She still looks good and has great color. But I think she needs to drink more. It's like the soil isn't absorbing much water at all. Maybe it's supposed to be this light. It's a new soil brand, so I'm not really sure what's going on. I think I'll top water her again tomorrow when the reservoir is less than half full. I was considering it today as it's a new week, but I'll be doing everything tomorrow when the rest of the plants are dried out.
Sour Diesel B is looking really good. Her lowers look a little underdeveloped. No concern, it's to be expected. But I'd much rather see some development from the supplemental lighting. I'm not sure if it's working or not. I think I have them set up wrong. I need the bars. That's the only thing I can think of. I really don't want to install them so late into the grow, but maybe I will tomorrow. Or later today if I decide to clean out the reservoirs and start fresh. It's still really early.
Sour Diesel C is swelling up more noticably now. I think it's due to the top feed. I'm wondering if this soil has issues with bottom feeding. Because I can tell you my previous soil would leave the whole top of the reservoir wet. And the soil would stay at a near constant 45% moisture level. Roots would come out from all over, but this is different. I might have to research the differences.
Sour Diesel D has this massive baseball on top. Good side branch buds as well. She needs to be top fed as well. I think. She is a bit light, but doesn't seem to be having any issues. She's drinking just fine though. It's strange. Maybe she is more thirsty than the wicks can handle?
The environment is a mess again today. It's really humid out and again it's showing in the tent. 67% humidity. Of course I'll be spending the day opening the tent to let in fresh air. Although, the airflow in the tent should be more than enough to keep air fresh and clean. Just humid. Once the AC kicks on it should drop to around 55%. Let's see how long that takes. It's not hot today.
Grow System Environment:
Temp: 76.1°
RH: 64.4%
VPD: 1.07 kPa
July 1, 2024
Watering Day! All ladies got a full gallon refill today. Not much else going on. No pictures today. I did rotate a couple plants to get light to the outer branches.
Sour Diesel A had about 2 liters left in the reservoir. So I put it in the sprayer and top watered it. There was absolutely no runoff, so I know she is a bit too dry. That should help. The branches are also starting to sway a bit when I move her around.
Sour Diesel B has these super dense colas. Great size and smells wonderful. I can't wait to see how she tastes. Very promising quality. And a decent yield for the size.
Sour Diesel C is looking really good. Now that all the buds are swelling, they are connecting and making the branches look fatter. She is also starting to sway a bit with movement.
Sour Diesel D looks great with her giant cola. Nothing really else to say. I took a leaf off that was just blocking everything.
The humidity today is still about 60%. I don't know how to make it go down. The AC hasn't kicked on, so I'm fighting it again. Shocker.
Grow System Environment:
Temp: 74.1°
RH: 61.8%
VPD: 1.07 kPa
July 2, 2024
It's picture day! That's about it though. No watering. Everything looks great!
Sour Diesel A is starting to sway a bit. She is definitely packing on the weight in her buds. We are looking absolutely wonderful right now. Great leaf color. Beautiful buds. Nice bright orange pistils. Tons of trichomes. Nice and frosty. She is also holding on to that top feeding from yesterday. I may have to top feed her more often. I will most likely use some recharge when I have to top feed. Just to keep the microbes going.
Sour Diesel B has these huge fat buds and some super strong branches as well. There's no real sway unless I jostle the plant, but she is also covered in frosty trichomes. Another week or 2 on her I think. Maybe a bit longer.
Sour Diesel C is definitely starting to pack the weight on. Her tops are swaying without much touching. Solid buds and a lot of them. Definitely not a big as they should be. A friend of mine said it could be from a slight lack of water. It's definitely possible. My plants usually go through a gallon in less than 2 days by this time.
Sour Diesel D looks great with her baseball sized cola. The side branches look pretty good as well. Lots of trichomes. Super dense.
I've also had an idea. I haven't used base nutrients for this entire run as the soil is pre-amended and these are autos. However, I'm starting to think that was a bad idea. I don't think they got enough base nutrients to keep up with growth. It's probably why they didn't shoot up and most likely why 2 of them didn't grow super fat buds. Either way, I didn't have all three bottles anyway, so there wasn't much I could do. I should have used the micro and bloom and just worked with that. I don't have the grow bottle.
Anyway, they didn't show any signs of deficiency, so I didn't bother adding them, but I'm starting to think they could have handled a hell of a lot more nutrients than I gave. There's still 2 to 3 weeks left. Maybe I'll add the flower and micro the next watering until flush.
The environment is really weird. So it's a super nice day out. 72° and like 40% humidity. Just an overall nice day. On the other hand, my tent is stuck over 60% humidity yet again. So I have my heater turn on periodically to keep the temp up and try to pull some of the humidity out of the air. It's not really working. Even with the tent door open, the humidity is still high. I really don't get it.
Grow System Environment:
Temp: 72.4°
RH: 62.1%
VPD: 1.01 kPa
July 3, 2024
Not much going on today. Our ladies still have enough water to last another day or 2. I've also decided to add a new gallon of water to each reservoir after the first plant runs out of water. The rest will be top fed into the corresponding plant.
Sour Diesel A is definitely the most frosty of the bunch. Her buds are swelling up nicely and are super dense. Another 2 to 3 weeks of this and we are gonna have some hefty buds.
Sour Diesel B already has some hefty buds. Not as much frost, but definitely a lot. Her lowers are also getting fairly hefty. Big for lowers that I have seen.
Sour Diesel C has super dense buds. Even though they are smaller, I expect them to continue swelling over the next 3 weeks.
Sour Diesel D is happily doing her thing. The single massive cola seems to be getting fatter as expected. There's still a good 2 to 3 weeks left on her, so I expect some super weight on the cola.
The environment is jacked up. I don't know how to fix this with what I have. Now it's 64% and I have no idea why. It'll drop shortly when the central air kicks on.
Grow System Environment:
Temp: 74.3°
RH: 58.8%
VPD: 1.17 kPa
July 4, 2024
Happy 4th everyone who celebrates it.
It's picture day! Not a ton going on today, just some slight adjustments.
Sour Diesel A looks good. She's getting heavy and swaying on the wind. Tons of frost, lots and lots of orange pistils.
Sour Diesel B has massive frosty buds. They are super dense and look great! Honestly, there's a lot of leaves, but they are big. Even the sugar leaves are big. It should be pretty easy to trim.
Sour Diesel C had light burn on one of the leaves that was way too close to the supplemental lighting. I snipped it off and rotated the plant slightly to get the leaves directly off the light. Secondly, she was super light, so she got a half gallon of just recharge top feed. I didn't use any of the nutrients, just the recharge. Hopefully that triggers some water intake.
Sour Diesel D looks ridiculous with her one massive cola. Kinda looks like the main top of a huge plant that was cut off. Lol. She's drinking really well right now. The bottom of the container is evenly wet throughout. A great sign. She will be putting on more weight I think.
Super frosty too.
The central air kicked on really early today, so the environment should be good for the day.
Grow System Environment:
Temp: 75.8°
RH: 57.7%
VPD: 1.26 kPa
July 5, 2024
Not a lot going on today. I checked the plants and watered D.
Sour Diesel A looks really nice. Super frosty and her pistils are bright orange and shriveling against the buds. It's really pretty.
Sour Diesel B is packing on more weight. I see the natural foxtails. I wouldn't call them foxtails. I'd call them buds that got too big for the cola. Hell yes.
Sour Diesel C is looking super good. Her buds are still swelling and frost is still coming in.
Sour Diesel D was bone dry today. Not the soil, but the reservoir. The soil was a little dry, but it will soak up the water and fix itself. If not, I'll be doing a half gallon top water tomorrow. I did the full nutrient regimen, but I used the rest of the half gallon for A yesterday. I topped it off and left the Recharge in.
The environment is messed up like it is every morning. But it's noon now and the humidity is still at 64%. When the central air kicks on, it will drop down to 50% by mid afternoon. The temp is still really good at 75°. Very happy with that.
Grow System Environment:
Temp: 75.2°
RH: 57.6%
VPD: 1.24 kPa
July 6, 2024
It's picture day! It's also the last day of week 6 of flower. Day 77 from seed. I also did my weekly video.
Sour Diesel A is looking quite good. Her branches are pretty stiff and that frost is insane. It looks like white frosting all over. Some is so thick you can't see the green beneath.
Sour Diesel B looks great! Her leaves just started to canoe a bit. I'm not sure if she is reaching or coming to the end of her life, or has some sort of toxicity or deficiency. I don't think so though. Nothing has changed in weeks. However, tomorrow I'll be watering with Overdrive for the rest of the grow cycle. She's also foxtailing. Not entirely sure that's supposed to happen, but it is. Although, I read somewhere that the Sour Diesel strain tends to produce foxtails naturally.
Sour Diesel C is a bit droopy. I'm not sure why. She doesn't seem to need water, but I may top feed her tomorrow as well as refill the reservoir. Maybe I'll water to runoff. I'd say a gallon of water should do it. Or 3/4 gallon. Either way, I think she needs it. Actually, I'm thinking the rest of the plants need it too. Maybe I'll just water all of them to runoff.
Sour Diesel D is just doing her thing. Not much to report. A couple little foxtails here and there, but the buds are still super dense. Let's hope it's a natural occurrence and not some environmental issue, like the @#$&ing humidity being too high. I should definitely try to research this.
The environment is back to what it has been. High humidity in the morning and then it drops down to 54% by mid afternoon and by evening it's down to 49%. The temp is perfectly under control. At a steady 75° to 76° all day. Night time is a bit weird lately though. 72° at night. Mostly because the central air kicks off and my room warms up. I have my room AC but we all know by now that the thing blows out humidity like a rainforest. It just doesn't make sense.
Grow System Environment:
Temp: 75.3°
RH: 57.3%
VPD: 1.25 kPa

Likes
53
Share


@gottagrowsometime
Follow
This was a hard one to grow, as I'd never done DWC, and with my water temperatures she really is such a strong solid genetic strain.
I learnt a lot about growing from doing my few females. Probsbly more so by these 3 plants, 2 DWC and 1 mainline more them my 17 autos. So, all in all, I'm glad I did them. She surprised at the quality of the bud. She is so frosty its such a lovely sight to see her grinded, all the kief, love it.

Likes
51
Share


@Chumpkilla
Follow
11/20/23 - Day 14 - Today the box flipped to Veg state. I made the decision in the software yesterday, its take effect the next day at the light on schedule.
The system will do a couple of things now that it's in Vegetative mode.
Lights will remain at 18Hrs On/6hours Off, however the intensity will slowly creep from 30% intensity to 100% within a couple of days.
Air Temp will remain the same at 79deg. F
Humidity will go down to 50%
Water temp and PH will remain the same, 64.5deg. F and 6.0Ph
Because I have it all hooked up for Auto water. It started the first video about 1 min after lights on. It drained the water, refilled it. After it refilled it, it turned on the air stone, started the water temp cool down, and it slowly over the next 30 minutes delivered nutes, and finished it off with balancing the PH. All of this was done on its own. I DID NOTHING. Other than verify because why not. I sat back and watched the system work.
This time around with everything hook up for auto I really am not doing much. The hardest part of this grow so far is not opening the door while the light is off.
the rest of the week I don't expect to do much. I will update daily with pictures and things that I am noticing.
This is an Auto strain. I am a little worried about growing an Auto in this box. usually, I can control the growth utilizing the lights because I'm space limited. This time the plants going to flip to flower on its own. I'll need to make sure I am training and cropping early on.
11/24/23 - Day 18 - Everything is starting to get aggressive in there. I say that because the new nodes are growing out of new nodes on the top. It's like its packed full of plant and it all wants to come out at the same time. The leaves have more serrated Leafs than I have seen on any of the other strains I have grown. Ill post a picture of the last time I grew this strain. I did it in Coco Coir. It will be cool to see the differences.
11/25/23 - Day 19 - The Leaves are all reaching up, and the plant is growing so fast! Its such a bushy plant.
Likes
5
Share


@Deli_Weed
Follow
Esta semana fue solamente de flush 🚿 en esta ocasión decidí usar florakleen para ver con cual obtengo mejor resultado si con este o con flawless finish, lo hice así, primero hice un lavado con pura agua con ph de 6.2 lo hice desde el ultimo día de la semana anterior, fue lavado doble, uno en cuanto se encendio la luz y otro justo antes de apagarse, luego empezando esta semana regué dos dias usando el florakleen y ph de 6.2, el tercer día no regué y al final de ese día le di corte ✂️ y la colgué, actualmente ya la tengo curando, la tuve 10 días secándose con una humedad de entre 50 y 60% para un secado lento.


Processing
Likes
68
Share


@Tazard
Follow
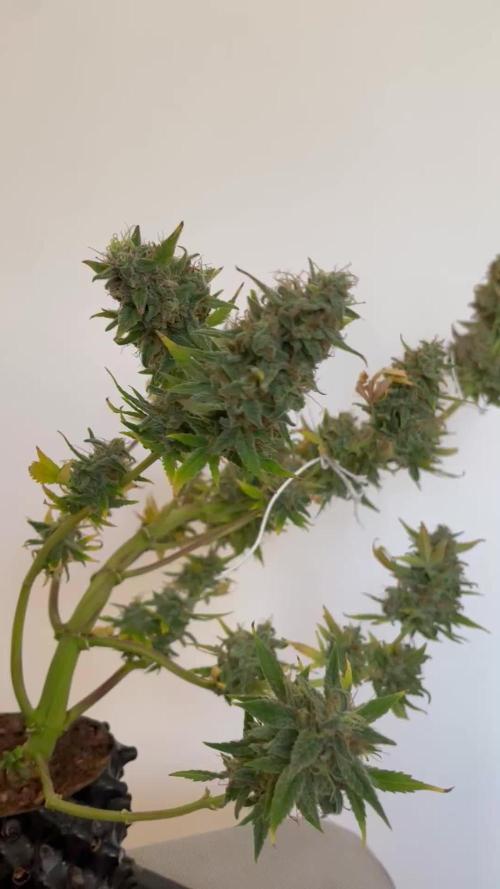
Beginning of the 10th week of flower. Shouldn’t be too much longer now. I will add some bud and trich pictures this week.



Likes
Comments
Share

@BBZETTA
Follow
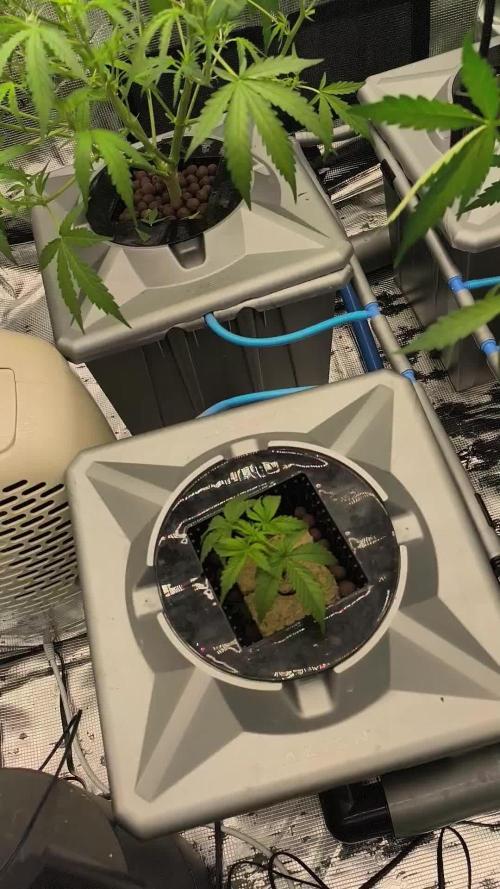
The bloom hast started feeding Go switched now im waiting for the Budsites to multiply!


Likes
4
Share


@StickyHands
Follow
Flower day 21
Today I returned from vacation after 7 days. My first look was in the water tank, and it was indeed empty. Hopefully, I looked into the tent, and luckily, the ladies all looked healthy. The 40 liters had probably only recently been emptied.
The ladies have grown more than I expected. Some even grew a few centimeters up to the lamp, and so I was forced to supercrop the longest shoots.
I also lolipopt the plants properly.

Likes
22
Share


@Sativagrad
Follow
the week went well, it bends very well, does not break, despite the fact that it is not tall, it is very wide)
Likes
10
Share


@Lazuli
Follow
This strain smell very elite i was about to quit autos but these zkittlez are fire
Processing
Likes
28
Share


@Bud_E_grows
Follow
Slowly starting out, dialed in temp and humidity. Was jumping from 68-82 degrees Fahrenheit
And humidity from 38%-52%
Only watering with cal mag and occasional misting.
Likes
46
Share


@Capo420
Follow
Week has had ups and downs🙃
Plants seem to be growing fine 🙂 But there is yellowing and spotting still that I cannot resolve.🙄
Day 22- Still having some kind of deficiency/issue. They are growing well, don't really seem to be stunted. I think I may have burnt them with nutes.🤧 Flushing may help. 🤷♂️😅
Run-off pH is at 6.08, PPM 266
I have flushed them, lowered feeding... I'm driving myself crazy. Hahaha
Update 119 Day 23- Things are looking better. I definitely have been overfeeding them.😅
They are responding well to half nutes.🙌
Issues seem to be getting much better.
Happy Growing!
🤙💚💪🌱😎🌱💪💚🤙
Likes
4
Share

@AKGorillaGrow
Follow
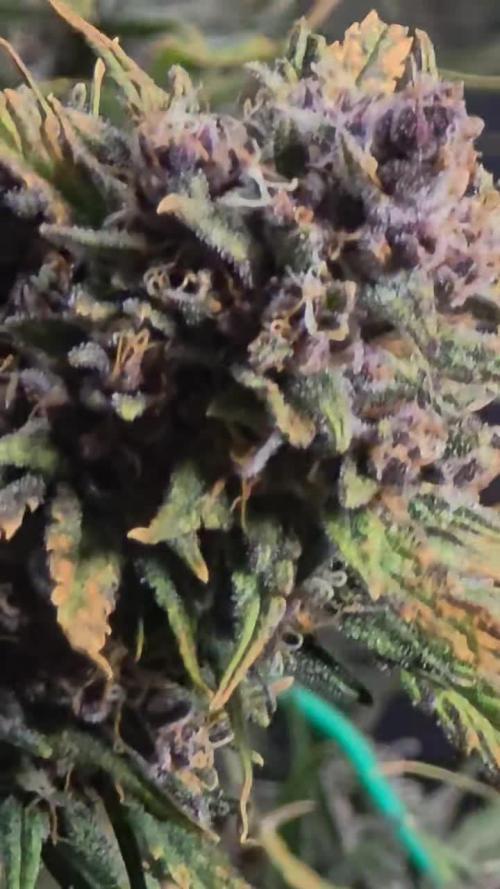
Well I'm sad and excited at the same time. Sad they got chopped but happy to see what all my work and dedication was for that sweet sweet marijuana. I know I'm just a beginner but damn with these genetics and love it is truly shocking what they can do in such a short time frame.