


Processing
Likes
Comments
Share


@BigBaby420
Follow
Started with 2 Sour Chelumbians and 2 Lemon Haze Autos. Neither of the LH autos wanted to live so I started a bubba kush and a white widow to be in the same tent. They will be about a week apart in life


Likes
7
Share


@Buds_Beats_n_Beans
Follow
Will put her under HID in 2 weeks cause she summer will be over soon

Likes
40
Share


@Chubbs
Follow
420Fastbuds
FBT2314/Week1
Week 1 update on these new sprouts. Been a week since they sprouted and so far seems good. I did switch from misting the top soil with my sprayer to feeding 500ml of water and 1/4tsp/gal strength General Hydroponics Calimagic about every other day. Over all Happy Growing

Likes
46
Share


@Juschiln420
Follow
6/26 added water ph
6/27 added water, ph
6/28 added water. Ph
6/29 added 2ml gro,2ml bloom to runtz(showing leaf color fading, brown of leaf sides and tip) Added 8ml hydroguard to all
6/30 didn't make it in
7/1
Added water,nutrients banana and runtz.
Bloom(Full strength)(new)
Micro 0.75/L =8.5ml
Gro 0.50/L =5.65ml
Bloom 1/L =11.3ml
Cal mag 2/L =22.6ml
Bud candy 2/L = 22.6ml
Big bud 2/L =22.6ml
3 gal = 11.3L
Washed out cookies bucket fully. Only gave ph water
7/2 feed cookies pulled way too early, added 3ml gro to runtz
Records kept here
https://1drv.ms/x/s!AmTQ-7u9iyH6kDFcBT1QhRk7ttv4


Likes
14
Share


@MUSRIME_supreme
Follow
В нашем регионе, аутдор бесполезен :)
Проще было все эти семечки вырастить в индоре.
Всем спасибо за просмотр =)
Likes
65
Share


@3lementa1
Follow
The buds are coming out. It's disappointing that I broke off a big stem, and some of the ones that survived are bent over so the canopy isn't as even. But it's OK she looks good and it's been nice watching her bloom.

Likes
31
Share


@Endriu
Follow
Hi Bros&Sis!
I've been a little bit lazy, indeed, but there's a lot of works to do here, on my girls and as a father of a big family.
Look at the amazing and explosive bloom that some of the ladies has shown! YUMMY!


Likes
3
Share


@Nookandplant42o
Follow
It's drinking a lot of water, obviously because of its huge size, smaller doses of nutrients to go little by little, the shape of the tall buds, they're much more resinous with this update, I'm hoping for more time with this one due to its size and little light.

Likes
6
Share


@MastaFive
Follow
I started the LST trying not to stress the plants too much! Everything seems fine, but if you have any tips for me, I'm happy to read them! 👍


Likes
Comments
Share


@Mr_nugs_lover_David
Follow
Another beautiful black cherry punch pheno but this one is one of the 2 which are completely purple, beautiful sweet aromas, I'm just in love with this strain man 🍒💎💚👨🌾🌱✌️

Likes
20
Share


@FarmZOG
Follow
This run didnt went the way I expected, loosing half tent yield because that freack plant (46 gr) frostiest and densest the the big one though, well thats life
Overall very happy with bud quality
Likes
69
Share


@Natrona
Follow
The Divine ladies Afghan Bullet and Pablo Escobar are getting close to harvest. I'm going to water only for the remainder.
Tps1 30 ml
Ph 7.01
Ppm 505
each received 3 ltrs
Thank you @DivineSeeds
Thanks for the visits, likes and comments, I appreciate all the plant love💚.
Have fun & love what you grow 💚
Sending you good vibes of love, light, and healing 💫
💫Natrona 💫

Likes
2
Share


@KeemBboomin
Follow
Once again, we are cruising through week three there’s nothing to do but water one dry and keep their favor bop music playing
Likes
7
Share
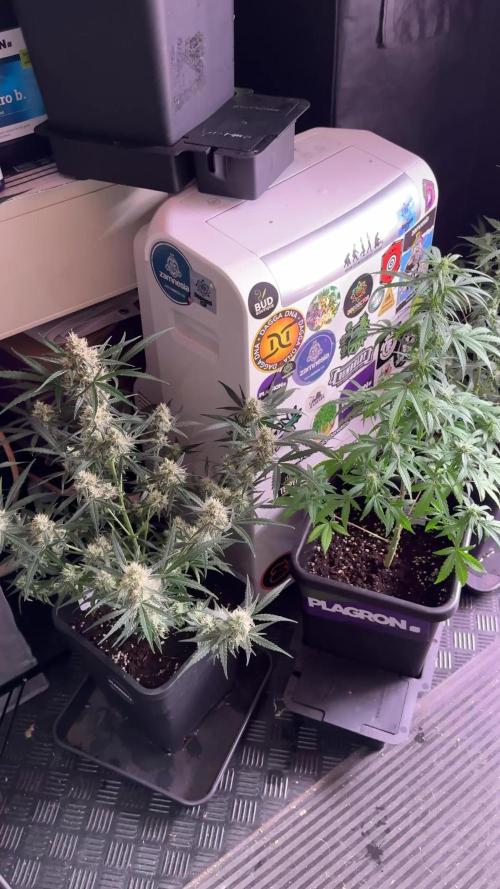

@DogDoctorOfficial
Follow
💎 Black Diamond Auto by Zamnesia – Pheno B | Week 3 Flower
The Quiet Sister Is Starting to Shine
Not every plant needs to be the biggest in the room to deserve attention.
Sometimes the more interesting story belongs to the one quietly developing in the background, steadily building her structure while her sister is busy taking every photon she can find.
That is exactly where Black Diamond Auto Pheno B finds herself this week.
Her sister, Pheno A, continues to be the more explosive phenotype of the two, pushing larger and more dominant flower clusters and naturally demanding attention whenever I open the tent.
Pheno B?
Well...
She's a little more shy. 😄
But I'm pretty sure she's still walking around the room looking for those extra photons.
Unfortunately for her, Pheno A seems to have already collected most of them.
And yet, when I stop and actually look at Pheno B, there is a lot to admire.
She may not be producing the same oversized colas as her sister, but she is developing into a beautiful, balanced plant with exceptionally healthy foliage, excellent flower distribution, and a very elegant structure.
This is exactly why I love documenting individual phenotypes.
Same genetics.
Same environment.
Same nutrition.
Same lighting.
Same irrigation.
Same training philosophy.
Two completely different personalities.
And Pheno B is beginning to show us hers.
🌱 12/12 From Seed
Like every plant in this project, Pheno B has been grown using my favourite technique:
12/12 From Seed.
From the moment she emerged from the soil, she has lived under a flowering light schedule without an extended vegetative period.
No topping.
No high-stress training.
No aggressive manipulation.
Just gentle Low Stress Training, leaf tucking, observation, and allowing the genetics to decide how the plant wants to develop.
And this phenotype is making a very convincing argument for that approach.
Her architecture has remained upright and elegant, with flower sites developing progressively along the branches rather than forming one massive dominant structure.
She isn't trying to become the biggest girl in the room.
She's simply becoming her own girl.
And I really like that.
🌿 Environment
Another week of stability inside the flowering room gives these plants exactly what they need: consistency.
🌡️ Day Temperature: 29°C
🌙 Night Temperature: 25°C
💧 Relative Humidity: 60%
🥤 Nutrient Solution Temperature: 21°C
🌱 Root Zone Temperature: 21°C
☀️ Light Schedule: 12/12
🌬️ CO₂: 636 ppm
💦 Watering: 1.3 L per plant / 24h
? Pot Size: 15 L
📏 Plant Height: approximately 160 cm
The root zone remains stable at 21°C, while the nutrient solution is also maintained around 21°C.
This kind of environmental consistency is something I value enormously.
The plants don't need to spend their energy adapting to constant changes.
They can simply grow.
And that's exactly what Pheno B is doing.
🌿 Training & Canopy Management
The training philosophy remains unchanged.
Gentle LST continues to guide the branches outward, while leaf tucking is used whenever necessary to open developing flower sites.
There is still no defoliation.
The fan leaves remain healthy, green, and highly active, so I see no reason to remove them simply for the sake of creating a cleaner-looking plant.
Those leaves are working.
They're capturing light.
They're producing energy.
And Pheno B still has plenty of flowering ahead of her.
So for now, I prefer to let her keep every healthy solar panel she has.
Sometimes the best training decision is knowing when not to interfere.
🌾 Feeding Program
The flowering nutrition program continues supporting the transition from stretch into increasingly active flower production.
Current feeding includes:
• Plagron Terra Bloom – 2.2 ml/L
• Plagron Power Buds – 1 ml/L
• Plagron Green Sensation – 1 ml/L
• Plagron Sugar Royal – 1 ml/L
• Plagron pH Plus – 0.03 ml/L
• Plagron Lemon Kick – 0.03 ml/L
Current solution strength is around 2 mS/cm, with the irrigation maintained at approximately 1.3 litres per plant per 24 hours.
And visually?
She's loving it.
The foliage remains a beautiful, deep green without showing obvious signs of excess or deficiency.
No dramatic corrections are necessary.
No reason to chase numbers simply because we can.
The plant is telling us that she's comfortable.
So once again, the best decision is simply to stay the course.
💎 Phenotype Spotlight – The Quiet Sister
This is where Pheno B really deserves her moment.
At approximately 160 cm, she has developed into a tall, elegant plant with a very different expression from her sister.
The colas may not be quite as large or aggressive as Pheno A's, but there is something incredibly attractive about the way Pheno B is building her flowers.
The plant is covered in developing sites.
The branches remain nicely spaced.
The flowers are stacking progressively along the internodes.
And the entire plant has that beautiful, healthy green appearance that makes you stop and look twice.
Her slender leaf fingers continue to stand out as one of her most interesting characteristics.
For a heavily indica-dominant Black Diamond Auto, this particular phenotype continues expressing a surprisingly elegant, narrow-leaf appearance.
It's another reminder that genetics are never quite as simple as a percentage written on a seed description.
You can grow two plants from the same genetic line, place them in the exact same environment, and still watch them tell completely different stories.
Pheno A is the loud sister.
Pheno B is the quiet one.
But quiet doesn't mean uninteresting.
Far from it.
🌸 Flower Development
This is probably the most exciting part of this week's update.
The flowers are becoming much more defined now.
The early framework of individual pistil clusters is beginning to transform into recognizable buds, and the calyxes are progressively stacking along the flowering branches.
The pistils are still predominantly fresh and white, although a few are already beginning to change.
The flowers are also carrying an increasingly visible layer of resin, especially around the sugar leaves and developing calyxes.
It's still far too early to make any serious predictions about the final level of frost or aroma.
But the first signs are definitely there.
And sometimes that's all you need.
A little sparkle.
A little promise.
A hint of what might be waiting several weeks from now.
💡 The Photon Hunt Continues
One of the funniest differences between these two sisters is how they seem to approach the light.
Pheno A?
She simply takes it.
Pheno B?
She looks like she's still searching for more.
😂
With her more open and elongated structure, she seems almost determined to explore every available pocket of light inside the room.
But there is a problem.
Her sister is already standing there.
Taking it all.
Pheno A continues producing those larger, more dominant colas, while Pheno B is developing a greater number of beautifully distributed flowering sites.
And honestly, I don't think that's a bad thing at all.
Different architecture.
Different flower distribution.
Different potential.
That's exactly what makes a phenotype hunt interesting.
🌿 Welcoming Lumiflora
The introduction of the Lumiflora under-canopy lighting system is also becoming increasingly interesting as flowering progresses.
The goal is simple:
Complement the overhead lighting by bringing additional usable light into areas of the canopy that naturally receive less intensity.
Pheno B's more open structure makes her particularly interesting to watch under this setup.
Rather than trying to predict exactly what the additional light will accomplish, I'm choosing the approach I always prefer:
Document it. Observe it. Compare it.
Then let the harvest tell us the truth.
🔭 Looking Ahead
Over the coming week, I expect the transition toward heavier flower production to become increasingly obvious.
The remaining stretch should continue slowing down, while the developing flowers begin putting more emphasis on calyx expansion and stacking.
Pheno B may never produce the same massive cola structure as her sister.
And that's perfectly fine.
Because she's building something different.
She's becoming a tall, elegant plant covered in beautifully distributed flowers, with healthy dark-green foliage and an increasingly visible resin presence.
Maybe Pheno A is the sister everyone notices first.
But Pheno B?
She's the one who makes you stop when you finally take the time to look.
And I think she's going to surprise us.
💚 Final Thoughts
There is something incredibly rewarding about watching two sisters grow side by side.
One is more explosive.
One is more reserved.
One seems determined to conquer the entire tent.
The other appears to be quietly wandering around asking where all the photons went.
😂💎
But both are expressing the same genetics in completely different ways.
And that's the beauty of phenotype hunting.
Pheno B doesn't need to beat her sister.
She simply needs to become the best version of herself.
Right now, she's on a beautiful path to doing exactly that.
Her foliage is lush.
Her structure is elegant.
Her flowers are developing beautifully.
Her resin production is beginning to announce itself.
And she's slowly transforming from the quieter sister into a plant that deserves her own spotlight.
So this week, the spotlight belongs to her.
Black Diamond Auto Pheno B.
The quiet sister.
The photon hunter.
And maybe...
just maybe...
the one hiding a beautiful surprise underneath all that green.
A huge thank you once again to Zamnesia for providing these Black Diamond Auto genetics, to Plagron for supporting this journey with their nutrient line, and to Lumiflora for joining the project with their under-canopy lighting system.
And, as always, thank you to the amazing GrowDiaries community for following along, sharing your knowledge, and enjoying this journey with me.
Two sisters.
One genetic line.
Two completely different stories.
And we're still only getting started.
Until next week...
Growers love and Happy Growing! 🌱💚

Likes
25
Share


@Trippychef
Follow
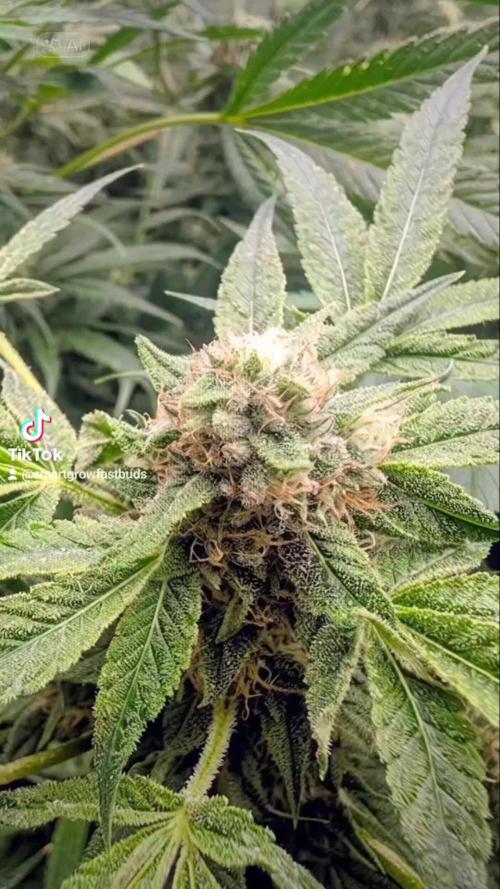
Red gorilla auto/left back-7 weeks
Red gorilla auto/right back-6 weeks
Purple punch og/ front-4 weeks


Likes
24
Share


@SMELLYBUDZ
Follow
Week 3 day 7.
Buds are getting icey and stretching around 1-2” a day.
Dropped the carboload and is going to be replaced by a PK booster (big bud).
Watering everyday. Plain RO on every 3rd water.
The kind LED is pissing on the hps if im being honest. Bud development and vigor seems a lot nicer.
Stay baked.

Likes
14
Share


@Dunk_Junk
Follow
She grew 10cm this week!
Next week I'm going to change the HID bulb I use in the tent. Currently it's quite a red spectrum. I'm going to swap it to a more blue/daylight 1000w item.
Likes
25
Share


@JeyGanesha
Follow
Anche questa watermelon è giunta al termine.. missione compiuta con successo, adesso resta l'ultima è quasi più importante cosa da fare...LA CONCIA!!!!MOLTO IMPORTANTE ASCIUGARE BENE É PIAN PIANO, ALTRIMENTI PERDIAMO TERPENI E SAPORI TIPICI DELLA NOSTRA AMATA PIANTA..HO VISTO PERSONE FARE DELLA BELLE PIANTE MA POI ROVINAVANO TUTTO PER NON ESSERE CAPACE..FACEVANO L'ALBANESE AMMONIACATA E NERA( perché la chiudevano fresca,facendola fermentare) un peccato 😜🤦🤦