


Likes
Comments
Share


@The_Bearded_Grower
Follow
Welcome to week 4 a flower it's day 86 and she is still growing beautifully with tons of trichome development no deficiencies and getting bigger all the time I still got at least four weeks left I'm hoping she gets nice and fat and I'm really hoping that it turns purple in the late stages. I haven't really changed much other than I increase the amount of flush material as I started to notice a little bit of Browning tips on some of the leaves I raised it from 2L to 4L of straight water I also increase the amount of nutrients from 3 to 4 litres starting tomorrow I'll be reducing the amount of flushing water down to three but keeping the nutrients the same. Hope the information was useful happy growing and keep your stick on the ice

Likes
50
Share


@Blabina
Follow
😍 And here we are. 😍
👻 Every explanations about the moovie and what I did are written at the end of the video. 10 minutes of your life to watch 57hours and 54 minutes of my Quickgreen's life. ♥️Shot in 2k ♥️Watch it fulll screen ! 👻
♫♪ Music : Act I Year 1 of Akhnaten's Reign (Thebes) - Scene 1 Funeral of Amenhotep III ♥️♫ by Philip Glass ♪♫ End credits : Act I Year 1 of Akhnaten's Reign (Thebes) - Prelude - Refrain, Verse 1, Verse 2 ♥️♫ by Philip Glass ♪♫
😻It was a lot of work while I was feeding them at the same time, I got a small place for the grow area and the camera (who isn't small at all).
💪Thank you to my dwarves who accompany me during this creative process 💪
Enjoy the moovie ! 👻
👉 12th of october 2021 / DAY 6 👉 Shooting the film from day 10 late at night, this feed was not too hard (I bumped the tripod of my camera on day 5) 👽Calmag 1.6 ml/2L + 👽 Acti-Vera 0.8ml/2L 👽Bio-Grow 0.6ml/2L 👽Bio-Heaven 0.8ml/2L 👽Terra Aquatica Root booster (GHE) 10 ml/2L /// p.h. 6.3 EC : 07
I mooved a bit while feeding Quickgreen, the big star of the movie, during the shot... I will take some pictures of the 2 others on the following days when the moovie will be over.
👉 13th of october 2021 / DAY 7 👉 Finish and uploaded the moovie. First time my lovely quick have a light break !!! Lights where on for 3 days. 12h00 to 18h00, lights are off.
18h00 : 👽Calmag 2 ml/2L + 👽 Acti-Vera 2 ml/2L 👽Bio-Grow 0.6ml/2L 👽Bio-Heaven 1 ml/2L 👽Terra Aquatica Root booster (GHE) 10 ml/2L /// 😇 p.h. 6.0 EC : 07 degree 22° 😇 Run-off : The smart pot are in direct contact with "fresh" wood, naked wood so I don't know if the run-off is accurate despite the plastic plant cup i've put under them to retrieve the water and to test it : 😰 Quigreen (moovie star) : E.C. 1, ph. probably 7 degree 19° ... 😰 QuickPink : E.C. 1.2 ph 7.2 degree 19° 😰 QuickBlue : E.C. : 1.1 ph 7.3 degree 19°
Tent : Temp 24.2°- 19.5° // 61-81 % (light on - light off)
👉 14th of october 2021 / DAY 8 👉 👽Calmag 1 ml/1L + 👽 Acti-Vera 1 ml/1L 👽Bio-Grow 0.3333 ml/1L 👽Bio-Heaven 1 ml/1L 👽Terra Aquatica Root booster (GHE) 5 ml/1L /// 😇3 L. p.h. 5.9 EC : 08 degree 22° 😇 Run-off : from 0.8 to 1.2, quick blue seems to have troubles, ph seems decreasing, 6.9 about.
👻👻👻 New video : x3 speed with new music ! I keep shooting so I am adding materials, I will keep shooting until I have to close the tent in flow (smell reason)... Let's do it !👻👻👻 Edit : I've left a black frame (you will see shortly a fast cut) to show when the light turn off. So 6 hours in real life are not showned anymore since today.
👻💪😍Dwarves POWER 😍💪👻
👉 15th of october 2021 / DAY 9 👉 12:00 : took dailies back and added in editing timeline. Mooved the light from 100cm to ☼ 79cm (31inch) MAX 24.4°//92% MIN 20.4°//45% : average : 23°//61% Fan is on since yesterday (not the extractor but tent is a bit open on top so... we are good. /autoflower power
18h00: 👽Calmag 2 ml/3L + 👽 Acti-Vera 2 ml/3L 👽Bio-Grow 1 ml/3L 👽Bio-Heaven 2 ml/3L 👽Terra Aquatica Root booster (GHE) 15 ml/3L /// 😇3 L. p.h. 6.0 EC : 07 degree 23,8°
👉 16th of october 2021 / DAY 10 👉 12:00 : took dailies back and added in editing timeline. 👻👻👻 New video : x5 speed ! ... Let's do it !👻👻👻
18h00 : 👽Calmag 2 ml/3L + 👽 Acti-Vera 2 ml/3L 👽Bio-Grow 1 ml/3L 👽Bio-Heaven 2 ml/3L 👽Terra Aquatica Root booster (GHE) 15 ml/3L /// 😇3 L. p.h. 5.9 EC : 07 degree 22,4°
👉 17th of october 2021 / DAY 11 👉 12:00 : took dailies back and added in editing timeline.
18h00 : 👽Calmag 2 ml/3L + 👽 Acti-Vera 2 ml/3L 👽Bio-Grow 1.2 ml/3L 👽Bio-Heaven 2 ml/3L 👽Terra Aquatica Root booster (GHE) 15 ml/3L /// 😇3 L. p.h. 5.9 EC : 08 degree 21,4° /// Run-off pretty much the same for quickblue quickgreen and quickpurple. E.C. around 0.9 and p.h from 6.9 to 7.0, I don't know why my p.h is so high....
👉 18th of october 2021 / DAY 12 👉 12:00 : took dailies back and added in editing timeline.
👽Calmag 2 ml/3L + 👽 Acti-Vera 2 ml/3L 👽Bio-Grow 1.2 ml/3L 👽Bio-Heaven 2 ml/3L 👽Terra Aquatica Root booster (GHE) 15 ml/3L /// 😇3 L. p.h. 6.0 EC : 08 degree 21,5° /// Changed light hours : 13h00 - 19h00 dark
👉 19th of october 2021 / DAY 13 👉 19:00 : took dailies back and added in editing timeline.
👽Calmag 2 ml/3L + 👽 Acti-Vera 2 ml/3L 👽Bio-Grow 1.8 ml/3L 👽Bio-Heaven 2 ml/3L 👽Terra Aquatica Root booster (GHE) 15 ml/3L /// 😇3 L. p.h. 6.0 EC : 09 degree 23,3°
👻👻👻👻 /// The moovie (quick green) star IS UNFORTUNATLY NOT the QUICKEST Quick one I have, completly the opposite, she is definitly the slowest to grow (so I will take more time to shoot to have something more "spectacular" to show)👻👻👻👻
👉 20th of october 2021 / DAY 14 👉 13:00 : took dailies back and added in editing timeline.
19h00 : 👽Calmag 2 ml/3L + 👽 Acti-Vera 3 ml/3L 👽Bio-Grow 1.8/2.0 ml/3L 👽Bio-Heaven 2 ml/3L 👽Terra Aquatica Root booster (GHE) 15 ml/3L /// 😇3 L. p.h. 6.0 EC : 1.0 degree 24.2°

Likes
17
Share


@rockbo47
Follow
SUMMARY: Its finally time to start the flush and I'm aiming to flush for 2 weeks. I started the flush on day 95 flushing with tap water straight from the hose. I’ve heard you’re supposed to flush with 3x the container volume, however that would be around 57 litres for a 5 gallon pot which seems absurd. I didn’t record the amount but I took my time and flushed with at least 30 litres.
I am now continuing to water twice daily until harvest aiming for 20-30% runoff each time. I water once of a morning around 11:00 giving roughly 2-2.5L and again of an evening around 18:00 giving a further 2.5-3L.
DAY 93
-----------
Friday 26th March 18:30
I fed Jesus 3L of late bloom nutes which produced 740ml runoff (25%). [26°C/48%]
DAY 94
-----------
Saturday 27th March 18:30
I fed Jesus its last ever feeding, 3L of late bloom nutes which produced 560ml runoff (19%). [26°C/48%]
DAY 95
-----------
Sunday 28th March 18:30
I flushed Jesus with tap water straight from the hose. I’ve heard you’re supposed to flush with 3x the container volume, however that would be around 57 litres for a 5 gallon pot which seems absurd. I didn’t record the amount but I took my time and flushed with at least 30 litres.

Likes
53
Share


@Almora
Follow
I give 8 liters of water per pot.
I was giving a 2-nutrient callmag, but the water coming out from the bottom has high ppm, so I will give empty watering.
Day 97-Bloom 38= sugar leaves and immature buds were cuted

Likes
4
Share


@Growstopher
Follow
4.14.25.
2nd week of veg! Started tie down method on the 7th and going good nice new healthy growth!
Going to start wrapping plant around perimeter of pot!

Likes
5
Share


@Mr_nugs_lover_David
Follow
Very happy with how this lady has performed, amazing quality buds, very sticky and dense flower with a concrete smell that I love so much, which is that kind of fruity sweet flavor that this lady is able to produce, it's been a beautiful journey, I'm gonna enjoy a lot this flowers. Very recomended guys!
Likes
29
Share


@eldruida_lamota
Follow
Vamos familia que viene la cuarta semana de floración de las Titan f1 y jodo cómo se notan los cambios de una semana a otra al menos está semana si note buen cambio, las flores se están formando guay y se están poniendo repletas de tricomas.
Es de las cepas nuevas más potentes en thc tengo ganas de probarla.
En general tienen buen color , un poco pequeñas pero para el armario que tengo tampoco da para mucho más . Los demás si este no tanto.
Pero para autos va guay.
Temperaturas máximas de 27 y mínimas de 24 grados.
La humedad relativa está en torno al 50%
Agrobeta:
https://www.agrobeta.com/agrobetatiendaonline/36-abonos-canamo
Mars hydro:
Code discount: EL420
https://www.mars-hydro.com/
Hasta aquí es todo , espero que lo disfrutéis, buenos humos 💨💨.
Likes
17
Share


@MasterKush714
Follow
UPDATE GUYS!!!!!
So the girls are doing great I got some new genetics also I'll be doing
for my next grows and so forth, but yea just watering as necessary,
I really really feel that this process is a learning curve for me lol, mainly
because I've learned from the past that everything comes with progress
trial and error, so I'm learning which I accept so its okay its okay haha
but things are progressing and ill stay up to date with this for you guys thanks!!!!

Likes
6
Share


Likes
5
Share


@Mr_Puff_N_Stuff
Follow
Plants are looking very healthy. I have stopped adding Recharge and MykosWP. I have them only on water now so they can effectively eat the High Tide from Commonwealth Canna. Lights are at 90% and 20 inches above the canopy. I will be using plant stakes to hold the buds up.
Should see flowers see some flower forming sooner than later.
Happy and Healthy…
Likes
6
Share


@Mr_Prawn
Follow
Creo que hay un problema en las raices, las hojas tienen clorosis y se caen, aplico cannaflush hace 2 días y cuando seque un poco añadiré rootbastic a ver si noto mejoría. Algunas plantas ya casi están a otras les queda un poco



Likes
2
Share
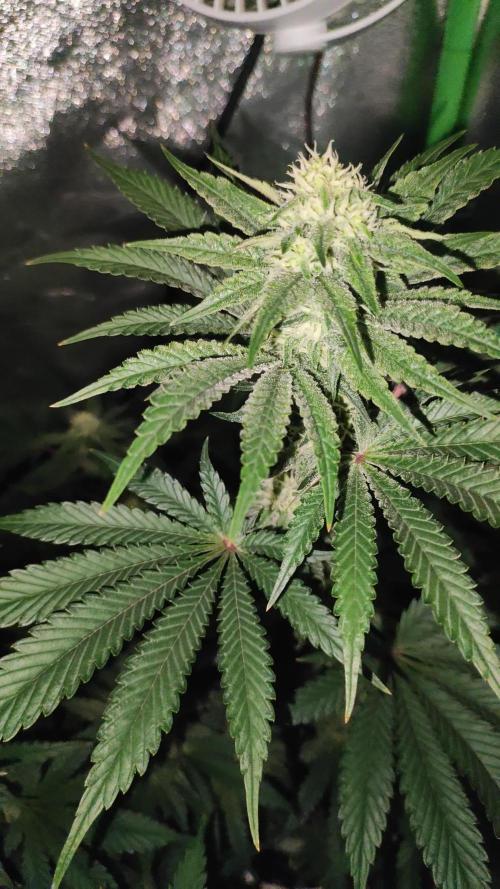

@Bncgrower
Follow
Week completed, these girls are developing great, the flowers already smell wonderful and are very resinous... Looking forward to the next few weeks.
Stay well! 💪🙏
Likes
107
Share


@Tropicannibis_Todd
Follow
💩Holy Crap Growmies We Are Back💩
Entire grow has been stunted by the soil/medium
Code Name FBT2309
Well growmies we are at 56 days in and everything is going as good as possible 👌
👉 Well folks shes been a busy girl , making a ton of bud , just hope she chunks up 👌
Lights being readjusted and chart updated .........👍Even with early major issues due to the soil/medium she's come a long way 👈
👉I used NutriNPK for nutrients for my grows and welcome anyone to give them a try .👈
👉 www.nutrinpk.com 👈
NutriNPK Cal MAG 14-0-14
NutriNPK Grow 28-14-14
NutriNPK Bloom 8-20-30
NutriNPK Bloom Booster 0-52-34
I GOT MULTIPLE DIARIES ON THE GO 😱 please check them out 😎
👉THANKS FOR TAKING THE TIME TO GO OVER MY DIARIES 👈
Likes
4
Share


@MrGoonai
Follow
02/03/25 Short facts:
- 58cm high
- Light is @80% but in a distance of 24 to 35cm - 600 to 740 ppfd
- VPD increased to 1.0 but I only do get it up to 0.9
- Defoliated again
---------------------------------------------------------------------------------
She has grown significantly again, becoming taller and producing more leaves. I had to defoliate her once more, but she has already regrown some leaves, so I'll probably have to defoliate her again this week.
I'm really impressed, she's doing so well!

Processing
Likes
15
Share


@ThePotFactory
Follow
Added a scrog today, plants looking healthy. Ill be looking foward to see how they react being autoflowers. Bat guano also added to the coco as a top layer and mixed in about an inch. Upped the cannaboost and cannazym. Next week probably be adding PK 13/14
Likes
28
Share


@Coopmc
Follow
Land race Psychedelic this one did not turn Purple but she tastes purple and makes you feel like the color purple I think Franco and Prince are smoking this stuff in Heaven !


Likes
7
Share


@Waisgrower
Follow
Primer dia desde cambio de fotoperiodo, recien se pueden ver los primeros pistilos indicando el sexo de nuestras plantas🌱. En unos dias se veran las primeras preflores que nos indicaran que partio la floracion🌺. Muy contento con los resultados obtenidos hasta ahora con tan solo 4 semanas de vegetacion, hemos llenado el espacio super rapido🔥. Se pretende sacar este cultivo en menos de 3 meses, asi como vamos se cree lograrlo!.
Las proximas lavores a realizar sera desfoliacion a los 21 dias de floracion ✂️.
Iluminacion Sodio 400w al 75% se aumentara en una semana a 100% 💡.
Fertilizacion con linea @topcropchile 💥
Potenciadorgenetico @knactive_ ⚡
Royal gorilla🦍 by: @royalqueenseedsrqs 🦁.


