


Likes
Comments
Share


@CanadianFillmore
Follow
Gotta get the Glueberry OG to the finish line! Flushing has begun, she's incredibly sticky, buds are very dense and heavy, branches bending and twisting like crazy! Smells like glue/fuel and she's heavy on OG Kush growth characteristics, in comparison to my previous OG kush grows. Only a few amber trichomes, she's 60-70% cloudy.
Thanks for watching! 👽🌳


Likes
26
Share


@Snacks_for_Argus
Follow
Late to update this week. Was out of town and finally I found some time to update.
I started giving them a healthy dose of KoolBloom to start finish this grow off. Temperature is getting higher and I wish I started these girls 2 weeks earlier, but hindsight is 420.
I think these should be ready by week 9, so i’ll be looking at those trichomes at this stage of the grow. I like mine cloudy. What do you all prefer?

Likes
45
Share


@Organic_G
Follow
Ernte ist ziemlich nah, werde die Ernte in 3 aufteilen, damit der mittlere und untere Part nachreifen kann…
Da ich die RH nicht wirklich runter bekomme und kein Schimmel riskieren will werde ich mit hoher wahrscheinlich das obere Drittel morgen ernten und direkt zum Trocknen aufhängen…
Time will tell


Likes
1
Share

@Liquits
Follow
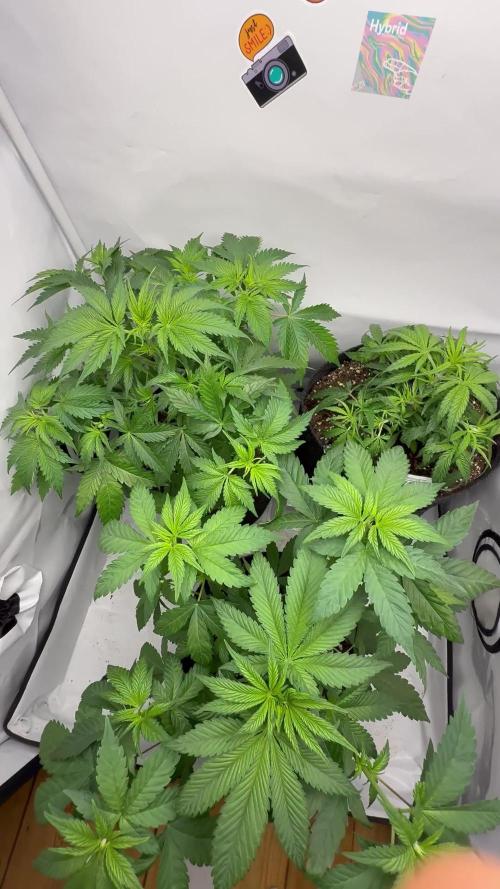
Nachdem die 2 Autos auf dem Balkon stehen und die drei FF Ladies allein im Zelt wachsen, breiten sie sich aus und nehmen den ganzen 80x80 Platz ein, sie wachsen schnell.
Sattes Grün, kräftige Blätter, glückliche Pflanzen.
Der Wedding Cheese Cake 🍰 habe ich einen höheren Absatz zum Schuh untergemogelt, da sie doch etwas kleiner wächst, als ihre exotischen Schwestern.
CalMag wurde bestellt, wird sofern eingetroffen, direkt verabreicht!
Es wurde zum Ende der Woche auch Zeit, ihnen einige Blätter zu entfernen.
Vielleicht gefällt es der Wedding Cheesecake, so dass sie noch etwas an Höhe gewinnt. Sie wächst mir unerwartet zu klein.

Likes
21
Share


@Indicate
Follow
Another week under the belt and I’m not sure how much longer to leave these two. Starting to smell a bit more like weed but still waiting on the clear to opaque transition. All I want for Christmas….

Likes
13
Share


@Ksouth1
Follow
Last week went well. She has started showing signs of flowering and is showing some promise. She is drinking a decent amount and is starting to stretch I believe. I'm happy to see that I am going to get a decent turnout from her when I almost abandoned her in the beginning. I have used lst and supercropping to even out the canopy and it created what will be several tops. Plant took it well and handled being topped well. I think she will have a few decent colas if all goes well. Until next time happy growing to everyone!

Likes
12
Share

@420DeepGrow
Follow
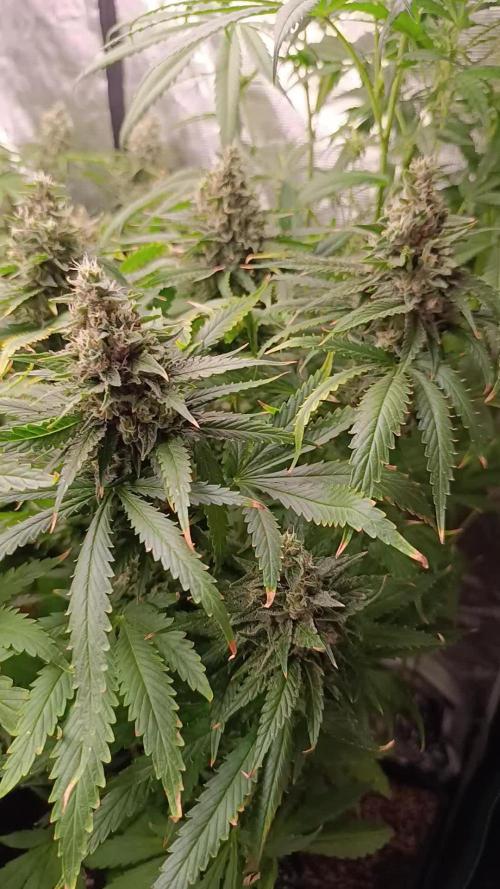
📆 Semana 8
Los cogollos continúan endureciéndose y ganando densidad, mientras la maduración avanza de forma evidente. La producción de resina se mantiene muy elevada y los aromas son cada vez más intensos. Los pistilos siguen oscureciéndose y replegándose progresivamente, y comienzan a aparecer tonos morados en las flores y algunas hojas, aportando una coloración espectacular a la planta.
La planta mantiene un buen consumo de agua y nutrientes, mientras el objetivo pasa a ser acompañar esta fase final de engorde y maduración manteniendo una EC estable y evitando excesos.
⚡ EC: 1.7–1.8
💧 pH: 6.2–6.5
🌡️ Agua: 20–21°C
🌫️ Humedad: 40–45%
💡 Intensidad: 950–1050 PPFD
🔥 Nota de cultivo: En esta etapa la prioridad es mantener unas condiciones estables, buena ventilación y una humedad controlada para favorecer el endurecimiento de los cogollos, la producción de resina y la expresión de sus intensos colores morados.
¡Seguimos creciendo fuerte! 💪


Likes
81
Share


@LockDownGrow
Follow
ok so everything has gone fantastic , no nutrient burns at all , and have been slowly creeping up the base nutrients , i have stopped the cal mag and now adding house and gardens bud XL at full strength these girls are now in full swing of flower the Cal mag has made absolutely no difference too the yellow colour of this blackberry so I suspect it is just how this strain is as meany diary's on here of the same strain are also on the yellow side , but it's certainly not affecting the speed of the growth of her , i also bought a new ph stick this week ,
i have found when PHing the feed bucket that its best too have air stones in the bucket , add all nuts and then ph but do not use the feed that day as if you check the next day the ph is off again so i left it 24 hours after i add more ph down , and it seems too make the measurements alot easier and stable , i have bent down the main stems " without damaging them onto my netting too A keep the canopy all the same high so my lighting is covering all plants at the same distance and also it allowed the side stems too reach up too ,
i also was sponsored another new led light by kingbo this week so have added another 600watt led too the grow , so now have two 600's and one 900watt , and temps are still fine sitting at 24c lights on and 19-20 off , so am pleased with that ,
I accidentally bend the main stem last week while I was putting them under the netting too try and control the stretch , luckily it did not crack or snap the branch at all and she didn't droop on that branch at all and has healed already , it may or may not be related but as soon as it happened the side branches thickened up too the thickness of the main stem , this plant has over taken the rest in size even being a full week too 15 days younger , it's certainly not ideal but it really does not appear too have slowed down the growth and may well go in my favour , this lady really did stretch out from week 4 into 5 and is showing no sign of slowing down , her side branches are very thick almost as thick as the main stem , her leaf production was minimal and I have only had too remove very few too expose the bud sites , the yellowing seems too be recovering now and most of the plant is green now ,
Update ,
Now gone a lush green colour instead of that horrible yellow , and the buds have already started too purple , she has also stepped up a gear with her nutrient intake almost drinking 6 pints since Thursday ,
She seems too have slowed down on the stretch and has so meany bud site scattered all over her with as the diary name suggests black roses everywhere , and note too any seed banks reading this if there is not a purple stain out there already called black rose now is your chance lol and Iwant a sample pack first kinda like the tester :)
Now defoliation , as you can see they really didn't seem too mind at all being stripped and within a couple of days they had all replenished the lost leaves and even this week olive had to pull the odd few off as they have grown out ,
Method , well all info now is simple ,
Anything I cannot tuck under something that is blocking a bid site with shade I remove too middle or bottom ,
Everything else stays , I just stand above the plant and pull off anything covering the sites , it's really as simple as that , I see some strip them until there is nothing left on but a few sugar leaves , but for me didn't like the look of the plants , for me the growing process is just as much fun as the fruits ,

Likes
1
Share

@Pot_Portraits
Follow
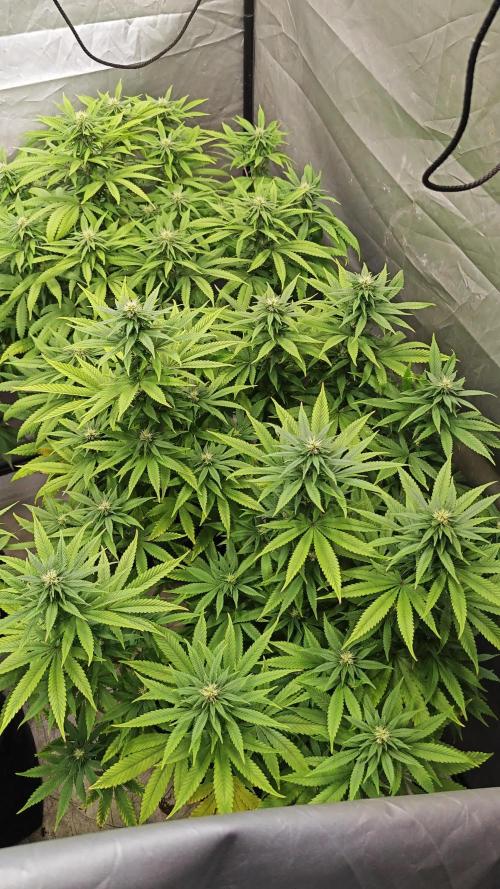
Royal moby is doing amazing, heat wave is hitting but she is not impressed, it's kind of hard to keep the soil moisture right with 33c in the tent but we are going on !


Likes
4
Share


@Adam22
Follow
Lost my phone so couldn't post I've found it now all is looking good. Had the gavita blasting out the heat and infrared after vegging 5 weeks without any warmth. Using the 50w veg led strip in the corner and the 150w mars hydro led in the front corner. This 5x5 tent I will put the 4x4 up ASAP. First I have to get some more led lights ordered tomorrow and a UV tube from migro. The 4x4 will have either a few panel led lights or a 5x5 led bar light not sure yet what I'm doing but either one its crammed in here. Tomorrow is feed day I will try get some light to the top of the container as the shade is covering most of it since past few days now and I noticed its better to have some light heat and warmth to allow the roots to be warm and not damp in the cold shade. I messed up last time by cramming too many in a small tent. Hope not to repeat this time. I did expect there to be a couple more males this but even the bagseed blue cookies is confirmed female now 😋 I will start a new diary now for that one plant separately
Likes
21
Share


@Gram_Solo
Follow
These have shooted right up! 🚀🚀
I only topped once and she's responded well
1 has deficiency I think some weird leaves but she looks healthy overall
Switching to flower in 2 weeks 🙌

Likes
2
Share


@Gardens_of_Of
Follow
I keep increasing the light and she seems to enjoy it, growing new bud sides and leaves everyday. Defoliation continues. I can’t go below 25-26 Celcius due to increased light though. She has also been moved to back middle.

Likes
36
Share


@valiotoro
Follow
Super frosty & rock hard buds💥
Delicious terps🤤
Perfect buds leaf ratio


Likes
Comments
Share
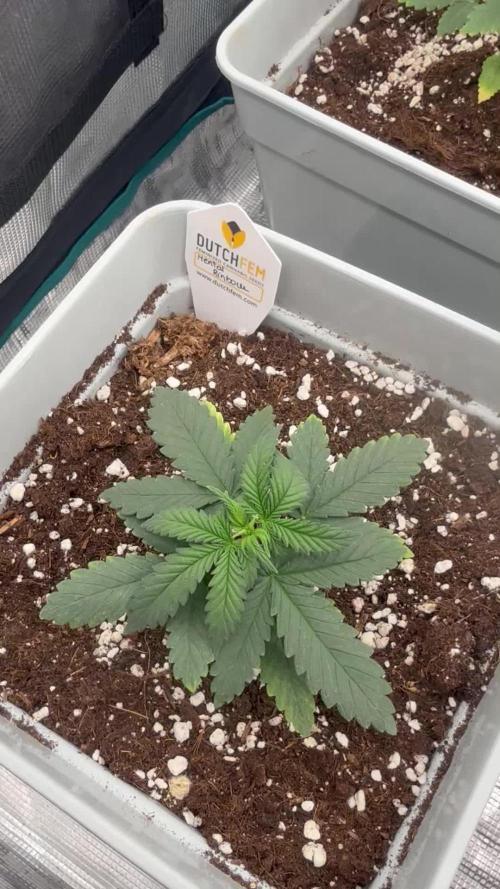

@Elguacho420
Follow
Buenos días y buenos humos para tod@s…
Estamos en la semana 3 de crecimiento y, por el momento, las plantas van como esperábamos. Están creciendo de manera continua y se mantienen en buenas condiciones.
Hemos añadido algo más de humedad, ya que estaba bastante baja, y de momento parece que está funcionando bien.
El riego lo hacemos cada 5 días: a las plantas grandes les damos 150 ml y a las pequeñas 100 ml. Tanto el pH de la humedad como el del riego está en 6.0 y, por ahora, va perfecto.
También hemos empezado a utilizar Plagron Grow, añadiendo tan solo 1 ml por cada 2 litros de agua. La idea es ir introduciendo la alimentación de forma paulatina, para que las plantas se adapten poco a poco y no generarles ningún tipo de estrés.
Mucha suerte en sus cultivos y seguiremos informando… 🌱💀💨
Likes
1
Share


@InDiviDoOm
Follow
К началу 3 недели снизил влажность до 60%. По листу добавил Б52 на 1 литр 1 миллилитр. Опрыскиваю по мере высыхания листьев. полив ежедневный под корень.

Likes
80
Share


@Greenwolvesfarmer
Follow
Súper bien .lindo crecimiento . Sigue con sus hojas anchas y algo más gruesa que las hermanas del armario ...
Tranquilo y a disfrutar ...esperando con ansias , ya te quieres cambiar de camita bebé ...te amo nena ...
Gracias padre Sol y madre tierra por bendecir el día a día ..