


Likes
Comments
Share


@GoosengrowerUK
Follow
Hey Growmies, hope everyone is keeping well a nose around the garden all looking good for the moment the stardawg is looking deficient as hell because of all the rain recently I'll be mixing some nutrients for her tomorrow but everything else is loving life hope everyone is staying happy healthy and as high as humanly possible 💚🇬🇧💪

Likes
14
Share


@Bread_n_Buds
Follow
The Black Runtz scared me to death because one didn't germinate, a big insult for a stubborn person like me. Two days of fear but we already have two plants and maybe a third is on the way. That's why they're still in the biodegradable pot but we're only talking about a few days late, no problem. They're cute and in great shape.
For now I've put in fertilizer to root and special enzymes that transform the residues of previous plants into nourishment....perfect I'd say to renew the soil as best as possible.
Never stop at the first good results guys, always improve and it's fuel for the next day, to keep the passion alive and have results.
Growing Projects -----In this case we were a little late and I planted two plants together. Giving up Main Cola is always a big sacrifice. To avoid depression and to give a better vision to our super trusted breeder, home breeder and Zamnesia heart breeder we make a plant in topping x16 and a straight one preserving the main cola.
The first week went only with Power Roots 1 Ml/l and Pure Zym 1ml/l from now on we start with ALga Grow. The plants were transplanted shortly after germination because the biodegradable pots were very small. The soil is Plagron Pro Mix 100% organic renewed with 30% new soil and 20% Perlite added. (Pro mix don't have perlite but is airy we added anyway)
Plagron fertilizers are available on Zamnesia in convenient Pack formats for all growing styles. I used this with a simple search you can find the other products.
---- https://www.zamnesia.io/en/12119-plagron-top-grow-box-100-natural.html
Try a seed of this strain that drives us crazy...
---- https://www.zamnesia.io/en/11159-zamnesia-seeds-black-runtz.html
Zamnesia Description // Black Runtz comes from a truly legendary genetic pool. Our breeders used three modern classics from the United States to create this strain: Zkittlez, Gelato, and Runtz. With 20% THC and flavors of grapes and berries, Zkittlez passed on her delicious flavors and relaxing effects. Gelato contributed to Black Runtz's immense flavor profile by passing on high concentrations of the terpenes limonene and humulene. Finally, Black Runtz inherited the high potency of the original Runtz, a strain with a respectable 21% THC. The end result of this 3-way cross is a strain with 55% indica genetics and 45% sativa. Black Runtz boasts rapid flowering times, high potency, and contrasting yet balanced terpenes that support its delicious flavor profile.
Growbox and Air System - Secret Jardin DS120w + fans + Exhaust fans and filters DF16 kit ---- https://www.secretjardin.com
All the best that mother nature has to offer is on ----www.zamnesia.com
Call for collaboration: I am available for collaborations with companies of Lights and various equipment for growing (No Seeds and Nuts company please) I would like to renovate my 120x120 space that has slightly obsolete lights, and I would like to try some controllers. If you have proposals available.

Likes
8
Share

@Bread_n_Buds
Follow
Our Gush Mintz have undergone a small revolution and are still super beautiful, even more than before.
One of the plants was damaged during the main lining I broke a brunch and it was transformed into a very very beautiful LST plant, it could remain small but I wouldn't swear it has a truly spectacular shape.
In this diary therefore you will find the plant worked without techniques that require cutting but only with a LST this time also on the main stem and very aggressive to give a beautiful shape.
The comparison is the salt of the experience so the plant in the other diary will be worked very differently.
We have started the Plagron fertilization program, we are in 100% organic configuration, the soil is recycled Promix + 1/3 fresh soil + 10% Perlite + RQS Mycorrhiza Mix (4 g in the mix, 1 g under the small fiber pot).
We are administering // 1 ml/l Power Roots - 1 ml/l Pure Zym - 1 ml/l Sugar Royal - 3 ml/l Alga Grow
https://plagron.com/en
The doubts about the compatibility between Pure Zym and mycorrhizae have been dispelled, they can get along according to Plagron experts. If someone tells you that enzymes eat mycorrhizae, which in principle may seem possible, explain to them that it is not true.
https://www.royalqueenseeds.it/growing/452-easy-roots-mix-di-micorrhize.html
Try this strain, it's a top strain of the last few years very high thc level
------------------------------------------------------------------- https://www.zamnesia.io/it/11234-zamnesia-seeds-gush-mintz-automatic.html
Brief description of Zamnesia // Gush Mintz Auto is a relaxing hybrid strain that derives from the original Gush Mintz and a high-performance ruderalis specimen. This cross produced a plant with 70% indica and 30% sativa genetics. Her parents have given her a range of interesting traits, including mint and candy flavors and a high THC content of 20%. Smoking these buds provides creative vibes, a sense of euphoria and a pleasant sensation from head to toe. In addition to its enticing flavors and powerful effects, Gush Mintz Auto produces large yields of compact buds in just 9–10 weeks from germination.
Gush Mintz Auto is extremely easy to grow, with plants reaching an average height of 70cm indoors and 120cm outdoors, making her ideal for discreet grows or limited spaces both indoors and outdoors. This strain is well suited to LST (Low Stress Training) and performs best in a ScrOG setup (a technique that optimizes light exposure to maximize yields).
Punching aromas and deeply relaxing effects
As she grows, Gush Mintz Auto's aroma intensifies, releasing sweet and minty notes. This refreshing flavor profile really comes into its own when smoked, offering an inviting combination of minty freshness and sweetness. The effects are deeply relaxing, enveloping the body in a pleasant well-being without being too sedative. Gush Mintz Auto is perfect for those seeking creative inspiration, making writing, painting or music-making sessions smoother and more inspiring.
At Zamnesia you can find the whole world of growing and much more. Take a tour around the site and you will find "all the best that nature has to offer" in various shapes and colors.
The new strains are amazing and the old ones are no exception... p.s. for now zero Hermaphrodites, growers, can you say the same?
--- // www.zamnesia.com
Likes
46
Share


@StoneyMelony
Follow
Overview of my grow:
Tent: Secret Jardin DS120 4 x 4 (120 cm by 120 cm)
Lights: 2 x 120 Watt CTlite c4 clusterled
Climat: Trotec Dehumidifyer 240 watt- 10L/24h
Filter: Prima Klima carbon filter PK2600
fan: 2 x Secret Jardin 20watt osc. fan
Pots: Gronest 4 x 11 liter airpots
Water : automated water system
PH: bluelab
Nutrients: Plagron cocos A + B
Plagron PK 13/14
ATA cal/mag
Epsom salt
no rights to music in the videos
Week 6 She is doing great. I did some defoliation and some HST. She grew another 24 cm in height. She has a nice indica structure She is on the same watersource as my brooklyn sunrise and i had to raise the nutes a bit up. I hope it isn't to much for her. 😋 Stay safe all 😉


Likes
3
Share

@centralflpheno
Follow
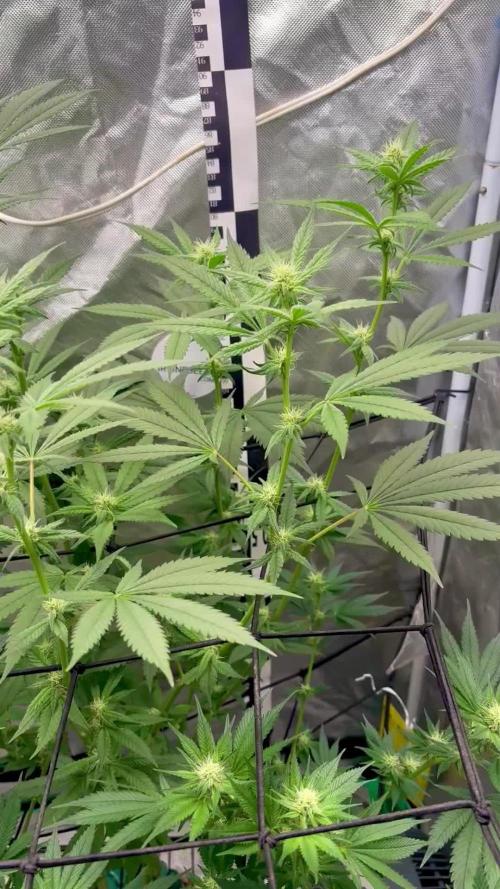
She’s getting the PK now and loving it. She starting to smell a little fruity. Similar to the Glitter Bomb plant I just grew


Likes
31
Share


@Reaper
Follow
So week 8 flowering, the plant in the back starts to get purple tints (night temperature drops to 12celcius.
trichomes on both plants are cloudy (on top)
at bottom they have clears left so i go another week and well see what happens. i give only tap water now
dont mind the butterfree hes protecting my buds from sneeky neighbours


Likes
7
Share


@Kali420Autoflower
Follow
Lemon AK Autoflower - 420 Fast Buds
Tercera semana de cultivo.
La planta se adapta al cambio de dosis de nutrientes. Además, esta creciendo vigorosa, frondosa y claramente destaca su fenotipo principalmente Sativa.
Como se puede apreciar en las fotografías, tomadas a principio de semana tiene unas hojas estrechas y largas representativo del genotipo proporcionado por la Ak47.
Se aprecia una zoña internodal más amplia y sus pequeñas ramas largas. Estoy disfrutando este ciclo de cultivo con tres verdaderas joyas.
Sin embargo, veo que esta planta me va a dar algo de problema en mi pequeño armario.
Likes
27
Share


@Wicked_Stix
Follow
We back with some buckets! Time to fire up the pumps and get this show on the road. Soaked this beautiful little gem of a bean in some water until it cracked then threw it into the bucket with 100% perlite. Started them on a low dose of maxigro on day 3. Doing these diy Dutch Bucket style as always. Going to be running 8 in house genetics strains on the system with constant 24 hour a day irrigation. Not much exciting going on yet, but with a little luck that may change pretty soon. A huge thanks to @wildeweed for this bean.
Likes
21
Share

@Bread_n_Buds
Follow
When the tropic is part there is to be afraid. She knows she's fast and she grows rapid, maybe I made her fade a little but now we'll take it right away. Tropicanna is a baby that i redo soon.

Likes
1
Share


@gse314
Follow
Did a lil experiment and clip the top of each was looking to see a increase veg


Likes
8
Share


@Gardens_of_Of
Follow
8th week of Flowering is over. Buds almost doubled in size except Lemon Orange. Smell is pretty heavy and frosting continues. Mimosa Evo and Runtz can not carry their buds anymore. I had to tie them up.
Trichomes almost fully milky for all ladies but waiting another week to get 20% Amber.
Target VPD is still set to 1,5 with 23 Celcius Target Temp.
Top Left: Wonder Pie (GHSC)
Top Right: Lemon Orange (GHSC)
Middle: Mimosa Evo (Barney’s - Clone)
Bottom Left: Runtz (Barney’s - Clone)
Bottom Right: Exotic Runtz (Exotic Seed)


Likes
20
Share


@Mr_weed_pt
Follow
For one plant i am very happy how it grows and finish .thanks royal queen seeds

Likes
5
Share


@Willy_Balls
Follow
1st week of 12/12 light going beautifully. They are doing really well. Although I still experienced root issues. I think this spot is cursed :P


Likes
83
Share


@Teamdirtbag2
Follow
16 days transplant to 3.5 gal Dutch bucket with perlite. Auto watered every 6 hrs with newts ppm 680 we will get some burn. It will be ok. Should be mild but strain depending. We She all see who gets upset. They are now in the Greenhouse. So it's up to the Sun and 2 - 1000 watt HPS ( for supplemental light ). Grab a chair and hold on. Don't forget the popcorn.

Likes
25
Share


@BigDaddyK
Follow
Starting to flower 🌹
Friday video fir you
Added another vid
Sunday added full power Fir 10 hrs