Likes
Comments
Share
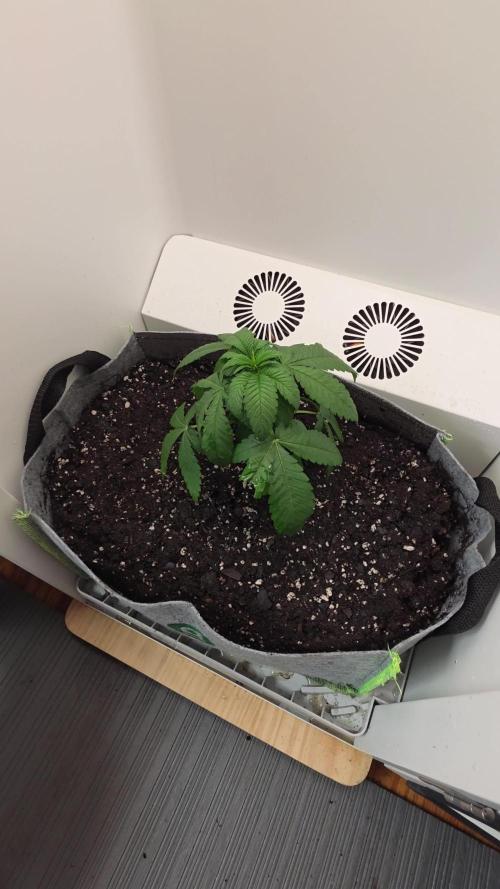
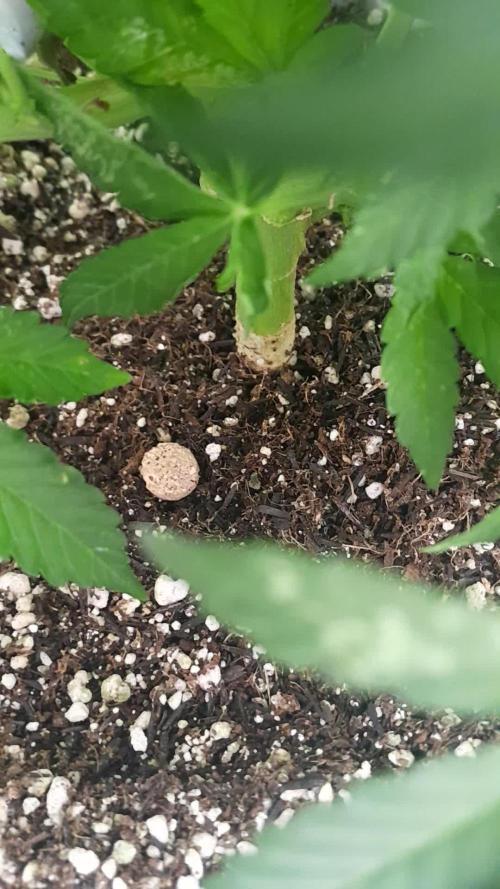
29/06 Day40 Height 83cm Noticed that on one of the plants that approx 70% of the leaves look exaggeratedly rough with a dusting of orangey brownish markings. This came after the bug episode I remedied with Eccofective Bug Spray (Organic) Fed each 2L of Solution Inoculated the rims of their pouches with Peppermint Oil. The creepy-crawlies hate it😈 07/06 Day 47 The one plant looks decidedly miserable. Weird rough leaves with slight discolouration and droopy. They're not being over or under watered. They both receive the exact same nutrient ratio and mix. It's been suggested to me by Bloombuster that it's heat-related. This makes sense as it was over 30c when I moved them outdoors. They're also showing Indica genetics more than the Sativas they're meant to be. I'll make mention of this to Lineage Genetics.
Likes
41
Share
@Hashy
Follow
This is the 2nd MSNL strain I have tried and the genetics are great. She got the longest time in the tent as she is a standard photoperiod and the rest of the grow where fast flowering photoperiods. I trimmed her after 16 days of drying and got 35g of decent buds and 9g of ok buds. Power used for whole grow in 114 days. Lights=201.7Kw (201.7×0.25)(=£50.42) Rad=212.23kw (212.23×0.25)(=£53.05) 201.7÷114=1.769kw per day light average. Average 100w for veg Average 150w for flower. Light average for grow 125w. Stats for the grow. FFNA2410=42g FFNA2411=45g FFNA2412=43g Acapulco Gold=44g Expected hash from trim 28g Total=174g 174÷125=1.39g/W
Likes
Comments
Share
@Ensign420
Follow
|»» LOG DISCLAIMER: Not intended as a grow guide. Grow log entries are usually posted 3 weeks later and are for my learning reference. ««| Introduction - Week 15 Summary - Ensign's log, stardate 17711.1, Been a great week in the garden! Wow the 4x4 tent is thriving and the canopy is full of tops! By the end of the week, all phenos have begun to show signs of flowering! Growth has continued to stretch so added the second scrog frame and netting. By the end of the week, the canopy has stretched through the second layer and looking green and healthy! In the veg tent, been tending to solo cup waterings as needed. Also up-potted Chill Out OG into a 3-gal pot (with BluMat watering). Took more veg cuttings and now have them in Coco Coins rooting and looking healthy! Onwards to next week! [START OF WEEK 15] ========================================================== ---------- [ 3x3 VEG TENT - GR7 / GR3 ] ---------- TKO #2 - WEEK 07 - Full Veg Gorilla Goat #1 - WEEK 07 - Full Veg Chill Out OG #3 - WEEK 04 - Full Veg Chill Out OG #2 - WEEK 00 - Transplant ---------- [ 4x4 MAIN TENT - GR30 ] ---------- Chill Out OG #2 - WEEK 15 - Full Bloom Wk1 TKO #2-2 - WEEK 09 - Full Bloom Wk1 Heady OG BX1 #1 - WEEK 11 - Full Bloom Wk1 02/09/26 → 02/15/26 [WEEK 15] This Week's Estimated Goals ---------------------------------------------------------------------------------------------- DLI: ~13 mol/m²/d PPFD: ~300 μmol/m²/s VPD: ~1.2 kPa This Week's Meter Readings & Averages ---------------------------------------------------------------------------------------------- Light On/Off: 16:00 - 10:00 | Wattage: ~386.3W [LV05] Distance From Canopy: ~[22”, 13”, 13”] Plant Height: ~[30”, 39”, 39”] Max Plant Height: ~52” [Lamp-to-Soil Distance] DLI: ~16.80 mol/m²/d PPFD: ~389 μmol/m²/s VPD: ~0.89 kPa Soil %: ~[47.9, 47.1, 43.3, 53.0, 48.3, 63.4, 47.1, 61.9, 48.6, 72.3] ========================================================== Day 01 - Monday - 02/09/26 - Total Days: 096 ----------------------------------- Daily Averages ~[+01:00] - Temps: 81.1°F [27.3°C] - Humidity: 74.4% - VPD: 0.92 kPa - Soil %: [48, 47, 44, 51, 49, 66, 48, 65, 50, 75] ----------------------------------- - [22:14]: Night check on the 4x4 tent. --- Garden is full of tops and the canopy is getting taller! --- Chill Out OG #2 is getting taller, but is staying shorter than Heady OG BX1 #1 and TKO #2. --- The under canopy is looking clean and all pots are clean and no signs of flooding. - [22:17]: Checked on the BluMat soil moisture sensors: ------ Chill Out OG #2 » 46mbars ------ Heady OG BX1 #1 » 42mbars ------ TKO #2 » 49mbars --------- Watering Range: [Too Wet] ~25mbars «| [Ideal Target] ~40-80mbars |» ~125mbars [Too Dry] --------- BluMat Max Values: [10mbars «||» 750mbars] - [22:24]: Checked the Ecowitt soil moisture sensor data: ------------------ [ 3x3 VEG TENT – GR7 / GR3 ] ---------------- ------ 45% - [CH01 » M1 » VBL – TKO #2] ------ 46% - [CH02 » M2 » VBR – Gorilla Goat #1] ------ 44% - [CH03 » M3 » VFL – Chill Out OG #3] ------ 51% - [CH04 » M4 » VFR – Dry Soil] ----------------- [ 4x4 MAIN TENT – GR30 ] --------------- ------ 49% - [CH05 » P1 » FLT – Chill Out OG #2] ------ 66% - [CH06 » P1 » FLB – Chill Out OG #2] ------ 47% - [CH07 » P2 » BLT – TKO #2-2] ------ 64% - [CH08 » P2 » BLB – TKO #2-2] ------ 51% - [CH09 » P3 » FRT – Heady OG BX1 #1] ------ 75% - [CH10 » P3 » FRB – Heady OG BX1 #1] --------- Veg: ~38%-45% | Flower: ~45%-55% --------- General: ~30% [Dry] «| ~45-60% [Moist] |» ~70% [Wet] - [22:27]: Checked the 3x3 veg tent. --- Wow the veg garden is blowing up with growth! --- All mothers and clones are perky and getting tall! Definitely need to top soon, but not today! --- A Chill Out OG #2 clones needs watering! - [22:33]: Here is the starting initial watering range: ------ Chill Out OG #2 » 267.3g → 301.0g --------- General Weight Range: [Dry] ~275g «| [Dryback] ~300g |» ~325g-400g [Wet] --- Been 2 days since the last watering. --- Took the starting weight before watering, ------ Chill Out OG #2 » 289.2g --- While on a scale, --- Evenly misted the top of the cup with RO water. --- Did not spray the top growth. --- Misted 10-20 sprays. Waited a moment, then misted again. --- Repeated this process until the cup weighted at least 300g. --- There was no runoff. - [22:44]: Took the saturated weight after watering, ------ Chill Out OG #2 » 390.7g --- Updated the wet weight and watering date. --- Placed the cup back into the tent. --- All veg clones in the propagation tray look great and no need to water! - [22:53]: Checked the humidifiers. --- Tanks are still full and no leaks found. Day 02 - Tuesday - 02/10/26 - Total Days: 097 ----------------------------------- Daily Averages ~[+01:00] - Temps: 81.0°F [27.2°C] - Humidity: 76.9% - VPD: 0.83 kPa - Soil %: [50, 47, 44, 51, 49, 64, 47, 63, 50, 74] ----------------------------------- - [21:06]: Night check on the 4x4 tent. --- Ca-Caw! Wow the garden soaring upwards with healthy tops! --- Heady OG and TKO are stretching up at equal heights and are almost tall enough to begin the second level or netting. Nice! --- Chill Out OG is chilling and staying squat, but looking perking! - [21:12]: Checked on the BluMat soil moisture sensors: ------ Chill Out OG #2 » 48mbars ------ Heady OG BX1 #1 » 44mbars ------ TKO #2 » 56mbars --------- Watering Range: [Too Wet] ~25mbars «| [Ideal Target] ~40-80mbars |» ~125mbars [Too Dry] --------- BluMat Max Values: [10mbars «||» 750mbars] - [21:16]: Checked the Ecowitt soil moisture sensor data: ------------------ [ 3x3 VEG TENT – GR7 / GR3 ] ---------------- ------ 47% - [CH01 » M1 » VBL – TKO #2] ------ 49% - [CH02 » M2 » VBR – Gorilla Goat #1] ------ 43% - [CH03 » M3 » VFL – Chill Out OG #3] ------ 51% - [CH04 » M4 » VFR – Dry Soil] ----------------- [ 4x4 MAIN TENT – GR30 ] --------------- ------ 48% - [CH05 » P1 » FLT – Chill Out OG #2] ------ 64% - [CH06 » P1 » FLB – Chill Out OG #2] ------ 47% - [CH07 » P2 » BLT – TKO #2-2] ------ 63% - [CH08 » P2 » BLB – TKO #2-2] ------ 51% - [CH09 » P3 » FRT – Heady OG BX1 #1] ------ 74% - [CH10 » P3 » FRB – Heady OG BX1 #1] --------- Veg: ~38%-45% | Flower: ~45%-55% --------- General: ~30% [Dry] «| ~45-60% [Moist] |» ~70% [Wet] - [21:21]: Checked the 3x3 veg tent. --- Woah! The veg garden is stretching upwards and has reached the grow light! --- Time to top! --- Also going to take more Gorilla Goat clones. Not too sure on the current one in the tray, so cutting a couple more just in case. - [21:33]: Filled a measuring cup with 2 cups of RO water. ------ Added 1/8tsp of Horticultural Aloe --- Mixed the solution and poured it straight into a clear solo cup. --- Made sure the PVC tube on the rig had the correct names marked. --- Placed the rig into the cup just above the aloe water. --- Okay! Time to take the cuttings! --- Using a pair of clean trimmers, - [22:05]: Topped and defoliated each mother plant. --- Removed a decent amount of growth (a good 7-8 inches of top growth). --- Mulched the trimmings. - [22:07]: Also cut several Gorilla Goat #1 clonal cuttings. --- Made sure to trim most of the branches leaving a top node or two. --- Did not cut any leaf fingers and made sure to cut the tip of the stalk (about 45-degree) before placing each cutting into the cup of aloe solution. - [22:09]: Placed the cup into the veg tent. --- Have the cup resting on top of the drip tray (front left pot). --- Okay! Let the soaking begin! - [22:10]: Decided to cull the Gorilla Goat #1-2 clone in the propagation tray. --- Mulched the entire cup. - [22:18]: Checked the humidifiers. --- Tanks are still full and no leaks found. Day 03 - Wednesday - 02/11/26 - Total Days: 098 ----------------------------------- Daily Averages ~[+01:00] - Temps: 81.7°F [27.6°C] - Humidity: 76.9% - VPD: 0.85 kPa - Soil %: [47, 47, 43, 50, 48, 64, 47, 62, 50, 74] ----------------------------------- - [16:09]: Evening check on the 3x3 veg tent. --- Veg garden is looking nice and clean! --- The growth is still recovering from the topping, but all mothers and clones look great! - [16:22]: Okay! Time to transplant Chill Out OG #2 into a 3-gal pot! --- The 3-gallon pot has been already pre-amended and prepped for a fresh transplant. --- Will also be installing the BluMat watering carrot before connecting it to the water source loop. - [16:46]: Took a 3-gallon pot out of the veg tent and set it on a drip tray. ------ Removed the drip tray and Ecowitt soil sensor. --- Loosened the soil and made a hole in the center of the pot. ------ Set a clear cup into the center of the pot. --- Tucked the sides of the cup in snug with the surrounding soil. --- Gently removed the clear cup from the fabric pot leaving a perfect hole. ------ Sprinkled 1/16tsp of Great White ------ Sprinkled 1/32tsp of Beauveria Bassiana Plus - [17:06]: Dusted the sides of the hole. --- Also sprinkled a bit around the top soil. --- Great! Time to transplant! --- Chill Out OG #2 weighed 291.2g and was watered 2 days ago. --- To loosen and unstick the rootball from the cup, I gently squeezed the sides before pressing the bottom upwards. - [17:14]: Once fully loosened, I simply Vulcan-gripped the base of the plant before flipping her upside down. --- Ooo yea! Nice pearly white roots! --- She’s more than ready for a larger pot! --- Did not break up the rootball. - [17:16]: Gently set her straight into the pre-inoculated hole. --- Pressed and evened out the top soil. - [17:22]: Using fresh BuildASoil Organic Straw Mulch, --- Covered the top soil with straw. - [17:35]: Then using a fully filled 5" BluMat watering carrot (pre-soaked and set to gold for gravity feed) along with a 5" drip ring, --- Placed the drip ring around the base of the plant. --- Then gently inserted the BluMat carrot into the soil near the drip ring's fill tube before connecting it with a 3mm connector. - [17:58]: Also set the Ecowitt soil sensor back. --- Placed the fabric pot back into the Veg tent. --- Shut off all flow-valves and made sure the (8mm) water source loop had no water pressure. --- Then cut the tubing and installed an RO valve-rig (with 3mm T-fitting). - [18:12]: Finally connected the watering carrot's 3mm fill tube to the valve-rig before turning all flow-valves back on. --- Ca-Caw! Done with the transplant! --- The soil moisture was pretty wet so decided to not water. --- Will continue to check and will water if needed. - [18:20]: Decided to also cull the extra Heady OG BX1 clones. --- Mulched the trimmings and soil. - [18:54]: Checked the Ecowitt soil moisture sensor data: ------------------ [ 3x3 VEG TENT – GR7 / GR3 ] ---------------- ------ 52% - [CH01 » M1 » VBL – TKO #2] ------ 50% - [CH02 » M2 » VBR – Gorilla Goat #1] ------ 43% - [CH03 » M3 » VFL – Chill Out OG #3] ------ 56% - [CH04 » M4 » VFR – Chill Out OG #2] ----------------- [ 4x4 MAIN TENT – GR30 ] --------------- ------ 48% - [CH05 » P1 » FLT – Chill Out OG #2] ------ 64% - [CH06 » P1 » FLB – Chill Out OG #2] ------ 47% - [CH07 » P2 » BLT – TKO #2-2] ------ 62% - [CH08 » P2 » BLB – TKO #2-2] ------ 51% - [CH09 » P3 » FRT – Heady OG BX1 #1] ------ 74% - [CH10 » P3 » FRB – Heady OG BX1 #1] --------- Veg: ~38%-45% | Flower: ~45%-55% --------- General: ~30% [Dry] «| ~45-60% [Moist] |» ~70% [Wet] --- Also updated the soil sensor names a bit. - [19:07]: Checked the 4x4 tent. --- Ooo yea! The garden is thriving and the canopy is still stretching upwards! --- All phenos are looking great and will need to set the second scrog frame layer soon. Nice! --- Not too sure if Chill Out OG will make it to the second netting, but she’s looking healthy and perky so not a big deal. --- Stoked that the under canopy is clean and looking healthy! - [19:17]: Checked on the BluMat soil moisture sensors: ------ Chill Out OG #2 » 51mbars ------ Heady OG BX1 #1 » 46mbars ------ TKO #2 » 53mbars --------- Watering Range: [Too Wet] ~25mbars «| [Ideal Target] ~40-80mbars |» ~125mbars [Too Dry] --------- BluMat Max Values: [10mbars «||» 750mbars] --- All veg clones and cuttings are looking great! --- Need to change the Gorilla Goat cutting’s aloe water out. Also a couple clones need watering. --- Filled a clear cup with fresh RO water (1.5cups). - [20:21]: Gently lifted the PVC rig out of the cup of aloe water and set it gently into the RO cup. --- Going to let these soak for another day before transplanting into Coco Coins for rooting. --- Two clones need watering! - [20:34]: Here are the starting initial watering ranges: ------ TKO #2-1 » 290.7g → 340.5g ------ Gorilla Goat #1-1 » 279.9g → 340.6g --------- General Weight Range: [Dry] ~275g «| [Dryback] ~300g |» ~325g-400g [Wet] --- Both cups were last watered 8 days ago. --- Took the starting weight of both clones before watering, ------ TKO #2-1 » 289.8g ------ Gorilla Goat #1-1 » 295.6g --- While on a scale, --- Evenly misted the top of both cups with RO water. --- Did not spray the top growth. --- Misted 10-20 sprays. Waited a moment, then misted again. --- Repeated this process until both cups weighted at least 300g. --- There was no runoff. - [21:06]: Took the saturated weight of both cups after watering, ------ TKO #2-1 » 355.5g ------ Gorilla Goat #1-1 » 355.4g --- Updated the wet weight and watering dates for both cups. --- Placed both cups back into the tent. - [21:36]: Checked the humidifiers. --- Tanks are still full and no leaks found. Day 04 - Thursday - 02/12/26 - Total Days: 099 ----------------------------------- Daily Averages ~[+01:00] - Temps: 81.5°F [27.5°C] - Humidity: 75.3% - VPD: 0.91 kPa - Soil %: [49, 48, 43, 56, 47, 63, 46, 62, 50, 73] ----------------------------------- - [16:01]: Evening check on the 3x3 veg tent. --- Veg garden is looking incredible and growth is recovering nicely! --- Also veg clones and cuttings are looking good! - [17:03]: Okay! Time to start the rooting process! --- Filled a measuring cup with 1.5 cups of RO water. ------ Added a pinch of Quillaja Saponaria Extract [60] ------ Added 1/64tsp of Horticultural Aloe ------ Added 1/32tsp of Mycrobe Complete --- Mixed the solution thoroughly. - [17:04]: Dropped 2 Coco Coins into the measuring cup. --- The coins immediately started to expand. ------ [» ~5 MINUTES LATER «] --- Placed each fully saturated Coco Coin into half-cut solo cups. - [17:25]: Using a squeeze bottle filled with Clonex, --- Gently filled each pre-made hole with Clonex rooting gel. - [17:38]: Time to plant the cuttings! --- Using a pair of clean trimmers, made a final 45° cut. --- Also stripped and scrapped some of the stem’s outer membrane. --- To help with planting, gave each Coco Coin a squeeze to loosen the coco. --- Made sure to insert each stem straight and snug with the tip about a 1/4 inch from the bottom of the Coco Coin. --- Also secured the stem by pinching and pressing in the top of the Coco Coin. --- Once each cutting was planted, - [18:11]: Placed each Coco Coin into the propagation dome’s tray. --- Made sure to keep each cutting properly tagged. --- Did not spray the top growth with any water, but did fill the bottom of the tray with RO water. --- As far as PPFD, --- At the lowest light intensity (and raised ~14 above the tray), the PPFD is around 42 μmol/m²/s which gives a DLI of 2.72 mol/m²/d under an 18/6 light cycle - [18:18]: Decide to cull TKO #2-2 along with the spare Gorilla Goat cutting. --- Going to mulch the trimmings, but going to add something more to the mulch pot. - [18:23]: Since I also make and drink my own F1 kombucha (helps to maintain healthy gut bacteria along with a great way to lose weight), I have a decent amount of spare scobys. --- Placed a few spare scoby pellicles into a plastic bin. --- Using scissors, chopped up the scoby pellicles into smaller chunks and added the soil and trimmings from the culled clone and cutting. --- Set the container aside. Will top dress the mulch bin in the main tent later. --- Might move the mulch bit to the front of the tent for the next cycle and am thinking about turning it into a potential worm bin. --- Anyways! - [18:41]: Checked the Ecowitt soil moisture sensor data: ------------------ [ 3x3 VEG TENT – GR7 / GR3 ] ---------------- ------ 49% - [CH01 » M1 » VBL – TKO #2] ------ 45% - [CH02 » M2 » VBR – Gorilla Goat #1] ------ 43% - [CH03 » M3 » VFL – Chill Out OG #3] ------ 55% - [CH04 » M4 » VFR – Dry Soil] ----------------- [ 4x4 MAIN TENT – GR30 ] --------------- ------ 47% - [CH05 » P1 » FLT – Chill Out OG #2] ------ 63% - [CH06 » P1 » FLB – Chill Out OG #2] ------ 46% - [CH07 » P2 » BLT – TKO #2-2] ------ 62% - [CH08 » P2 » BLB – TKO #2-2] ------ 50% - [CH09 » P3 » FRT – Heady OG BX1 #1] ------ 72% - [CH10 » P3 » FRB – Heady OG BX1 #1] --------- Veg: ~38%-45% | Flower: ~45%-55% --------- General: ~30% [Dry] «| ~45-60% [Moist] |» ~70% [Wet] - [19:05]: Checked the 4x4 tent. --- Ca-Caw! Let’s go ladies! Wow the garden is looking incredible! --- Growth is ramping up and the canopy is definitely in full stretch! --- The under canopy is looking clean and pots all look great! - [19:09]: Nice! All phenos are showing clear signs of bud crowning! --- Chill Out OG seems to be further along than the rest of the cultivars, flower has officially begun! --- Heady OG and TKO has slight signs of crowning, but will continue to stretch for a few more days. I think. --- Anyways! - [19:17]: Quickly checked on the RO reservoir and auto-watering system. --- Reservoir looked good and no leaks detected. - [20:14]: Took the kombucha top dressing from earlier and spread the mix top of the mulch bin (in the back right of the tent). --- Spread the top dressing out evenly. Since kombucha is naturally and acidic ferment, going to let the top dressing dry out a bit (smells great too). --- Will continue to add leaves and trimming on top after defoliation and toppings. - [20:21]: Okay time to build the second scrog frame layer and re-string the second level of netting! --- Prepped and built the PVC scrog frame outside of the tent. --- Using mason string, restrung the netting and double-looping each screw. --- Once the frame was fully assembled and re-strung, - [22:21]: Placed the PVC riser poles and installed the second scrog frame into the 4x4 tent. --- The first scrog layer is currently about 18.5" from the top soil. --- The second scrog layer is currently about 35" from the top soil. --- Done! - [22:59]: Checked the humidifiers. --- Tanks are still full and no leaks found. Day 05 - Friday - 02/13/26 - Total Days: 100 ----------------------------------- Daily Averages ~[+01:00] - Temps: 82.2°F [27.9°C] - Humidity: 75.7% - VPD: 0.91 kPa - Soil %: [46, 47, 43, 55, 47, 63, 46, 61, 48, 71] ----------------------------------- - [21:16]: Night check on the 4x4 tent. --- Wow the garden is raging with growth! --- The second layer is almost pretty much already full! --- Chill Out OG is chilling in between the netting and looking healthy with signs of bud crowning starting to swell up! --- Both Heady OG and TKO are also continuing to stretch with slight signs of crowning. Nice! --- Let’s go my girls! - [21:24]: Checked the Ecowitt soil moisture sensor data: ------------------ [ 3x3 VEG TENT – GR7 / GR3 ] ---------------- ------ 46% - [CH01 » M1 » VBL – TKO #2] ------ 50% - [CH02 » M2 » VBR – Gorilla Goat #1] ------ 43% - [CH03 » M3 » VFL – Chill Out OG #3] ------ 55% - [CH04 » M4 » VFR – Chill Out OG #2] ----------------- [ 4x4 MAIN TENT – GR30 ] --------------- ------ 47% - [CH05 » P1 » FLT – Chill Out OG #2] ------ 62% - [CH06 » P1 » FLB – Chill Out OG #2] ------ 46% - [CH07 » P2 » BLT – TKO #2-2] ------ 60% - [CH08 » P2 » BLB – TKO #2-2] ------ 48% - [CH09 » P3 » FRT – Heady OG BX1 #1] ------ 71% - [CH10 » P3 » FRB – Heady OG BX1 #1] --------- Veg: ~38%-45% | Flower: ~45%-55% --------- General: ~30% [Dry] «| ~45-60% [Moist] |» ~70% [Wet] - [21:26]: Checked the 3x3 veg tent. --- The veg garden is looking nice and perky with healthy growth! --- A Garlic Budder clone needs watering. Let’s go Ensign! - [21:37]: Here is the starting initial watering range: ------ Garlic Budder OG#1-1 » 299.1g → 340.6g --------- General Weight Range: [Dry] ~275g «| [Dryback] ~300g |» ~325g-400g [Wet] --- Been 8 days since the last watering. --- Took the starting weight before watering, ------ Garlic Budder OG#1-1 » 298.5g --- While on a scale, --- Evenly misted the top of the cup with RO water. --- Did not spray the top growth. --- Misted 10-20 sprays. Waited a moment, then misted again. --- Repeated this process until the cup weighted at least 300g. --- There was no runoff. - [21:43]: Took the saturated weight after watering, ------ Garlic Budder OG#1-1 » 355.6g --- Updated the wet weight and watering date. --- Placed the cup back into the tent. --- Gorilla Goat cuttings are looking great in the propagation tray! No need to spray or water. Great! - [22:04]: Checked the humidifiers. --- Tanks are still full and no leaks found. Day 06 - Saturday - 02/14/26 - Total Days: 101 ----------------------------------- Daily Averages ~[+01:00] - Temps: 80.9°F [27.2°C] - Humidity: 75.7% - VPD: 0.88 kPa - Soil %: [48, 47, 43, 54, 48, 62, 47, 60, 47, 70] ----------------------------------- - [19:01]: Night check on the 4x4 tent. --- Ooo yea! The garden is looking healthy and looking great! --- Ca-Caw! Heady OG is still raging upwards and stretching through the netting - [17:14]: Checked the Ecowitt soil moisture sensor data: ------------------ [ 3x3 VEG TENT – GR7 / GR3 ] ---------------- ------ 52% - [CH01 » M1 » VBL – TKO #2] ------ 50% - [CH02 » M2 » VBR – Gorilla Goat #1] ------ 43% - [CH03 » M3 » VFL – Chill Out OG #3] ------ 54% - [CH04 » M4 » VFR – Chill Out OG #2] ----------------- [ 4x4 MAIN TENT – GR30 ] --------------- ------ 46% - [CH05 » P1 » FLT – Chill Out OG #2] ------ 61% - [CH06 » P1 » FLB – Chill Out OG #2] ------ 46% - [CH07 » P2 » BLT – TKO #2-2] ------ 60% - [CH08 » P2 » BLB – TKO #2-2] ------ 47% - [CH09 » P3 » FRT – Heady OG BX1 #1] ------ 70% - [CH10 » P3 » FRB – Heady OG BX1 #1] --------- Veg: ~38%-45% | Flower: ~45%-55% --------- General: ~30% [Dry] «| ~45-60% [Moist] |» ~70% [Wet] - [19:18]: Checked the 3x3 veg tent. --- Veg garden is looking great and growth is healthy and green! --- A Garlic Budder clone needs watering! - [19:25]: Here is the starting initial watering range: ------ Garlic Budder OG#1-2 » 279.2g → 340.3g --------- General Weight Range: [Dry] ~275g «| [Dryback] ~300g |» ~325g-400g [Wet] --- Been 9 days since the last watering. --- Took the starting weight before watering, ------ Garlic Budder OG#1-2 » 297.3g --- While on a scale, --- Evenly misted the top of the cup with RO water. --- Did not spray the top growth. --- Misted 10-20 sprays. Waited a moment, then misted again. --- Repeated this process until the cup weighted at least 300g. --- There was no runoff. - [19:40]: Took the saturated weight after watering, ------ Garlic Budder OG#1-2 » 355.5g --- Updated the wet weight and watering date. --- Placed the cup back into the tent. - [20:01]: Checked the humidifiers. --- Tanks are still full and no leaks found. Day 07 - Sunday - 02/15/26 - Total Days: 102 ----------------------------------- Daily Averages ~[+01:00] - Temps: 80.8°F [27.1°C] - Humidity: 76.2% - VPD: 0.85 kPa - Soil %: [47, 47, 43, 54, 50, 62, 49, 60, 45, 69] ----------------------------------- - [19:04]: Night check on the 4x4 tent. --- Ooo yea! Let’s grow my ladies!! --- The canopy is packed with bud top crowns and the mid canopy (in between the netting) is getting really dense! --- Plan to do a deep defoliation soon, but going to let everything grow and stretch upwards for now. --- Grow strong my girls! - [19:11]: Checked on the BluMat soil moisture sensors: ------ Chill Out OG #2 » 38mbars ------ Heady OG BX1 #1 » 93mbars ------ TKO #2 » 43mbars --------- Watering Range: [Too Wet] ~25mbars «| [Ideal Target] ~40-80mbars |» ~125mbars [Too Dry] --------- BluMat Max Values: [10mbars «||» 750mbars] - [19:14]: Decided to make a slight adjustment to Heady OG’s watering carrot. --- Using the provided allen key, increased the water moisture by turning the BluMat’s tension cap slightly counter-clockwise. - [19:18]: Checked the Ecowitt soil moisture sensor data: ------------------ [ 3x3 VEG TENT – GR7 / GR3 ] ---------------- ------ 44% - [CH01 » M1 » VBL – TKO #2] ------ 47% - [CH02 » M2 » VBR – Gorilla Goat #1] ------ 43% - [CH03 » M3 » VFL – Chill Out OG #3] ------ 54% - [CH04 » M4 » VFR – Chill Out OG #2] ----------------- [ 4x4 MAIN TENT – GR30 ] --------------- ------ 51% - [CH05 » P1 » FLT – Chill Out OG #2] ------ 63% - [CH06 » P1 » FLB – Chill Out OG #2] ------ 50% - [CH07 » P2 » BLT – TKO #2-2] ------ 60% - [CH08 » P2 » BLB – TKO #2-2] ------ 45% - [CH09 » P3 » FRT – Heady OG BX1 #1] ------ 69% - [CH10 » P3 » FRB – Heady OG BX1 #1] --------- Veg: ~38%-45% | Flower: ~45%-55% --------- General: ~30% [Dry] «| ~45-60% [Moist] |» ~70% [Wet] - [19:22]: Checked the 3x3 veg tent. --- Veg garden is looking great and all top growth is green and perky! --- Clones are also looking good and don’t need watering. Nice! --- Gorilla Goat cutting in the propagation tray look green and healthy! --- Easy night in the veg garden! - [20:15]: Checked the humidifiers. --- Tanks are still full and no leaks found. --- Another grow week done! --- The main tent has begun to flower and the stretch has started to slow down for the most part. Almost time for a top dressing! --- Probably need to defoliate again soon. Just stoked that growth is all around healthier than ever! --- As for the veg garden, there’s work to be done and plan to overhaul the veg garden to be able to better preserve my current (and future) genetics. --- Anyways, onwards to next week Ensign! [END OF WEEK 15]
Likes
11
Share
Week 15 - August 09, 2020 -Day 99 08/09: We’re almost at the end. I gave Aaliyah her first watering with plain water. I’m planning on chopping the top colas off of her in a week. Hopefully I can get something out of the lower growth that isn’t getting any light right now. Alexis is coming down in two and Annie in three. Annie has some damage due to the light, but she is hanging in there. Alexis looks the healthiest overall. She stayed pretty compact, so light is still able to reach her lower parts. I think I could’ve had a better grow overall if I would have stuck with using only 3-gallon pots. [General notes: The nutrients on the diary are based off what I’m giving Aaliyah. Alexis is on the previous weeks schedule and Annie in the schedule from two weeks ago.]
Likes
24
Share
@m0use
Follow
***Sponsored Grow*** = Medic || https://medicgrow.com || Grow = ***Sponsored Grow*** This week has been interesting, I was getting some weird runoff numbers in terms of EC/PPM and PH, so I decided to try and bring the PH up with a flush of high PH water into the medium. I did not have any PH up on hand so I used borax, PH of 9-10 plus it will help kill off any microbes in the soil that I believe is causing the PH swings. After doing this and getting the PH I wanted in the solution I released that the amount of B in the solution was to high and would cause more issues down the road, It was late in the day so I left the next flush to fix the excess B till tomorrow morning. Morning came and when I processed to flush I added in a bit of peroxide to the water and a dash of dish soap to break the waters surface tension so it flows through the pots more easily. This was going fine till it started to not drain out at all. I think it was foaming up in the medium and preventing a normal flow, plus on two of the pots I lost my perlite that sits on the top of the medium. I had to massage the pots "like when you transplant" to make then start draining again and then purchased a Yucca extract to help it flow through. Everything is back to normal. The pots are really root bound and should be transplanted but its mid flower and that's not going to be happening. I also don't know if I'd even have the space for it. I added in a b1 vitamin as well on recommendation of grow shop as apparently their other lineup I purchased did not have any. No idea if its working well only first week in the feeding. The Cytokelp is fun, but the one hormone in it is similar to a PGR but its not a real PGR. I am skeptical of it and not using it as foliar, just root watering. I also added in a bit of CaMg supplement that gave the plants a boost in N and Ca. The mg of this product was lesser then others I have seen about a 5:1 ratio of Ca to Mg. after the big flushes the runoff was hitting 120ppm so I gave it a good feed at 1.8EC Time will tell If i fucked it up royally by doing all this, this ETS plant is still going strong and is the 2nd best plant in the tent, it very well may get 1st some harvest time as I was detecting some strong whiffs of a kushy berry smell coming off it, it was sexy as fuck! All the plants are still stretching but it seems slow to me. Maybe it will continue going but it only put on about 2cm in the last week and a half. Feels slow. I may see more stretching in the next week upcoming and it just had a ruff start. Lights still running at 100% with V1 spectrum, everything seems to be working just fine, no light burn. Till next week. ***Sponsored Grow*** Official Website: https://medicgrow.com/ + https://www.emeraldtriangleseeds.co.uk/ Facebook: https://www.facebook.com/medicgrowled + https://www.facebook.com/OriginalETS/ Twitter: https://twitter.com/medicgrow + https://twitter.com/emeraldseeds Instagram: https://www.instagram.com/medicgrow420/ + https://www.instagram.com/emeraldtriangleseeds/ YouTube: https://www.youtube.com/channel/UCNmiY4F9z94u-8eGj7R1CSQ Growdiaries: https://growdiaries.com/grower/medicgrowled https://growdiaries.com/grow-lights/medic-grow + https://growdiaries.com/grower/emeraldtriangleseeds https://growdiaries.com/seedbank/emerald-triangle-seeds
Likes
2
Share
Likes
48
Share
Gather 'round, because it's time for the grand finale of my Tropicana Cookies Auto journey. Week 10 has arrived, and boy, oh boy, this gal has been an absolute delight from start to finish. Let's dive into the final chapter of this epic adventure! I harvested my lovely lady at day 69 from seed, and let me tell you, it was a celebration of beauty and abundance. Picture this: a majestic all-girl harvest, suspended upside down for a glorious two-week drying extravaganza. At a temperature of 60 degrees Fahrenheit (15 degrees Celsius) and a relative humidity of 60%, the drying process unfolded like a symphony of perfection. Now, let's talk trichomes, shall we? Oh, those glorious little resin factories! This Tropicana Cookies Auto has blown my mind with the sheer amount of trichomes it boasts. It's like a frosty wonderland, sparkling like a million tiny diamonds. I've never seen trichomes in such numbers, shapes, and colors before. It's a trichome party, and everyone's invited! But let's not forget the benefits of the drying process. By allowing our precious buds to dry slowly and evenly, we're enhancing their flavors, aromas, and overall quality. It's like fine wine, my friends, getting better with age. Patience is the name of the game, and trust me, the reward is worth every second of anticipation. Now, let me take a moment to give a big shout-out to @Fast_Buds. They've truly outdone themselves with this Tropicana Cookies Auto. It's like they sprinkled magical trichome dust all over these seeds, ensuring a frosty experience like no other. They've got the genetics game on lock! So, my fellow cannabis enthusiasts, as we bid farewell to this remarkable journey, let's cherish the memories, the lessons learned, and the joy shared. From seed to harvest, this Tropicana Cookies Auto has captured our hearts and ignited our passion for the green wonders of the world. May your drying process be smooth, your trichomes plentiful, and your buds burst with flavor. Thank you, Tropicana Cookies Auto, for gracing my garden with your extraordinary presence. You've left an indelible mark in my cannabis-growing adventures. Keep cultivating with love, spreading the joy of this amazing and holy plant we all love so much, and remember, my friends, trichomes are like the glitter of the cannabis world—bright, beautiful, and absolutely fabulous! As always thank you all for stopping by and for supporting me on this journey, i am super passion about growing and fell blessed to have you all with me on this new journey <3 <3 <3 Genetics - Fast Buds Tropicana Cookies Auto Ligth - LUMATEK ZEUS 465 COMPACT PRO 
Food - APTUS HOLLAND 
 Tent - MARS HYDRO 
All info and full product details can be find in can find @ https://2fast4buds.com/ 

https://aptus-holland.com/
 
https://autopot.co.uk/ 

https://lumatek-lighting.com/ <3 <3 <3 Growers love to you all <3 <3 <3 Tropicana Cookies Auto is the perfect variety for growers of all levels, especially beginners as this strain performs very well outdoors and indoors, and can produce up to 500gr/m2 in 56-63 days without needing extra maintenance. Reaching up to 110cm, this strain grows fairly tall with medium-sized branching, showing its mixed heritage. Definitely the right choice for those with a high tolerance looking to get their hands on the strongest autoflowers out there. Thanks to the 27% THC, you can expect an extremely powerful and long-lasting high that’ll boost your mood and give you that extra push you need to start your days on the right foot. This variety offers the whole range of citrusy and woody flavors with a strong candy-sweet background that will keep you coming back for more and more. Bud description Tropicana Cookies Auto produces gorgeous dark purple flowers, so expect really dark buds with gorgeous hues of pink, purple and blue, and thick dark-orange hairs that get completely covered in resin by harvest time, giving them an almost shiny-white appearance. This variety develops a typical Indica-like structure and very few sugar leaves that will make your trimming sessions a breeze. But make sure to store your trimmings as the gorgeous flowers reek of a mouth-watering blend of lemon peels, orange juice, and sandalwood that gives it almost a citrus candy-like flavor that makes for the most aromatic hash and extractions.Smoke report Thanks to the 27% THC, Tropicana Cookies Auto’s effect starts with an energizing head rush that gets your mind up and running while leaving you in a nice calm state. As the Indica-dominant side kicks in, the powerful cerebral effect gradually moves downwards and hits your whole body with a deep relaxation that leaves you with a joyful stoney sensation that alleviates chronic pain while leaving you in an overall happy and positive state of mind. It’s the perfect daytime and nighttime strain as it can boost your mood and enhance a night out with friends but can also quiet your mind as you get ready for a good night of sleep. No matter the scenario, expect a powerful high that lasts for hours on end.Plant appearance Tropicana Cookies Auto reaches up to 110cm and develops a tall main cola with shorter side branches, typical of hybrid strains. You can expect a stocky yet tall main cola with medium-sized side branches and thin fan leaves that fade into a yellowish hue with a beautiful dark purple tint. Thanks to the excellent selection, this variety develops a short internodal spacing that makes the medium-sized flowers look like they’re growing stacked on top of each other. It’s the ideal choice for growers who want to get big yields without having to deal with huge plants, as this monster yielder can produce up to 150g per plant while growing relatively short. Grow tips This variety grows super dense buds so make sure to space out the branches by tying them down, this way you improve airflow which helps prevent mold and other pests. Tropicana Cookies auto reek of a delicious sweet and sour smell so make sure to flush thoroughly to enhance the aromas even more. This terpene heavyweight finishes with lots of resinous sugar leaves that make for fantastic hash and extractions so remember to have your trim bucket ready!Flavor Tropicana Cookies Auto boasts remarkably sweet flavors that resemble a blend of lemon peels and fresh orange juice, with subtle floral undertones that make it the perfect choice for extractors looking for unique terpene profiles. Expect an overall citrusy zest that’ll coat your whole mouth and leave a delicious tropical candy-like flavor aftertaste. The sweet and sour flavors get balanced out with a herbal background that gets stronger as you exhale and gradually opens up, bringing out the whole range of woody, floral, and spicy flavors, making it the perfect choice for the most flavorful extracts
Likes
17
Share
@JonnyKush
Follow
hey guys sorry for the absence but in this period I have had a lot to do with my work and I have not been able to bring a good detailed diary, but finally now the holidays will start and I will be able to dedicate myself 110% to a new crop and new ones diaries. having said that, I think I will leave him a week at the most and finally reap the benefits 💚🌳💚🌳maybe my fault the RQS slow release nutrients did not perform as much as the ADVs in my tent, you can see it from the video of 27/07/22 where you can see that 2 out of 6 plants are visually leaner and less compact to the touch , I wanted to try on the same varieties in order to have feedback. I think it could also be caused by the crowding of the tent but with the ADV I have not encountered any problems. I will definitely try them again, giving them much more attention.
Likes
43
Share
Flowering day 25 since time change to 12/12 h. Hey guys :-) . The ladies are developing more and more beautiful and fat week after week 😊. The tent fills up perfectly 👌. I removed the bottom shoots to allow the energy to flow to the top buds. This week it was watered 3 times with 1.3 l each (nutrients see table above) Otherwise everything was cleaned and checked. Have fun and stay healthy 💚🙏🏻 👇🏼👇🏼👇🏼👇🏼👇🏼👇🏼👇🏼👇🏼👇🏼👇🏼👇🏼👇🏼 You can buy this Nutrients at : https://greenbuzzliquids.com/en/shop/ With the discount code: Made_in_Germany you get a discount of 15% on all products from an order value of 100 euros. 👇🏼👇🏼👇🏼👇🏼👇🏼👇🏼👇🏼👇🏼👇🏼👇🏼👇🏼👇🏼 You can buy this strain at : https://www.exoticseed.eu/ Water 💧 💧💧 Osmosis water mixed with normal water (24 hours stale that the chlorine evaporates) to 0.2 EC. Add Cal / Mag to 0.4 Ec Ph with Organic Ph - to 5.8 - 6.5 MadeInGermany
Likes
23
Share
Toda esta fantasía se hace realidad gracias a Royal Queen Seeds y @James por confiar en mí. 🚀💥 Fiel a su linaje genético, la Hyperion F1 ofrece un aroma intenso que está dominado por notas frescas de pino y hierba, junto con un trasfondo terroso y un delicioso toque especiado. Aunque todos nuestros híbridos F1 producen excelentes concentraciones de cannabinoides y terpenos, no hay duda de que la Hyperion destaca entre el resto. Sus cogollos alargados y escarchados producen una resina rica y cargada de cannabinoides (sobre todo THC), y terpenos como mirceno, ocimeno, farneseno, terpinoleno, cariofileno y humuleno. Esto no solo da lugar a un aroma muy fuerte, sino también a un efecto bien equilibrado que combina una relajación física (en gran parte gracias al mirceno y al farneseno) con la euforia, risa y efecto motivador de otros terpenos. Al igual que el dios de la luz del mismo nombre, la Hyperion F1 causa un subidón esclarecedor que se puede disfrutar a cualquier hora del día. 🌻🚀 Consigue aqui tus semillas: https://www.royalqueenseeds.es/semillas-de-marihuana-hibridas-f1/622-hyperion-f1.html 🍣🍦🌴 Xpert Nutrients es una empresa especializada en la producción y comercialización de fertilizantes líquidos y tierras, que garantizan excelentes cosechas y un crecimiento activo para sus plantas durante todas las fases de cultivo. Consigue aqui tus Nutrientes: https://xpertnutrients.com/es/shop/ 📆 Semana 5: Un temporal ha ralentizado el crecimiento, aunque ella sigue creciendo algo mas lento. No riego esta semana porque hay lluvias constantes que mantienen la humedad en el suelo. Esta semana creo que apareceran las preflores
Likes
11
Share
Hello Growers & Tokers! The route to having a jungle starts with the roots! That's why my main goal in those first 14-21 days is developing the root system. I like to give them time to expand the roots which is very important for a healthy plant. That also gives them more time to get bigger and stronger before going into flower. More growth, more bud sites, more buds. Trust me the wait is worth the reward. We'll be seeing some truly sweet and zenzational flowers. This week they got transplanted to their final pot, 11L fabric pots. It's one step closer to getting that jungle, zenzational! Medium used was Light Mix from BioBizz. Synergy from Grotek nutrients was blended in the medium to help out the roots. Let the mycorrhizae do its job and take over the soil, then the roots just follow. Take care out there and happy growing!
Likes
20
Share
@Roberts
Follow
She grew well for the little time I spent with her. She grew fast as upping my room temps a few degrees sped the process up. She has a good smell and I will be back to update on a smoke report in a few months once it is dried, cured, and trimmed. Thank you, Medic Grow, and ILGM. 🤜🏻🤛🏻🌱🌱🌱 Thank you grow diaries community for the 👇likes👇, follows, comments, and subscriptions on my YouTube channel👇. ❄️🌱🍻 Happy Growing 🌱🌱🌱 https://youtube.com/channel/UCAhN7yRzWLpcaRHhMIQ7X4g.
Likes
11
Share
Hello Diary, Purple Lemonade has reached the end of its journey, its last week because I harvested it two days after taking the photo. 73 days since I put the seeds in the ground. 65 days since the start of the vegetation. Really very fast, although that has somehow become the standard on my little "Farm". But I am still fascinated by how quickly a plant goes through its cycle when it has the most ideal conditions. I don't necessarily mean myself here, I try to give the plants the best I can and know how. As you can see in the photos, the result is impressive. The flowers are large and showy, the branches bend under their weight. The main cola is especially noticeable because it is covered in flowers full of trichomes that create a frost effect. The smell is very intense at this stage, the whole room smells like plants when I open the grow box. Watering was standard, every three days. This week I stopped adding nutrients, I just lower the p.H. to 6.0 and water the plants with clean water. After taking the photo, it was in the grow box for two more days to drink all the water from the soil so that the drying would be more efficient. Before cutting, I removed all the leaves from the plant to also make drying easier and have less work to trim the dried flowers. But also to prevent the formation of potential mold. After cutting, I left it upside down in the grow box to dry. Now there is that last step to see how much Purple Lemonade really rewarded me. See you when that happens. Here's what the last week looked like. 19/09/2024 - Day 57. Watering. I prepared 9 liters of water, lowered the pH to 6.0 and used that amount to water all three plants on the farm. 22/09/2024 - Day 60. Watering. I repeated the same procedure as three days earlier. 24/09/2024 - Day 62. I watered them all with 1.5 liters of water each plant so that they were fresh for the photo shoot. 25/09/2024 - Day 63. End of the last, 9th week since Purple Lemonade began its journey. Photo shoot. 27/09/2024 - Day 65. Purple Lemonade has been harvested. That's almost all from me for this diary, there is still the final report that follows after drying and testing. Thank you all once again for your support and comments.
Likes
61
Share
@IndiCat
Follow
Likes
10
Share
@nonick123
Follow
🚀 4 clones de Blueberry Pie F1 Fast seleccionados por @stacksfarmsltd - https://www.instagram.com/stacksfarmsltd 🚀 Breeding by @seedsmangenetics - https://www.seedsman.com/eu-en/blueberry-pie-f1-fast-feminised-seeds-sman-blpi-fast-fem 💦 BioTabs 15% DISCOUNT code "GDBT420" biotabs.nl/en/shop/ @biotabs_official 🌱Substrate PRO-MIX HP BACILLUS + MYCORRHIZAE @promixmitch @promixgrowers_unfiltered 💡2 x Mars Hydro FC1500 EVO Led Grow Light (2024 NEW FC 1500-EVO Samsung LM301H 150W LED) - https://marshydro.eu/products/fc1500-evo-led-grow-lights/ - https://www.amazon.de/dp/B0CSSGN5D8?ref=myi_title_dp
Likes
26
Share
@Agrocann
Follow
It was a last week of flowering. Next week will post a photos of a harvest. Some conclusions from the current grow- It is looks like there was too much light. Many top leaves were too dry. Next grow will use only one 240W lamp
Likes
5
Share
@Bluemels
Follow
Tag 45: Leider hat eine Pflanzen braune Flecken bekommen. Vielleicht weil ich den Ph wert einmal bei 6,2 hatte? Der anderen Pflanze hat es nicht geschadet. Die schlimmsten Blätter hab ich heute mal entfernt, jedoch scheint sich das ganze noch weiter auszubreiten. Zum Glück ist es nicht mehr lange bis zur Ernte. Diese sollte spätestens in 4 Wochen sein laut RQ.
Likes
15
Share
Black Cream Starting To flower. Beautifull plant.. It as came to the first scrog level. Started Training. Dont know if it let her got or make another scrog level. Please share your ideias. Scrog Its new for me but in small budget space i get it. ... this its the way to go. Bomberry its a slowstarter maybe gave her a little more water in seedling fase. The pots are big and it was dificult to control seedling moist at begening.... Killed 3 seedlings. Wedding Cake looking good Purple Couscous Tink its going to be another beast. Share Idias. Sensores with possibel integration. i will make it work. Hope You Like This Diferent Aprotche To The Culture
Likes
10
Share
Everything is looking good and doing good . Not bad for my first run . Also I would love to know about any nutrients that you use . Looking to try new ones so leave a comment .