


Likes
Comments
Share



Likes
10
Share


@LowzGrowz
Follow
Was Easy Going No Issue
Smaller side but didnt do much just let her go
little over water @ Times from all the Rain was having...
but she handled it

Likes
37
Share


@StickyFingah420
Follow
Una gran variedad, la verdad es que las 3 novedades auto que cultivé de este banco me sorprendieron bastante.
Cogollos hermosos fragante a frutas y dulce una combinación que te hará babear!

Likes
38
Share


@RussianGrower
Follow
Приветствую своих друзей из разных уголков мира. Я приношу извинения за то, что я делаю не регулярные обновления, так как у меня очень много работы перед небольшим отпуском. Поэтому я хочу сделать как можно больше. Я собираю информацию о каждом своём дневнике.
Если вы следите за мной, то вы знаете, что я веду несколько дневников партизанского выращивания. Данные растения от Доктор Выбор я вынес на болоте с высоким камышом, после чего я пересадил растения в 10-12 литровые горшки и добавил корневых стимуляторов. Результаты прогресса видны сразу. Растения увеличили свой размер практически в 2 раза. Это полностью 100% сатива стиль.
Есть некоторые проблемы с насекомыми и слизнями, некоторые листья были покусаны, поэтому завтра я отправлюсь бороться с вредителями. А так же я планирую транспортировать туда ещё несколько других штаммов, в том числе один из штаммов будут растения Доктор Выбор, так как ценю его работу за тесные связи с Россией.
В целом у меня всё хорошо и потихоньку все мои дневники развиваются. Если вам интересно следить, за приключениями травки в России, подписывайтесь на мои дневники


Likes
78
Share


@Roberts
Follow
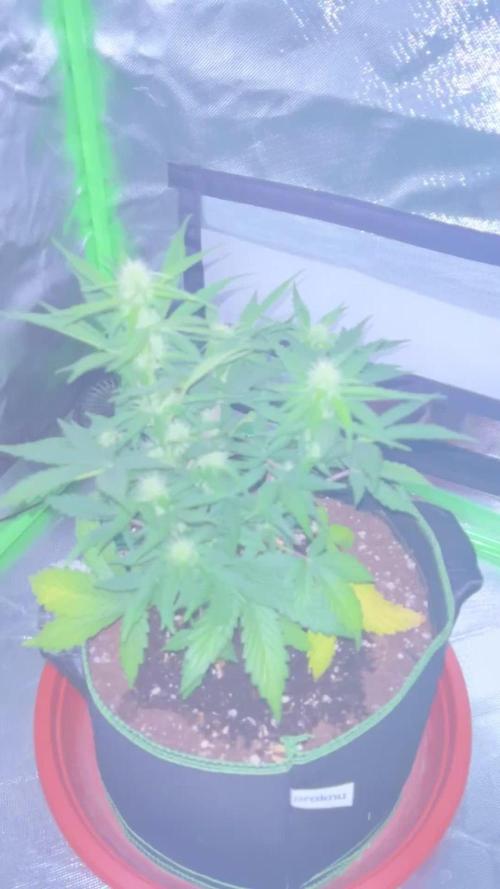
Pure Ice cream is doing great under the Spider Farmer G5000/UVR40 lights. I just switched to a 12/12 schedule today. I will be doing a solution change in a few days to a blooming mix. Everything is looking great at the moment. Thank you Spider Farmer, Athena, and Pure Instinto Seeds. 🤜🏻🤛🏻🌱🌱🌱
Thank you grow diaries community for the 👇likes👇, follows, comments, and subscriptions on my YouTube channel👇. ❄️🌱🍻
Happy Growing 🌱🌱🌱
https://youtube.com/channel/UCAhN7yRzWLpcaRHhMIQ7X4g
Spider Farmer Official Website Links:
US&Worldwide: https://www.spider-farmer.com
CA: https://spiderfarmer.ca
UK: https://spiderfarmer.co.uk
EU: https://spiderfarmer.eu
AU: https://spiderfarmer.com.au
G5000 Light Amazon Link:
amzn.to/4643esa
UVR 40:
https://www.amazon.com/dp/B0BR7SGTHS
Discount code: saveurcash (Stackable)



Likes
119
Share


@Wicket
Follow
And im in first flowering Week since last sunday, so far i really can't complain. Everything looks healthy and fine.
Plant 3 is still kinda weaker/slower and Plant 4 seems to want to do some sativa things and grows up like hell but oh well, at least Plant 1 and 2 just grow as they should.
This week i made the Bio Tabs compost tea for the first time and the plants seem to love it. Each one received 500ml if it.
Can't wait to see the results at the end of the run. Again thanks to Bio Tabs for sending it out so i can test it.
Humidity was pretty high because of constant rain this week, but it seems like i have made it through it, now just to make sure to finish this run before the summer heat will come.
I removed a few leaves here and there because they were stacking or blocking light, i will defoliate in 1-2 weeks for real.
Sadly Plant 4 needed an even higher stool then last weeks, so it's on the same height as the others. It was getting not enough light this deep down. That is also because why the scrog net does look like it does right now. I try to make it more "appealing" tonight, but i don't want to break anything and it works like it should right now, so yeah it looks stupid but it's alright.
See you next week and thanks for all the likes and comments. 😍🙌

Likes
14
Share


@Chuckwaggon420
Follow
These 3 girls have just completly taken over the flowering tent just massive! Keeps changing the light i raise it and they back at it again next couple days! Think they slowing a little possibly as u can see some bud clusters starting to form. That also tells me she is ready for a hair cut to get that light in there more!
They have a great strong kush smell when u do a stem rub but I don't smell anything at tent opening yet. They been getting heavy canna dose of nutrients for the steeach will see if they need another week of that dose if they chase the light again or if going to flower development now.
Food every 2 days around 3 L till runoff at ph of 5.6-5.7. I like how the canna nutrients when ur in correct ph range it foams so u know ur getting close. I have really came to like the stuff. Great results compared to past soil grows. Nutrients being more ready for the plants like force feeding is way faster for growth.
Like I mentioned will do hair cut over next week possibly start to see some more bud development over the next week also. Love yall.
Likes
2
Share


@EtnoGrow
Follow
el segundo corte luego 15 dias o dos semanas, ya mas maduro punto mixto temprano, cogollos ambar y blancos nublados, predominantemente blancos . se ve con mejor pinta que el primer corte
Likes
18
Share


@Jays_Not_Here_Man
Follow
Week 1 (Day 7) Flower- Running with the Indo nutrient line, easy to use, 3 bottles. They were recommended from the friend I got the clones from, and his did great. The girls started to stretch immediately, waited till day 7 flower to start the Flowering nutrient dosages.
Setup:
2x4x5 AC Infinity Tent
X2 LED 600 watt (blurples ☹️)
X2 6” clip on fans for canopy and light heat
Floor fan pushing fresh air from the bottom
Vivosun 4”in-line fan/12” carbon filter
Humidifier in the tent
Dehumidifier In the lung room for excess Rh
Timers set to 11 hours 💡/ 13 hours 🌜💤
Likes
27
Share


@Oetelando
Follow
We have Day 2 of Week 5 from flowering.
Everything looks green and nice.
The Buds get every day Bigger and more and more Frosty.
Wir sind in der 5. Blütewoche und alles läuft perfekt die Buds werden größer,keine Zickt rum und die zeit zur ernte Nähert sich langsam.


Processing
Likes
12
Share


@Tazard
Follow
These are clones that I managed to take from my summer garden that became a disaster due to a heat wave that we had breaking 100 year records. I expect everything to be 48” in height at maturity.

Likes
8
Share


@BoredSangheili
Follow
Was fun to grow. Wish I used a little more nitrogen in the beginning, but I through this plant into flower pretty fast. Results seem amazing!0000


Likes
101
Share


@WhiteEdge
Follow
23.04.2024
Continue into week 8
Replaced all filters in the system and cleaned them.
Mixed a new batch with the following components:
20+25ml AN Connoisseur Bloom A+B
Total volume: 34 liters
Electrical Conductivity (EC): 1.0
Target EC for this week: 0.8-1.0. Adjustments will be based on plant observations.
Performed one long misting session (3 minutes).
Environmental Conditions:
Outside temperatures going up, today is raining but this week start higher temps and humidity
Wedding Cheesecake: One girl is gonna finish in this week, Two others probably in next. Frutti terps in this, Two pheno in total from 3 girls'
Tropicana Cookies: Phenomenal strain; One girl is going to finish this week and second couple days after . Two pheno in Tropicana's girls
Purple Lemonade: Tall plants, massive producer, all three girls will be in 9 week provably. Here so far all three girl share same characteristics and bud structure
Beautiful and high odor in the room!
Lighting Parameters: PAR Map: Maximum PPFD is 950, minimum PPFD is 650.
VPD: Ranges from -1.1 to -1.2.
Daytime Temperature (DT): 23-24°C.
Nighttime Temperature (NT): 19-20°C.
Leaf Temperature: 21-22°C.
Light Distance: 45-55 cm from the plants.
CO2 Levels: 700+ ppm.
HLG Scorpion Diablo: Set at 70%, positioned at a 45-55 cm distance.
Girls drink less water, so for this week and till the end of flowering new misting timing's
Daytime: ON for 70 seconds, followed by 30 minutes OFF.
Nighttime: OFF for 70 seconds, followed by 35 minutes OFF.
Nutrient Tank (NT):
pH: Maintained between 5.80 and 6.00. Stable PH, small drifting up and downs
EC: 1.05.
Temperature: 19-21°C
25.04.2024
TrolMaster toys arrived! Purchase new DST2E, DSP2E, DSH2E, AMP3+probes. Another DSH2E and DSP2E ordered to complete this grow box!
Replaced all filters in the system and cleaned them.
Mixed a new batch with the following components:
25+30ml AN Connoisseur Bloom A+B. Total volume: 17 liters
Electrical Conductivity (EC): 1.05
Tomorrow Tropicana Cookies harvest! Put bucket with this girl on separate line for flushing
Wedding Cheesecake also finish soon, probably in next week, Wednesday think...
Purple Lemonade still need full week or more...Exceptional odors
Temps and humidity outside start to raises, hope i will finish this run before Tropical heat
Lighting Parameters: PAR Map: Maximum PPFD is 950, minimum PPFD is 650.
VPD: Ranges from -1.0 to -1.1.
Daytime Temperature (DT): 23-24°C.
Nighttime Temperature (NT): 19-20°C.
Leaf Temperature: 21-22°C.
Light Distance: 45-55 cm from the plants.
CO2 Levels: 700+ ppm.
HLG Scorpion Diablo: Set at 70%, positioned at a 45-55 cm distance.
Daytime: ON for 70 seconds, followed by 30 minutes OFF.
Nighttime: OFF for 70 seconds, followed by 35 minutes OFF.
Nutrient Tank (NT):
pH: Maintained between 5.80 and 5.95. Stable PH...
EC: 1.05.
Temperature: 19-21°C
26.04.2024
Connect TrolMaster components into the Tent-X system. Program DSP2E, Temperature DST2E, Humidity DSH2E, as well as the AMP3 sensor with PH and EC probes, are all in place.
After calibrating the probes, AMP3 module works perfectly! It has a quick response in measurements, is accurate, and I am very happy about the possibility of online monitoring of liquid values.
After day off use i can tell that all readings are very consistent, compared with Milwaukee, totally without all over the place measurements. Perfectly steady and on spot receding!
The Program device runs flawlessly all day, and I hope it has solved all the problems I had with DH48-S timers.
The humidity control operates without errors throughout the day, and it’s nice to see in the app when the module is active.
Raise light as much as i can..50-55cm from canopy. Set off misting time from 30min to 35min @ day time , and from 35min to 45min @ night time
Flush Tropicana Cookies' for one more day, tomorrow harvest, prepared tent for drying with humidifier , ventilation and temperature and humidity controllers
PAR Map: Maximum PPFD is 850, minimum PPFD is 500.
VPD: Ranges from 1.0 to 1.1.
Daytime Temperature (DT): 23-24°C.
Nighttime Temperature (NT): 19-20°C.
Leaf Temperature: 21-22°C.
Light Distance: 45-55 cm from the plants.
CO2 Levels: 700+ ppm.
HLG Scorpion Diablo: Set at 65%, positioned at a 50-55 cm distance.
Daytime: ON for 70 seconds, followed by 35 minutes OFF.
Nighttime: OFF for 70 seconds, followed by 45 minutes OFF.
Nutrient Tank (NT):
pH: Maintained between 5.80 and 5.95. Stable PH...
EC: 1.05.
Temperature: 19-21°C
28.04.2024
First harvest in this run! Tropicana Cookies No1 is a winner.) First Tropicana Cookies is harvested on 89 day from seed. Total 55 days off flowering.
Fast flowering indeed as fast in vegetative stage. Cut this girl in branches and hang upside-down in smaller tent for drying
Set RH @ 55% , temperatures not able to control so they will be something around 20-21 in drying tent
Second Tropicana will be chopped within a couple off days. Checking trichomes with microscopes can tell that one Purple Lemonade is also going to finish in next days
Somme lady's will take full 9 weeks or so..
Lowering light intensity, EC in tank start to raise slowly so i will start to adjust according to condition. Currently 0.85EC is perfect strength i think
PAR Map: Maximum PPFD is 850, minimum PPFD is 550.
VPD: Ranges from - 0.9-1.0
Daytime Temperature (DT): 23-24°C.
Nighttime Temperature (NT): 19-20°C.
Leaf Temperature: 21-22°C.
Light Distance: 45-55 cm from the plants.
CO2 Levels: 700+ ppm.
HLG Scorpion Diablo: Set at 65%, positioned at a 45-55 cm distance.
Daytime: ON for 60 seconds, followed by 30 minutes OFF.
Nighttime: OFF for 60 seconds, followed by 35 minutes OFF.
Nutrient Tank (NT):
pH: Maintained between 5.80 and 5.95. Stable PH...
EC: 0.85.
Temperature: 19-21°C
28.04.2024
First harvest in this run! Tropicana Cookies No1 is a winner.) First Tropicana Cookies is harvested on 89 day from seed. Total 55 days off flowering.
Fast flowering indeed as fast in vegetative stage. Cut this girl in branches and hang upside-down in smaller tent for drying
Set RH @ 55% , temperatures not able to control so they will be something around 20-21 in drying tent
Second Tropicana will be chopped within a couple off days. Checking trichomes with microscopes can tell that one Purple Lemonade is also going to finish in next days
Somme lady's will take full 9 weeks or so..
Lowering light intensity, EC in tank start to raise slowly so i will start to adjust according to condition. Currently 0.85EC is perfect strength i think
PAR Map: Maximum PPFD is 850, minimum PPFD is 550.
VPD: Ranges from - 0.9-1.0
Daytime Temperature (DT): 23-24°C.
Nighttime Temperature (NT): 19-20°C.
Leaf Temperature: 21-22°C.
Light Distance: 45-55 cm from the plants.
CO2 Levels: 700+ ppm.
HLG Scorpion Diablo: Set at 65%, positioned at a 45-55 cm distance.
Daytime: ON for 60 seconds, followed by 30 minutes OFF.
Nighttime: OFF for 60 seconds, followed by 35 minutes OFF.
Nutrient Tank (NT):
pH: Maintained between 5.80 and 5.95. Stable PH...
EC: 0.85.
Temperature: 19-21°C
Week 8 off Flowering in Summary
80 litter off RO water,
120ml+150ml AN connoisseur A+B
45kW electricity in total for light, Pumps and AC Infinity Fans. 42kW for Light + 2kW Dehumidification + AC Infinity ventilation
Week start @ 1.1EC, nutrient strength., week finish with 0,87EC
Tropicana Cookies is first harvested on day 89 from sprouting , week 8 off flowering
Purple Lemonade is on second place with harvest on day 91, last day off 8 week off flowering
PH was stabile and move from 5.70 min to 5,9 max.
Light distance for this week - 50-55cm from tallest top , PPFD levels around 900 in center, trough whole week. Lowest reading 500 @ corner
Temperature are from 20c at start off day to 24.5c max at some points.
Night temps around 19.5-20c. Outside humidity is generally low
This week i have install TrolMaster AMP3 sensor and humidity, temp and program devices
Day RH is moved from 45% to 55% max, at night times drop to 45-48%
Lighting Parameters: PAR Map: Maximum PPFD is 900, minimum PPFD is 650.
VPD: Ranges from -1.0-1.1.
Daytime Temperature (DT): 24.5°C.
Nighttime Temperature (NT): 20°C.
Leaf Temperature: 22°C.
Light Distance: 45-55 cm from the plants.
CO2 Levels: 700+ ppm.
HLG Scorpion Diablo: Set at 65%, positioned at a 45-55 cm distance.
Daytime: ON for 70 seconds, followed by 25 minutes OFF.
Nighttime: OFF for 70 seconds, followed by 35 minutes OFF.
Nutrient Tank (NT):
pH: Maintained between 5.8 and 6.1
EC: 0.87-1,1.
Temperature: 20-21°C
Likes
13
Share


@masterofsmeagol
Follow
7/20 Went over this morning to plants soaking wet and heavy rain. Went back around 4pm and plants actually look really good. The rain has stopped for a bit and the girls looked great. Apart from some septoria leaves I needed to defoliate on the first plant I treated. I also noticed a few others on other plants so it's spreading albeit slowly. I treated the three in the middle with their second dose of Plant Doctor at 3tsp/1gal. One gallon administered to each plant via root drench. I think I may treat the other plant showing signs with a diy Dr. Zymes using citric acid as the active ingredient. That way I Gould start treatment right away without having to rely fully on plant doctor. Plus it would kill any pests. Ive seen damage but the birds do a number on them. I dont want to spray my plants with a bunch of chemicals if I don't have too. I shouldve replaced the pallets and cleaned the cage better. I think I did a good job sanitizing as I have no wpm. Just this septoria I probably got when the lady mowing the lawn cut all tjis fucking grass and blew it in my pen, throwing bird seed and I'm sure tons of disease into my grow bags. I literally had to harvest a bunch if fucking sunflowers. It looked like my plants had been mulched. Just with small disease carrying shrubs. At some point some of this stuff has to be on purpose. You CAN'T be that stupid. A couple kushes in the back look hungry. I think I may need to up my feed. I've written to much. I'll keep this updated. Thanks if you made it this far.
7/21 I guess it rained last night. Oh well. It was blue skies for hours before dark. It must've rained late/early morning. I'm sure the app of plant doctor will be fine. Like I said I'm considering using citric acid as a foliar spray to help with the septoria and clean up any pests. I don't have enough pests to warrant spraying. I just don't want to put all my eggs in the plant doctor basket. Today is overcast and windy. The wind has really assisted in spreading this virus. I remove anything I see infected immediately and since these plants are reveges they have plenty of leaves. Plants are really stretching. I know I talk about the septoria a lot but realistically if someone looked through my garden they'd have a hard time spotting it. I don't want to exaggerate the problem but I don't like dealing with ANY fungus or molds.
7/22 It was 55° this morning when I went over. I defoliated some septoria leaves and a few that were fading or damaged. I saw almost a whole leaf eaten so it's probably a good idea to move forward with citric acid. I can add that to the plants I've already treated with plant doctor. This is the first year it's been so noticeable. It's the reveg 10th planet that started this off. Oh well. I've dealt with MUCH worse. Plants LOOK good (other than septoria leaves (on bottom of plant). Today is water day for me but it's been raining and it's a lot cooler today. Bags still had weight to them. I want them to have a proper wet dry cycle. Temps top out at 75° so I'll monitor during the day and if something NEEDS WATER I'll give it to it. I'm suprised I have ZERO WPM. The septoria is much more identifiable but pm is usual present in these conditions bur I don't have a spot of it. I may do some defoliation today. I also need to add supports for flowering but one thing at a time.
EDIT: Went over around noon. 70°. Bags seem to be holding weight (it was easier to tell as ONE plant was substantially lighter than the rest) so I decided to hold off on watering. At least until tonight. There are three plants (at least that are going to NEED water). They look phenomenal now though and we've had lots of rain. Plan is to go over later and get the light ones and mix the water for the others so I can administer it in the morning quickly. I have an early doctor's appointment but I don't to overwater or water unnecessarily just because. But when you grow alone sometimes you need to do things when your able. I have people there that would help if I asked. And I have before but its late . I'm very grateful. I defoliated quite a few septoria leaves. They were all from the bottom of the plant. A couole wete bottom interior. I know there are worse things to contend with but still a pain.
EDIT #2 WENT BACK AT FOUR AND PLANTS LOOKED FANTASTIC AND STILL HELD WEIGHT. THE REVEG MK ULTRA IN EARLY FLOWER "MAY" HAVE STARTED TO DROOP AND "SEEMED" LIGHT. THE LARGE SPECIAL KUSH FUETHEST IN FLOWER BY THE DOOR WAS ALSO EXRRENELY LIGHT. I HAVE AN EARLY DOCTORS APPOINTMENT BUT DONT WANT TO OVER WATER MY PLANTS JUST BECAUSE IM IN A HURRY. ITS COOLER THIS WEEK. 70 TODAY AND HIGH OF 80 TOMORROW BUT DAD SAID THATS NOT UNTIL THE AFTERNOON. I MIXED UP ENOUGH WATER TO WATER EVERYTHING IN THE MORNING IF IT NEEDS IT. I HAVE AN IMPORTANT DOCTORS APPOINTMENT EARLY THAT WILL TAKE ME AWAY AND IM FEELING A LITTLE ILL SO I WANTED TO GET DONE WHAT I COULD TODAY. WATERED THE TWO THAT NEEDED IT WITH TWO GALLONS A PIECE (30GAL REVEG MK ULTRA AND THE BIG SPECIAL KUSH IN FRONT I DIDNT TOP THATS FLOWERING THE FASTEST. EVERYTHING ELSE CAN WAIT.
7/24 Surprisingly the plants still held weight this morning! The looked pretty good too! However its going to be highs in the 80's for the next 7 days. Since the plants still had some heft to them I watered everything just a gallon. I gave the 10s a half gallon and skipped the 50gal container plant. I think this is a good happy medium. I'm still seeing random septoria leaves but still no WPM. I defoliate daily sometimes a couple times. I need to get a minute to myself and add a foliar spray. I'll start with a dih Dr. Zymes while I'm looking into other products like bicilus (i have bt but its a different bicilus) or trichodermia. I need to feed sometime this week too.
7/25 Plants looked great this morning. I watered the 10th planet on the end that hadn't been watered in forever. I think I had been overwatering during those 100° days. I didn't water today as everything looks great and they don't seem to need it. I'll check later today. I did water the pink kush beside the 50 as it was much lighter (1/2 gal) to get it on par with the others. I'm starting to see pest damage as well so I think an app of Dr. Zymes would be a good idea. Both for pests and septoria. Plants are REALLY stretching. One special Kush is far ahead of the others.
EDIT:WENT OVER AT NOON AND 4PM. PLANTS LOOKED GREAT APART FROM MIRE SEPTORIA ON THE 10TH PLANET. I NEED TO WATERING DIFFERENT IN THESE TEMPS. IT WAS BREEZY AND 80° BUT THE BAGS DIDNT FEEL TOTALLY LIGHT AND THE PLANTS LOOKED AWESOME! THE HUGE EARLY FLOWERING SPECIAL KUSH IS PRETTY DAMN LUGHT BUT ITS PRAYING AMD LOOKING GREAT. I DECIDED TO WATER AND FEED IN THE MORNING AND HOPFULLY APPLY A DR. ZYMES PRODUCT ON THE ENTIRE GARDEN IN THE EVENING. PLANTS LOOK HUNGRY AND I HAVE RANDOM PESTS. ITS MOSTLY FOR THE FUNGACIDE ASPECT. PLANT SOCTOR SEEMS TO BE WORKING GREAT ON TWO OUT OF THE THREE I USED IT ON. THE THIRD IS A REVEG AND HAS TONS OF FOLIAGE I NEED TO ADDRESS AND CLEAN OUT. IT SEEMS LIKE IT WILL SPIT OFF SOME SEPTORIA LEAVES A DAY OR TWO BEFORE ANOTHER APP IS DUE. I'M LOOKING INTO MY OPTIONS. IF ANY OF YOU HAVE A SURE DIRE WAY TO DEAL WITH LEAF SEPTORIA IN EARLY FLOWER HIT ME UP! IM NOT TOO WORRIED THOUGH. I CAN SUPPRESS IT ENOUGH IF I HAVE TO EVEN IF I GOTTA SPRAY THE LEAVES WITH THAT 9.0PH ALKALINE WATER.
7/26 Supposed to be REALLY hot with thunderstorms. I watered the two thirstiest with a gallon and a half. Everything else got a gallon (but the 10th planet on the end that was still heavy and the 50). I fed everything too. I SHOULD'VE done the DIY Dr. Zymes spray but I wanted to keep feeding and adding an unknown foliar spray seperate in case of any reactions. A day before plant doctor is due to be applied again the 10th planet in the 20 starts showing signs of septoria again. I've defoliated quite a few septoria leaves. I'm not giving up. I assume I'll do something tonight and I MAY just look to see what I can find on Amazon. Luckily my plants still look beautiful. I hope it continues and I can stay on top of it.


Likes
22
Share


@BlackOpsGrow
Follow
Well this lady is starting to look finish 😁 I've bumped down nutes and are still keeping ph at 6.0+-0.2. She had started to crumble under her own weight so I've had to tie her up a bit. Next week I'll flush her and then it's harvest time 👍
A little note the 20/7, i saw today that i got a single little mushroom growing out of the side of my airpot. I've seen a lot of funny things, but never actually mushrooms 😂 didn't know they could thrive in coco at all?


Likes
54
Share


@Ganjagrandaddy
Follow
DAY 37 FLOWERING!!. ( i screwed up my counting !!. flowering began 12th july. )
This lady continues to impress me. with 3-4 weeks left on her she has some serious potential for fat buds. I have found sone bud rot due to high rh , killed me to lop it off but had to be done. Working with 2 extraction fans now for air.
She smells beautiful and is very very sticky now.
