


Processing
Likes
Comments
Share


Likes
Comments
Share

@Borberad
Follow
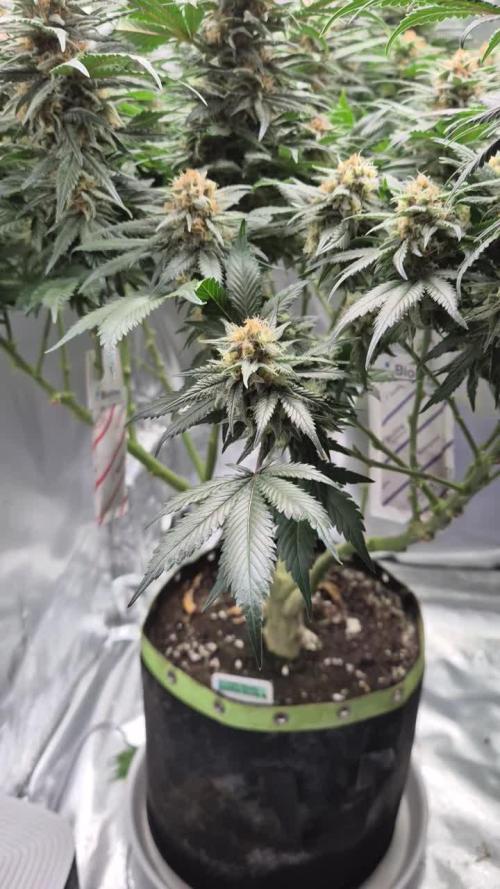
Mehr Sonne bitte!
Die anderen Bilder zeigen einen Steckling der Pflanze indoor.

Likes
4
Share

@Hou_Stone
Follow
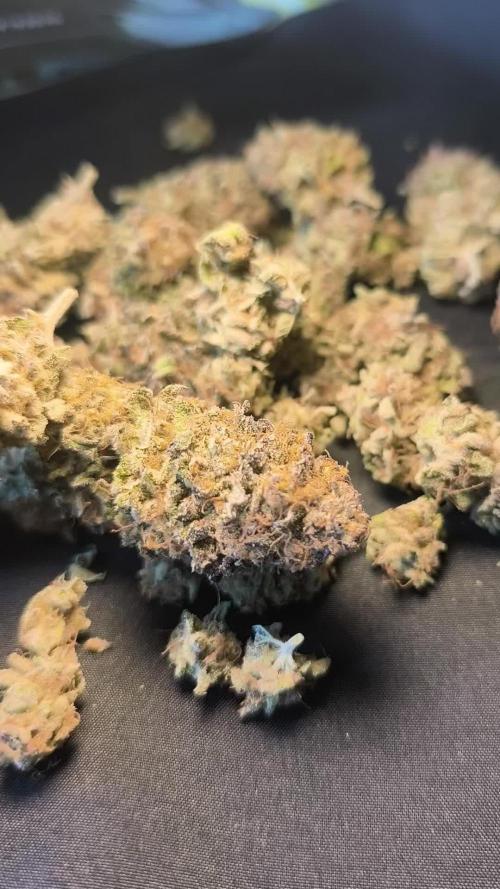
J'ai laisser les plantes séché dans la tente de culture, lumière éteinte, sans ventilateur pour entammer un sechage lent de 2-3 semaines. Ensuite est venu le moment le plus chiant de la culture pour moi, la manucure. Une fois la manucure effectué je vais laisser curer mes buds dans des bags

Likes
8
Share


@Skinnytalls420
Follow
Very happy with the outcome just as good as the first time I grown this strain!!!!

Likes
53
Share


@cheetah844
Follow
Still chugging along even though I've neglected them a little. A fun little side experiment, I learned a lot. At least I'll have flower from 6 more girls, not a complete waste.
Likes
66
Share


@UnorthadoxDude
Follow
So you've all seen the problems with this grow. The buds are all foxtails every one of them. Despite that she somehow managed to bring a decent yield. The smell is still the same, sweet and lovely.


Likes
151
Share


@PapaNugs
Follow
These girls continue to flourish and ripen. They are lined up to finish in 8 weeks as opposed to nine as advertised. A real positive. Having said that I'm starting UVB lights as two hours per mid day tomorrow. I'll slowing increase the amount of time until the end of the grow.
Add molasses to the top watering mix. Added optiveg for the chitin and finishing nutrients.
The girls are really frosty and sticky already. But no blueberry smell yet. I still have high hopes for blueberry phenos.


Likes
55
Share


@BodyByVio
Follow
Just got done with trimming the 4x4 @greenhouseseedco Super Silver Haze / @blimburnseeds Silver Surfer Haze tent.
The final yield is exactly 1000g plus some (kind of a lot)that I smoke in the last 2 weeks 😃
Also got 6, gallon size ziploc bags filled with good quality trim for concentrate.
To be honest I was expecting a little more but keeping in mind that this grow I did not supplemented with bottled CO2 I think I’m good with the results.
Definitely I enjoyed a lot this grow and I’ve learned even more.


Likes
53
Share


@Still_Smoq
Follow
10 September Harvest - see pictures. While some growers leave the plant whole when they cut, I do not. It is a personal preference and situational convenience if your a home grower. I chose to cut large, long branches, and remove any whole water leaves, as long as it doesn’t interfere with the bud formation. I don’t trim yet. This is done for a few of reasons: 1) It’s my last good close-up look at her until another 5 days or more, 2) I don’t want wet leaves drying on my buds if I can help it, and 3) I occasionally like being able to shine a small LED flashlight on the flowers while its drying. Mold is our greatest problem as growers, it can destroy a beautiful grow right up until the end process. Then I hang it in a dark closet, provide circulation and ventilation. Light and heat, anything above 80 degrees F, will start a break down in cannabinoids during the dry, it is ideal to stay away from both. I’m fortunate that a humidity level of 50- 55% and temperature of 65-70 degrees F is fairly consistent and easy to maintain. Anything below 60 degree F will prevent the adequate drying out of chlorophyll. Almost all my flower routinely take 5-7 days, some a little longer, to properly dry out.
15 September Trim - see pictures. First you’ll notice the buds have shrunk up to half their original size. This is just a fact that we growers have to deal with. Due to evaporation without uptake of water, it takes about 3 days for the chlorophyll to dry up, then slowly go through a chemical change. Along with the leaves, cannabinoids also begin a chemical change after 3 days called decarboxylation. A slow process where the THC level increases while curing. You want the leaf to be dry so they can be hand trimmed easily, but you do not want that bud so dry that it starts to fall apart in your hand. Try to handle carefully by the main stem to avoid touching the bud all together. A lot of these cut leaves will be covered with trichomes, good for making oils, or other products, it’s an option worth looking into keeping it. After trimming, I do separate a few premium flowers for my first smoq. Then loosely fill wide mouth quart mason jars with about 1 oz/28 gr of product per jar. I seal the lids for a few hours to determine what relative humidity they are at, see hygrometer pic, before making a decision to put in a 62% humidity control pack of my choice or to wait, then place in secure in a cool dark place with stable humidity and temperature. It is very important to then observe/burp or exchange the air as needed, up to several times a day, until 62% rh is achieved. Once your close to to your mark, put in your desired RH level control terpene shield. If you have a problem getting there: 1) it has dried out too much, no real solution, try to put several large cut stems left over from harvest into the jars with the buds to try and increase humidty, 2) it has not dried out enough, in this case no problem, just remove and dry out a little more. This is also a personal choice, some people like it drier in the 50% plus range. Whatever you do, research and preserve. At that time burping is no longer required. Cannabis will reach its peak potency potential at about 40 or so days into the cure.
The finished product should be a perfect grind when cured correctly without clogging up your grinder, this could take a month. Now that I’ve said that, I’m sure someone has grown something that they have not been able to grind. It can remain in this state for an easy 6 months with little change, locking in all the terpenes and potencies. All you need to do is occasionally check the product to ensure there are no molds. If your grow/harvest/cure techniques are good this should not be an issue. It would not be uncommon to find many cannabis strains will last, with small degradable change, for up to one year after being stored this way. Using an airtight glass container, controlled relative humidity, maintained low temperature, and kept in darkness will equal maximum shelf life. Always avoid direct sunlight and temperatures above 80 degrees F.
The reasons I’ve ultimately chosen Deep Water Culture as a grow medium. Each has their own pros and cons indeed. I found the most efficient, less maintenance and ideal solution for my situation was DWC. Burdens to overcome depend on size up set-up; initial equipment cost, size of containers, ph monitors, air pumps, type of water to use-reverse osmosis, RO cost/set-up/maintenance, ways to transfer/change water and nutrients, what nutrients to use and schedules, takes several grows to learn and understand, a 1 year learning curv, easy to nutrient burn. The Benefits of growing in water; no dirt, no bugs, no diseases, rare nutrient deficiencies/toxicities, steady and rapid growth that enables the plant to reach its genetic potential. After harvest, there is about a 1 hour equipment cleanup, sterilization and turn around process before replanting. Cannabis will perform in so many different ways and mediums, no one way is the best and the best way is the one you are using, right. Chose what works for you in the long run. There will always be an initial cost in set-up. My advice if one were in need to cut corners, I would not recommend cheap lights. This single factor is the most critical, afford for the best. The notion that organic and water has a different taste, flavor and potency effect is absolutely debatable. The more we learn the better we grow and experience is always the best teacher.
This is what works for me and my methods of growing in general from beginning to end. A BIG “Thank You” to everyone who stopped by to take a look. My next diary will start at the beginning of October 2023 with a Forbidden Runtz Auto. There will be minor differences during the grow. I enjoy Auto strains simply by what can be achieved in a short time. No matter the strain they will unveil one thing in common, the demand for attention. Many times over it is the anecdotal gardener that surmount plant scientist. Last should I mention, do not forget to stop and enjoy the fruits of your labour...



Likes
20
Share


@Rooflower
Follow
Week 2 F
D1
Another week down for my lemon ICE and everything goes well .
Defoliated her one more time today since she was getting a bit bushy again and I want the lights to reach the lower parts of her !
I haven't overdone that keeping more than half of her leaves on. I think I could go a bit harder but its okey ...
I find defoliation a really interesting technique for indoor gardening since plants are disease and pest free compared to outdoors.
I will defoliate her one more time at the end of week 3
Cant wait for the next two weeks !!
D5
Lemon ICE growing massive and those bud sites are getting taller every day!
She's going super fast into flowering and more and more pistils are showing up every day
Lushy deep green leaves and I really have nothing bad to say about her .
She's just growing beautifully, great internal stretch , great structure, great colour ,smell is super fresh
Introduced Canna Boost Accelerator to her diet at 2ml/lt and lets get it started
Till next Update


Likes
4
Share


@AmsterdamAutos
Follow
Initially ran this plant as a way to get dial in my tent and setup while coming to grasp with tent growing in general. Since its an autoflower the growing was easy. However this is a very commercial seed bank and the quality you get is in line with that. Now i'm moving, getting a larger setup, and going to run more genetics. Zamnesia will not be a part of that.

Likes
4
Share


@Barcelona_Farmers710
Follow
Buenas farmers!! Después de pasarnos tres dias con sólo agua volveremos con la mitad de nutrientes durante los próximos dos riegos, ya empezamos a prepar nuestras plantas para la fase final ! Espero que os guste buenos humos family!💚

Processing
Likes
20
Share


@Mr_nugs_lover_David
Follow
She's looking super healthy and and strong can't wait to see this beautiful strain in full flowering stage, I'm feeling a very good stretch,shed definitely a big girl,she's eating very well, no deficientes or nutrients burn so far. Let's see how this wonderful organic lady performs.
On August 9th I start to see the change from vegetative stage to flowering stage,she looks super healthy and strong,I missed some watering a few days ago,however she is perfectly fine and happy,she's a dream to grow.

Likes
27
Share


@ButterfliesLittleFarm
Follow
Hello Diary.
We reached the end of the fifth farm, along with two Haze Berries, there was another Fat Banana plant that ended its journey a week earlier than the Haze Berries.
Haze Berries have become record holders in terms of yield. A total of 185 g, with the larger Haze Berry # 1 yielding 105 g and the smaller Haze Berry # 2 yielding 80g. Definitely a record yield.
I think I wrote and described more or less all the information, the amount of photos shows the whole cycle of plant development during each week so I wouldn’t spend too many words on it anymore.
Here's how it all went since the last call.
05/12/2020 - Day 72.
Harvest. I checked with a microscope and when most of the trichomes are milky and about 5% have turned brown it’s time to harvest, at least that’s the case in my case. After the last photo shoot, I cut off both plants at the very bottom of the stalk and hung upside down in a growbox to dry.
Temp / Humidity on the farm - 23.4 degrees and 38% humidity.
17/12/2020 - Day 84.
After 12 days of drying, I took the plants out and pruned the rest of the dry leaves. I put the dried flowers in jars, put in moisture fighters for better moisture regulation and for better curing.
31/12/2020 - Day 98.
Tasting. Great smoke, fruity tropical flavor. Happy New Year
Haze Berry Auto (Royal Queen Sees) - 17/09/2020 - Sprouted - 05/12/2020 - Harvest - Total 80 days.
Haze Berry Auto # 1 - 105g
Haze Berry Auto # 2 - 80g
Finally, I would like to thank James from the Royal Queen Seeds, for his support, seeds and nutrients. And I would like to thank all of you who support me and give advice with the help of which I also grow along with my plants. Many thanks to everyone and see you soon with the new diaries.🙌
Likes
21
Share


@Fullmeltalchemist
Follow
Alright I've updated this postmortem and cure just to give an idea of what I was up to during the dry and cure weeks. This grow was a ton of work and I'm very please with the results. I learned a ton about soil and environment control and really feel like I'm gaining confidence and coming into my own as a cultivator.
I've been playing a lot with ice water hash and rosin and have set some neat goals for the future like hunting ice water hash cultivars, going perpetual and expanding the amount of canopy I can work with by building a network of remote-operated satellite flower tents in friends' and family's abodes . I'm not sure I'll go through all this effort of documentation here again, but please follow along on my instagram, stay in touch and chill out with me sometime @Fullmeltalchemist.00
All in all, I was running 1000w of quantum board across three tents and pulled just over 1100 grams, which was a big goal of mine.
Thanks for all the advice and love growmies! And thanks growdiaries for the platform. It's been coo.


