Processing
Likes
Comments
Share
@Major
Follow
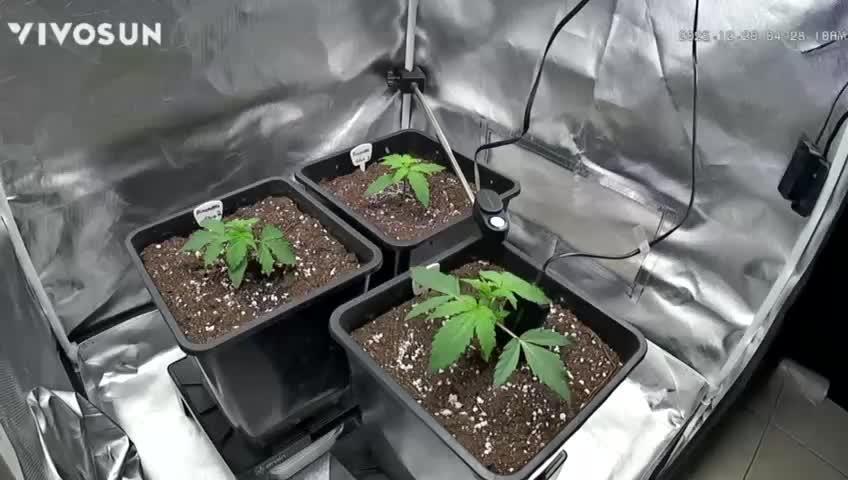
this week we went into flowering the plants are in shape and growing day by day I am waiting to repot them one last time in 13 l pots with Guano Bat Mix from Plagron finally all is well than happiness 🤞🏻 🤞🏻🤞🏻🤞🏻🤞🏻🙏😃
Likes
Comments
Share
@Wenz004
Follow
Jetzt ist mir klar warum Sativa so lange brauchen - nach 2 Wochen und 2 Tagen Stretch kaum noch richtige Blüten sichtbar - heute 4.1 Liter Getränk eher inhaliert als getrunken. Weiter gehts.
Likes
7
Share
@brapzky
Follow
I figured nothing could go wrong with 50% amber / 50% milky trichomes. Harvest day, Medical Mass: Huge buds and no traumas but got bud rot because of too high temps. The best I've ever smoked. Harvest day, Pineapplex Express: Got an early trauma when transplanting but handled it beautifully. Potent smoke. Pretty satisfied for a first grow, and I have a lot of changes for my 2nd grow!
Processing
Likes
4
Share
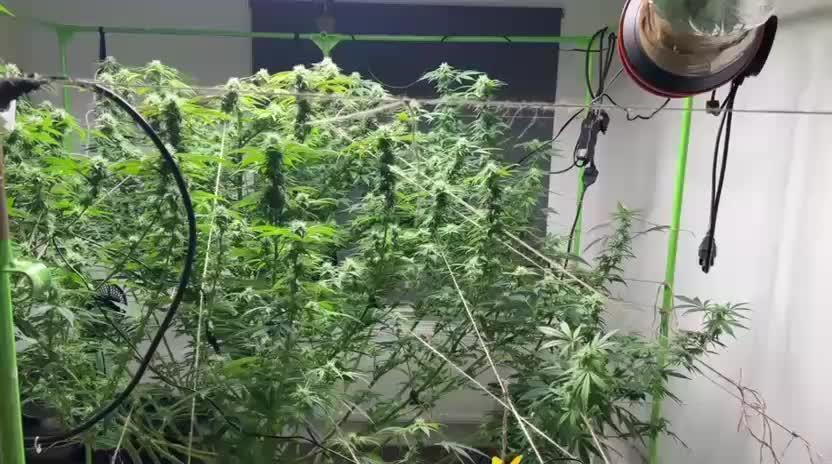
Went from 450w to 150w blue for a week due to heat and too much height gain. Weather got cold so I put the 450w red back in as they seem to be thickening up. Feminising was very easy on the ones I chose, I chose only three that had thicker faster flowering and more THC but will cross with the more sativa dominant ones.
Likes
9
Share
♦️ Apliqué la ultima dosis de Delta9,via riego. Hice algo de supercropping y defoliación.Todo ok🤙🏻🤙🏻
Likes
74
Share
@AsNoriu
Follow
Day 92. First of 3 girls down. Amazing, super productive strain !!! Loved that girl a lot ! Others still to come... Day 101. #1 is jared and #2 is chopped, busy day ! Day 111. #2 is Jared. Only Monster girl left. She is still pushing in ex dry tent. Day 125. Last girl is down ! Day 135. 240 g of nugs from her !!!! My record breaker by a mile ! Happy Growing !!!
Likes
2
Share
Terminamos nuestra quinta semana pasando a floración nuestras fotodependientes 🍀💫 empieza la magia
Likes
78
Share
@Hologram
Follow
Goodmorning growmies My bubatz is getting some sugar! trichomes arealready forming.. she is so sweet.. she is making sure i get some sugar too ASAP!! weather is much better for her, its HOT! 😎 ladybugs are working overtime.. they arecleaning her up real good..👌 🐞🐞 got a lot of spiders too..(small and big) luckily i am not affraid of no bug or insect.. so when i spot one, they are dead!💀👊 for now they do no real harm, just a lil hole in leaf now and then.. (when they make web as) no biggie My last update of my candyshop was 5 days ago, so it was a short week this time (week b4 was 10 days, so i am just maing up for that a bit..) cya next week, thanks for all the comments, likes and follows.. ur the best👊 Happy growing for all ✊ KISS!growing technique: KeepItSimple, Stupid!
Likes
18
Share
June 7 - We ordered some new lights last week, they are 240w kingbrite samsung lm310h with uv/ir, 3000k, and meanwell drivers. We setup the new room and moved the girls into there. After a bit of LST and a watering (with nutrients) at roughly 7ph, they were ready to go under the 2 new lights and the same SF-1000 we have been using in this grow. The new room is a 12 ft enclosed trailer. I moved everything from the small tent into this. I put clear poly on the walls, floor and ceiling. I put poly on the shelf I am going to be keeping in there as well. I bought 50ft of 6mm mylar and lined the floors, roof and sides with it. I plan to get some reflective tape to seal everything and to cover the wood. I did not get much of a chance to watch temp's today as they it was later in the evening after all was said and done. The inline fan blowing in air from outside. June 8 - 9 AM i checked the plants, they were at 25.2 and 50% RH. Late through the day I had checked and we had gotten up to around 32 degrees. So I moved the inline fan to the closer vent, hooked up to that, and had the air blowing out of the trailer with the inline fan sucking it from above the lights. I then added oscillating fan and had it blowing air on the left side of the room so it would somewhat circulate once I closed the doors. I then checked at about 9pm and we were at 22 degrees. Definitely noticed a decent amount of growth already. I have the lights on a 22/2 cycle as I was worried about the heat at night time. June 9 - Some great growth from the girls, still having problems controlling the temps in the afternoon. I decided to prop the door open a bit to have a constant breeze throughout the day while I am at work. Decided to do some more LST and also a bit of defoliation. I took about 25% of the leaf's that were blocking the new growth as it was getting a bit bunched up. I was then told the leaf's are almost solar panels for them. So from now on I will be trying to just do some tucking unless needed. The leaf's I removed were most of the damaged leaf's, I am not to sure if that makes much of a difference. I gave them a watering with only water as there is a potential I am getting a bit of a nutrient buildup along with the PH problem. Or potentially the reason for the ph problem is nutrient buildup. After watering with A PH of 7 I got some run off and tested it. The smaller plant gave me a PH of about 5.5 where the bigger one is around 5.0. June 10 - Plants are looking happy and showing tons of growth. Seems to be trying to stretch outwards. Not a ton of sign of PH issues showing so potentially getting it under control. Still a bit of damage to previous leaf's but it is what it is! The last few days I have been leaving the door open a bit in order to keep the temps down. I decided to test something and turn the lights off (automatically) at 11AM and back on at 5PM so light schedule has now changed to 18/6 and it seems I may have figured out the issue. We haven't had lots of sun the last couple days so it hasn't been to hard and I have yet to know if it truly fixed the heat issue for now. (I will be looking into a ac unit as well since it typically gets to around 30-35 around here. June 11 - Pulled some of the branches back down and added a few more LST spots. Seems we have a good amount of growth from the smaller plant out of the 2 topped spots. Unfortunately it looks like I fucked up on the bigger plant and only one of the nodes seems to have new growth. I will continue to monitor that but I think I cut the node to low and also to soon. Other then that, the girls are doing great. They seem to be absolutely loving these new lights. I gave them some nutrient water today as well. roughly 3L each. They seem to be A hell of A lot more thirsty under these new lights. June 12 - The girls are doing great , they are still just doing growing away. Lots of progress everyday. I am going to be getting a go-pro so I can set-up a time-lapse for the rest of this grow. I received my new inline fan, I got A ac infinity CLOUDLINE T4 with the temperature humidity controller. I am going to be having one fan pushing fresh air in and one fan pulling out the hot air. I will be doing that tomorrow since I have to work today. June 13 - I ordered another 50ft of mylar and that showed up today. I have decided to remove the shelf and add another 3+ feet to the grow space. So today I installed more poly, mylar, the ac infinity fan. I have it set-up to pump in air if it gets to warm. I am thinking of switching it to the output that way if it gets to hot or to humid I can have that air pulled out of the trailer. Right now my other inline fan is the outtake and I just have it set on full. Overall I think everything is set-up a bit better and more accessible. I will be putting my 2x2 tent in there at the left of the doors so I can have a veg room when these 2 are in flower. I plan to have 4 in veg and 4 in flower for the next grow. Still waiting on JOTI seeds, ordered 3 weeks ago and still have not been shipped. I will be getting those going the moment they arrive. The girls seem to be happy still, did a bit more LST to try to keep everything even, mainly I'm just pulling down on the spots I already have tie wire on.
Likes
92
Share
@Hou_Stone
Follow
it's been 2 weeks since it's 60% humidity and I can't go below :/ I noticed mold in 2-3 buds of my Ztrawberrys ;'(. I tried to remove the moldy areas with my pruner but it was moldy all the way to the center, I decided to just rip it off a bud. I don't know if it's a good solution, it's the first time it's happened to me
Likes
27
Share
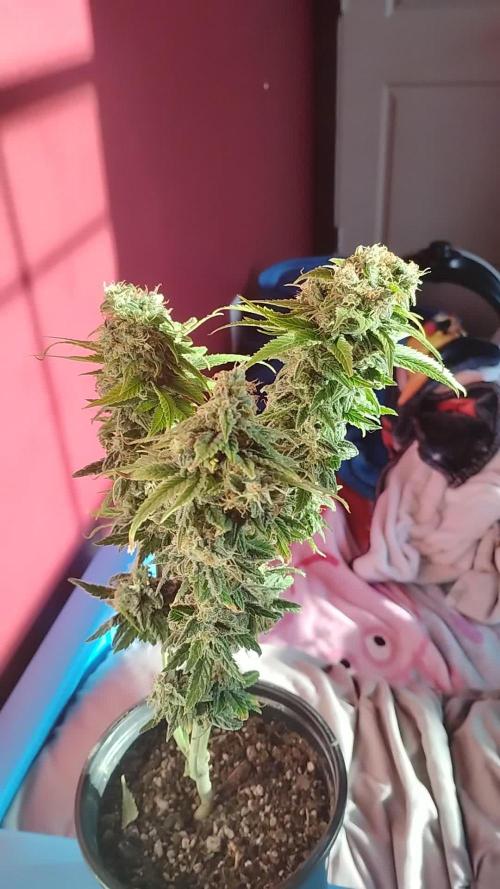
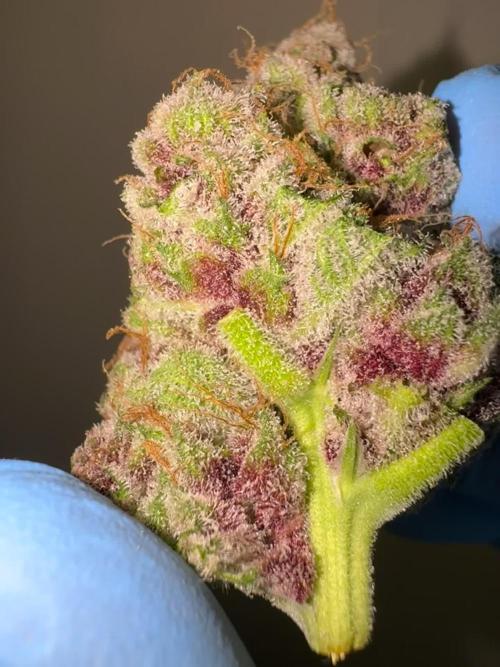
I’m overjoyed with the phenos this strain is producing, strong vibrant purples with some serious flavour profiles! Scent Profiles we have: Candy Lemon Sherbet 🍬🍋 Sweet & Piney Diesel 🍭🌲⛽️ Sweet & Tangy Tropical Punch 🏝️🥊 Alongside this, these beauties are the frostiest and the most insanely dense koala looking nugs I’ve ever produced!
Likes
155
Share
@deFharo
Follow
Bienvenidos cultivadores de marihuana clandestinos y también a los que tienen la fortuna de no serlo!🖐️👨‍🌾👍 Este es un relato semanal de técnicas, experiencias de cultivo y Bio preparados orgánicos caseros, los cuales llevo experimentando dos años en cultivos de marihuana interior. Esta semana voy a escribir sobre: CARBÓN VEGETAL ACTIVADO CON MICROORGANISMOS DE MONTAÑA. esta es una práctica avanzada pues al menos se necesita tener el inóculo sólido de Microorganismos de Montaña (MMS), aunque al final intentaré dar otras opciones para aquellos que no tengan MMS. Puedes consultar en la semana 3 la manera de hacer Microorganismos de Montaña Sólidos (MMS): https://growdiaries.com/diaries/134104-grow-journal-by-defharo/week/725879 El carbón vegetal es un excelente componente para toda clase se mezclas de sustrato, tiene varias propiedades muy interesantes, ayuda a la estructuración del suelo y la creación de humus, es un regulador térmico en lugares fríos, favorece la expansión de las raíces y su estructura de microporos promueve la retención de humedad y nutrientes, se dice que en 1cm cúbico de carbón puede contener de 8 a 30 millones de Microorganismos. Y es precisamente la propiedad de retención de humedad y nutrientes, de la que se aprovecha esta práctica. El carbón vegetal llamado "activado" que se usa en filtros de agua o aire, tiene mala fama entre los aficionados a las peceras, porque se dice que roba nutrientes, principalmente Nitrógeno, esto tiene una explicación y no es un problema para cultivo en macetas, el carbón seco tiende a absorber humedad y los nutrientes que se encuentra en el sustrato o en los riegos, porque es muy poroso, y de repente, tiene que saturar todos sus microporos, pero esto apenas va a tener incidencia en un cultivo. En mi caso lo que hago es mezclar el carbón con los Microorganismos Sólidos y después lo humedezco con agua y melaza para activar la Microbiología del inóculo, dándole la energía necesaria, de esta manera tengo un carbón inoculado con Microorganismos de Montaña, y una vez en el sustrato, con humedad, estos MM, se propagarán. En este caso el carbón, de momento, no captura nutrientes porque está saturado, pero después de unos riegos, será la casa perfecta donde los Microorganismos y los nutrientes convivirán ofreciendo una fuente extra de nutrientes, para que las raíces se alimenten en periodos de escasez de alimento o humedad. Supongo que quien tenga inóculos bacterianos comerciales, podría usar esta práctica para multiplicarlos. INGREDIENTES BÁSICOS: Agua pura: 500ml Carbón vegetal, para usarlo en macetas conviene que los trozos de carbón no sean grandes. 750 gramos. Melaza: 75g Microorganismos de Montaña Sólidos (MMS): 225g PROCEDIMIENTO: Se mezcla el carbón y los Microorganismos sólidos. Se disuelve la melaza en el agua. Se humedece el carbón lentamente, mezclándolo bien, porque el carbón vegetal puede almacenar mucha humedad y necesita tiempo para saturarse. Se guarda a oscuras durante un mes en un recipiente cerrado. Hasta aquí la fórmula básica, yo hago algunos añadidos, como se puede ver en las fotos. Añado 260g de Leonardita, que es un carbón vegetal con millones de años y en el proceso de convertirse en mineral, aunque todavía no lo es, es además, la mayor fuente de ácidos húmicos y comparte las propiedades del carbón. Añado Microorganismos de Montaña Activados (MMA) de forma líquida para aumentar la inoculación de microbiología, también un lacto fermento de frutas que aporta muchas vitaminas, nutrientes y enzimas... en la última foto se ve el recipiente después de un mes. Siguiendo el principio de saturación previa de los poros del carbón, para mezclas de sustratos, y sin tener acceso a microbiología, se podría, por ejemplo, saturar el carbón con alguna mezcla nitrogenada para el comienzo del cultivo, después el carbón seguirá cumpliendo sus funciones de estructuración de suelos, creación de humus y para retener humedad y nutrientes. Hasta la próxima... SALUDOS A TODOS LOS CULTIVADORES... 🖐️👨‍🌾
Likes
12
Share
@cherokee
Follow
Это было прекрасное приключение. Девочки цвели 60+ дней и все еще были готовы продолжать... стигмы все лезли и лезли, убеждаюсь в том что 55 дней указанные заводчиком это слишком маленький срок, растению нужно 65-70 или даже 75 дней что бы созреть на 100%. У меня к сожалению не было возможности продолжить цикл из за отсутствия места,пришлось резать ((( ну ничего уже новые 7-8 клонов готовы к новому дневнику и к новому приключению))) С каждим циклом вижу как мой результат стает все лучше и лучше, я начинаю понимать этот сорт и что он любит и как с ним нужно себя вести , соответственно с каждым циклом урожай все больше и больше, думаю в горшках 5л этот результат будет еще больше. ))) Великолепное растение OG !
Likes
22
Share
1/11/2024 Vegetation Week 1 Day 1- I have a root almost in the water.. Yay!! Top feeding is almost done. she is looking a little sad as I work the transition Top feeding but once the roots are fully in the water she will start to take off. Ensured my PPFD is set between 250-300 it is set to: 258 1/12/2024 Vegetation Week 1 Day 2- I have a root in the water.... NO TOP FEED TODAY SIR!!! now that a root is touching the water and she looks stable, I am not going to topfeed, I will see how she looks tomorrow and as long as everything looks good I am going to go ahead and do a change and week 1 fill on Nutes.. I know it is a couple of days in but the same Nutes go through Week 2 and get changed at Week 3 So I should be good to go.. I will just ensure I fill to root touching the water when I change tomorrow. 1/13/2024 Vegetation Week 1 Day 3- Water Change Day!! I added 36 Gallons of Water to the system: Silica= .5mil/gal= 18mil CalMag= .75mil/gal = 27mil FloraMicro=3.0mil/gal = 108mil FloraGro=2.0mil/gal = 72mil FloraBloom= 2.0mil/gal = 72mil PH DOWN= 30mil Very important thing with this system is to now wait the 24 hours for the system to adjust.. Do not make any further adjustments to your PH up or Down for 24 hours to allow time for the system to balance. 1/14/2024 Vegetation Week 1 Day 4- Today I just adjusted the PH to ensure that it was right at 6.0 1/15/2024 Vegetation Week 1 Day 5- Today I Cleaned up the lower damaged leaves from the transition from top feeding to roots in the water. She looks good today. 1/16/2024 Vegetation Week 1 Day 6- Today I just took a picture of the beautiful lady for Log. Other than that just normal day to day operations, check the pH, check the Humidifiers and fill as necessary, check level of water in the Res. Everything looks great. onto Tomorrow!! 1/17/2024 Vegetation Week 1 Day 7- Today I filled the humidifers, checked the PH and just let her grow.. Grow baby Grow.....
Likes
12
Share
@Roberts
Follow
Ze Chem Bang is growing well. She is stretching, and starting to flower. Everything is going really well. There is not much to report at the moment. Thank you Spider Farmer, and Terpyz mutant Genetics. 🤜🏻🤛🏻🌱🌱🌱 Thank you grow diaries community for the 👇likes👇, follows, comments, and subscriptions on my YouTube channel👇. ❄️🌱🍻 Happy Growing 🌱🌱🌱 https://youtube.com/channel/UCAhN7yRzWLpcaRHhMIQ7X4g.
Likes
24
Share
Day 21. Major LST adjustments with some defoliation to expose bud sites. Looking excellent. Day 24. Supercropped a few branches. Don't be afraid to do it. It's how I build monsters. Day 27. Starting to preflower. Continuing with LST and HST. Will give her a good feeding tomorrow.
Likes
14
Share
Day 70: Brain Cake seemed thirsty and wanting more nutrients: Topped off water yesterday, added +3ml of hyro A&B and +1ml of power roots & pure enzyme. EC went from 0.8 -> 1.0 Day 71: Brain Cake is showing symptoms, many top leaves have deformed tips and light interveinal chlorosis starting on opposite end of the tip and dark interveinal chlorosis at the end of the tip. EC is 0.8-0.9 (not very accurate meter :/ ) Not sure whether this is a nutrient deficiency or excess/lockout. The ph has been between 5.6 and 6.5 most of the time the past week, the reservoir change was 4-5 days ago. Plagron indicates to give more hydo A&B in proportion to their roots and enzyme nutrients in the first weeks of flowering (during veg these are given in proportion), so maybe these new problems are due to the different balance of nutrients that I may have times wrongly. Finally the problems may be due to the water reservoirs holding approx 12 liters in practice and the Brain Cake drinks approx 2-3.5L a day so maybe the water res is very unstable but after a day the PH usually remains in range and the EC usually drops a bit the first day after adding nutrients and stays pretty stable the rest of the week. Any suggestions are more than welcome! Day 72: Yesterday evening made an upgraded reservoir for the Brain Cake dwc (as we suspect the leaf problems may be due to instable water because of small res and roots nearly completely filling the res). Now the Brain Cake is in a 60L box with approx 32L of water, EC set to 1.0 and ph 5.7-6.5. She seems to be happy, nice and perky this morning. FYI the roots seem more orange in the video! They are on the white side though, just a bit of stain from the nutrients but looking very good overall.
Likes
34
Share
@ertaverd
Follow
Lots of wind and electric storms this week but they're still growing up, I did a defoliation and still watering with fish, roots and bio bloom from biobizz. Mucho viento y tormentas eléctricas pero siguen creciendo bien. He hecho una defoliacion y sigo regando solo con biobizz. Cuando este en plena floracion le metere BloomBastic.