


Likes
Comments
Share


@FlowerBloom09
Follow
2 weeks now , I had some mold on my soil I scrapped out with a Spoon , I added more soil & everything seems Healthy! Also had mini fits but they are no longer with us

Likes
8
Share


@Appoldro420
Follow
Today, I spent some time tying down branches under the net again. It’s still a tricky task as the branches are quite brittle and break easily. Fortunately, the plants recover quickly, and so far, I’ve mainly noticed new growth sprouting from where the branches broke.
Watering Experiment: Too Much or Just Right?
Two days ago, I decided to give each plant an additional 2 liters of water to test the effects of what felt like overwatering. The results were interesting:
High Humidity: The relative humidity spiked to 74%, which I consider a minor downside.
Lower Temperature: Dropped to 29°C.
Explosive Growth: The plants responded with vigorous growth!
Given the humidity increase, I’ve decided to water the plants heavily only once a week. This approach should give them time to rest and prevent the growth of more mushrooms in the soil—yes, I’ve spotted a few popping up from the pot’s surface.
Monitoring pH and Nutrient Reservoir
I’ve also noticed that the pH has crept up to 6.2, indicating that the nutrient water hardness is decreasing. This suggests it might be time for a full reservoir refresh. Tonight, I plan to inspect the reservoir and clean it out. Thankfully, my hydro pump makes draining it a quick and easy process.
Observations & Next Steps
Continue training and monitoring branch recovery.
Stick to the adjusted watering schedule.
Refresh the nutrient reservoir and recalibrate the pH if needed.
The grow is progressing nicely, and the plants seem happy despite some of the challenges. Let’s keep it going! 🌱
Cheers
30/11: Added some pictures, not to much to say because I didn't look at them the last 2 days and they just went crazy..
01/01/25:
Happy New year!!
Leaving them alone is not an option... If they keep growing like this, I'll take it! This weekend, I'll do some heavy pruning. For now, I’ve snapped a few stems and tied some others to see which method gives better results. I’ve done about half so far, but I need to head to bed because of work. Tomorrow evening, I’ll tackle the other half. Also, I’ll look for some more subtle zip ties.
Likes
22
Share

@KnightRider
Follow
Hey Cannafam,
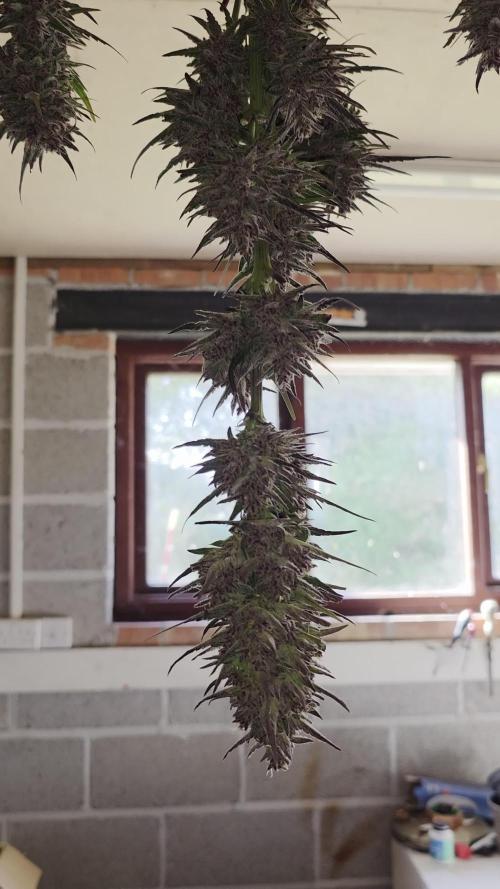
Well we've come to end for my Gauva gal and today i've decided to harvest. We are expecting some bad weather starting tomorrow for the week, and i don't want her to get ruined. Trichomes are mostly cloudy with a few clears and its best to harvest slightly early rather than run the budrot gauntlet!
The weather has been a good deal cooler over the past week and this had been a good turn as her her leaves have rapidly changed colour, shes rapidly turned into a dark purple, pink and red beauty 😊
Temps for Wednesday/Thursday were 22c day 14c night with rain on both days, but it has been dry since with nice sun. Friday to today 20c in the day and dropping down to 12c at night.
Humidity has remained generally high for most of the week at an average of 75%, although this has now come down to 53% for today, and daylight is at 13 hours 59 minutes.
Shes had one feed at the beginning of the week and plain waterings since. Her buds have filled out and are looking nice and chunky. Smell is a nice kinda fruity sugary candy waft which is very pleasant but not overpowering.
For the harvest ive taken the bigger fan leaves and also a few of the larger sugar leaves, shes been hung up in the garage for drying, which i anticipate take a couple of weeks and il then do a dry trim. I don't have hanging scales for wet weight but i'l give the final result when dry.
Throughout this gal has been absolutely solid and i would definitely grow again, but i may try another of the FastBuds/Mephisto crosses next year outside as from what i've seen they are a strong marriage 💪💪💪
Until the final update, thank you to anyone who has liked or commented. I hope you have enjoyed this diary and may you be happy and well 😊✌️💚

Processing
Likes
15
Share


@Andres
Follow
She is growing steong and healthy.. the winter its cloudy here and I am using cob led in my indoor...

Likes
8
Share


@Pjm70
Follow
5/4 Her first set of true leaves are coming in. So I guess I will call her in the vegetation stage. Skywalker was such a sweet child growing up. Haha. She had a bit of a rough start. Her shell was stuck on and she had some cold nights.
She was supposed to be an outdoor plant and still may end up out there. Popped her a bit to early for the northeast. She really seems to love the spider farmer se3000. I do prefer growing under the sun. Other than that she has good color and is starting to pack on some height.
5/5 she is moving along. Turned the light up to 70 dim. She how she likes that. She is sharing the light with a younger cheese auto that is not ready for more power
5/6 life has been hard on this little girl. Turned the light up to 70 dim and she got burned. She is still growing at a good pace. Her single leaves got torched a bit, I think she will be fine.
5/7 she is happy I turned the light down. Growing well.
5/10 bent her over today, lst. Maybe a little early. Her 3rd node is out and she has branches showing.
She had some sun the first few days after breaking ground. She will probably spend most of her time outside. The weather is supposed to be in the 70s for a while. Giving her a few hours of sun today then back under the light.
This strain is supposed to be pungent. We shall see. This is my first mesphito grow.

Likes
12
Share


@CheeRz
Follow
Unfortunately, the development of the buds does not look good. The buds are all tiny and growing very slowly. As we are already in flowering week 7, I do not believe that Lady Runtz will be nice yielder 😂.

Likes
38
Share


@GODSGIFT_2005_JM
Follow
For LIQUIDS & NUTES ******GREEN BUZZ NUTRIENTS***** organic.
Also i’m using their LIVING SOIL CULTURE in powder form!
MARSHYDRO ⛺️ has large openings on the sides which is useful for mid section groom room work. 🤩
☀️ MARSHYDRO FC 3000 LED 300W
💨MARSHYDRO 6” in-line EXTRACTOR with speed-variation knob, comes complete with ducting and carbon filter.

Likes
8
Share


@ThaGoat
Follow
Just water.
Had a issue six of my seedling's died smfh those Pee pots are the worst.
For the ones that's In flower. Just gave water and molasses. Other then that things have been ok


Likes
27
Share


@Theia
Follow
Hello. This girl is the fatest dankest kush I've ever grown. Her buds are just huge.
She is on a feed of bloom at 1.4-1.5ec
Lights are 60%
All is going great. May e another 14-21 days for her then

Processing
Likes
5
Share


@CecilioJardinero
Follow
Entrando ya en tierra derecha 😑😑😑😑
Modo zen en este proceso, ser paciente estar atento al engorde y esperar. 🤯🤯🤯
Así va el mix fem en sus últimas 3 semana 4 semanas para el corte 🌲🌲
Una de las #critical47 de @positronicschileoficial es la que estará primero y ya podemos ver que lograremos plantas sanas y limpias al final.
Las de mayor producción son las #fatbanana y la #greenpunch. La deaoyr resina hasta el mentó es una de las #critical47 y las #Toxic.
Durante todo el proceso y desde hace ya 5 años confiamos el cultivo a los fertilizantes de @topcrop. 🍒🌽🍍🌼💐💮


Likes
19
Share


@GrowMo
Follow
As she gets closer to the end these fat dense buds are filling out with a ton of trichomes that are so beautiful some almost look purple when the light hits just right. I can’t wait to try this bud out I’ve been so impatient about this cause it looks so good stay tuned for the chop soon only 2 more weeks!
Fed FloraFlex
B1 B2
3.0ec
6.0ph
No Cal-Mag


Processing
Likes
24
Share


@StunFlower
Follow
Things seem to be on track. Humidity continues to be my biggest challenge - hoping to to make it to the finish line without any incidents of mould. 🙏 Started cutting back on the nutrients. I must say I'm happy she's responded so positively to everything I've thrown at her as I've been a bit more aggressive with the fertilizers than with the original plan I had set out to follow. Hoping to see buds fattening up more over the next two weeks. 🌲

Likes
30
Share


@Silverback_Guerilla
Follow
9/10:
New week...good progress.
I'll probably transplant them into pots in a couple of days.
They are looking a little deficient, so I'll give them full strength nutes soon.
9/11:
I waited to long to transplant them and they have root problems to some degree or another...too wet for too long.
I transplanted both of them into 3 gallon pots and observed about 50% brownish roots on the bigger one. 😕
I powdered the planting holes with myco, tricho, and other goodness.
I added two Mars Hydro 150w lights, and a 60w 6500k LED panel light since they are all spread out now. The average CCT is still a little over 4800k, even though the Mars are a little warmer color temp than the Viparspectras.
9/12:
Between the root problems and the transplant, they looked horrible, so I sprayed them with BoomBoom Spray today and will do a good root drench tomorrow with BushDoctor Boomerang.
They looked better by the end of day, but still have a ways to go to get back on track...
9/17:
I fed them boomerang only twice this week, and gave also them kangaroots yesterday. They are both still a little droopy looking, but they are growing..
I'll prolly flip to 13/11 with emerson effect in the next couple of days.

Likes
435
Share


@Ju_Bps
Follow
Hello my friends grower 👨🌾👩🌾🌲
This first remote grow 🎥 week look nice, girl look nice grow up.
With 1l/bottles/plant around 8 days,
My friend came this Saturday to remplace the bottles.
Water + rhizo PH@6
And took the weekly video 📹
See you next week for the second remote grow week.
Thanks community for follow, likes, comments, always a pleasure 👩🌾👨🌾❤️🌲
Also to @marshydrococo2 , @News_SweetSeeds for sponsoring 💕💕.
Mars Hydro TS 1000
https://www.mars-hydro.com/ts-1000-led-grow-light
Gorilla Girl F1 fast version
https://sweetseeds.es/en/photoperiod-dependent-seeds/3065-gorilla-girl-f1-fast-version.html
See you next week my friends
Have a good week end 😁💕

Likes
65
Share


@Hologram
Follow
Goodday growmies
as i already told you, i could not log in for 11 days (mayb 10 but i like the number 11..😎)
Luckily GD finally let me in today..(finally ..sigh)
so i can show off my sweet Candy girl!
she is so awesome
dont tell the other girls but she is the most beautifull RN.. Hedge hogs are multiplying and getting fat in a fast speed!
looks like she is leaving then all behind ..
😇👌
it was cold and rainy but Candy still kept showing off her potential anywayz
she is not the tallest in my garden but iam feeling this is gonna be a FAT lady 👊 (LOVE BIG BUDS I CANNOT LIE ;))
she has a lotof Arphids too but i try to catch them in their tracks and i let loose some ladybugs, i have kidnapped from my garden..
they are the best @ hunting invaders. and clean up the whole plant👏
this week weather is gonna be much better so good times🙌
there is a lot of wind so lets hope the ladybugs hold on...
happy growing for all ✊
***KISS! growing technique: KeepIt Simple, Stupid!

Likes
9
Share


@Sato_Growing
Follow
My girls are going perfect they took about 10cm in height and become more bushy.
500-700 ml water per plant every day watering
About 3-4 times i water with nutrients and 3-4 times with water, depends on how many nutrients they want
Likes
2
Share


@Grandillustrator
Follow
Having to constantly move the ties as each branch keeps pulling in closer together , keeping on top of defoliation starting to get a weak smell when opening the tent overall plants healthy

Likes
55
Share


@Roberts
Follow
Fruity Pebbles in blue planet nutrition has grown really nice. She has a good fruity, sweet aroma. Loaded in trichromes, and looks like she will give me roughly a good quarter lb or more in a dry yield. Everything went fairly well in the grow. No major issue I can think of. Thank you Medic Grow, and ILGM. 🤜🏻🤛🏻🌱❄️🌱
Thank you grow diaries community for the 👇likes👇, follows, comments, and subscriptions on my YouTube channel👇. ❄️🌱🍻
Happy Growing 🌱🌱🌱
https://youtube.com/channel/UCAhN7yRzWLpcaRHhMIQ7X4g
Likes
44
Share


@The_Good_Twin
Follow
10 Oct 2021 (start of week 14)
Tragedy struck in the grow room today!! We lost a beloved companion in the form of a whole branch from C1. A picture has been uploaded to show the gory details. Sad day; sad day indeed!
Imagine my surprise today when I look into my tent and see not one, but two branches on C1 just laying over to the side. 😳 Now imagine that when you start to lift them up and secure them in place that you notice that one is no longer totally attached to the core, but just barely hanging on, and that the end is no longer moist, but dry.
The only thing to do is remove it. A whole branch, gone to soon, but probably far enough along to trim, dry, and cure! I’m trying to see the light here, but in reality I’m sad.
That isn’t the only issue either. Many of the branches are getting to heavy to support themselves, and I had to do a lot of maintenance to keep everything else going as planned. All of my gardening support posts I bought the other day have now been successfully employed. The only problem that I see is that I’m going to need more! Oh well. 🤷♂️
Keeping with the ripening stage right now, so they all three received the same level of nutrients in a gallon of water as they did the other day.
CALiMAGic 2ml, FloraMicro 5ml, FloraBloom 15ml, Floralicious Plus 1ml, and Dry KoolBloom 0.5 tsp.
Initial pH was 5.5 for both C1 & C2, and 5.4 for C3. I added 8ml’s of pH UP which adjusted all 3 gallon’s pH to 6.3. I didn’t adjust them any more.
TDS levels going into each plant was as follows: C1 - 1442 ppm, C2 - 1363 ppm, and C3 - 1378 ppm.
Runoff levels were as follows: C1 - pH 5.7, TDS 2161 ppm. C2 - pH 5.7, TDS 2265 ppm, and C3 - pH 5.5, TDS 2391 ppm.
Other than losing a branch due to weight, and having to support many others, the plants are still doing very well. Hopefully I don’t lose any more branches!! This should be the last week of nutrients, then to the flush, and harvest. Almost there, but not quite yet.
Happy growing everyone!
14 Oct 2021
I had planned on defoliating the older, larger fan leaves on all 3 plants today, but some issues came up and I wasn’t able to do as much as I had hoped to do. I removed some of them, but couldn’t do it as much, or as well as I had hoped.
The end of the 45 day flowering period is this coming Sunday, but I’m still using the ripening stage of nutrients this week. I’ll start flushing them in a few days.
Today my lovelies received 2ml of CALiMAGic, 5ml of FloraMicro, 15ml, of FloraBloom, 1ml of Floralicious Plus, and 0.5 tsp of Dry KoolBloom mixed into a gallon of water.
The initial pH for C1 was 5.5, and C2 & C3 was 5.4. I added 8.4ml’s of pH UP to each gallon which adjusted the pH in all 3 gallons to 6.4.
The TDS levels going in was 1440 ppm for C1, 1464 ppm for C2, and 1503 ppm for C3.
Runoff levels were as follows:
C1 - pH 5.8, TDS 2194 ppm.
C2 - pH 5.7, TDS 2477 ppm.
C3 - pH 5.7, TDS 2439 ppm.
The plants are still developing well, and the buds look awesome! The smell is very strong and amazing. So far they are doing very well, and we’re almost at the finish line.
Tent temp was 82F, and humidity was 48%.
See you all in a few days. Happy growing!

Likes
4
Share


@PolezGardn
Follow
fifth week flower, the ladies are getting really tasty and developing well!!
