
Processing
Likes
Comments
Share


@eldruida_lamota
Follow
Que pasa familia , vamos actualizar estas misty gorilla auto de Zambezaseeds, están increíbles, vaya color, como van formando esas flores , añado mega PK(0,5gr),Terminator, tricoma y explotacogollos (0,2gr),todo de la gama AgroBeta, que por cierto contentísimo con los resultados hasta ahora , cubren todas las etapas de principio , hasta el final de la floración.
Sigo controlando la humedad en que no suba de 50% la temperatura que no aumente de 27 grados y el ph controlado en 6,2 siempre en cada riego tenga nutrientes o no.
Pues lo que veis es lo que hay espero que os este gustando este diario, ya que no soy partidario de poner autoflorecientes en indoor, os traigo el lst en indoor con autos para seguir aumentando los diarios y que os puedan servir de referencia o futuras dudas, un saludo fumetillas y que tengáis buenos humos.

Likes
20
Share


@THCanbisGrower
Follow
This week in thailand is very hot.
temperature about 34 - 37 °C ( 93 - 98 °F).
😵😡
and my grow tent about 35 °C and if i don't have exhaust fan (size 8 inch) it's gonna be bad thing happen on my plants.


Likes
17
Share


@BuddingBudda
Follow
Flipped these they looked like they was ready but i had to go away for 4 days and when i got back god they got bushy!! So many side shoots etc so ive had to trim them again take a lot of side shoots out but hopefully they didnt waste too much energy on them, going to leave them a day or two before i trim again didnt want to do it all in one go so they are looking a bit shabby at the min but they will get back on track. Got to say this strain has been really good to grow so far and its had a really good recovery and growth rate also up to now ive had no nutrient issues all the leaves have been perfectly green which is a first for me 😂,

Likes
14
Share


@BudXs
Follow
CRAZY NIGHT (continued)
So apparently frontdeskgirl is pissed that NX left and is saying shes coming back to the hotel (she knows which rooms he has booked) Im just trying to eat breakfast and watch naked waitresses serve the bacon, and now we gotta race back to the hotel whilst calming down frontdeskgirl. We settle up, leave generous tips, and cab back to home base. We arrive to find Jon and Stephanie 2 missing, Stephanie 1 still passed out. The other 2 werent missing long, we found them fucking in the nearby stairwell. Under a security camera, so that was nice. They didnt have a key to get back in the room once they had left to smoke a joint, so they just fucked in the hallway. Got em in the room, and it wasnt 5 minutes before a knock at the door : "security!" Never good at 6am in a hotel room
DIARY STUFF
Coming in strong this week, these fast finishing photos are on the final stretch. Various percentages of amber coning out daily, waiting till about 30% Nutes are eliminated, running straight ph'd water and the fall colors are coming about. Looking forward to a chop very soon, and the harvest reports to follow.

Likes
3
Share


Likes
140
Share


@MrJones
Follow
mrjones - Slurricane #7 S1
🌱Slurricane #7 S1
@inhousegenetics_official
👨🌾🏽GD Grower: MrJones
🔹🔹🔹🔹🔹🔹GOALS🔹🔹🔹🔹🔹🔹
🌞Environment - 75/80℉ and 55% Humidity
💧 Feeding - Advanced Nutrients Organic
⚗️Soil - 50% Ocean Forest / 20% Tupur Royal Gold / 10% Earth Worm castings / 10% lobster Compost / 10% Additional Perlite
🍃Training / HST, Will be topping, Cloning, and creating larger plants, and placing to flower under a trellis
🕷️ IPM - Will be using Green Cleaner" 1 OZ per Gallon, and CannControl from Mammoth alternating between product each month for Integrated Pest Management.
💡Mars Hydro LED / Veg Geeklight Monster Board 480W V4 / Flower 480W FC 4800
🔹🔹🔹🔹🔹🔹🔹🔹🔹🔹🔹🔹🔹🔹🔹
📜 Rambling - With the start of week 5, did some serious HST, super cropping, along with a full stem massage, Jushman Chropratic Style. Let's see how a week progresses and how they look at the week's end,
🔹🔹🔹🔹🔹🔹🔹🔹🔹🔹🔹🔹🔹🔹🔹
▶️ Sunday - 03.07.21- The ladies are loving their new 5 gallon buckets, may be able to feed less per day or just less frequently, the new Pro-Mix HP is really nice.
Super cropping is a high-stress training technique that involves pinching and bending branches to damage the inner fibers while leaving the outer lining intact. ... On a secondary level, super cropping is a way to manipulate how your plants grow
▶️ Monday - 03.08.21- Checked in on these ladies this morning, fed each plant with 40 ounces w/ nutrients, they were looking a little wilted, I also lowered the plants down (removed milk crates from under the drain tray) about 40 inches now from the lights, plenty of room to develop their legs. Will post some pictures later this evening. UPDATE - these ladies are already bouncing back! They are thriving!
▶️ Tuesday - 03.09.21- So after Sunday's session with HST/Super Croping these girls are bouncing back and looking great! They are creating amazing bushes and will be choosing one for mother plants, and transplanting the other 4 outside.
▶️ Wednesday - 03.10.21-these ladies are looking so nice but different, I am learning words likening the thicker ones versa the single Sativa looking 1! All good tonight will feed in the AM.
▶️ Thursday - 03.11.21- Fed full 40 ounces this morning.
▶️ Friday - 03.12.21- Tonight just a close inspection, they are looking great, will be doing a fill IPM on all plants in the morning.
▶️ Saturday - 03.13.21-- Fed full 40 ounces this morning.
🔹🔹🔹🔹🔹🔹🔹🔹🔹🔹🔹🔹🔹🔹🔹
📜 Cultivar Information - In House Genetics - Slurricane #7 S1
🔹🔹🔹🔹🔹🔹🔹🔹🔹🔹🔹🔹🔹🔹🔹


Likes
13
Share


@goeser
Follow
just a wet papertowel in a plastic bag for one day
then after one day into a germination type of thin from rqs
5x Fat banana Auto Left side
3x Bubble Kush Auto Right Side
Processing
Likes
6
Share


@AbbyRose
Follow
Autos are doing great under the new light hopefully it will increase the yields


Likes
44
Share


@Buffynuffy
Follow
It’s amazing watching these plants grow, it’s been an experience already and so much to go with this grow and with all the learning to come I hope it looks okay to you guys anyone who would like to comment please do I’d love to hear other’s thoughts!
Likes
16
Share


@Naturalist
Follow
Uped lights to 30000 lux today added some mosquito bits as a few fungus gnats have been flying around, should be topping Gelato #1 soon its been really shooting ahead.

Likes
61
Share


@MadeInGermany
Follow
Everything is going great :-)
You can see every day how they continue to explode :-) Although we are still at the beginning of the vegi phase, the roots grow out on the first drain hose.
I carefully pushed it back up into the system :-) As fast as it all goes, I think I'll switch to bloom next week. I wish you all a nice grow 😎

Likes
9
Share


@Headies
Follow
So I had a little less nutrient last week then i needed. Def a calcium deficiency. I think it's clearing up but this plant has spot all over it. I changed the water, gave it the right amount of nutrients and a little exra hydrated lime for calcium. Hydro is hard. I hoping It's not sick. I hope It doesn't get the other plants sick. Just a few weeks left.
Likes
9
Share


@JakeTheButcher
Follow
Week 10 of flowering! This last week has been one of the most challenging when it came to climate, After I stopped C02 the humidity levels just continued to climb and the AC and Dehumidifier could not keep up. I'm guessing this has to do with the sheer volume of the plants in the airspace, and without the additional C02 keeping the stomas partway closed. I've decided to just leave the tent open during the day and its sits right at 55% humidity.
Now on to the flush...

Likes
6
Share


Likes
10
Share

@all_about_420
Follow
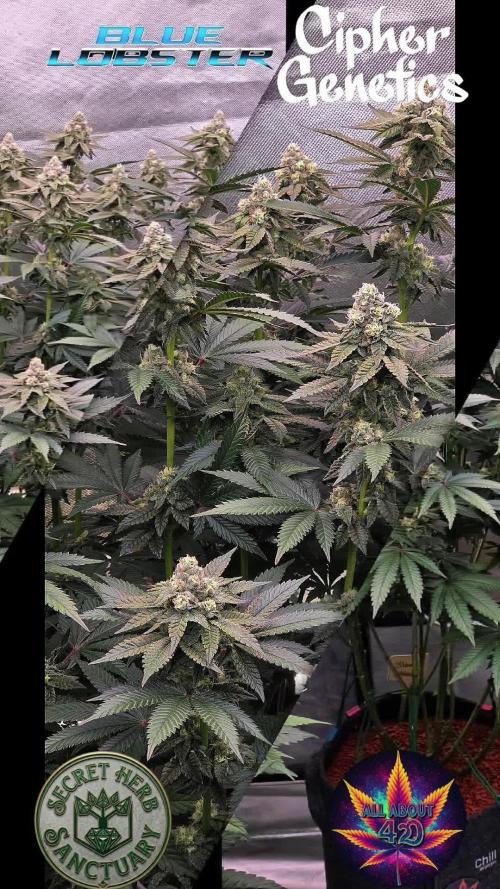
In der fünften Blütewoche bricht bei der Blue Lobster von Cipher Genetics die entscheidende Phase an, und die exklusive Genetik aus Blueberry x Banana x Blue Lobster zeigt jetzt ein ganz besonderes Phänomen. Das absolute Hauptaugenmerk liegt in dieser Phase auf der beginnenden Reife der Harzdrüsen, bei der sich auf den prallen Knospen zunehmend ein charakteristischer, intensiv gelblicher Trichomteppich bemerkbar macht, der fast wie feiner Blütenstaub wirkt. Diese dichte Puderzuckerschicht überzieht die massiven Blütencluster, während die Buds unaufhaltsam weiter anschwellen, an Dichte gewinnen und langsam eine minimale, leichte bläuliche Färbung annehmen. Das komplexe, fruchtig-süße Terpenprofil dieser Kreuzung kommt immer deutlicher durch, und das stabile, tiefe Blattgrün zeigt, dass die Nährstoffversorgung perfekt balanciert ist. Die Lady läuft absolut am Limit ihrer Leistungsfähigkeit und baut genau die klebrige High-End-Qualität auf, die man von dieser Genetik erwartet.