


Likes
Comments
Share





Likes
2
Share


@YAMA47
Follow
Dia 67 desde germinacio.aqui muestro las 2 mas avanzadas.comparando cultivos de bsf Arg. Con Bsf España. LLEGO A LA.CONCLUSION QUE A NOS NOS TRATAN DE SUDACAS Y NOS MANDAN SEMAS DE CALIDAD MEDIA.PROX CULTIVOS CAMBIO E BANCO¡


Processing
Likes
11
Share


@GreeneRecluse86
Follow
Such a great week watching these ladies bulk up!
It's looking like the gorilla zkittles won't get a full week on its current food schedule before I start it on its winter frost and flushing. The Red diesel and Phantom will probably take another two weeks on there food schedule.
Happy growing people!
I wish I would've started this grow sooner, then I wouldn't of ran out of stash during this quarantine!

Likes
35
Share


@Organic_G
Follow
Habe sie vorgestern das letzte mal trainiert vor der Blüte 🍀
Wachsen wie verrückt mit dem richtigen Setup, das macht echt einen Unterschied.
Selbstbewässerungssystem und CO2 Anlage habe ich mir ebenfalls zugelegt die in morgen Installiert werden.
Noch ca. 1 Woche Veg dann gehts ab in die Blüte


Likes
26
Share


@Dunk_Junk
Follow
She has grown another 10cm/4" this week!
Flowers developing quite slowly compared to her tent-mates. I'm hoping this is a sativa dominant phenotype??? Can anyone shed some light on that please?
I left the tape measure visible in the video for scale. Good? Helpful?

Likes
23
Share


@SonomaSungrown
Follow
French Macaron hit peak purple and trichs are all ready to roll.
Chem Brulee smelling amazing and packing on weight.
Pineapple Meatball remainders have now started going DEEP purple. Could end up with a few head stash nugs off of this late harvest.


Likes
17
Share


@GreenHouseLab
Follow
A lot more active on Instagram, green_house_lab
If interested in the genetics hit me up
My heart and spirit is with the people in Ukraine 🇺🇦💚
Likes
229
Share


@DadasGrow
Follow
Well they have been on 12/12 for 2 days now, this evening they began their 3rd day of flowering. They need a good defoliation. I’m feeling very overwhelmed by the canopy density, because my screen has such small spacing, all the vegetation in the middle is very tightly packed. No major issues. Making sure to keep my ph in check and I dismounted my fan from it’s stand and zip tied it to one of the tent supports. Hopefully everything continues in the right direction!
Oct 3
The stretch is on. These girls look great. I’m going to be feeding them tomorrow. They have filled in quite nicely from their last defoliation and I need to do another. I’ve tucked a number of leaves I should have clipped but I didn’t. I will have to do it soon.
My dog, Slade, was being a suck tonight so I let him downstairs with me.

Processing
Likes
12
Share


@Silverback_Guerilla
Follow
4/20:
I have 3 good clones of the shortie growing, and another FFT6 seedling.
5/1:
The seedling is now in a 5 gallon pot outdoors, and 2 of the clones are in my closet getting ready to be transplanted into 5 gallon pots and moved outdoors. One of the FFT6 clones will be grown in my tiny tent.
5/6:
I took the last two clones outdoors and fed them really well. I also did some training on the seedling and the clone in my tiny tent.
5/7:
I did a foliar application of Axiom Harpin proteins today.
5/9-5/11:
Did foliar feeding and lots of training every day.
5/12 - 5/17:
Fed the outdoor girls on the 13th, then we had lots of rain all week. The seedling is a beast. Installed a new 200w 3000k waterproof LED over the outdoor plants. The indoor clone looks great. I gave her some water on the 16th.
5/18 - 5/19:
The seedling and two clones outdoors are all flowering?!?!
I suppose it's because I germ'd and vegged them for a month under 24/0 before taking them outdoors under 14/10 of daylight...
I'm really hoping she sees the days getting longer and goes back to vegging. I need time to bush her up really well!
I ordered another 200w 3000k waterproof LED to replace the two cool white 60w LED's, so that will be 550w total watts of lighting outdoors in addition to the 5'ish hours of direct sunlight they get at mid-day, and the tree-diffused sunlight they get for the rest of the day.
Thinking about trying a product called Bud Bomb...has lots of hormones, cytokinins, and auxins that when applied at the beginning of flowering supposedly causes more lateral branching and less vertical stretch. As it is, I'm spending too much time training her and the other outdoor plants to stay below the eyeline of nosy neighbors, so I'm really considering giving it a shot...
5/20:
I went for it and sprayed them with Bud Bomb this morning...hope it works like they claim..
5/21 - 7/4:
The clone i grew in the tiny tent got to move in under the quantum boards for her last 2 weeks and fattened up nicely. I harvested her on 6/28 and washed her buds, then jarred and weighed her on 7/3. She produced 110g of cola and 51g of lower bud...very little of it was larfy.👍
After a few great weeks flowering outdoors, i was invaded by spider mites and grasshoppers. The #6 seed-grown plant didn't make it, but i brought the #6 clone indoors and treated her for spider mites a few times, along with the 2 x #1 clones and the #7 plant. That outdoor clone now in my closet is still flowering as of 7/4, but had her last dose of nutes on 7/3. Flushing in a few days.


Likes
62
Share


@Natrona
Follow
The Divine ladies Afghan Bullet and Pablo Escobar are getting close to harvest. I'm going to water only for the remainder.
Tps1 30 ml
Ph 7.01
Ppm 505
each received 3 ltrs
Thank you @DivineSeeds
Thanks for the visits, likes and comments, I appreciate all the plant love💚.
Have fun & love what you grow 💚
Sending you good vibes of love, light, and healing 💫
💫Natrona 💫

Processing
Likes
49
Share


@AsNoriu
Follow
Day 15. All girls will get either first or second feed. Upside down Kush was left in original pot, newwaver Kush was ripped with fingers from soil and transplanted to new pot, never will i have two plants in same pot ever again !!! And just couldn't throw out one ;)))
Kushes got middle of the tent, think i will top them only, it will be too bushy with 11 heavily LST'ed plants.
Think day 18 - first training day for 8 girls ;)
Day 16. Girls are loving life - thats fact !. Now i have to rethink LST plan, thought to train them on day 18, but they grow so compact, that i have two options :
A. Top them on 5 or 6 nod and train from there.
B. Lift lights and induce vertical grow. But its such a tricky move, usually they repeate that overstreched patern even if you bombard them with light after ...
C. Postpone LST to day 24-26. Never i did it so late, stem becomes very stiff, hard to bend her heavily ...
Next few days will show ...
Day 18. Girls are real beauty, they started to strech a bit, will give couple more days and will train them hard on monday.
Day 20. Dice was rolled !!!
LST !!! Girls are very compact, will be fun to veg them will have to plan well how to flatten up them.
Kushes are behind, but i had to keep tent as dry as possible, need plants dry, otherwise stems crack from such heavy training. Put couple soft wires to lift leaves from soil ..
Pure ph water and loads of spray now !!!
Next few days will show ...
Happy growing !!!
Likes
39
Share

@squalino
Follow
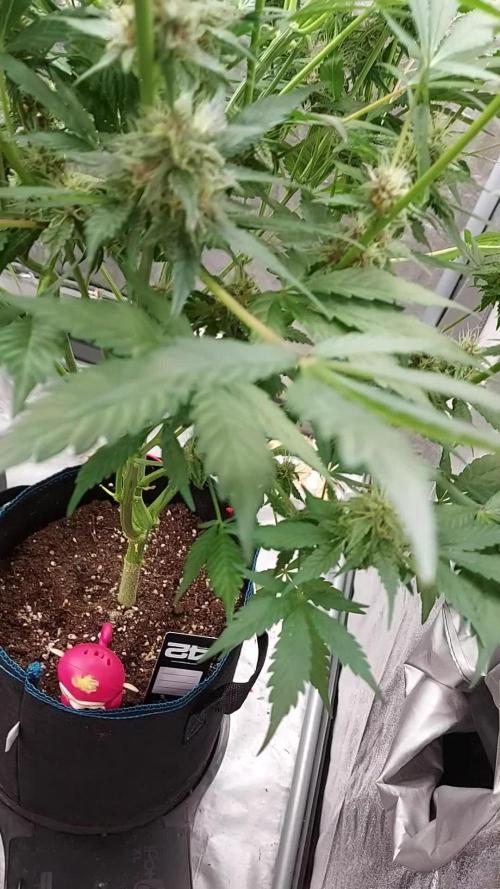
Journal de Culture : Frost 1 (Semaine 7)
Génétique : Frostbanger (F2 Perso) | Système : Autopot 20L
📣 Remerciements
Un immense merci à toutes les personnes qui suivent ce journal depuis le début ! Un grand merci en particulier à @MIA_BIOTABS et à Mrs_Larimar pour leurs précieux conseils toujours aussi utiles. Merci à tous pour votre soutien !
🛠️ Configuration Technique & Gestion de l'Espace
Éclairage :
Lumatek ATS 300W Pro (réglé à 75%)
Distance lampe/canopée : En adéquation avec la fin de la pousse verticale
Climat :
Jour : 25°C / Nuit : 21°C
Humidité (HR) :
50% (parfaitement stabilisée par le déshumidificateur)
Tente : 1m80 de hauteur
📅 Évolution & Floraison : Fin du Stretch
Le mot du cultivateur :
Petite confession pour cette mise à jour :
je suis parti en vacances à Rimini sur un coup de tête avec ma famille ! Pas d'inquiétude pour la box, l'Autopot gère l'arrosage en mon absence et le déshumidificateur veille au grain pour garder un climat impeccable.
Les automatisations, ça change la vie !
État de la plante & Morphologie :
Hauteur actuelle :
83 cm (+ 5 cm depuis la semaine dernière).
Aileron, étirez-vous :
Bonne nouvelle pour la gestion de l'espace dans la tente, elle a enfin arrêté son stretch ! On va pouvoir respirer par rapport à la hauteur de la lampe.
Évolution des fleurs :
Les têtes sont maintenant bien formées et commencent à prendre une très jolie structure.
Observation couleur :
Petit détail intéressant, elle commençait à changer de couleur pour tirer vers le violet, mais elle s'est arrêtée en chemin. C'est dommage, j'aurais bien aimé voir ce phéno s'exprimer à fond, mais elle reste magnifique !
Nutrition (Le passage au PK) :
Comme prévu après la période d'assèchement du pot, je suis passé à l'action côté booster :
Apport manuel de 4 ml de PK 5-8 de chez Biotabs dans 0,75 cl d'eau (pH 6,3).
Cet apport ciblé arrive pile au bon moment pour soutenir l'explosion des premiers vrais pompons maintenant que la structure ne bouge plus en hauteur. Le reste du temps, l'Autopot continue de distribuer l'eau claire.
Résumé visuel :
La canopée stabilisée présente une belle homogénéité. Les sites de floraison profitent pleinement de l'espace libéré lors de la dernière mise à jour. Les fleurs se densifient, la résine commence à s'inviter sur les petites feuilles et l'aspect général respire la santé. La phase de gonflement est officiellement lancée !
une bientôt ❤️❤️

Likes
2
Share

@Northern_Ent
Follow
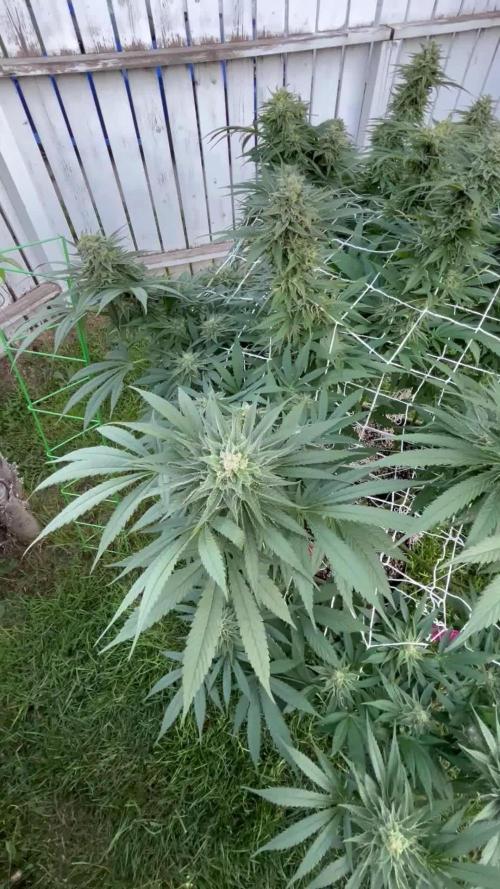
Sep 12: Godfather OG is doing great. Likely 2 or 3 more weeks, ideally, but will likely have to harvest earlier due to weather.
Final Flush was done today using 9 L of 26 C warmed water. Decided to do the flush because one of the other plants is having problems with bud rot and the season here is ending soon. Wait 7-10 days after the flush so that timing works on this surprisingly fast flowering plant.
Sep 13: did another 18 L flush as I decided 9 L yesterday wasn’t enough. Defoliated to expose buds to sunlight.
Sep 18: flowers are looking really nice. Removed a small bit of bud rot that she picked up from her wagon mate that had a bad outbreak. She looks really good, and the bit I had to remove had a great pungent smell and the buds are nice and solid.

Processing
Likes
34
Share


@Ashbash
Follow
Hey there,
Welcome to another week in the tent.
All plants are proceeding well, only thing is the gelato leaves are very light green in places bordering on yellow. I have added a little exra N nutes to that plant to try and remedy.
Other than that its plain sailing. Very easy going plants. Might just be me, but im sure that the QB has bought out the pistils sooner than the HPS did, but who knows. Light is doing very well, ecstatic with the upgrade.
Tried to upload a vid, but getting site errors, so maybe later it will be up.
Happy Growing.

Likes
10
Share


@portcityplug
Follow
I did HST on B and put one of the branches into the centre for a better spread of the light I also took off all the under foliage from A give it some better airflow
did a water change on the 26 everything is looking good to me a little burning on some leafs but light moved up now
Likes
112
Share


@PEAKYPLANTERS
Follow
welcome back, brothers of the old weed! we apologize for the interruption of services, but we went for a swim in the sea to recover stronger than before!our sprouts seem to be very happy and are gaining weight very well! I hope you enjoy our content! a kiss to all, see you soon


