


Likes
20
Share

@DogDoctorOfficial
Follow
Grow Report — Nectar Drip
GrowDiaries Week 10 (Actual Week ~6–7 from Seed)
First things first, a small clarification for anyone following the diary closely.
On GrowDiaries this report appears as Week 10, but in reality the plants are around week 6–7 from seed. The reason is simple: the first entry in the diary was created during germination and no photos were uploaded at that moment, so the timeline shifted a little on the platform.
So for accuracy:
plants are currently around week 6–7 from seed and well into early flower.
Now let’s talk about what has been happening.
⸻
Quick Recap
For anyone just arriving to the diary, here’s the short version of the journey so far.
The goal of this run has always been simple:
grow healthy plants, observe them carefully, and share the process honestly.
The environment has been kept stable and relatively simple:
• 12/12 from seed
• balanced feeding schedule
• steady environmental control
• minimal intervention unless the plants ask for it
Up until now we mostly focused on guiding growth and observation, allowing the plants to express themselves naturally while keeping the canopy organized.
And they are doing exactly that.
⸻
This Week — The Garden Is Exploding
This week the girls are looking absolutely incredible.
Structure is strong.
Color is perfect.
Leaf health is excellent.
And the most exciting part:
trichomes are already everywhere.
Even at this stage the plants are starting to sparkle. Resin production is clearly ramping up and the flowers are stacking beautifully.
Height is now roughly around one meter to a little over one meter, creating a very healthy canopy without stretching out of control.
Honestly, these are beautiful specimens and a joy to watch develop.
⸻
Defoliation — Why We Did It Now
This week we performed a targeted defoliation.
This was not done because the plants were struggling or because something was wrong.
We did it by choice and by timing.
The reasoning is simple:
It is often easier and less stressful to remove certain leaves earlier in flower rather than waiting until the canopy becomes dense and airflow becomes restricted.
So we removed only what was necessary to:
• improve light penetration
• increase air movement inside the canopy
• reduce future humidity pockets
• allow the flowers to develop in a more open environment
Nothing aggressive.
Nothing excessive.
Just removing leaves that were clearly blocking key flower sites.
This kind of intervention is always a balance. Different growers prefer different approaches, but in this case it felt like the right moment to open the canopy a bit.
Now we observe how the plants respond.
⸻
First Structural Training
This week also marks the first time we applied some stronger structural training to these girls.
Until now the plants were mostly guided and allowed to develop naturally.
At this stage we introduced a bit more direction to the structure so the canopy develops evenly and future flower sites receive better light exposure.
Again, nothing extreme.
The idea is simply to help the plant organize itself for the next weeks of flowering.
The real feedback from this will come in the next report, where we will see how they react.
⸻
Environmental Conditions
The room is currently running around:
Temperature: ~28°C
Relative Humidity: ~68%
Outside conditions at the moment are:
~10°C with about 87% humidity
Considering the outside environment, we are actually very happy with how stable the room is staying.
But one thing worth mentioning:
We don’t chase room VPD numbers too aggressively.
What really matters is leaf VPD and plant response.
Plants tell the truth much better than charts do.
Right now the plants look extremely happy:
• strong leaves
• no stress signals
• steady growth
• excellent resin development
So the environment is clearly working for them.
⸻
Nutrients
Feeding remains exactly the same for now.
No changes this week.
The current nutrient schedule continues to support healthy growth and there is no reason to modify something that is clearly working.
Sometimes the best move in the garden is simply:
don’t change what isn’t broken.
⸻
Introducing a New Team Member
This week we also officially welcomed a new member to the team:
Mr. Baggy.
He has already been making appearances around the garden and many of you may have spotted him in some of the photos.
He’s now officially part of the crew and helping around the studio and garden.
Please give him a warm welcome when you see him around the diary.
He’s a cool guy and we’re happy to have him with us.
⸻
Gratitude
As always, huge appreciation to everyone who takes time to visit this diary.
To the:
• longtime followers
• new visitors
• curious growers
• supporters
• skeptics
• lovers
• haters
Everyone has a space here.
If energy crosses paths here, something is being exchanged and that always has value.
Special thanks as well to:
• the breeders behind these genetics
• the GrowDiaries platform
• the entire GD community
And of course to the sponsors supporting the project.
⸻
What To Expect Next
Over the next weeks we will mainly observe how the plants respond to the structural adjustments made this week.
Things we’ll be watching closely:
• flower stacking
• resin development
• canopy response after defoliation
• structural balance of the plants
If everything continues like this, the next weeks should be very exciting.
The girls are clearly entering the phase where the flowers start building real weight and character.
And we’ll be here documenting every step.
🙏 Thank you for your patience and continued support.
FOR DISCOUNT CODES AND MORE JUST FOLLOW THE LINK https://website.beacons.ai/dogdoctorofficial
📲 Don’t forget to Subscribe and follow me on Instagram and YouTube @DogDoctorOfficial for exclusive content, real-time updates, and behind-the-scenes magic. We’ve got so much more coming, including transplanting and all the amazing techniques that go along with it. You won’t want to miss it.
GrowDiaries Journal: https://growdiaries.com/grower/dogdoctorofficial
Instagram: https://www.instagram.com/dogdoctorofficial/
YouTube: https://www.youtube.com/@dogdoctorofficial Deleted by Youtube
Vimeo : https://vimeo.com/dogdoctorofficial Under construction stay tuned ⸻
Explore the Gear that Powers My Grow
If you’re curious about the tech I’m using, check out these links:
🔆 Lighting & Environmental Control
• Future of Grow — Advanced LED lighting technology
https://www.futureofgrow.com/
DISCOUNT CODE: DOG20
• Lumiflora — Under-canopy LED lighting
https://lumiflorade.com/
• TrollMaster — Environmental controllers and automation gear (past collaboration)
⸻
Genetics
• Zamnesia Seeds — Genetics used in this project
https://www.zamnesia.com/
⸻
🌱 Soil, Substrates, Boosters & Root Support
• Plagron — Substrates, bio mixes, and supportive products
https://plagron.com/en/
⸻
🎒 Storage, Curing & Preservation
• Grove Bags — Curing and storage solutions
https://grovebags.com/
⸻
Straw Baggy Links
🌍 Website
https://www.strawbaggy.com/?ref=339 10% discount code for our Community - Dogdoctor10
📸 Instagram
https://www.instagram.com/straw_baggy/
⸻
📸 Photography Equipment & Tools
(Not sponsors, but part of my creative toolkit)
• Sony A6700
• Sony full-frame macro lens + few more
• Stacking photography workflow - learning
• iPhone (for behind-the-scenes shots)
We’ve got much more coming as we move through the grow cycles. Trust me, you won’t want to miss the next steps, let’s push the boundaries of indoor horticulture together!
As always, this is shared for educational purposes, aiming to spread understanding and appreciation for this plant. Let’s celebrate it responsibly and continue to learn and grow together.
With true love comes happiness. Always believe in yourself, and always do things expecting nothing and with an open heart. Be a giver, and the universe will give back in ways you could never imagine.
💚 Growers love to all 💚
📸 P.S. – The Eye Behind the Lens
All photos in this diary (for now — except for the ones showing the camera, which I took with an iPhone) are taken with a Sony A6700 paired with a Sony full-frame macro lens and a few more.
Photography is part of the story — it’s how we share the fine textures, the glow, and the quiet details that words can’t always capture.
I’ve also started experimenting with photo stacking — a technique where multiple images, each taken at a slightly different focus point, are layered together to create one perfectly sharp image from front to back.
It’s not digital enhancement or AI; it’s pure photography — a way to reveal the plant’s beauty in microscopic depth, from trichome to petal.
You’ll even see a few shots of "ghost me" capturing the shots — camera, lens, setup — because every grow deserves not just to be cultivated, but documented like art.
FOR DISCOUNT CODES AND MORE JUST FOLLOW THE LINK https://website.beacons.ai/dogdoctorofficial
NEW DISCORD - Official Server Invite Link : https://discord.gg/ksjAkA5T74


Likes
18
Share


@Grower_Of_Persia
Follow
week intel:
its time to harvest some of plants the ones that is mature enough. indica dominant plants will done first always so we should harvest them first
because my base nutrients and one of boosters was salt based, i'll do flushing this week to get some relieve to plants in the last days
stresses :
flushing
Drought stress via watering only one time with flushing this week
feeding:
day 1 : i flushed them with Advanced Nutrients Flawless finish and adjusted ph
day 3 : no more feeding from now on
day 5 : no more feeding from now on
guide of the week :
i harvest in 2 parts : first i harvest top of the branches and will let the lower buds to ripe another week then ill harvest the second wave.
indica dominant plants will get done 1 or 2 weeks sooner than sativa dominant plants that will often takes more than 8 weeks so be aware to harvest them sooner.
my dry and cure style is this:
3 days of hanging upside down to get water activity lower to around 0.6 in 50% humidity and 26 C temp (i know its a little high but we are in a hot summer right now and i cant get it lower even with air conditioner) and then after 3 days of drying i remove leaves and stalks, trim buds and move them to jar for the rest of their life :D . and in the first 4 days of curing i open the jar door and let hem get some fresh air in the jar for about 5 minutes and close the jar door again, after 4 days of curing like that buds are smokable but they will get better as they getting cured about 1 month.
im happy as hell with this harvest :D.

Likes
3
Share


@Pirangueiro
Follow
My first plant! I think the setup exceeded my expectations!! Just 60w led. 1 week to dry and know healing in glass pot! Im satisfied.
Likes
99
Share


@CrazyHorse
Follow
Hello my friends 😇
I'm very sorry for missing updates, I'm very busy man in last weeks so I have very limited time for myself thats why I get silent for a while 😑
Good think is all of my girls doing great or even better 😅
I didn't add any new pictures for few days, different between that days is amazing, what do you think ??
Have a good night 😴 You Lovely Girls Growers 😇 💪 🙏
Likes
49
Share


@Bronhitis
Follow
This is first plant of 4, so total dry weight will be updated in about 2 weeks. I made a quick video about bud development, because i couldnt find it anywhere on the web.


Likes
13
Share


@710_Squish
Follow
There should be lots of growth this week before the stretch. I'm seeing the biggest growth from the growth tips on the 2nd and 3rd nodes but the 1st nodes are catching up. I will probably start some lst this week.

Likes
16
Share


@Canadian
Follow
She has been suffering from some heat stress and also like burn but because she has been grown too close to the light .Has been growing without stop vegging for a long time meaning will allow you to do extensive training on her and maximize yield. smell is very strong and I'm glad I get a chance to this strain that has been on my reserve for at least 2 years.
I will continue to update thank you for reading have a happy grow

Likes
4
Share

@BudsPerMinute
Follow
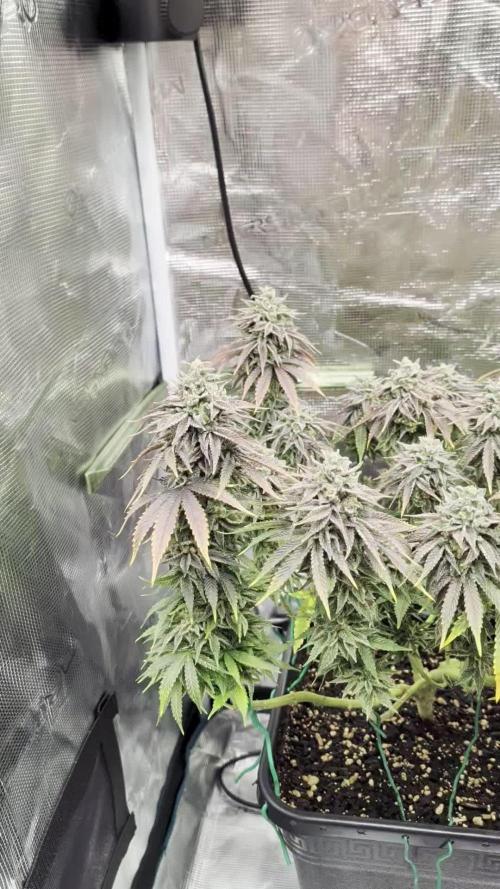
Woche 12
Wow innerhalb von 1 Woche haben die Pflanzen ihre Farbe verändert! Man bemerkt das Blue Zushi in der Genetik steckt nicht nur an der wunderschönen fast schon schwarzen Farbe sondern auch am wirklich intensiven Terpenen Profil!
Diese Woche wird wahrscheinlich schon geerntet da die ersten trichome schon Bernsteinfarbend sind.
Likes
3
Share


@I_Identify_As_A_Dan
Follow
Day 35
Shes disappointed me a little with her stretch power, hopefully shes waiting to use her secret weapon a little later into flower.
Also cleaned her up down the bottom as those leaves were completely in the shade.
Shoot of her top of pot roots looks decent.

Likes
2
Share

@AlphaCut_Gen
Follow
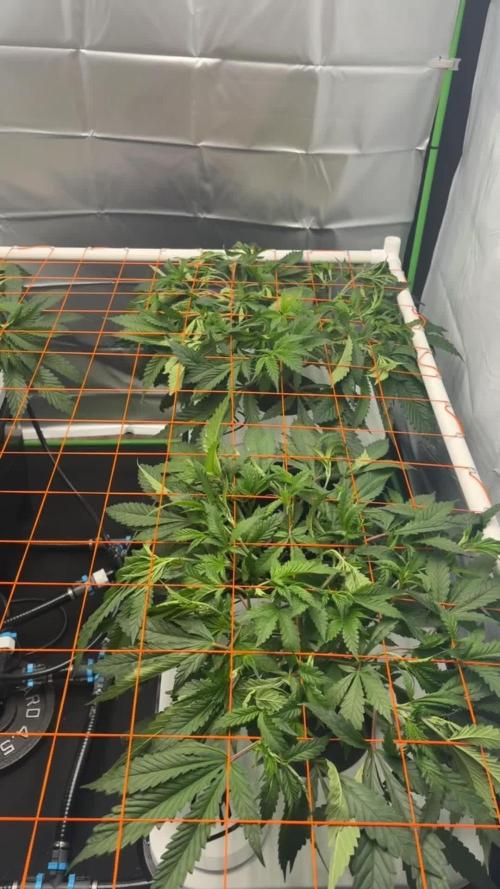
I’ve stopped tucking over the past week to avoid snapping shoots during stretch. At this point I’m letting the plants do what they do best and focusing on environment and nutrition rather than manipulation.
Once the second trellis net goes in, I’ll start assigning individual squares, spreading the canopy a bit more, and following up with a defoliation to improve airflow and light penetration.
We’re currently 9 days into flower and the plants are healthy, vigorous, and drinking well. I couldn’t ask for a better run so far. I expect to see bud sites forming across all tops by the next update as stretch begins to slow and flower development kicks in.
Likes
12
Share


@CordersGreen
Follow
👉DIA : 13/12/21👈
Metodo de germinacion: 👉<< VASO DE AGUA >>👈
seleccionamos las cantidades deseadas de semillas y en un pequeño vaso con agua opmotizada insertamos las semillas para nutrirlas durante 12H, situada en un lugar sin luz, apropiadamente tapada con un trapo.😉
__________________________________________________________________________________________________________________________________________________________________________________
👉DIA : 14/12/2021👈
👇👇👇👇👇👇👇👇👇👇👇👇
una vez pasada las 12 H de germinacion en vaso de agua , depositamos las semillas bien colocadas en un recipiente con papel de cocina humedecido con agua y 1ML de estimulador de raices (TOPCROP).
Esperamos de 1 a 2 días a que salga la raiz de la semilla y ser transportada a los Jiffy😉
___________________________________________________________________________________________________________________________________________________________________________________
👉DIA 17/12/2021👈
👇👇👇👇👇👇👇👇👇👇👇👇
Pues pasados los 3 dias de germinacion en el metodo de papel, vemos que ya salieron a luz las raices y damos paso a colocarlas en los Jiffy.
👉Instrucciones:👈
- Colocación de los jiffy en un recipiente con 2L de agua y 2ML de enraizantes de top Crop.
- Dejamos actuar durantes varios minutos hasta que el jiffy se extienda.
- Abrimos un pequeño orificio en los Jiffy para introducir la semilla con el cáliz dejandolo hacia afuera.
- Colocamos en un pequeño invernadero para que tengan la suficiente humedad.
- Ayudandonos de unos foco de pocos waltios, le damos a luz necesaria para esta face de germinacion dejandolas 24 horas de luz.
________________________________________________________________________________________________________________________________________________________________
DIA 22/12/2021
Colocacion de Jiffy en Maceta de 3,25L
👇👇👇👇👇👇👇👇👇👇👇👇
👉Instrucciones👈
-Pasados varios dias vemos que el periantio(semilla) ya se rompió y empezo a salir los cotiledones con una hermosa raiz blanca por debajo del jiffy.
-rellenamos macetas de 3,25L con sustrato de top crop(anterior cultivo).
-introducimos los jiffy en las macetas dejando la plantula bien colocada.
-regamos con 3L agua opmotizada y 1ML/L enraizante Voodoo ADVANCED NUTRIENTS
- Permanecemos con las 24 horas de luz con foco led.
_________________________________________________________________________________________________________________________________________________
👉DIA 25/12/2021👈
👇👇👇👇👇👇👇👇👇👇👇👇👇👇👇
pasados 3 dias desde que se plantó en maceta. A dado unas respuestas increibles !!👍
las volvemos a regar y a cambiar las horas de luz que se pasarian a 18H

Likes
16
Share


@Naujas
Follow
112 days!!!! she looks great, the flowers are very full of sticky trichomes:) next week will be her last, I don't know which day it will be yet, but it will definitely be soon :) she only drinks 6.3 ph water without any additives :) good luck to everyone :).

Processing
Likes
16
Share


@blendmedmedman
Follow
seed was put in to a root riot cube that was soaked witht he clonex water. now i wait to see what happens

Likes
Comments
Share


@2far4heaven
Follow
Buds start swallen and trichomes start cloudy but not yet amber..
Will let her to get amber 10% trichomes , and then start to flushing straight 2 weeks with ph-ed tap water 5.5.
Hopefully by next week can start the flushing and finish this run.
Cant wait🤞!!




Likes
28
Share

@foxbberg
Follow
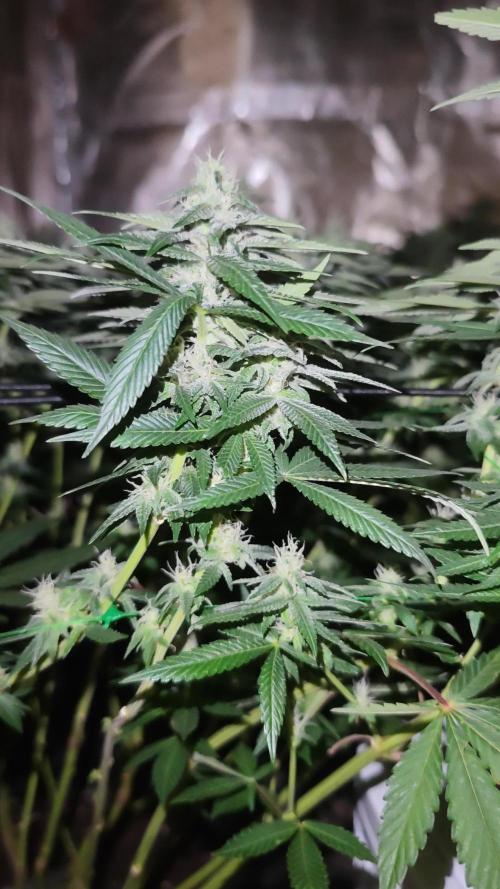
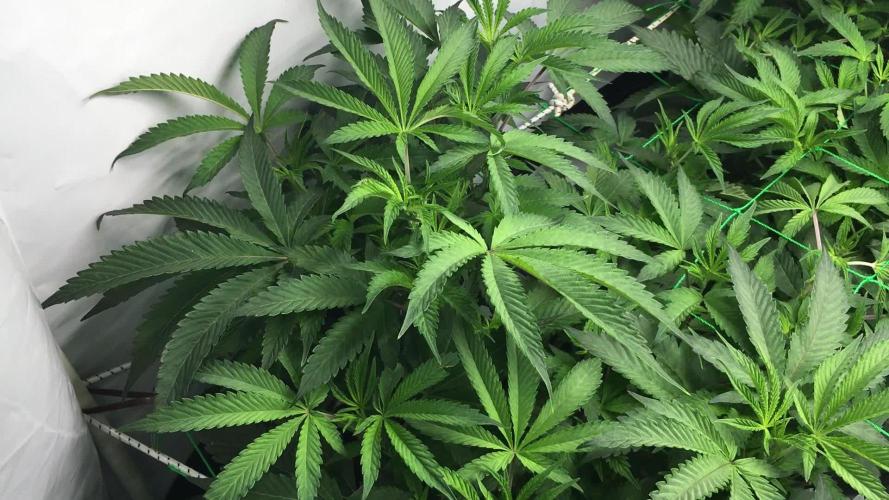
Flipped to 12/12 at day 43.
Raised light-intensity from 60 to 90 %.
Now +70% of the net is filled and i can see potential to make it an evenly shaped bowl full of fruits:-)
The deep, dark colour has turned to a juicy green, shoots everywhere....... everything fine but two little things:
1) run-off-pH is a bit high...... 6.6-6.9. will feed rather acidic next time....
2) Main Colas get a bit tall..... will supercrop them as soon, as the rest of the cannopy is organzied to a clean scrog.
Nutritionwise i lowered N, raised K and gave an extra P-shot (0,05 g/L BLOSSOM-BOOST) on days 43 and 44.
Day 45
fed pH 5.8 - readings immediatly dropped to 6.3 to 6.5 👍
Vigorous stretch.....!!! Mounted some more hooks to get the scrog even - works perfectly now! +80% of the net is filled......and the colas in the corner almost make plants of their own - i will supercrop them, as soon as they don't stretch any more.
Day 46
fed pH 6.1 today..... readings still good (average 6.4)
took out some more leafs today, to give a little more light to young shoots.
Smell is getting stronger, but no visible signs of flowering yet.
Likes
4
Share

@Adriano420
Follow
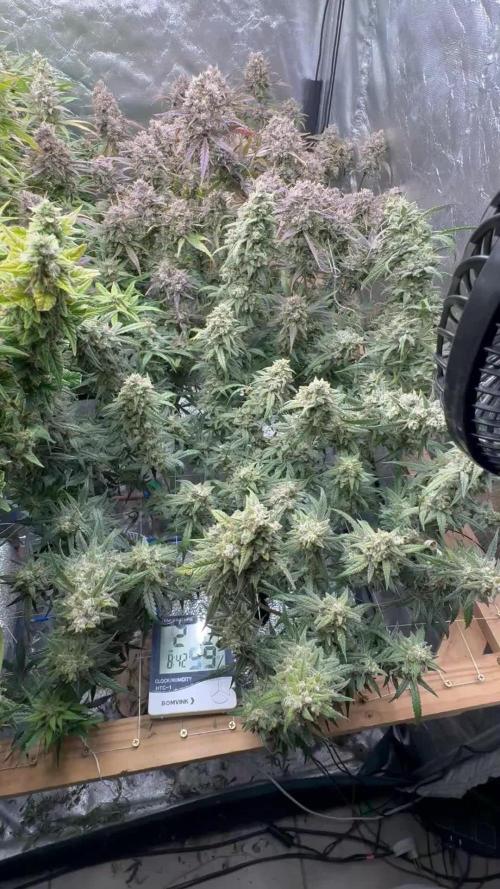
Segue tudo normal, a planta de trás já está com 10% âmbar, vou colher essa semana, a outra da frente vai mais uma semana e as da esquerda provavelmente mais 3.