


Likes
5
Share


@CzAlmighty
Follow
Hi friends. 🦍🦍🦍🦍🦍
beautiful next week behind me .Flowers and looks healthy and strong. I water the flower every two days. The fruits look beautiful. And the scent is incredibly amazing.💚

Likes
6
Share


@MrPipi
Follow
Mr. Pipi welcomes you to the 15th Week of Grow and the ~6th week of flower.
I guess the Colas stopped bulking up as quickly as at the beginning. Sadly, but that´s nature.
Maybe a last time watering with molasses and then the next 2weeks flushing. Maybe some ice cubes to see if she gets purple, but i doubt it :D
Day 107: its exactly 7 weeks since Mr. Pipi switched light cycle.
Girl is starting getting purple.

Likes
3
Share


@boomgt
Follow
*Late Week 2 Mimosa Evo
Living Soil pot - Look healthy, and I put the clovers to help them
CoCo pot - In coco also look unhealthy by deficiency
* I hired 500 employees to take care the girls, You guys can see them in the video


Likes
62
Share


@SimpleGrow
Follow
Hello again guys and welcome to day 89!
The girls are taking their time but finally the trichomes are turning milky. As you can see from the videos, they still aren’t quite there yet. I really want them to reach their maximum potential instead of rushing it. I think in maybe a week or so they should be ready!
Thanks for stoping by

Likes
3
Share


@macrocefalo
Follow
The ladies were flushed on the 68th and will be flushed again on the 71st. Analyzing the resin with a magnifying glass, I think we will not have a harvest before the 75th. B3 this blooming I think she will be looked after with more than 80 or 83 days.
Likes
12
Share


@Daviz_42
Follow
Muy buena genética, me quedé con el pheno 1, ya que tenía más resina y un mejor terp para mi gusto. Buen híbrido no te deja superaplacado y ofrece un efecto cerebral eufórico.

Likes
12
Share


@Jays_Not_Here_Man
Follow
Temps have been good and RH has been steady between 60-65%. I have good airflow all around and don’t worry too much about it the higher RH at this point in the grow. Transplanted the ladies from their starter pots to their 2 gallon pots. They did not seem to have any transplant shock. A few more weeks and we will go to their 4 gallon final pots.

Likes
10
Share


@PolezGardn
Follow
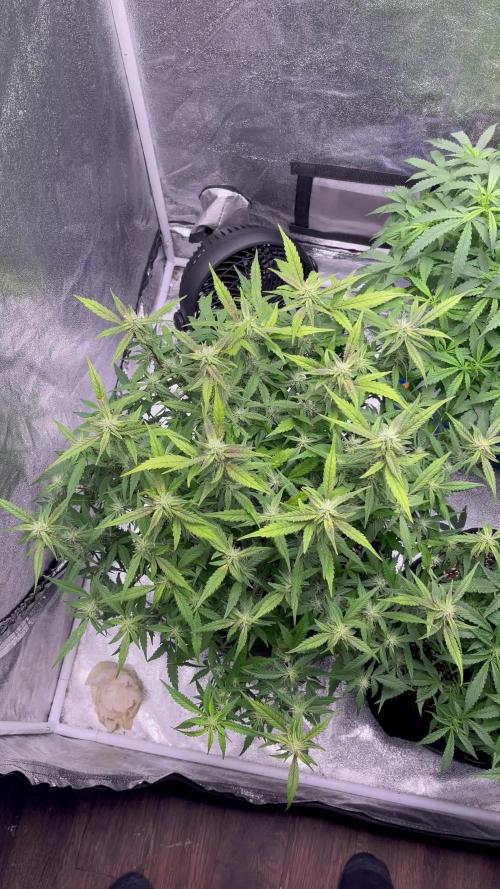
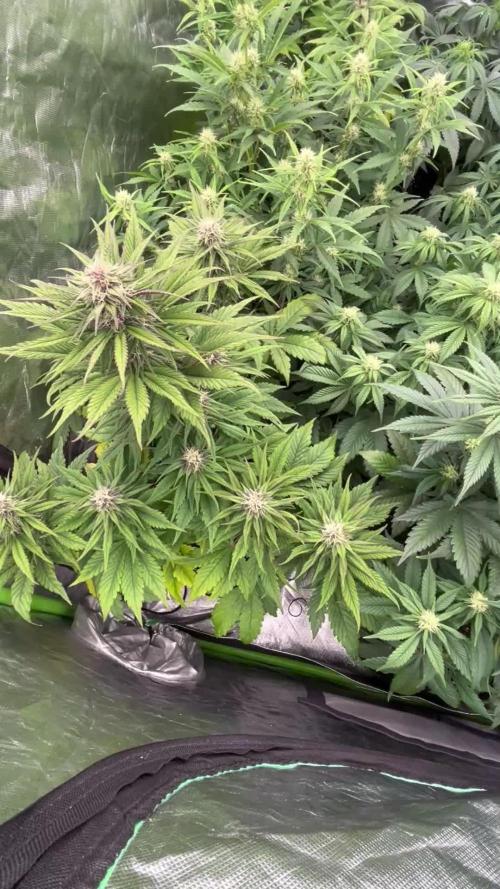
week four flower everything looks fine so far :D
I water them with 1.5l every 48h
the light I use was set to 100% and it hangs 80cm away from the tops

Likes
Comments
Share


Likes
8
Share

@Canna055
Follow
Letzte Woche viel um die Ohren gehabt, und die Ladys wurden leider vernachlässigt machen sich aber ganz oke
Jetzt nochmal ein wenig lollipoppen und sonst arbeitet die Zeit für mich


Likes
19
Share


@Ganjagrandaddy
Follow
Day 56 from seed(16flowering)
Smoothie by name smoothie by nature !. She has been so easy to work with and train to this point and her smell is very sweet up close.
#1 The Los girl is huge. she has sites throughout her structure that are developing nicely together. I expect she would have been a very big plant without the lst and would have outgrew my room very quickly. Buds are slowly developing and I expect she has at least another 3-4 weeks before harvest.
#2 coco and mc have been keeping her happy. despite the poorly appearance of her mottled damage and some.dying lower leaf from before , she is growing well. her structure is natural and no ties or last at all so she is taller than her sisters. lots of sites on her so let's see what she does.
#3 is one of the smaller girls in the grow and now moved into the middle to bathe her in more light. she has sites poking out of her low canopy so should still be a decent yield.
Merry Christmas All on grow dairies and staff
Likes
47
Share


@FreddyGrows
Follow
Hey there,
The clones rooted very good.
So i gave them a bigger pot.
Also the mainlined O.GKush went to a bigger pot.
The clones from to 1L airpot
O.GKush from 4L to 38L airpot
This week i added a little of the nutrient Result-c is showed last week.
This one is supposed to make your plant stronger and also makes the blooming up to one week faster. So we will see
Only thing bothering me is the one in the back falling a bit behind but hey not every grow can be perfect right.
So im very happy the clones made it.
They are growing together with the clones in a small 60x60 tent also under a cree 55 watt cob light.
Now looking for some growth in the og.Kush so i can put her outside and let the clones take the space they need.
Will be continued

Likes
32
Share

@Growbody
Follow
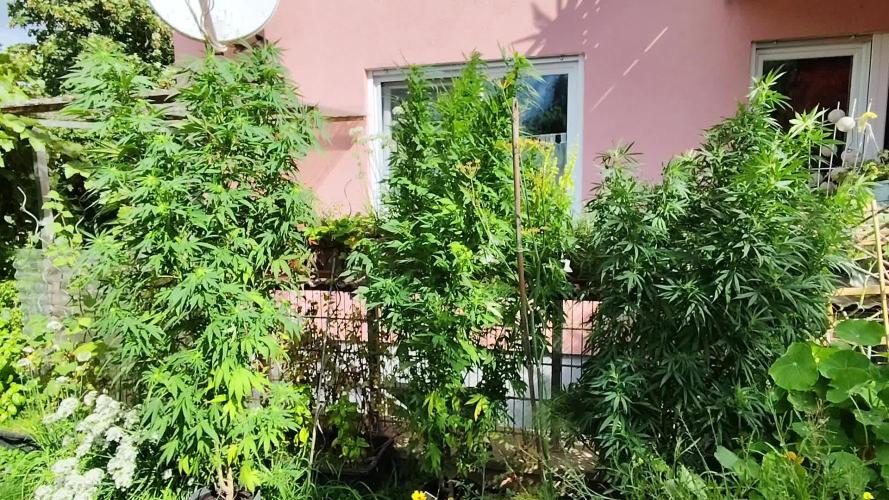
Hallo und herzlich willkommen zu meinem Growbericht Outdoor 2025 mit den Sorten Power Flower Feminized, Royal Medic Feminized und Special Kush #1 Feminized, alle 3 von Royal Queen Seeds. Es ist das erste Mal, das ich Töpfe für den Outdoor grow verwende, bisher waren alle Gorilla grows und direkt in die Erde gepflanzt.
Die URL der Power Flower Feminized: https://www.royalqueenseeds.de/feminisierte-hanfsamen/120-power-flower.html
Die URL der Royal Medic Feminized: https://www.royalqueenseeds.de/cbd-samen/148-royal-medic.html
Die URL der Special Kush #1 Feminized: https://www.royalqueenseeds.de/feminisierte-hanfsamen/138-special-kush-1.html
Die Planung für den Grow ist, die Samen in easyplug Anzuchtwürfeln keimen zu lassen und danach in 0,6L und 2,2L Plastiktöpfen, dann letztlich in die neuen komplett doppellagigen ROOTIES 15 Liter Wide Version Stofftöpfe umzutopfen. Sobald die Witterung es zuläßt, sollen die Pflanzen an die frische Luft.
Es ist schon eine Weile her, das der Grow losging, die Bilder sind jetzt aktuell.
Tag 187: Die drei Ladies haben sich unter der Obhut meiner Nachbarin sehr schön entwickelt. Es hatte sehr viel geregnet, hinterm Rückhaltebecken war ein See und der Bach war voll bis zum Rand. Der Brunnen ist auch wieder offen. Die drei großen stehen jetzt wieder in der Sonne, heute hat's nur ein paar Wölkchen. Die Power Flower fem. ist jetzt 215 cm hoch, die Special Kush #1 fem. 205cm und die Royal Medic fem. 175 cm. Der Blütenzuwachs ist jetzt endlich deutlich zu erkennen.
Tag 188: Heute ist es sehr windig und stark bewölkt. Die drei Großen sind jetzt doppelt am Zaun festgemacht, nur eine Befestigung hat nicht mehr gereicht.
Wenn's dir gefallen hat, schau wieder vorbei ✌️😎
Likes
6
Share


@Santi_nf
Follow
Una semana más plantadas la menor parte el 28-12 y lo siguiente 18-01 , 1-2 lo último

Tutti Candy · Zmoothiez

Critical Widow · Pev Seeds

Sweet Skunk Fast Version® · Sweet Seeds
Skywalker OG Runtz XL Auto · Sweet Seeds

Cheese Berry · 00seeds

Hard Diesel · Gea Seeds

Scrambler Haze · Blimburn Seeds
AK · Gea Seeds
Cachalote · Gea Seeds
Gealato Kush · Gea Seeds
Gorilla Glue #4 · Gea Seeds
Somango · Gea Seeds
Likes
21
Share


@3lementa1
Follow
Had to cut. Open house through my apartment for 4 hours/day every day basically until it sells. I'm keeping them hanging in the window until the tours come through, then they go in a paper bag in a bin under my bed and I burn incense. It went ok today. I just used a microscope and they're both pretty early. This one has mostly cloudy trichomes with some clear and very few amber. The White Widow has a lot of white hairs that aren't even through growing, and the trichomes aren't really there as much either. Certainly not glowing white with resin. It's a shame I had to cut early but I think it will still be some good smoke as long as I can keep if from going mouldy.
Likes
100
Share


@AsNoriu
Follow
Day 111. First is ready, second week behind, third maybe even 3 weeks behind ....
Plus they are LEAFY ,!!!!
Trim jail ...
Wet trim for all of them - no doubts !!!
Day 115. Still hanging, slowly drying and result should be decent at the end ... A week more I guess, very humid in UK ...
Day 118. First trimmed - 175 g. Other is chopped ! One still grows ...
Day 136. Chop day for the last one !!! Long run ....
Happy Growing !!!

Likes
11
Share


@Hempshire_Empire
Follow
Growth has slowed after the House sitter issue but I’m just gonna let her take her time. I Think that she’s about a week behind.
She was also getting too close to the lights which I believe started to stress her. I rigged them up higher and i'm sure it we will coast right into harvest from here.
This strain is awesome, I've seen that it's not considered easy to grow and I can tell shes fussy but she definitely tells me what she needs and what's wrong.
She reeks of very pungent lemon with a hint of skunk.
