


Likes
Comments
Share


@BudBeat
Follow
Die Blüten werden immer noch größer und die Pflanzen strecken sich brav nach oben 👆





Likes
54
Share


@PremiumBudsEU
Follow
Flowering Week 7
Trichomes getting milky 🔍
I removed the CO2 BAG, lowered the temp. to 26° end of week 6, that's gonna protect the beautiful buds from the heat the last 2 weeks.
From this week there will only be water + CalMag, next week flush with just water.
Update:
2 plants was ready to harvest on day 49 🌳🌳


Likes
508
Share


@Legendaryseedthumb
Follow
Day 23: had to remove some leaves! The stems had some insane growth yesterday so the leaves was growing in the tent😁
Just a picture at the final product of sugarpunch, one phenotype out of 5x!
Smells amazing and taste so sweet just like sugar. very strong head high.
Mars hydro TS-1000
Increase Yield & Crop Quality in Led Grow
Newest SMD Led technology provides the highest Par/Lumen output, makes you get 30% higher yield compare old led lights, can get up to 2.5g/watt yield.
Only 150 watts true output so you don't have to check your bill every month. 342 pcs LEDs, more scientifically and energy-efficient! Perfect for 3'x3' (100x100cm) veg stage and 2'x2' (60x60cm) bloom stage
https://www.instagram.com/marshydro_aliexpress2/
Likes
27
Share


@w33dhawk
Follow
25.07.21 Tag 51 der vegi hab alle Ladys neu runter gebunden und Lady nr.4 getoppt und ausgehackt werde die Stangen die ich für die Tomaten Halterung gebastelt habe entfernen sobald die Pflanzen aussen herum gewachsen sind und den Ring dann am Topf fixieren zur Spreizung der Äste,ich glaube das die Pflanze sonst die Stäbe einfach hoch drücken wird...........
27.07.21 Tag 53 hab heut morgen mich darum gekümmert das die Riesen Töpfe etwas erhöht stehen damit die Luft unterm Topf zirkulieren kann und die Töpfe nach dem Giessen nicht Klatsch nass stehen sondern noch nach Tropfen können, habe dafür mein altes Gestänge wo ich sonnst mein netzt drauf Spanne zum scroggen verwendet is ja knapp 90x90 gross mit festem Hühnerdraht aufgespannt Steine seitlich an den Ecken drunter und Holz in der Mitte zur Stabilisierung damit der Zaun nicht so stark biegt und die Töpfe somit nicht allzu stark schief stehen hat ganz gut geklappt wie ich finde. Zu den steckies 2 davon sind im Garten in einem 20 l Stofftopf gemeinsam ich weiss jetzt denken viele oh man das geht schief wir werden sehen ich experimentier so gerne. Der 3te Steckling steht beim Kumpel auf dem Balkon hab ich ihm geschenkt hatte kein Platz mehr dafür Bilder von den draussen stehenden Pflanzen werde ich gelegentlich hier mit einfügen will deswegen jetzt kein extra Bericht auf machen,bis die Tage ich komm wieder keine Frage .........
28.07.21 Tag 4 Outdoor die Ladys haben sich in 4 Tagen verdoppelt und das obwohl sie sich den Topf teilen Mal sehen was die nächsten Tage so bringen für die 2 steckies


Likes
4
Share


@Ryno1990
Follow
Snow Panda from Atlas seeds is doing very good has started getting some good growth after being topped an has been growing happy an healthy under this medic grow fold 6 an she has been loving the cultured biologix nutrients
Ending week 4 the Snow Panda has started shooting up with growth under this medic grow fold 6 she has been loving her nutrients from cultured biologix as shes been flourishing an looking great
Likes
3
Share


@MicroHidroGrow
Follow
Día 09. Segunda semana de crecimiento. La planta sigue creciendo a un buen ritmo. Ya pronto voy a agregar un bioestimulante de crecimiento y algunos microorganismos. Probablemente esta semana también haga la poda apical.
Día 14. Le hice el corte apical el día 10. Ya está recuperada y creciendo. Por el momento mantengo la solución. Mañana seguro ya cambio y le agrego un bioestimulante de crecimiento. Aún no fui a buscar las bacterias, pero esta semana tengo que ir sin falta. Ya voy a ir preparando la parte de arriba para cuando lleguen los esquejes. Pero una vez que corte, tengo dos semanas de enraizamiento. Por lo cual todavía falta. Pero ya está todo encaminado.
Likes
9
Share


@Lazy_Stoner_Metal_Grower
Follow
So I started this plant in my miracle grow Aerogarden for about 2 weeks then moved it to the coco pots. When I moved it the stem was really thick and very impressive. I originally had a second generation hydro Hawaii Maui Waui in the tent with her, really just expecting a small grow. Instead this monster took over all the space (and then some), so I moved the Maui Waui out and spread laughing buddha out, added another net and moved the 150w to the lower side to boost the Larf a little and hopefully add weight. So far so good, the stretch was definitely amazing to encounter. She grew a whole other 3x her size, from the bottom net to where she is now. The smell is so fruity it puts the Maui to shame with the deliciousness. AMAZING!!! That's all I can say thus far is FUCKING AMAZING!!!


Likes
2
Share

@hassehujasse
Follow
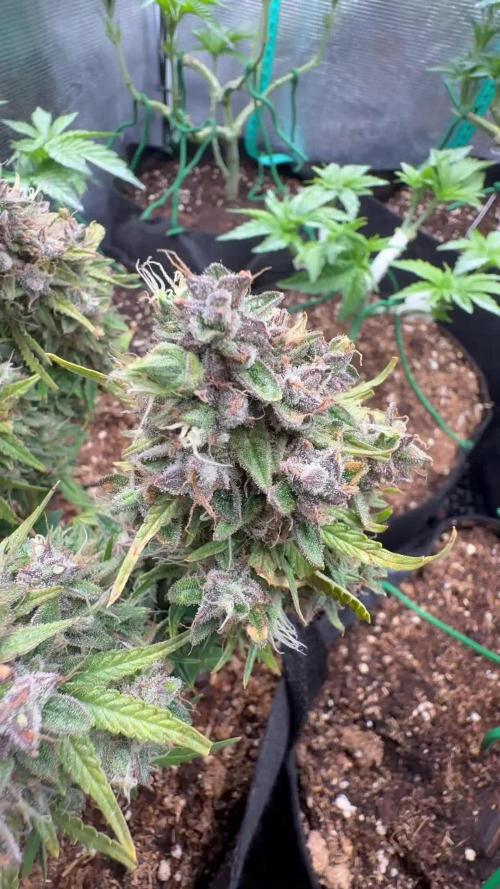
From beginner to professional. Grow as God raised you and enjoy it!!!
Looking. for harvest as soon she realise her potencial
Processing
Likes
18
Share


@Silverback_Guerilla
Follow
11/30:
I harvested the first 6 today, flushed 5 more for the second time, and fed everybody else for the last time.
I washed all the branches using the 4-step method ascribed by Doc Bud at High Times/420magazine and many other notable cannabis connoisseurs, with slight modifications:
4 x big plastic totes/bins
8 x ounces of 12% hydrogen peroxide (or 32 ounces of 3%)
2 x cups of concentrated lemon juice
2 x cups of baking soda
10 x gallons of water in each bin
Unless your tap water stinks, you're safe to use tap water for the procedure, but I used an inline carbon hose filter to fill my buckets.
Bin #1 - 10 gallons of water mixed with the hydrogen peroxide
Bin #2 - 10 gallons of water mixed with the lemon juice and baking soda
Bin #3 - 10 gallons of water as hot tap water
Bin #4 - 10 gallons of cold tap water
I was mainly concerned about removing as much lint and cat/dog hair as possible, but also rinsing off any residue left from all the various foliar applications of humic/fulvic acid, kelp, axiom, big bloom, and tiger bloom I did. First, I put my leaf blower on low speed and blasted my plants thoroughly, one at a time, replicating 50-60mph winds for about 10 seconds and watched as a whirlwind of debris and hair flew out the back door.
Bud-washing:
Pluck any necrotic plant material and any old fan leaves off while they're still on the plant. Then, take a handful of branches and submerge them in Bin #1 for about 30 seconds, agitating it, removing from water, submerging again, agitating, etc...then remove it and let it drip out for a few seconds...then repeat the process with Bins #2-4. Let it drip dry overnight with a little bit of airflow, then dry as you normally would...baskets, boxes, etc..
I hadn't watered these plants in a few days, so they were almost in draught, but after doing this procedure, they were fully hydrated(turgid) and seemed to have brighter colors than before. Nice!😍
12/1:
The bottom part of the closet seems empty with only 9 plants in there.. 😟
I cut the harvested plants up and put them into drying baskets in the top of my closet with a small oscillating fan on. I've got the temperature fluctuating between 68f and 75f and the RH is staying between 48% and 52%.
To do that, I had to take down the small light in the top of the closet to fit the drying baskets up there. So, I moved the 3 shorter plants still up there down to the bottom and put them on top of buckets. Now the bottom of the closet looks full again!😃
I'm anxious to finish up this grow so I can get busy growing the Fastbuds Fast Flowering Photo Testers!!! When I harvest the next 5, I'll flush the remaining plants really well and that will be all the flushing they'll get..I'll let them dry back out for a few days and harvest them. I've got to make some minor improvements to the garden (adding UV, blue and red/far red booster panels and intake fans) That should put me on track to start germinating them by mid-December if all goes well.
12/3:
...early a.m...
The harvested plants are already dry!?!?? And have excellent texture??? Wow..bud washing is for real..roughly 48 hours after I hung them to drip dry, and 40 hours after I put them in baskets in 50% RH/70f conditions with moderate airflow...usually takes 4 or 5 days to get a good slow-dry in the same conditions, so I'm convinced that this must be attributed to the bud-washing procedure. I'm sold!
Here's the talley so far:
plant #1 - 115g (plus 13g larf) - Candy Cane [F2]
plant #2 - 108g (plus 18g larf) - Candy Cane [F2]
plant #3 - 119g (plus 15g larf) - C4ndycaine [Candy Cane x C4]
plant #4 - 92g (plus 6g larf) - Candy Cane [F2] - the smallest plant in the main area
plant #5 - 112g (plus 22g larf) - Candesia [Candy Cane x Amnesia]
plant #6 - 75g (no larf) - Candesia [Candy Cane x Amnesia] - grown in upper area under 200w
...afternoon:
I flushed 6 of the last 7 plants for the first time today and harvested 4 more of them. I washed them and hung them to dry.....my dripping wet bathing beauties!😍
Likes
28
Share


@PrairieFrostGrow
Follow
This little girl started her journey on April 4th with germination into a water glass and finished up on June 27/20 – Day 78 from germination. She was a fun grow and was very resilient through the whole run. She spent most of her grow time in a 20/4 light schedule. She formed nice frost levels and stayed to a very nice and manageable height of roughly 20” tall without topping or bending her main stem. She was not as fussy about nutrient levels and took them well. She does like her medium on the dryer side though. Small little auto bush of OG Kush crossed with Indica genes😃 She would make a nice a plant to run while you are vegging out some photos for 6 or 8 weeks as she is not very big in size but will swell up and yield decent weight👍
She was grown in a 3 gallon fabric pot with coco coir and maybe 15% perlite. She was fed salt based nutrients……..so sorry but they are flushed out and that is what I am more comfortable with. Focus on the early growth with microbes, fungi and kelp!! She was fed the normal pattern with pH being held around the 5.4 to 5.8 range in feeding. Then as flower approached, I gave the pots a more consistent look at the runoff numbers and she was running 7.8pH coming out of her!!!!! WTF. She stayed in her pot that she was planted in and fought this issue all through the rest of her grow.
The pH issues started surfacing around week 3….as we headed into flower of course. Scratching my head for weeks, I ultimately didn’t change anything other than really low pH feeding going in…….below 4 idea. For weeks she had 3.9 water going in and still getting 7.8 running off. I initially felt it was related to cheap fabric bags so I cut slits in the very bottom of the bags that stayed and tried transplanting other girls into plastic pots, which it can be fabric pot issues but I am not as convinced anymore for this run that there was an issue there, wasn’t sure about giving her Magnesium on top of Magnesium and therefore did I mess her up good on the inside early on in week 2 idea, out of options I changed back to RO water and that seems to have solved my issues……I was using tap water that was not filtered this run🤬 The pH was high so that was adjusted but with the ppm being at 185 to 200 range I chose not to buy a filter and just dechlorinated the water only. I was tired of lugging 5 gallon water bottles in and out of the basement😃 That is a difference from all other grows…..silly for not catching this by week 4! So…….back to lugging bottles in and out of the basement😂😂😂
She really started to take shape around weeks 7 and 8 and formed a beautiful little cannabis plant and grew to 20” tall and roughly 18” wide. Main focus with her was to just perform LST on side branches and let the top go…….I wanted to just let her go and see what would happen to her main cola for size and height……plus I don’t do that…….I always bend over the tops on my grows so this was a little different for myself.
She grew very nice leaves and a lot of them. This pheno had a lot of leaves to her and that is fine……its not really my first choice in characteristics of a plant though..…..so much more work at trim time……Green Poison XL Auto, SWS71, was a dream to trim👍 as a comparison!! She didn’t fox tail very much she firmed up her buds towards the end. The resin production was a little slower coming out in her but by week 7/8 she was getting pretty impressive😋😋😋 White and sticky!! She smelt of woods with citrus notes…..works for me👌
There were no issues at all retaliated to pests or bugs……I threw in a couple sticky traps but there weren’t any to catch. She handled the high humidity in this run great and there were no signs of any powdery mildew👍👍👍 She is a very stable strain from Sweet Seeds!
Day 63 was last feeding, flushed for almost two weeks. Rezin and Liquid Weight still given for one of the weeks but the last week was plane water. In hind-site I think I should have hit her with some Flawless Finish to help get that last bit out of her. She did feed on most of her nutrients but some of the lower leaves were still more green that I would have liked. She was cut down on day 77…..11 weeks is about what I suspect looking at her in week 7…….this was roughly 8 weeks flower time……makes sense😃
She grew for 75 days and then I decided what the heck…….she needs a hole in her stem to stress her out😃 I didn’t try breaking a branch but rather drilled a hold into the base of her stem……something new to try out. I think I will try more holes next time….max 3 I think……then I want to run a couple with cracking their stems and see if there is a difference👍 I feel more in control of a drill and its accuracy vs bending branches and they snap where they want to…….anyway it was worth a try!!!! Worst case, it made it easy to hang her as a whole plant to dry😃
This girl battled pH issues all her life and as a result the buds were not where I would have liked them. There were not fluffy…..but here were not as hard as I would like for rolling joints, so the whole girl went to concentrates She dried for 7 day as a whole plant, 2 days more in smaller branches, then 1 day curing in jars before dry ice sift. She yielded 74g of dry cured buds, 2.65 ounces. Not bad…..I don’t think her buds would have gotten a lot bigger but they certainly would have had more weight if they firmed up…..grower issue, not genetics.
So…..lets make some rosin from this girl🤩 The yields on this and making her hash a perfect colour are not what this process is about…..let’s get that out of the way right away……this is about another way to enjoy and consume my cannabis for my own relaxation and medicinal needs. Taking pictures of rosin is always a challenge…..it is always dark in the pictures unless you are using a nice DSLR to let more light in.
Rather than making bubble hash with water, I just used the bags to make a dry ice kief from the buds. Unfortunately I couldn’t get a block of dry ice and had to use these cubes…….don’t like these as much because there are too many surfaces beating your green plant material and your kief goes green before long when shaking. Could have done it with out ice all together…..nicer hash but lots left on the plant afterwards that way so yield is low. Used two bags in this extraction, the 220 as the bag for edibles and the 120 as the bag for pressing rosin to smoke…..dry ice hash rosin!! The yield on this from the 74g of bud was 22.4g kief. 220 bag was 12.6g and the 120 bag was 9.8g. Not great I guess but I didn’t want to keep going for 4 and 5 minutes with the bags…..these were roughly 2 minutes with the 220 being 3 minutes on the high side. You can certainly see that the 120 product is more golden in colour than the 220 but since I didn’t crazy, the 220 is still a very nice colour.
Last step on this journey was then to take the kief and make our rosin. I pressed product using 37um bags with the temp set at 160 degrees. All were done the same for the most part……roughly 4 gram presses, the same temperature, and the time. The first presses were 90 to 120 seconds. If a second press was done on the pouch, then it was at the same temp but for only 40 to 50 seconds. The yield on this was just shy of 7 grams…….6.77g…..roughly 30% yield from Kief???,…..roughly 9.2% from flower???…….would have likely done better right from flower😂 😂 😂 it was fun, regardless of the yield😃 Tasty rosin!!!! Can’t beat rosin for getting the true tastes of the plants. These numbers are absolutely due to my abilities with extraction.......sure don’t judge the genetics based on my returns......she is a frosty plant and will give great returns!!!👍👍 Several pictures show that, I hope!!
So that will wrap up this diary for Sweet Seeds Killer Kush Auto, SWS56. Certainly give this girl some consideration if you like OG Kush and also have space concerns in your grow. She is beautiful frosty little girl with a punch. Certainly get the usual woody and citrus notes from her rosin and she has a lasting high. She helps to get get you going and willing to finally start cleaning that corner of the room you have been avoiding…….watch out though…..distractions😃……next thing you know 40 minutes go by and you are staring at a box of DVD’s wondering what happened to CD’s…….cassette tapes (the art of the “mix tape”), 8 tracks, vinyl……ALBUM COVER ART Baby!!!!!! Then its either back for another rip, or get your crap done because the next rip leads into even less work getting done😃😃
Great job as usual @Sweet_Seeds !!! Looking forward to the next one……Cream 47 photoperiod……actually, already done germination and a new diary coming👍👍…..compare a 3 gal pot to a 5 gal pot, or a fabric vs air pot, and see what my yield differences are??
Thanks for the read and greatly appreciate the comments Growmies!!!!! Love spending time on a forum for growers to help fellow growers. Much grower love and thanks again for your time, opinions, and suggestions🙏🙏🙏
Cheers!!

Likes
4
Share

@Budhunter
Follow
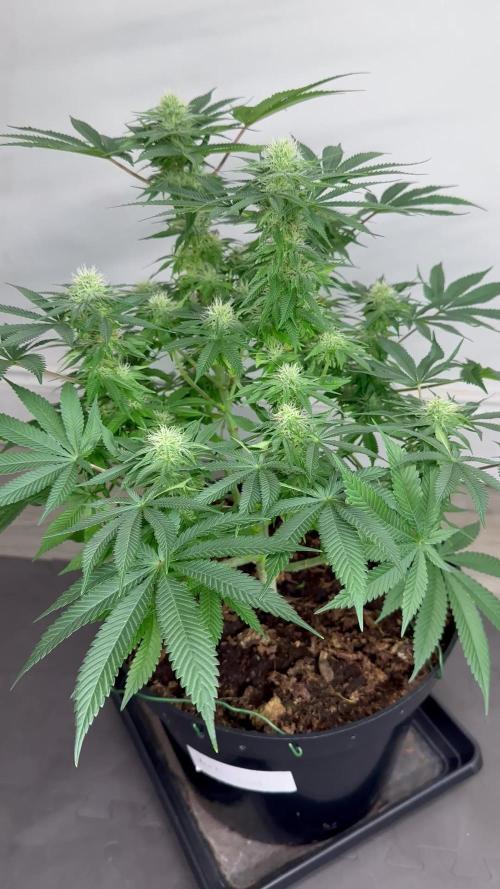
Week 5 Flower - Day 30 Flowering - Day 86 of life
Black gum is fatting up nicely for a small plant. Buds are like ball shaped. It’s frosting too and starting to smell.
Let’s go ✨

Likes
7
Share


@Thebyrdman420
Follow
I’m in love with this plant! Beautiful huge colas, awesome color, terps are like sour cherry candy and gas it’s ridiculous how good this plant smells! Harvest is gonna be sickkkkkk.

Likes
16
Share


@DeepRootsGrowTrees
Follow
Fast Buds White Widow is a strain that is easy to grow she can handle some stress if you have issues. She makes a massive bud on the main stem mine was 80 grams freshly trimmed!! She doesn't stretch much if your growing in a confined space. I'll repost what the total is dried and cured and smoke report as well.
Smoke Report Update she's Earthy, Piney, with sweat citrus flavors, smooth pull, earthy, piney up front then then that sweat citrus when you exhale, really clean and smooth enjoyably smoke hits you quickly and then mellows out she has the ability to change your motivation level but not put you on the couch the rest of the day or night for the most part!!! 70% Indica 30% sativa. The total weight of the grow of 535 grams wet weight, when dried out to it was a total of 178 grams dry. That's a loss of 67% of the weight.
She's a plant with thricomes that cover the fat, stinky, and sticky buds. I didn't have any problems with her. She can take some nuts for a autoflower as she never showed any signs of nutrition stress. Easy grow, strong plant, dense sticky buds, she smells sweat with a earthy note. I would recommend to any grower new grower you really can't mess her up, advanced grower she will give you a great harvest.
Continue to grow your own medicine if you can or grow for someone you know that can't continue to make a difference in lives!!! Growdiaries is a great place to learn and connect with other like minded individuals!! Stay growing my friends!!!
Thank you for looking at the diary!!!


Likes
6
Share


@mikheil007
Follow
Vanilla Latte is very special strain for me: I've never grown the plant like this: thank you Humboldt Seed Company for such a good job


Likes
2
Share


@GuniGugu
Follow
- continuing LST
- BioBizz nutrients by their schedule, every third watering pure tap water