


Likes
Comments
Share


@Grow420pice
Follow
Hopefully :-)
Barney's Sweet Tooth Auto
Week 1
HomeBox 120x90
12.5l Potsize, soil Biobizz light mix
LED 2xGC4 250w, 1x GC-BAR Single 70w, 4x Secret Jardin per 26w (Flowering)
Biobizz nutrients

Likes
9
Share


@Lazuli
Follow
I havent touched this plant once its just sitting there in the autopot, i fill the reservoir once a week and call it a day hahaha super easy


Likes
19
Share


@GoldenWeedGrower
Follow
Legend
Timestamp: 📅
EC - pH: ⚗️
Temp - Hum: 🌡️
Water: 🌊
Food: 🍗
pH Correction: 💧
Actions: 💼
Thoughts: 🧠
Events: 🚀
Media: 🎬
D: DAY, G: GERMINATION, V: VEGETATIVE, B: BLOOMING, R: RIPENING, D: DRYING, C: CURING
________________________________
📅 D08/V01 - 23/11/23
⚗️ EC: 0.5 pH: 6
🌡️ T: 24 °C H: 80%
🍗 Grow A-B
💧
💼
🧠 I'm still hoping, but I'm pessimistic now
🚀
🎬
________________________________
📅 D09/V02 - 24/11/23
⚗️ EC: 1 pH: 6
🌡️ T: 21 °C H: 76%
🌊
🍗
💧
💼 I put a support to hold the big one
🧠
🚀 I talked with Marina from Pure Instinto, she's very kindly and she has already sent to me the seeds not sprouted. Many thanks to Marina for the perfect customer care. 5 stars to Pure Instinto.
🎬
________________________________
📅 D10/V03 - 25/11/23
⚗️ EC: 1 pH: 5.8
🌡️ T: 21 °C H: 76%
🌊
🍗
💧
💼 Humidifier out. Collar on the big one.
🧠 Little weird the leafes of the little one
🚀 With the support the big one is going better
🎬
________________________________
📅 D11/V04 - 26/11/23
⚗️ EC: 1 pH: 5.8
🌡️ T: 21 °C H: 55%
🌊
🍗
💧
💼 I left the support, now she can grow free. Collar on the little one: I named her "Nicole"
🧠 Little weird the little one leafes
🚀
🎬 6 pics of Nicole and the other girl that will be used to produce clones. Added Timelapse video
_______________________________
📅 D12/V05 - 27/11/23
⚗️ EC: 0.9 pH: 5.5
🌡️ T: 21 °C H: 50%
🌊 Added 1L
🍗
💧
💼 Lowered EC
🧠
🚀
🎬
________________________________
📅 D13/V06 - 28/11/23
⚗️ EC: 1 pH: 5.5
🌡️ T: 21 °C H: 50%v
🌊 Added 2L
🍗
💧
💼
🧠 Lowered EC until 0.8
🚀
🎬 Added Timelapse video
________________________________
📅 D14/V07 - 29/11/23
⚗️ EC: 0.8 pH: 5.4
🌡️ T: 23 °C H: 40%
🌊 Added 4L
🍗 CalMag -Grow A-B
💧
💼
🧠
🚀
🎬

Processing
Likes
10
Share


@DudeGrowsWeed
Follow
She's 4 feet tall!!! Wow! I'm a little concerned about light burn, but don't notice any signs of light burn yet. And she will be going outdoors soon. But I'm very impressed with this girl so far! 👍

Likes
10
Share


@wheedtobeus420
Follow
day 27. She took very well to the low stress training. She’s looking beautiful. Her little pistols are in pre flower. I’m very happy with how she is coming along. Looks bushy green happy and healthy 🔥

Likes
4
Share


@TiRobotProds
Follow
Cette souche es en forme de sapin, pour l'instant c'est l'une de mes préférée que j'ai faite pousser. Dernier rempotage le 16/10/22 en contenu de 19L.
Processing
Likes
1
Share


@Ganjagrandaddy
Follow
Day 39 and overdue and update!: Another slow week for the ladies and waiting on my finishing touches to the room before I can put the tanks in and let them get off to the flying start they want to do !. I have nipped the small 5th nodes out and been encouraging them to quadline a little but they are still too little to put the pressure on yet . Now time is more available I can get busy on this run finally. I expect some nice results with these genetics


Likes
Comments
Share

@GreenHobbit
Follow
Killer A5 Haze. 😈💚
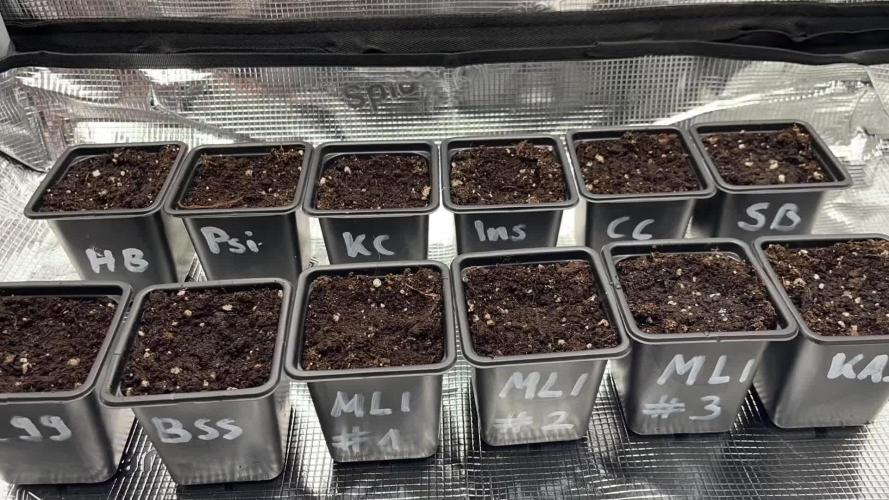
Die Killer gehörte bei der Keimung zunächst zu den Nachzüglern und bekam noch etwas zusätzliche Zeit im feuchten Küchentuch.
Mittlerweile hat sie davon nicht mehr viel übriggelassen. Sie hat einen der längeren Stiele der Gruppe entwickelt, gleichzeitig aber bereits ein kräftiges erstes echtes Blattpaar und deutlich sichtbaren neuen Austrieb.
Der lange Stiel kommt mir sogar entgegen: Beim Umtopfen wird der kleine Ballen einfach 2–3 cm tiefer eingesetzt.
Und diese Kleine bekommt später sowieso eine Sonderbehandlung: eine Killer A5 Haze und ein Solo 70x70cm SCROG. 😏
Heute ein Sämling auf Stelzen – irgendwann hoffentlich ein komplettes grünes Dach.
Let the Killer grow. 😈

Likes
12
Share


@timbarin
Follow
Welcome to the new week. Don't forget to bookmark and follow.
The plants are getting fatter and I do start to see a nutrient burn on them due to excess food. I plan to flush this in the last two week of the grow. For now they will be pushed with 1.8ec, fed every day or every other one.
I'm getting closer to the end.. I'm not happy with the hight of them but this is on me as I didn't let them to stay in veg enough after placing them in the tent..

Likes
111
Share


@Salokin
Follow
Hi Growmies,
Luckily she has made full recovery, in the tank below and up top :). OST of the root growth I. Observing, I would attribute to the combination of orca, rhizotonic and cannazym. Mainly the orca though ;). I will minimum give her 1–2 more weeks max until I flip her, as it feels like she should have a fairly short flowering phase. Overall she is looking very lush and healthy again, but still has some catching up to do.
Here is the code that’ll give you 20% in Zamnesia‘s online store, just input ZAMMIGD2023 at checkout.
Thanks for stepping by and until next week!
Likes
2
Share


@CuriosityWebster
Follow
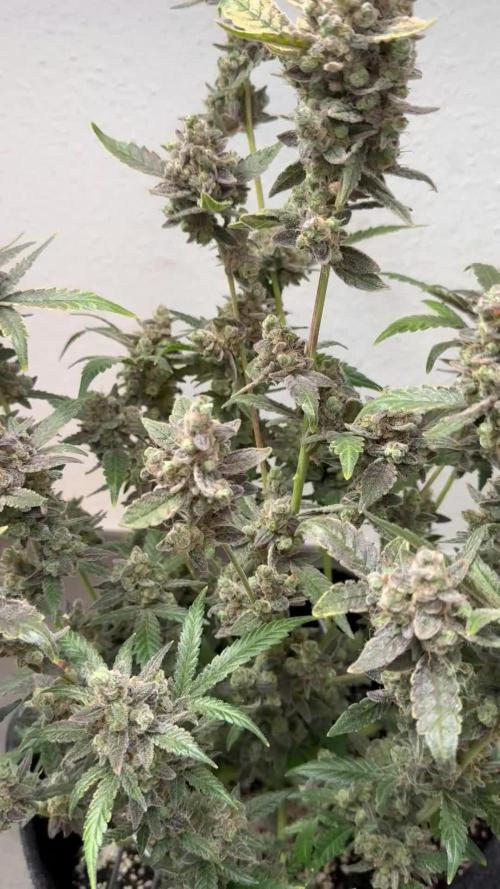
Very hot weather, girls are managing better than I thought.
Cleaned up all the girls extra leaves, really needed to get some more airflow through it
Cut out 2 small nugs that had a little bit of spiderweb mildew
Done nutrients and done instant compost tea

Likes
56
Share


@Prilyfe13
Follow
April 26, 2024 Day 71
It's a new week and the start of late flower. It was also cleaning day. Both reservoirs have been cleaned out and are freshly loaded with new water.
This week we are focusing on watering and nutrients. I may start to drop the dose until flush, over this week and the next.
The light power will also be gradually dropped down over the next 2 weeks. Not much this week, I think I'll drop the DLI down to 43 mol/m²/d in the middle of the week. Next week I'll drop it down to 38 mol/m²/d. It all depends on what the plants look like.
The plants are getting ready to hunker down and finish up. Both have decent sized buds and just need to finish swelling. I'd say another 2 weeks maybe? Flushing will start at some point over the next 2 weeks as well. Flushing won't be much of a big deal as it's just cleaning the reservoirs and running a week of Flawless Finish.
The environment is changing a bit as well. I dropped the day temp down to 75° and the night temps to 65° or lower. Not cold enough to cause stress, but enough to get some purple I hope. The humidity is sitting at 47% and I'll be leaving it there unless somehow I can get it to go lower. For now it's pretty solid at 47% and everything looks great, so no need to worry.
I'll be taking trichome pics every few days. One pic for each plant. No point in loading up the whole photo gallery with even more daily pics. Plus, the progression of trichomes isn't fast enough to really notice daily. So every 3 days should be fine.
Grow System Environment:
Temp: 74.2°
RH: 47.7%
VPD: 1.49 kPa
April 27, 2024
Nothing happening today. Both ladies were inspected with no issues. I snipped a single leaf off of Banana Purple Punch B. Just one. Blocking bud sites.
Banana Purple Punch A has some massive buds. About the size of golf balls. Maybe a bit smaller. They are still swelling and have a good 2 weeks left. Pistils are still mostly white, so that's a good sign for larger buds and more trichomes.
Banana Purple Punch B is looking wonderful as ever. She doesn't seem to be suffering any issues with nutrient burn unlike her sister plant. She's perfectly healthy and has very nice bud production. The buds aren't quite as big as Banana Purple Punch A, but still nice and sizeable.
The nutrient burn seems to have stopped for Banana Purple Punch A. So that's good. It should be perfectly fine now.
Lighting is staying the same for the next couple of days. Although, I may keep it the same for the rest of the week.
The environment is excellent now. It's raining today and the humidity is still at 47%. I did get it down to 44% for most of the afternoon yesterday, so I may be able to keep it down after the rain stops. Or just wait for the afternoon and see what happens. Either way, the humidity is now at 47% and the temp is at 76.8°. The VPD is at 1.57 kPa. A tiny bit high, but still well within range. Last night's temp was a little high at 69°. I'll have to drop the temp lower again to get that 65° sweet spot.
Grow System Environment:
Temp: 74.4°
RH: 45.7%
VPD: 1.55 kPa
April 28, 2024
Not much to do today. I mixed a new batch of nutrients for both plants. The only difference is that I cut the Overdrive in half down to 2 ml/gal. Neither plant needs it, but now it's mixed and ready to go. I may end up filling the reservoirs tonight as it stands. Or later this afternoon. I don't think they will last til tomorrow morning.
Both plants are putting off a wonderful aroma. I honestly can't describe it. Like sweet and kind of a hint of banana and a bit heady.
Trichome production is picking up quickly. The pistils are starting to turn orange as well. They are definitely in the late flowering stage.
I think I'll start dropping the nutrients for the next watering. And I'll drop the DLI down to 40 mol/m²/d tomorrow I think. Not much else to say about nutrients or lighting, so moving on to the environment.
It's a warm humid day out and raining off and on. My whole environment is wonky, with humidity being at 57% and the temp at 77°. I turned the AC on about an hour ago and the temp went down to 75°, and humidity up to 60%. I think I'll crank the AC all the way down. And hopefully get rid of the humidity with the temp being a bit lower than perfect.
Update: I ended up adding about a half gallon of plain water to both reservoirs. Just Incase I have nutrient lockout or something. They should go through that by tomorrow afternoon. Maybe late evening.
Grow System Environment:
Temp: 75.6°
RH: 52.8%
VPD: 1.39 kPa
April 29, 2024
No watering today. I'm still waiting for the plain water work it's way through. However, I did drop the light power.
Both ladies look great. Big buds, great scent and nice color. I'm not seeing any fade yet, but the nutrient burn is still there. I hope it will fix itself with the plain water. And then maybe fading will start. These two need a good 2 weeks or so before harvest.
The lighting, as I said, was changed today. I dropped the power down to 70% to get as close as possible to 40 mol/m²/d. I may have to drop it another 10%. I'm not too sure. I'll check the DLI again when I'm more awake. (I'm finally on my second cup of coffee. Lol) Looks good though. Just around where I want it to be.
But there are a lot of spots where the DLI is a bit high at 43 mol/m²/d. The tallest tops are also kind of high at 45 mol/m²/d. Again, I'll double check on a couple hours, but it should be fine.
The environment is wonky again today. The temp is fine, but the humidity is still high at 60% and I don't see a way to drop it again. Not with the current weather. Hopefully I can get it down with some heat. The AC method did not work. Well, it maybe will work tonight. I'll be dropping that bad boy down to 59° tonight and hopefully it will do what I need it to.
Grow System Environment:
Temp: 74.2°
RH: 59.8%
VPD: 1.15 kPa
April 30, 2024
Watering day. The reservoirs were both nearly empty and there was just enough space for a full gallon in each one. It's the normal nutrient dose with Overdrive being at 2 ml/gal.
These two plants are looking mighty fine. Excellent bud swelling and trichome production. I'm definitely going to be wet trimming them instead of my normal dry trim. I may leave the bods on the branches and do a partial wet trim, or I guess mostly wet trim.
They smell great! Very strong aroma now. I swear they smell like artificial grape. I can't describe it any other way. Grape and pungent. Awesome.
So far the light seems to be fine. No reaching or showing any signs of lack of lighting. They look pretty happy. Although, Banana Purple Punch A is a bit sad from nutrient burn. Banana Purple Punch B however didn't seem to have much of a problem with the burn.
The environment is still pretty wonky. High humidity again. I can control the temp pretty easily, but the humidity is another issue. It's currently sitting at 56% and I'm holding the temp at 76°.
Grow System Environment:
Temp: 75.5°
RH: 57.0%
VPD: 1.26 kPa
May 1, 2024
Not a whole lot going on today. No water needed, no light changes. I rotated both ladies 180° so now they are getting light on other sides. I'll leave them like this for the rest of the grow I think.
Banana Purple Punch A actually fits better in the new position. Less wall touching and about the same neighboring plant touching. I also removed 3 leaves. Ones that were misshapen from being crushed against the tent walls.
Banana Purple Punch B seems to fit a little better in the new position, mostly because of her sister plant. More room on the outside and a little less room inside. No leaves were removed today. I'll reserve that for the last 2 days of the grow cycle. Then I'll do a massive defoliation and then a wet trim.
It's humid here right now and I need the space. Otherwise I'd stick with dry trimming. But I can't hold up the tent for 3 more weeks. I have other plants getting ready to be planted in their final containers. Like a week for that, I might be able to squeeze a week and a half, but that's it. They will have a space, but the main tent is where they will need to be. Not a 2x2 dry tent. I'll work it how I need to I guess.
Anyway, both ladies look great! Trichome production is coming along nicely as well. They are very smelly now and I love it. They are also still packing on weight I think. Not a ton, but the buds are clearly getting denser now that some of the pistils are starting to turn orange. I'd say another 2 weeks on these two.
As I said, the lighting hasn't changed at all. Not for another few days to a week. Then it will have another power drop. Until then, we are staying at a DLI of 40 mol/m²/d. It's roughly 38 mol/m²/d on the outer part of the canopy.
The environment is STILL wonky. I cannot for the life of me get that damned humidity down at all. Not with a dehumidifier, not with the heat cranked, not with the AC cranked. I'll try my big dehumidifier in my room, but the humidity is like 49% and frankly I'd rather the room humidity stay there. Much easier to breathe. However, the humidity in the tent is suffering at 59% while the temp is hanging out still at 76°
Grow System Environment:
Temp: 75.2°
RH: 56.1%
VPD: 1.27 kPa
May 2, 2024
Not a lot going on today. No watering needed, no trimming, nothing.
I found a broken bud on Banana Purple Punch A. It must have been from when it was against the wall, or too close to the other plants and got stuck on a branch while I was rotating. Oh well. It's a lower bud, so not huge.
It's also the last day of the week and that means new videos!
For the rest of the grow, I'll be making weekly videos of the individual plants. So that will.be this week and the next 2 weeks or so.
Banana Purple Punch A looks great aside from that one broken bud. Her buds are fat and thick. Super dense from what I can see. I would like to note that the fade hasn't started yet, so we still have that 2 weeks left. Unless it starts in the next day or 2, I'll be banking on 2 weeks.
Banana Purple Punch B is still compact as ever, but her buds are getting fatter everyday and of all the plants in the tent, she has done the best with the nutrients. Very little burn and didn't seem to be bothered by it. Maybe I did something early on to have such a small plant, but still. I think I can bank on 2 oz from each plant. Maybe 3 oz. It's really nothing compared to previous grows, but as I said before, as long as it's fire, I'm happy.
Trichome production on both plants is fantastic. They are loaded from top to bottom. And building more and more everyday. There's still plenty of time left for there 2 as well. Most of the trichomes are clear with about 20% being cloudy and sparsely amber. That's another sign that they need another couple of weeks. Maybe slightly less.
I increased the light power yesterday back up to 80%. I think I was a bit early on the intensity drop, so I'll drop it again in a few days I think. Around mid week coming up. Now we are running a DLI of 43 mol/m²/d inside and 40 mol/m²/d on the outside.
The environment kinda fixed itself, but not to the ideal climate. It's still at 55% humidity. Better than 60%, but still not good enough. It needs to be below 50%. However, I can still control the temp and I have it at 74.5°. I'll turn it up a bit and see if I can clear out the last 5% of the humidity.
Grow System Environment:
Temp: 73.7°
RH: 55.2%
VPD: 1.24 kPa
Update: I added a couple test videos to see if they would upload. Success!
Processing
Likes
142
Share


@MadeInGermany
Follow
Hi everyone :-)
This week a lot of nice things happened in the flower tent :-)
Everyone looks super nice, and is growing stronger and more beautiful week by week 😍👌.
The blue cheese smells like a dream ;-) As usual from this variety 👍.
The kosher tangie is also very, very tasty 👏🏻.
Both got Pk 13/14 this week for the last time :-)
Everyone else is developing very well 👍, That will be the last diary with several strains together :-)
In future everyone will come individually 👌.
I wish you a lot of fun with the videos, have a nice weekend, stay healthy 🙏🏻 and let it grow 😎👌


Likes
26
Share


@BudBoutique
Follow
Welcome to Bud Boutique Grow Diary - really appreciate all your love and support :)
Dont forget to check out my other current grows!
🗓️ This Week:
- Day 52: the end is near - fading out colors super beautiful
- Day 53: Trichomes check - looking super good almost all cloudy, a few amber and clear. perfect point to chop
- Day 54: this one is finished, let's chop them !! ✂️✂️✂️
- now its time to dry inside the tent at about 60%rh and less than 20°C/68°F trying to get it even lower for the next 10-14 days - complete darkness needed!!
Thank you for still staying with me 💚
___________________________________________
--- 🌱 Strain (Sponsor) ---
🏷️ Blue Cinderella 99 FF by MSNL
https://www.marijuana-seeds.nl/blue-cinderella-99-fast-flowering
--- 🥗 Nutrients and Feeding (sponsored by APTUS: APTUS Ambassador) ---
🍸 APTUS: full nutrient schedule extreme
-- Regulator, N-Boost, P-Boost, CaMg-Boost, K-Boost, Allin1 Liquid, Startbooster, Topbooster, Enzym+ every feeding
-- Fulvic-Blast, NutriSpray as Foliar each once a week
🔗 https://aptus-holland.com/
--- ♻️ Grow Control (Sponsor) ---
TROLMASTER: TENT-X + LM14 Light Adapter to dim/sunrise/sunset lights + Temp & rH Sensor all remote on App
🔗 https://www.trolmaster.eu/
--- 🚿 PetraGrow (Sponsor) ---
CannaFogger Foliar Spray
🔗 https://www.petratools.com/product/petragrow-cannafogger-atomizer-new-mini-fogger
--- 🏭 Grow Setup ---
💡LUMATEK Zeus Pro 600
* 🏠🌿 Indoor: Homebox 120x120x200cm (4x4)
* 📐🌀 PrimaKlima exhausting Fan 1180m3/h (running on 60-80%)
* 🌀 Can Light Filter 800m3/h & 1x Fanbox 1x Dyson fan for Air circulation
🔗 https://lumatek-lighting.com/zeus-600w-pro-29/
🔗 https://primaklima.com/de/shop/ventilatoren-de/ec-ventilatoren/pk160ec-tc/
🔗 https://canfilters.com/products/filters/
All Likes and comments are highly appreciated!!!
👨🌾 don't forget to check out my Instagram for daily educational content: @budboutiquee
- Bud Boutique

Likes
2
Share


@Bwright_315
Follow
Soon very soon. It been a mild October I can't complain praying it holds out🙏🏿