Likes
Comments
Share
@Chubbs
Follow
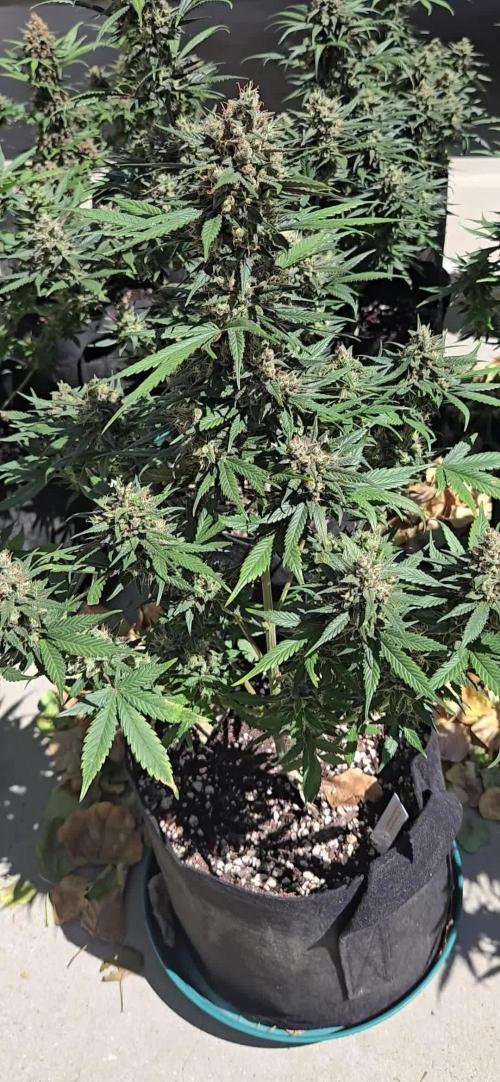
What up fam, took down my 4x8 these where in and figured I'd let them soak up some summer sun. They're getting super close to being finished,I guess another couple days. They smell so good and I really couldn't be happier with how they've grown. Happy Growing.
Likes
8
Share
@Oldwied
Follow
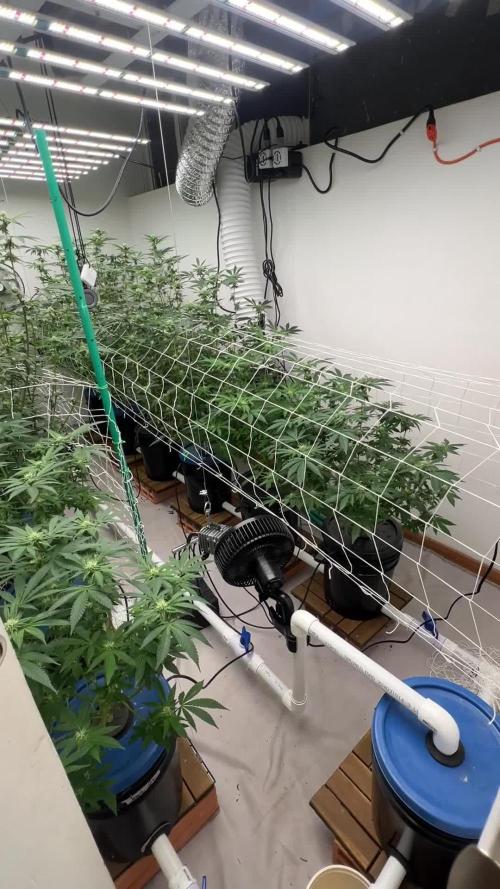
4 days of flower. Everything looks great. The screen of Kush is 2cm lower, based on the slow grow. 80% light power
Likes
44
Share
@rudiak
Follow
Hey everyone! It’s been another fabulous week of the girls fattening up getting ready for the ever looming harvest time! The colas are huge and glistening like a glitter ball! The back right girl has been on flush since day 51, 2 more went on flush on day 53, and the final girl front right went on flush today, day 56! Over the week I gave 3 girls a really heavy defoliation taking the majority of fan leaves off to allow good airflow and try fattening up those lower buds. It’s still impossible to tell if I prefer defoliation or not but we are getting close to harvest so should have a definitive answer to that soon! The back right girl has had absolutely no defoliation or trimming through her life cycle. I still regularly think back to when we broke one of the girls and transplanted, the cannabis gods were on our side warning us 4 girls will be huge, we were very lucky or would be seriously short of space as of now. As the girls are going to be harvested at slightly different times to ensure each are at their optimum, I have had to construct a dry box. How I built my smell free DIY dry box: Take a large cardboard box, cut an extraction hole in the top at one end and mount some ducting and seal the gap around the edge. Cut a flap in the opposite end at the bottom which will be the passive intake and promoting a draft through the hanging buds. Poke some holes in each end of the box using a screwdriver and thread some thin rope or string through the box tying the ends together once finished to give you sturdy locations to hang some pegs from. Finally I attached an extra bit of card on one of the flaps at the top; this overlaps the slight gap in the top between the flaps that could allow light to enter. Once completed I put the ducting into one of the lower intakes of the tent; the negative pressure in the tent then uses the air in the dry box as a passive intake creating a smell free area to dry your cannabis outside of your grow tent. This also keeps a slight breeze flowing through the box to ensure even drying. Happy toking guys and hope you enjoy the pics and vids, thought it was getting hard to tell how big these girls were in pics anymore so the vids help a lot, and I was lazy this week! :P
Likes
4
Share
Likes
6
Share
vraiment tre content de ces demoiselles elle ont été partie après le Nort premier journal et voila quelle les dépasse lol
Likes
99
Share
Hello Folks 👋 👋 👋 In this week massive changes occur 😇 😇 😇
Likes
2
Share
🥒 14B – Pickled Lemon Haze F1 | Week 3 The Second Sister Takes the Crown Welcome back to the Project Blue Tent, my little experiment where every plant receives individual attention from seed to harvest. For anyone joining the journey for the first time, this project follows multiple Zamnesia Genetics grown side-by-side inside the same environment. Every phenotype gets its own diary so we can truly appreciate how genetics express themselves under identical conditions. This week certainly wasn’t boring. A malfunction in the irrigation system flooded the entire tent, leaving every growbag sitting in far more water than intended. Thankfully, the problem was caught quickly, the system was repaired, and every bag was allowed to drain naturally. Thanks to the incredible aeration of Plagron Cocos Premium, the roots never complained, oxygen remained available, and the plants simply carried on growing as if nothing had happened. If anything, this little accident became another reminder that good substrates forgive our mistakes. And this beautiful Pickled Lemon Haze F1 was no exception. ⸻ Week 3 Development She has been an absolute pleasure to watch. Although sharing the same genetics as her sister, she’s already showing her own personality. Her structure became incredibly symmetrical during the week, producing thick internodes, broad leaves and, most importantly, exceptionally vigorous lower branching. Sometimes a plant tells you exactly what she wants. This one practically asked to be topped. Instead of growing vertically with a single dominant apex, she was already investing heavily into her side branches, making this the perfect candidate to redirect her energy and begin building a much wider canopy. Looking underneath the plant was enough to make the decision. Healthy secondary shoots were already racing upward, ready to become future main colas. ⸻ Why I Chose to Top This Plant Many growers see topping as simply cutting the tip off. It is actually much more than that. The main growing tip naturally produces auxins that suppress the lower branches through what’s known as apical dominance. By removing that single growing tip, the plant redistributes hormones and allows the side branches to take over. Instead of one dominant leader… …we create several. Since this Pickled Lemon Haze already had such impressive lower development, topping should allow those branches to explode with growth over the coming weeks, producing a much flatter, more even canopy. For indoor cultivation, that means: • Better light distribution • More productive flowering sites • Stronger structural balance • Easier canopy management Of course, topping is a high-stress technique, so timing matters. I only perform it when the plant is completely healthy, actively growing, and has enough established nodes to recover immediately. Judging by her response only days later, she barely noticed the haircut. ⸻ A Tiny Surgery Using the Zamnesia trimming scissors, I carefully removed the apical shoot just above the selected node. One of my favorite macro photographs this week captures the fresh cut perfectly. Looking through the lens, it almost resembles a tiny green well filled with crystal-clear sap. It is fascinating how much beauty exists in details we rarely notice with the naked eye. Nature never disappoints. The removed growing tip itself was almost too pretty to throw away. Sometimes I think photographers become sentimental about the strangest things. ⸻ Recovery Recovery has been outstanding. Within a very short time the remaining growth tips had already begun pointing upward, clearly responding to the hormonal redistribution. There is no sign of stress, drooping or stalled development. The stem continues thickening nicely, while the side branches seem eager to compete for dominance. Exactly what I hoped to achieve. ⸻ Environment The entire tent continues sharing the exact same environmental conditions. 🌡️ Day temperature: 27°C 🌙 Night temperature: 25°C 💧 Relative humidity: 67% 🌱 Root zone: 24°C 💡 Light schedule: 18/6 ⚡ EC: 1.61 💧 pH: 5.8 ? Pot size: 8 L Plagron Premium Growbag 💨 CO₂: Ambient (~450 ppm) Everything remains stable, giving the plants every opportunity to recover from both the flooding incident and the topping session without unnecessary stress. ⸻ Feeding As the plants continue accelerating their vegetative growth, I increased nutrition slightly. Current feeding per litre: • Plagron Hydro A — 1.6 ml/L • Plagron Hydro B — 1.6 ml/L • Plagron Hydro Roots — 1 ml/L • pH adjusted to 5.8 The slight increase in EC is already being rewarded with faster growth and richer colour throughout the canopy. The new growth remains bright lime green—a perfectly normal characteristic of rapidly dividing young tissue—while the older leaves continue holding a healthy medium green without burnt tips or nutrient deficiencies. Everything points toward a happy, hungry plant. ⸻ Looking Ahead Now comes the fun part. Over the next several days I’ll simply let nature do its work. The goal is to allow the two new dominant tops to establish themselves while the lower branches continue stretching upward. Once the canopy begins filling evenly, gentle LST will likely follow to keep every future flowering site exposed to as much light as possible. She has all the ingredients to become a beautifully balanced bush. ⸻ Thank you so much for stopping by and following another chapter of Project Blue Tent. Every week these plants continue reminding me that growing isn’t just about producing flowers—it’s about observing, learning, adapting and appreciating how incredibly resilient these genetics can be. I truly appreciate everyone who takes a few minutes to read, comment, share advice or simply enjoy the journey with me. Happy growing, and I’ll see you all next week! 🌱💙 ⸻ PS A huge thank you to all the amazing companies making this project possible. 💙 Zamnesia for the outstanding genetics, the fantastic trimming scissors that made this topping effortless, and for believing in this adventure from day one. ? Plagron for providing the Premium Growbags, Cocos Premium substrate and the Hydro nutrient line that continues delivering healthy, vigorous growth week after week. Your support allows this project to become the detailed educational diary I always dreamed of creating. Growers Love and see you all in Week 4! 🌿💙
Processing
Likes
12
Share
The girls have grown nicely and accepts defoliation pretty well id say. I know this is a pretty discussed subjet , some say its bad but since i did not bought thoses seeds i figured awww why not give it a try! I am now switching to full bloom nutes
Likes
11
Share
As expected the look of the bud from Exotic Genetix never disappointed us but as always it come with low yield and small bud. Even though the bud tastes amazing and it give a pretty heavy indica effect
Likes
26
Share
Jo, wird! aber schon wieder Blattläuse. Damn. Die Galato? Überall wo sie gebrochen war ist das jetzt n baum. Ach und 1.10 m hoch. Und voll... Yes! Die Sensi. Und, gut oder? Füe 12 h Licht. Auf jedenfall! Ja, der geneigte aufmerksame Beobachter wird es gesehen haben. ICH HABE SIE ANGENAGT! (ok schnell trocknen, dann mit tabak.. Knallt. Musste weil hier wiedermal im eh nicht gur sortierten FACHHANDEL,nix war, alles doof). SENSI SEEDS macht sich selbst alle Ehre. Hat trotz 12 h Licht angefangen Amber trichome zu zeigen. Ach ja, sheppert scheppert knallt, wummst. Explodiert, potent..POTENT. habe ne Knospe getrocknet (langsam). Genießbar. Und... Boah ich bin lemon. LEMON! nice one. Musik voll geil!. Und das ungecured. Yes. YES! YEAHH!
Likes
17
Share
@EXZELENS
Follow
Bud wet weight : 168,1g of trimmed medium to big sized buds 25,4g of tiny tiny buds/larfs = 193.5 grams of trimmed wet buds. Details on genetics and smoke report above. This, as my first grow, is way more than I ever expected it to be. I haven´t had that much fun and enthusiasm in a very very long time. I can´t even explain the feeling it is to harvest your own cannabis, but I know most of you know what I´m talking about haha. It was really nice to practice LST, even tho it was SO HARD, ´cause I didn´t had barely any space to work since I used a hard pot and did not fill nearly half the size of it and the walls of the pot were really high. It was even difficult to water without dropping water on the lower buds. I haven´t learnt much about defoliation tho, I feel I need to study a little more about the phases you should or should not do it. Also, I discovered thrips are a pain in the ass. I had 2 tough weeks dealing with thrips, but in the end it was alright. I don´t have any humidity control device, which I intend to buy for the next grows. Growdiaries was really helpful for me, it kept me motivated everyday (not that I wouldn´t have had it anyways), the Grow Questions are REALLY useful and all the community is awesome. Thanks to all people that helped me here on GD during this first grow! To conclude it: I am really happy and satisfied with how the grow turned out. They look incredible, it almost feels like I can´t believe it still. Peace. UPDATES: 07/10 : The buds are now dry and already in curing jars, one of them with a Boveda 58% humidity pack. The total grams of the dry buds are: 41.4g (medium to big sized buds) 4.1g (tiny buds) = 45.5 grams! I´m really happy with the results, I thought it would be around 30g so yeah, that´s a really good surprise! In 2 weeks I´ll be back to update the smoke report. Thanks so much for reading! Peace. 09/10 : I managed to fit everything in the same container with some space between them, so now every bud is with the Boveda pack. 14/10: It´s been a week and the smell improved, it still smells a little like hay/plant ( even tho it´s not too dry neither too wet ). 21/10: Now it´s been two weeks and even tho the smell isn´t anymore hay, it´s a lot herbal. I really think the aroma can get better, but the taste is already good enough for me. The smoke report has been done and in case I have something to add, I´ll report here. Thank you so much for reading! Peace.
Likes
226
Share
@HighTV
Follow
| 📅 Week 5 | Days 29 - 35 | 💡 562w 📏42' | | ☔ 29%-38% | | 🌡️️🌞 76 - 79 | | 🌡️️🌑 73 - 75 | 12/07 Weekly Reservoir swaps on all plants to clean them and give fresh nutrients. 2 plants repeated week 4 nutrients with no micro and the other two (including the focus plant in the lapse) are accurate with the Dairy. 12/08 PHed all plants to 5.8 and updated the LST on all the plants. Spread some of plants out to get better lighting as I raised the light s few inches. 12/09 Topped off the reservoirs and PHed them to 5.6 because they have been rising alot. Rotated plants half turn. Did more LST for more light penetration. 12/10 Signs of preflower are starting to show on two plants and the tent is starting to get that flowering smell not to much longer until I need to hook up the carbon filter to stop the stench. 12/11 Updated front left and back left plants to week 5 nutrients with no Floramicro, because these plants hate nitrogen. PH in all reservoirs set to 5.6 12/12 PHed adjusted to 5.8 and topped off all the reservoirs. Did more LST and tucked plenty of leaves away for better light on new growth! 12/13 First real signs of Flower! PH adjusted to 5.8 and reservoirs topped off with water to keep the nutrient levels balanced. Lollipopped the front left plant for experimental purposes. These plants overall are doing fine and I have 2 different phenotypes displaying. One is extremely reactive to nitrogen and taller while the shorter phenotype is slightly less reactive to nitrogen (both hate it). I am pleased with the growth at this stage and the smell is just starting There is slight purple coloration displaying with the preflowers but nothing really noticeable yet. I am excited for the flowering to start so these girls can start showing their true colors 😍 edit: changed final picture for better lighting.
Processing
Likes
34
Share
Hello Growers and Tokers! 👋 👩‍🌾 🧑‍🌾.🔥💨 Sorry for the delay on the updates. ** THIS TEXT SERVES FOR WEEKS 14-18** I had ALOT of problems with this lady these past 4 weeks. Really bad weather, rain, wind, blazing heat, cloudy, temps going from 17-35C every other day for 2 WEEKS straight.. very sketchy! World's going to shit y'all! Also had a Spider mites battle for 3 weeks and finally got rid of them. And on top of that, all of the pictures I had weekly were deleted off my pc.. Only have a few for each week, luckly found those on my phone. I've been watering 2L every other day for the past 4 weeks. Some days less.. about 1.6L beacuase there just wasn't enough sun for her to drink up. On week 16 there were some crazy-ass MFing winds. I'm talking gone with the wind style. As I had the spider mite problem, I didn't want to bring her in the house and risk those little fuckers finding their way to my grow room. (As I have that section perfectly isolated and pest free, wanted to keep it that way.) The result of not bringing her inside? The bottom branches that weren't tied down properly because I didn't think they would be damaged as the balcony has a little wind breaker on the bottom half. But to my surpise.. all three branches snapped and broke, So i decided to go ahead and take them off. I know it isn't much info for the past weeks, but It's what I've been battling with. The buds are airy as a result of all the stress, don't look to appleaing to be honest. My other two GSC came out GREAT, awesome lovely dense buds but those were different conditions. I'm just finishing her to harvest because she made it through a big battle and deserves to be harvested as a champion she is. Keeping in mind this was just a balcony experiment to see what I can and can't do with this balcony.. I'm not too worried about the final outcome. Luckily she pulled through so i'll make some hash with what I harvest. I'll also be joining the FastBuds Halloweed contest with this lady before harvesting and I've got the perfect idea... 😏 Hope you all enjoyed the update and again sorry for the long delay on this one. You can check out my other diaries of indoor ladies. Take care out there! One Love!
Likes
145
Share
@yan402
Follow
🌸🍊✨🍭🌸🍊✨🍭🌸🍊✨🍭🌸 Back at it with Kannabia — huge thanks for the NEW EXCLUSIVE Upcoming Kannabia's seed Launch 🙏🍨🍊 Grateful for the trust and for everyone following along, I’ll run her clean and showcase what she can do. Dessert-party goals: berry–citrus sherbet terps, creamy finish, tight stacks, easy trim, zero drama. Veg 24/0, clean manifold + LST, flip on a happy, even canopy. Coco’s fresh, seed goes in now. 🚀 Added on 12.10.2025 🌞 Light conditions: Limited direct light for the first 4 weeks — ~4 h/day on weekdays and ~10–11 h on weekends due to tent sharing and work schedule. 🌸🍊✨🍭🌸🍊✨🍭🌸🍊✨🍭🌸 💭❗💭❗💭❗💭❗💭❗💭❗💭 ❗Events & thoughts worth noting❗ 💭❗💭❗💭❗💭❗💭❗💭❗💭 10.08.25 GW1 Sowed seed, soaked starter pot with #1 12.08.25 GW1 Seed popped hip hip hurray 28.08.25 VW2 Stopped using GreenBuzzBloom, took it out of the schedule. 01.09.25 VW3 TriPartMicro 10→30ml, TriPart bloom 10→30ml 12.09.25 VW4 Applied nemadodes against thrips and fungus gnats. 20.09.25 VW6 topped and trained for first time, decided against a full manifold as I lost a few weeks already. 26.09.25 VW7 Topped her one more time for 8 mains 27.09.25 VW7 Topped up the pot with perlite instead of clay pebbles this time, just trying things out, TriPartMicro 30→40ml , TriPartBloom 30→20ml 10.10.25 VW9 have her a haircut, umm be trimming the side shoots tomorrow, rest in the video 📹 12.10.25 VW9 done some extra trimming to clean up a bit and chose two extra side shoots to nurture info mains, so kept the 8 original mains plus 2 rest in the video 📹 17.10.25 VW9 FfJ/fpj fish mix 30 → 60 ml 20.10.25 VW10 Feed tweak: added 3 g Calcium Nitrate/ 30 L (≈ 15 ppm N + 10 ppm Ca) 24.10.25 VW11 did a defoliation and trimming session 📹 27.10.25 VW11 Epsom Salt 0 → 2.5, Calcium Nitrate 3 → 9 g 01.11.25 VW12 CalMag 60 → 30ml, TriPartBloom 20 → 30ml, Magnesium 2.5 → 3.5g 02.11.25 VW12 Did a cleanup in preparation for flowering, rest in the video 📸 13.12.25 VW13 Did another cleanup in the tent 🎥, also switched to the FERMAKOR PK Micro schedule 🌱💦🌱💦🌱💦🌱💦🌱💦🌱 🌿 Day to day tasks & actions 🌿 🌱💦🌱💦🌱💦🌱💦🌱💦🌱 07.11.25 VW12 – Fed 5l of #1 → 2l runoff 08.11.25 VW13 – Fed 5l of #1 → 2l runoff 09.11.25 VW13 – Fed 5l of #1 → 2l runoff 10.11.25 VW13 – Fed 5l of #1 → 2l runoff 11.11.25 VW13 – Fed 5l of #1 → 2l runoff 12.11.25 VW13 – Fed 5l of #1 → 2l runoff 13.11.25 VW13 – Fed 5l of FERMAKOR PK→ 2l runoff 14.11.25 VW13 – Fed 5l of FERMAKOR PK → 2l runoff (*RUNOFF reused for tomato plants) 💧💦💧💦💧💦💧💦💧 💧 Nutrients in 30 L #1 💧 💧💦💧💦💧💦💧💦💧 💧 TriPart Micro: 10 → 30 → 40 ml  = 0.33 → 1.00 → 1.33 ml/L 💧 TriPart Grow: 0 ml  = 0.00 ml/L 💧 TriPart Bloom: 10 → 30 → 20 → 30 ml  = 0.33 → 1.00 → 0.67 → 1.00 ml/L 💧 Cal-Mag: 60 → 30 ml  = 2.00 → 1.00 ml/L 💧 Home-made FFJ/FPJ (new batch): 30 → 60 ml  = 1.00 → 2.00 ml/L 💧 Calcium Nitrate (Calcinit): 3 → 9 g  ≈ 15 → 45 ppm N + 20 → 60 ppm Ca 💧 Magnesium (Epsom Salt / MgSO₄·7H₂O): 0 → 2.5 → 3.5 g  ≈ 0 → 8–9 → 11–12 ppm Mg 💧 pH Down: Citric acid (BuxXtrade) — adjust to ~ pH 5.8 – 6.0 📦 TOTAL: ≈ 110 → 180 → 170 → 190 ml liquids  + 3 → 11.5 → 12.5 g solids per 30 L  ≈ 5.9 → 6.4 ml/g active mix per L 💧💦💧💦💧💦💧💦💧 ⚙️✂️⚙️✂️⚙️✂️⚙️✂️⚙️ ✂️ Tools & equipment ✂️ ⚙️✂️⚙️✂️⚙️✂️⚙️✂️⚙️ ✂️ 2× MarsHydro SP3000 ⚙️ MarsHydro 150mm ACF Ventilator ✂️ Trotec dehumidifier (big unit) ⚙️ Mini no-name dehumidifier ✂️ Kebab skewers (LST – stainless) ⚙️ Wire + roast skewers (LST assist) ✂️ Scissors (HST) ⚙️ Vacuum (for spills & cleanup) ✂️⚙️✂️⚙️✂️⚙️⚙️✂️⚙️✂️⚙️✂️⚙️ --- 🍊🍧🌬️🍬🍊🍧🌬️🍬🍊🍧🌬️🍬 Mystery seed (Kannabia Seeds) — NEW EXCLUSIVE 🍊🍧🌬️🍬🍊🍧🌬️🍬🍊🍧🌬️🍬 Species: Hybrid (GF / swift-flowering line) Genetics: TBA (breeder sheet pending) THC: TBA Effect: Euphoric, relaxed, creative (target profile) Flavor: Berry–citrus sherbet, sweet candy, creamy finish Flowering (indoors): ~6–7 weeks target (GF) Resistance: High (aim: no drama) Indoor yield: TBA Outdoor yield: TBA Structure: TBA Notes: Brand-new exclusive from Kannabia’s GF line — I’ll update specs when the breeder card drops. Goal is rich sherbet terps (berry–citrus + cream), low leaf-to-calyx, easy trim. Stage harvest stays on the table if tops finish early. YouTube Link: https://youtube.com/-m8h?si=A7x4Zlr2kj-_ga31
Likes
30
Share
10/31: I fed today with one, signal, sweet & sticky, beastie bloomz, and silica. Forgot to take glamour shots, but will tomorrow...they're getting fat and frosty! 11/4: Fed with one, signal, sweet & sticky, beastie bloomz, silica, and humic acid. They are frosting over very well now and still fattening. Interesting aroma...very sweet, but has a hint of English toffee..
Likes
4
Share
Week 5 – flowering stage Dwc: ppm= 1000-1200 / ph: 5,8-6,2 420 hydroponics bloomshort base / monster pk 52-34 booster Soil in top for more information ≈ 1,5-2l per plants Environment: Light intensity: 85-100%, distance: 55–75 cm Temperature: 26–28°C🌞/ 23-24°c🌙 Humidity: 45% The buds are starting to swell !!🚀❤️
Likes
5
Share
@Bdawg
Follow
Foliar fed shogun sumo boost yesterday
Likes
8
Share
@pzwags420
Follow
Started off week 6 off by adding 5ml of Flying Skull Z7 to reservoir and adjusted reservoir PH to 6.0. I've got the blumats nearly dialed in and keep making small adjustments every 24 hours. I am holding off a few days on the nutrients to see what the plant tells me. The clawing seems to have improved(combo of over watering and not getting runoff on hand watered nutrients I believe). When I apply nutrients going forward I will make sure there is plenty of runoff so I don't repeat the same mistakes. 😬 on day 2 I applied 1 gal of nutrients and watered until runoff. On day 3 I defoliated the bottom of my plants to improve the air flow. On day 6 I added 5ml of flying skull Z7 to the reservoir. I noticed a possible calcium deficiency on one plant so on day 7 I applied my 1 gal of nutrients with the addition of calmag and silica. Ive only used calmag once growing in coco and it burned my plants...so I assumed there was enough from my tap water and nutrients. I know this goes against all advice.. I think it finally caught up with me LOL.LIve and learn to buffer your coco. Next grow I will buy buffered coco and use a calmag product 😅 I defoliated the center of my plants to increase airflow and expose light deeper into the canopy.
Likes
6
Share
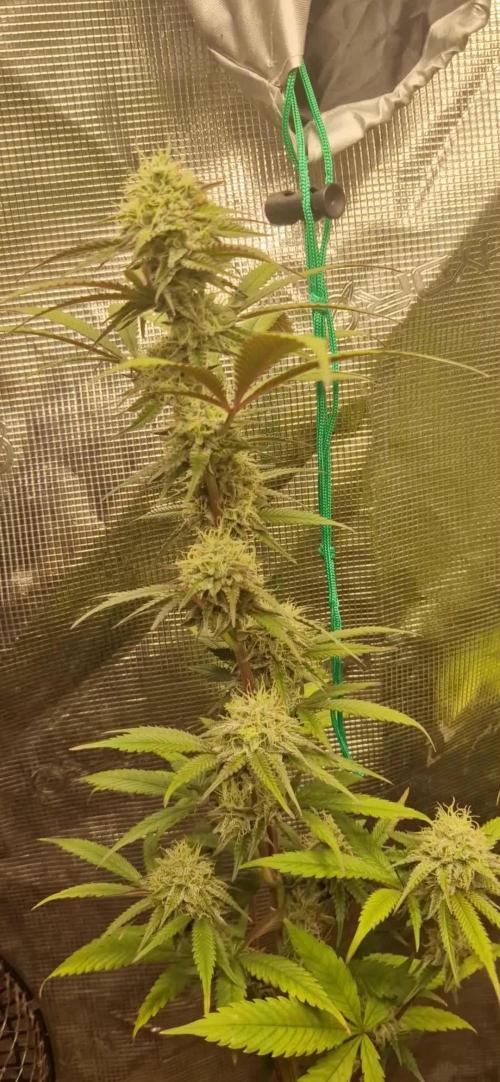
D50 - 11.13 - Flipped to 12/12 a week ago 👍 D54/F11 - 11.17 - Looookin gooood :)