


Likes
Comments
Share

@gkpowa
Follow
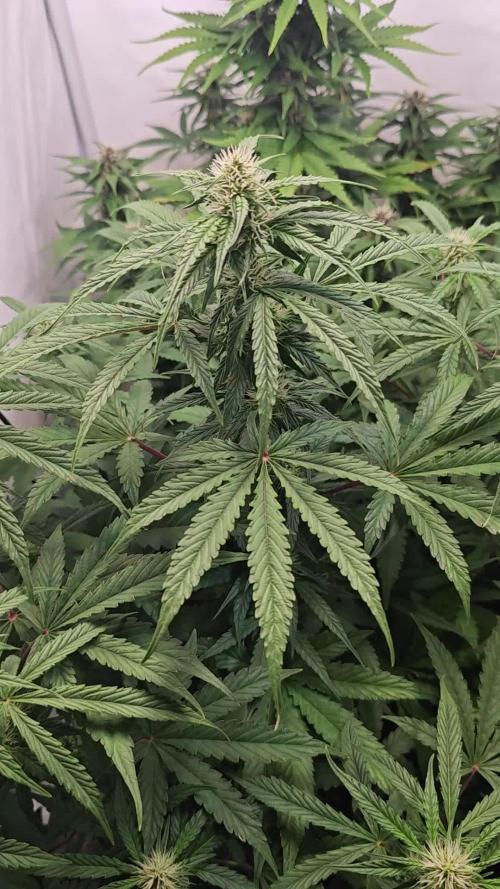
Dokoupil jsem doplňky k hnojivům, překvapilo mě jak jsou drahé, jenom green sensation je 10x dražší jak základní Bloom. Trochu se bojím plísně, protože mám pořád vlhkost 60-65%, snad pomůže když mi v tom malém stanu jede odtah S6 na 7/10 a mám tam 2 oscilátory S6.

Likes
6
Share


@Sators
Follow
🗓️ Day 78 – Embracing the Power of Nature
Another week has passed in this beautiful outdoor grow journey. The plant continues to surprise me with its strength and resilience. This past week brought intense sunlight and scorching heat, but no changes were made to the technique – I still rely entirely on nature’s rhythm. No additives, no boosters – just clean tap water and occasional Plagron Bat Guano top-dressings every 10 days.
🌿 Growth & Structure
After recovering from the strong winds and heavy rain earlier this month, the plant has bounced back stronger than ever. The main cola is stretching tall and proud, and the side branches are developing nicely with consistent flower formation.
🔎 Health Observation
The leaves remain lush green with no signs of deficiency or stress. The overall structure is symmetrical, with good internodal spacing and healthy development. Some light purple tint appears in the petioles – likely a natural trait under current temperature fluctuations.
💡 Minimalist Approach
This grow has been intentionally simple – an experiment to see how far genetics and nature alone can take a plant. The result so far is impressive, especially for a FastBuds autoflower grown without any synthetic nutrients or intensive care.
🌸 Flowering Stage
The plant is now in full flowering mode. Bud sites are clearly swelling, and trichome production has started. With a bit of patience and consistent care, we’re on track for a natural and aromatic harvest.
🌱 Soil & Feeding
• Organic super soil mix
• Occasional Plagron Bat Guano (every 10 days)
• Tap water only – manually aerated before use
No bottled nutrients.
📷 See photos for close-up bud development and overall plant structure.
The FastBuds 20:1 CBD strain is proving to be a great outdoor choice – vigorous, hardy, and perfectly suited for low-maintenance growers.
Likes
7
Share


@tutankhamun
Follow
пока што могу сказать 2 дния назат родьилис етьии чудесние девачки💚🌱🌱🌱🌱💚


Likes
5
Share


@GarciasGarden
Follow
Day 9 plants looking great all green already seeing bud sites forming! Can’t wait to see the buds on these girls!
Again check out General hydroponics their nutrients are the best out there!


Likes
9
Share

@LoccoMotive
Follow
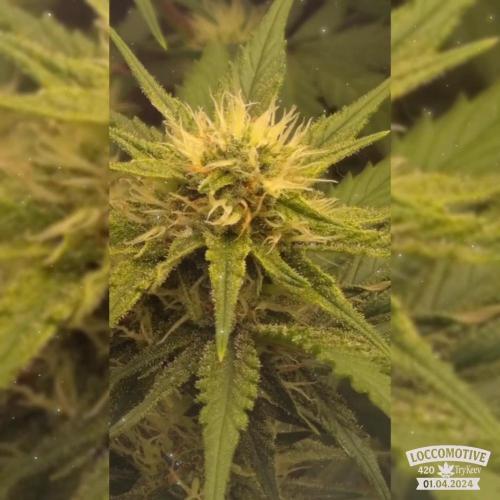
🌿 Woche 6 – Eine entwicklungsreiche 3. Blütewoche
🌱 Wachstum
Auch wenn ich 2 gute Triebe verloren hab, ✂️bin ich super happy. 😄🍀
Beide Pflanzen sehen trotz allen Widrigkeiten super aus. 💪🌱
Es geht auf jeden Fall in Richtung Ernte. 🍂✂️
🌱 Living Soil
Da es mit diesem Run bald zu Ende geht, 📅 muss ich mir Gedanken machen,
den nächsten Grow gut vorzubereiten – gerade was das Bodenleben angeht. 🌏
Aber auch, was die verfügbaren Nährstoffe betrifft.
Eine Behandlung mit Wurmhumus und Gesteinsmehl + Komposttee-Dusche ☕💧
sollten ausreichen, um für den nächsten kompletten Run gerüstet zu sein. 🛡️🌱
💡 Licht & Schatten
PPFD wird langsam, Step by Step erhöht. 📈 Aktuell ca. 700 µmol/m²/s.
Je höher die Triebe wachsen, desto mehr Licht bekommen sie ohnehin. ☀️🌿
☀️ Wetter
Die Temperaturen sind und bleiben brutal: 25–31 °C 🌡️🔥
Die Lady´s schlagen sich tapfer unter diesen Bedingungen. 💪
💧 Gießen
🕒 Alle 2–3 Tage
🚿 Jeweils 2,2 l Wasser 💦
🎶 The Grow must go on! 🌱✨
Likes
8
Share

@GERGrowDesigns
Follow
Dear Growers ,
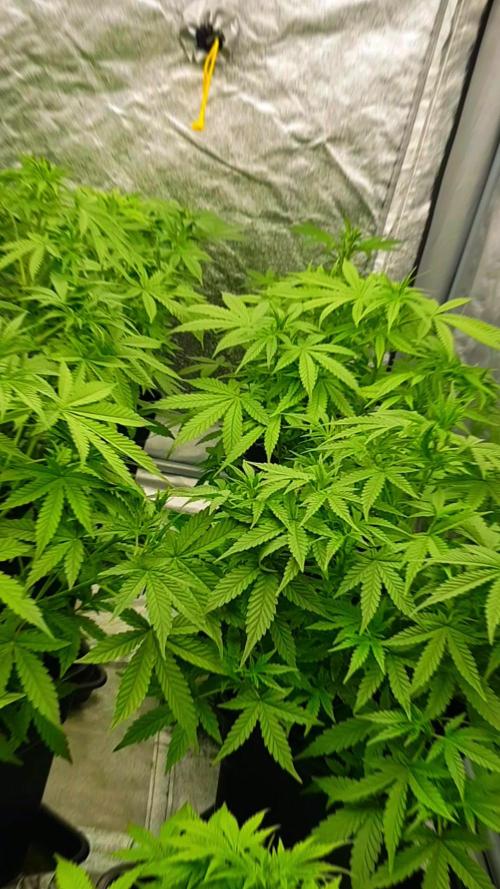
Welcome to Veg Week 3 Day 15-26 of WeedSeeds Express Wedding Cakw Auto
Whether you're a beginner or an expert, you are warmly invited to join, ask questions, and share your own experiences along the way!
Project Setup & Conditions:
• Brand/Manufacturer: WeedSeeds Express
• Tent: 222cmx150cmx150cm
• Light: 2x 720 Watt Full Spectrum
• Humidity: 50%
• Soil: Narcos Organix Mix
• Nutrients: Narcos Products
• pH Value: 6
Get Your Epic WeedSeedsExpress Genetics or Explore the whole seeds/headshop or Merchandise from This Amazing Breeder and one of the best EU Stores.
Just Take a look with some time in your pockets with this link [https://weedseedsexpress.com/?a_aid=GGD]
If you want Germinitation results like mine , check out Kannabia Seeds with my link [https://www.kannabia.com/de?ref=61966] and grab the germination device or theyre amazing strains . Trust me – it’s worth it for sure !
Congratulations on Your Own Projects!
We celebrate your growth, your creativity, and the passion you bring to the table. It’s truly inspiring to witness at Each visit .
Stay curious and keep up Growing —we look forward to welcoming you back for the next chapter soon!

Likes
15
Share


@Siriuz
Follow
Check out the videos guys, she is flowering real good even tho we are not using any special nute like big bud for example, but i really want to try it soon, hopefully!
Still she is doing great and im happy to have her!
How are you doing growers whats up!?
Dont forget to leave a comment
Any suggestion is welcome!
We are happy to learn new things alwas,
Thanks for the support happy growing everybody
Enjoy the footage thanks to Siriuz
Likes
4
Share


@sunnykuyall
Follow
04 - 07 May 2023 - Germination Week
08 - 14 May 2023 - Veg week 1
15 - 21 May 2023 - Veg week 2
22 - 28 May 2023 - Veg week 3
29 - 04 June 2023 - Veg week 4
05 - 11 June 2023 - Veg week 5
12 - 18 June 2023 - Flower weel 1

Likes
38
Share


@kijani
Follow
she is still branching, so i realized she needed ore space and put her out in a larger 4x4 tent as compare to the orignal 2'x2'. the tent has more cmlights then the single one in the smaller tent - this made the girl start to uptake nutrients such that there is very little drained to waste.
i also put a screen to start scroging over her. the screen has large holes, so i think it may require high stress training to move the stems to the next section without breaking them.
the data from grow rooms sensors etc gets overwhelming quickly and i can't really keep up. so i created a graphical animation visualizing for the composite garden data from the live garden sensor data.
this is fun as things on the dashboard change colors and shape based on the sensor status. it is also interactive as i can also send commands to say control the lights, pump by clicking on them on the animation.
. i am still using my doser to mix nutrients and then refill this garden manually. besides the plant response to the increased lighting , all other conditions i can adjust are still similar.
Likes
11
Share


@ChefSpliff
Follow
Week 3 has come and gone and it was a sight to see!! All the pistills came in nice and strong. I have to get in there and defoliate every couple a days a bit. This will be the last week of defoliation. Once I can see the main bud sights I will do my final trim. Started reducing the Nitrogen as the stretch faze comes to an end and up the bloom ferts. I cant raise my light much more so I hope they stop stretching this week. Im excited to see the flowers grow into these pistills and watcch the calayx swell.

Likes
9
Share


@Appoldro420
Follow
Title: 100% ChatGPT-Guided Grow – 12/12 Fast Flower Test (With Supervision)
Hey growers!
This grow is an experiment: I'm letting ChatGPT guide my entire grow cycle, from lighting to nutrients to environmental tweaks. It’s all based on AI suggestions.
Of course, I’ll still be keeping a close eye on things — if I see something going wrong or the plants aren’t vibing with the plan, I’ll step in. But the idea is to test how far AI can take a grow under controlled conditions.
Strains – All from @Sweet_Seeds (F1 Fast Version):
Mental Rainbow F1 Fast Version
Tropicanna Poison F1 Fast Version
S.A.D. Sweet Afgani Delicious F1 Fast Version
Gorilla Girl F1 Fast Version
Setup:
Coco in 20L @MarsHydroLED SmartPots
Grow tent: @SecretJardin DR240W
Lighting: 2x 720W LM301H EVO LEDs
12/12 from seed
Germination: May 14th / Main grow starts May 20th
Nutrients: Hy-Pro Coco A/B CalMag Pro, @BAC Silica Power, F1 Extreme Booster
Irrigation: Week 1 hand watering, then Blumat
pH starts at 5.8
CO₂ supplementation via natural gas system (Spider Farmer GGS)
Goal: Complete a full grow cycle in 10 weeks or less, from seed to harvest.
Updates will be posted in a personal yet informative style — a hybrid of stoner chill and data-driven grow logs.
Let’s see what AI can do in the grow tent. Stay tuned! 🤖🌿
🌱 Weeks 1–3 (May 20 – June 9) – Seedling to Early Flower (Stretch Phase)
Goals: Strong root development, firm stem structure, controlled stretch
Light: 12/12, start at ~500 PPFD → ramp up to 800 PPFD (day 14–21)
CO₂: 1500 ppm (only active when lights are on and temps 26°C)
Temperature: 26–28°C day / 22–24°C night
RH: Start at 70% → gradually lower to 60%
Nutrients (EC ramp-up):
Start EC: 1.0 → increase to 1.4
Plagron Cocos A+B + CalMag Pro (0.2 EC tap water)
Always mix Silica Power first (0.1 ml/L)
Actions:
Week 2: Start light defoliation on lower leaves
Week 3: Begin LST if desired
pH: 5.8 throughout the veg phase
🌸 Weeks 4–5 (June 10 – June 23) – Flowering Phase 2 (Bud Set)
Goals: Initiate flower formation, maintain healthy leaf mass, stimulate bloom
EC: 1.5–1.7 (monitor Blumat watering rate carefully)
RH: 55–60%
Nutrients:
Plagron Cocos A+B
CalMag Pro
Silica Power (0.1 ml/L – only until end of week 5)
Start B.A.C. F1 Extreme Booster at half dose, watered manually twice a week
Light: 900–1000 PPFD if plants can handle it
🌼 Weeks 6–7 (June 24 – July 7) – Flowering Phase 3 (Bud Building)
Goals: Develop dense flower structure, maximize flowering potential
EC: Up to 1.8 max
RH: 45–50%
Nutrients:
@Plagron Cocos A+B + CalMag Pro
@BAC. F1 Extreme Booster at full strength
Actions:
Final defoliation at beginning of week 6
Inspect leaves regularly for airflow and mold prevention
💧 Weeks 8–9 (July 8 – July 21) – Ripening Phase
Goals: Maximize terpenes, trichome maturity, flush medium
Week 8:
EC: taper down to 1.4
Stop using booster
Optional single flush with enzymes (manual watering)
Week 9:
Only plain tap water through Blumat (~0.2 EC)
Temperature: 24–26°C
Dim lights to ~600 PPFD for final 3–4 days
✂️ Week 10 (July 22 – July 28) – Harvest
Trichome check: Aim for 10–20% amber with a loupe
Optional: 48 hours darkness before harvest
Temperature: Keep low (20–22°C) to preserve terpenes
Deadline: Harvest no later than July 28
Powered by the new 2025 @SpiderFarmerLED GGS system..
Detailed setup (only SF parts mentioned here):
SF GGS Grow Light Controller (1x)
SF GGS AC10 Kit (1x)
SF GGS 6 Inch Clip Fans (2x)
SF GGS 6 Inch Inline Duct Fan (1x)
SF GGS SensorPro Kit
SF Ultrasonic Humidifier
May 20 – CO₂ moved outside, lighting dilemma, and a warm future ahead
Moved the CO₂ generator outside the tent today. Immediate win: steady 700 PPM from just the pilot light, no active burn needed. When turned off, it drops neatly to 400 PPM, matching the calibration point. Double-checked with the Dimlux CO₂ sensor—readings line up perfectly.
Still no tracking info for the originally ordered lights, so out of impatience I grabbed two new 720W LM281B fixtures from Germany this afternoon. Should arrive Friday/Saturday. It's a Trade Assurance order, so in theory, I'm covered.
Now the question: let the seedlings coast at 259 µmol for two more days, or hang the old lights to boost them to 500 µmol? Eight out of twelve are already above soil, and honestly, I’d rather not mess with the current vibe. Leaning toward leaving them be—low stress, happy sprouts.
Best part: temps dropped to 27.9˚C inside the tent now that the CO₂ generator’s out. Room itself is 24˚C, so all in all pretty chill. Curious what’ll happen once those dual 720W monsters fire up… it’s gonna get toasty, no doubt.
24/05: Stocked up on new Plagron nutes—finally. Now I can lock back into the full 10-week feeding plan (Plagron Cocos + B.A.C.). Flushing the res tonight and going full reset. Mixing fresh soup right after, dialed in to match this schedule:
Week 1:
Plagron Cocos A/B: 2 ml/L
B.A.C. Silica Power: 0.2 ml/L
Plagron CalMag Pro: 0.5 ml/L
B.A.C. F1 Extreme Booster: 0 ml/L
EC: 0.9–1.0
pH: 5.8
PPFD: 500
DLI: 22
RH Day: 70%
RH Night: 65%
CO₂: 700 ppm
Processing
Likes
9
Share


@High_Grade_Dadli
Follow
Main crown got damn last week on plant with lil to no training done to it...leave are also a bit yellow going to straighten it out this week
Likes
5
Share


@KannaGrowing
Follow
Ha llegado el momento de cambiar la duración del periodo diurno de nuestro cultivo para inducir la floración.
Pasamos a 12h de luz y 12h de oscuridad.
Las cuatro luminarias están conectadas al 50% de su potencia máxima.
También realizamos una poda baja, para que la planta concentre su energía en la canopia, al mismo tiempo que facilitamos los riegos.
Seguimos con la fertilización JUJU Royal by BioBizz, siguiendo su tabla de dosificaciones.
Likes
Comments
Share

@A-C-H
Follow
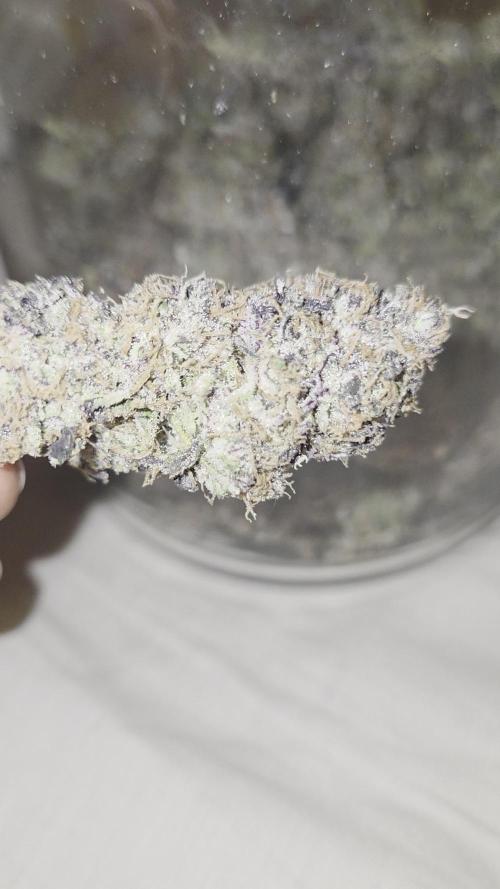
Ich bin mit dieser Kultur nicht besonders zufrieden, da ich einige Probleme mit zu niedrigen Temperaturen hatte, aber letztendlich ist alles in Ordnung.


Likes
107
Share


@MrJones
Follow
Mr-Jones Strawberry Pie Auto by FastBuds
🍓╰⊰🍓´🍓⊱╮🍓╰⊰🍓´🍓⊱╮🍓╰⊰🍓´🍓⊱╮🍓╰⊰🍓´🍓⊱╮🍓
🌞Environment - Contenu to work on ensuring that the Humidity stays above 45%
💧 Feeding - Using "Super Coco" amended soil. compost teas, Dechlorinated H20 PH/6.5 Fish Fertilizer
🍃Training / None just keeping things defoliated.
🕷️ IPM - Will be using Green Cleaner" 1 OZ per Gallon, and CannControl from Mammoth alternating between product each month for Integrated Pest Management.
💡"960 Watts of LED's 4x8x8 Custom Grow Closet"💡
🍓╰⊰🍓´🍓⊱╮🍓╰⊰🍓´🍓⊱╮🍓╰⊰🍓´🍓⊱╮🍓╰⊰🍓´🍓⊱╮🍓
Rambling - Week 13 will be the last week before she gets chopped, looking at Saturday, she just looks amazing, and smell so much like strawberry fields!
🍓╰⊰🍓´🍓⊱╮🍓╰⊰🍓´🍓⊱╮🍓╰⊰🍓´🍓⊱╮🍓╰⊰🍓´🍓⊱╮🍓
▶️Monday 02.08.21 / Watered w/ Dechlorinated H20 PH 5.8 / 6.2
▶️Tuesday 02.09.21 / Watered w/ Dechlorinated H20 PH 5.8 / 6.2
▶️Wednesday 02.10.21 / Watered w/ Dechlorinated H20 PH 5.8 / 6.2
▶️Thursday 02.11.21 / Watered w/ Dechlorinated H20 PH 5.8 / 6.2
▶️Friday 02.12.21 / Watered w/ Dechlorinated H20 PH 5.8 / 6.2
▶️Saturday 02.13.21 / Chopped her today and put 402 GRMS into the tent to dry @ 62F/58RH should take about a week to 10 days, so back by and check out the full harvest report!
▶️Sunday 02.14.21 / Bud in the dry tent!
🍓╰⊰🍓´🍓⊱╮🍓╰⊰🍓´🍓⊱╮🍓╰⊰🍓´🍓⊱╮🍓╰⊰🍓´🍓⊱╮🍓
SOIL MIX
COCO - 70/30% Tupur Royal Gold 30 GALLON
WORM CASTINGS 5 GALLON
LOBSTER COMPOST 5 GALLON
PERLITE 6 GALLON
INSECT FRASS 2 CUP
ORGANICALLY DONE GROW 5 CUPS
BUILD A SOIL COCO MINERAL MIX 6 CUPS
Likes
8
Share


@LittleBigTrees
Follow
Have her a big defoliating to allow light to the bud sites and to reduce humidity in the tent , she took it well and is growing really fast still.
The smell is very old school skunk type smell at this point

Likes
25
Share


@Snaak
Follow
This week ill try to switch over to an English diary because the translation is absolutely crap and i might learn a thing or two about the English terms in growing, also because the American and Canadian researchers extended the growing knowlegde in an absolute insane tempo and i would probably get most of my information from them.
I don't have a spelling-check on this pc, therefore i apologize in advance ;).
I uploaded some photo's with crappy lighting (Next grow ill switch day-night rythm and should give me better opportunities for photo's, but we'll get to that in the future) but also i short video of some notes which i will elaborate below:
Last week on saturday i turned off the carbon vent because i could not get the humidity level right and i was still waiting for my humidifier. I placed a big fan inside the tent for air circulation and besides that i installed a small vent-filling fan in in front for clean-airflow.
Last weekend i closely watched what the humidity and temperature did and started playing with the setup.
All the changes i made in the tent last week are:
06-02:
- Shut down carbon vent
- Added rotation fan inside
- Added small front-fan for clean airflow
07-02:
- Added humidifier (setting 55%)
- Dropped HPS 600W about 15 cm's to 110 cm height
08-02:
- Humidifier setting 60%
09-02:
- Dropped HPS 600W about 20 cm's to 90 cm's height
10-02:
- Front fan on 2 instead of 1
11-02:
- No changes because all is stable
12-02:
- Placed humidifier at the back instead of the side of plants
- Dropped HPS 600W 15 cm's again to 75 cm's height
- Moved the inside fan more to the top-back of the tent (more facing downwards)
- Opened up a vent-hole in the top of the tent for a little warmth release
From the moment i turned off my carbon vent last week the sprouts started flourishing, especially when i added the humidifier. All the changes, noting, and looking at them how they pose, reading blogs and learning have brought me to the point that i think i stabelized it. Allthough i am going to turn on the carbon vent sooner or later (i might do this tomorrow) i need to pay attention again because i'm predicting it will drain the humidifier in a higher speed and that means i have to refill approx. 15 liters in 2 days? The tank is 5.5 liter and at the moment i refill it every evening, so thats already 11 liters in 2 days. I'm really expecting it to increase significantly i ill keep my notebook ready. :p
I'm also a bit worries it will be so warm in my tent because the outside temperature is pretty cold, and that might also be the reason the temperature doesen't go above 28 degrees anymore.
Okay enough about the tent setup changes. Lets talk plants.
After the transplant last week to their end-pot these auto's started to grow immediately and i think they did really well this week. Since the humidifier got added to the tent, every morning the plants praise their "Hallelujah" pose which is really pleasing to watch...
**Last weeks's first time watering in the big pots:**
06-02 around 09.00:
- 750ml around the side
- 750ml around the middle area
- 750ml with nutrients spreaded around the pots
All is equally divided through 4 plants.
This week's watering and nutrients:
08-02 around 16.00:
- 750 ml around the pot
- 750 ml with nutrients
11-02 around 10.00:
- 500ml around
- 500ml around
- 500ml with nutrients
12-02:
- Sprayed Vita Race first time 4ml in 750 ml and sprayed about 15% of it on the leaves, no drups, mostly nebula.
The vita race really made the leaves shine, also within 1,5 hours all moist was took in or evaporated, Today probably again around 1600 ill water them again but ill hold the next vita race for tomorrow or something. as long as the plants shine the same i don't know if it's neccasary?
Okay, last but not least.... This week on wednesday i kinda mis-read some shit on internet and topped 3 of my 4 plants. I think it went okay, because they don't seem to stressed about it. They still flourish and hallelujah on! Still i'm pretty worried because i made the cut right next to the nodes which isen't the best thing (learning phase :p)...... The reason i topped 3 outta 4 because i wanted to see if i diden't stress the smallest one, he would out-grow the others, but that does absolutely not seem to be the case.
Also i think it's a great way to learn by not stressing one plant to see the differences, i want this first grow not to be about end results but more about learning and developing my own personal experience and point of view.
Oh PS, i also drilled all the holes to prepare for LST, but i think they were kinda to small on 10-02 when i drilled it. I'm going to watch the recovery from the topped plants closely coming week and maybe start with LST.
Stay tuned while this noob messes around with Auto Critical Orange Punch of Dutch Passion.

Likes
6
Share


@eldruida_lamota
Follow
Acabamos la séptima semana de floración de las Original de GrowBarato familia, y no podéis imaginaros lo bien que huelen.
Tienen un buen color, se ven sanas, y van progresando adecuadamente la flor va poco a poco engordando y tirando bien de tricomas.
Creo que seguiré abonando una semana más , ya iremos viendo estos días que hago pero si creo que una semana más es necesario.
Agrobeta:
https://www.agrobeta.com/agrobetatiendaonline/36-abonos-canamo
Mars hydro:
Code discount: EL420
https://www.mars-hydro.com/
Las maximas de temperatura no superan los 26 grados y las mínimas no bajan 20, así que no me puedo quejar.
Los niveles de humedad también son los correctos van entre 45%/55% de humedad relativa.
Por supuesto el Ph lo estamos dejando alrededor de 6.
Hasta aquí es todo, buenos humos 💨💨💨.
