


Likes
Comments
Share

@burnout
Follow
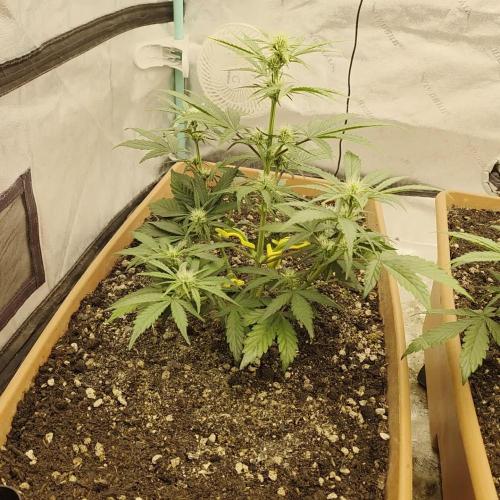
Day 28. Started seeing stigmas on the plant on the left on day 24, now seeing flowering on the plant on the right and just starting on the plant in the middle. The middle plant sprouted first, the other two came up a few days later. Hoping to see some good stretch soon! Took about three days for the reservoirs to go dry last week. Added top dress along with rock phosphate and top watered each box with one gallon of water including the ferment, recharge, and build a bloom. Added another gallon of water to reservoirs today.

Likes
15
Share


@GardenTroll
Follow
Started training the main stems towards the corners. Pulled the runt and actually wanted to pull the second runt, but the roots of the two left plants are tangled and I didn't want to damage the healthy plant. Started lst with pipe cleaners

Likes
4
Share


@LittleBigTrees
Follow
So we're in week 3 veg , they've mostly outgrown their mutated leaves now and looking strong.


Likes
49
Share


@Roberts
Follow
She has a citrus smell with earthy tones. She has grown well in the solo cup. She is on ph water and will get harvested next update. Thank you Medic Grow, and Zamnesia seeds. 🤜🏻🤛🏻🌱❄️
Thank you grow diaries community for the 👇likes👇, follows, comments, and subscriptions on my YouTube channel👇.
❄️🌱🍻 Happy Growing 🌱🌱🌱
https://youtube.com/channel/UCAhN7yRzWLpcaRHhMIQ7X4g
Likes
45
Share

@Ultraviolet
Follow
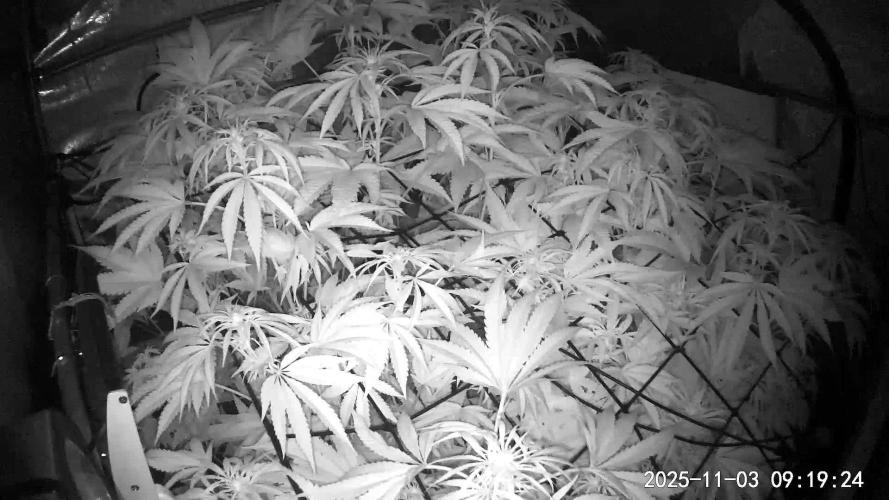
New week. 55-65 DLi. Been smoking some Pakistani Landrace this week, must say, its exceptional.
The plant shifts its energy entirely from vegetative growth to flower production. Small blemishes are creeping in, but expected, holding up remarkably well given the circumstances.
A high CEC acts as a nutrient "storehouse", preventing essential cations from being washed away by water (leaching) and making them available for gradual plant uptake. Soils with high CEC can store larger quantities of nutrients, allowing for less frequent, potentially larger, fertilizer applications compared to low-CEC (sandy) soils which require smaller, more frequent doses. By providing a steady and dependable supply of nutrients, high-CEC soils support healthier plant growth and potentially higher crop yields. High CEC is typically associated with soils rich in clay and organic matter, which also generally have a greater water-holding capacity, benefiting crops during dry periods.
While high-buffer soils require larger amounts of amendments (like lime) to change their pH initially, they need to be limed or amended less frequently, simplifying long-term management. High CEC and buffering capacity work together to create a stable, nutrient-rich, and resilient soil environment that is highly conducive to healthy plant growth.
Likes
50
Share


@AsNoriu
Follow
Day 43. Light is on max output, heat enormous and they RUN !!!! thought intensity will stop them a bit , but i think i do only worse ... We have +30 heatwave in UK, i live in attic , so for 4 more days everything will be out of control.
Watered today. 6.3 phed water.
I love simple and affordable Mars Hydro products, if you can cope with heat TSL2000 can do magic in your tent !
Will update after heat wave us over. Should be in 4 days back to +20 ;)))
Day 45. They GROW !!!! Distance is insanly small, but i have 30 cm of space left, wont move light for a week, then i will try to have 20 cm at least again.
Planing last top up, need two more waterings before it, so it should be on last day of this or first of next week.
Thinking to take down all LST at that time, need pots to breath better, too thin fabric, they dont keep form.
Day 47. Drink every two days !!! 4 liters goes to nothing !!! Huge, still streching, tops almost rubbing TS2000, heat 30 inside, humidity 65-68 ..... will need heavy clearing again !!! Bomb getting stacked !!!
Happy Growing !!!!

Likes
8
Share

@DogDoctorOfficial
Follow
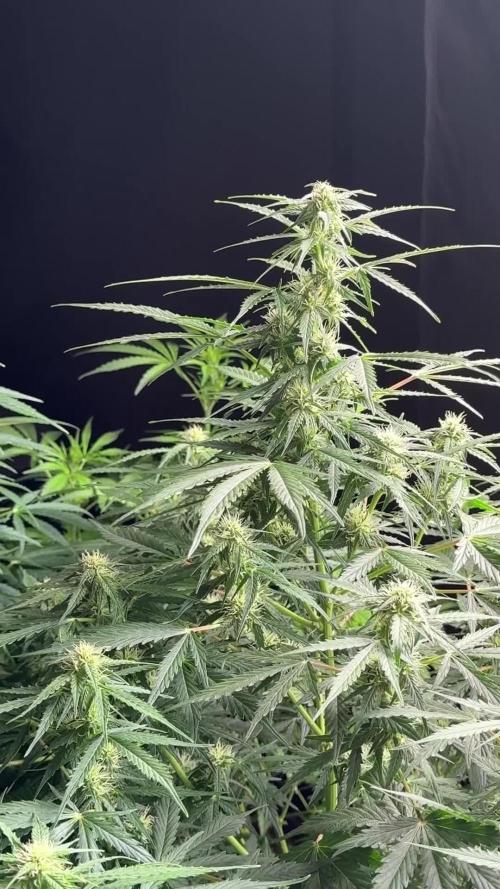
🌱 Sour Diesel — Week 10 From Seed (Week 5 Flower)
The comeback story.
⸻
🔁 Quick Recap — The “Unhappy Girl” That Didn’t Quit
This Sour Diesel started as the most challenged plant in the room.
Slow growth, stress signals early on, and clearly behind her sisters.
But plants don’t quit — they adapt.
She stayed smaller (~60 cm), but instead of stretching for size, she focused on recovery and survival. And now, in Week 5 of flower, we’re seeing something special:
👉 A full metabolic comeback
👉 Active water uptake (~1.2L/day)
👉 Healthy flower development despite early setbacks
This is why we document everything — not just perfection, but resilience.
🔬 Macro World — What We’re Really Seeing
This week, we zoom in — literally.
Macro photography shows us what the eye misses:
✨ Trichomes (The Frost Begins)
• Tiny resin glands forming on sugar leaves and calyxes
• At this stage: mostly clear → early cloudy
• Function:
• UV protection
• Pest defense
• Secondary metabolite production (terpenes, cannabinoids)
👉 This is the plant saying: “I’m protecting my flowers now.”
⸻
🌸 Calyxes (The Core of the Flower)
• The actual reproductive structure
• Each calyx = potential seed site (if pollinated)
• Now stacking and swelling slowly
👉 This is where your final yield is built.
⸻
🌿 Pistils / White Hairs
• These are stigmas, part of the female reproductive system
• Their job:
• Catch pollen
• Signal reproductive maturity
At Week 5:
• Still mostly white → plant is actively building, not finishing
• Upright and fresh → healthy hormonal signaling
👉 White pistils = growth mode
👉 Dark/orange pistils = maturity progression
⸻
🌡️ Environment & Feeding (Dialed In)
You kept it consistent — and that’s why she bounced back:
• 🌡️ Temp: 28°C
• 💧 RH: 60–65%
• ⚗️ pH: ~6.0
• ⚡ EC: 2.4
• 🌬️ CO₂: ~1000 ppm
• 🚰 Water intake: ~1.2L/day
👉 That water uptake is key — it tells us:
roots are active → metabolism is running → recovery is real
⸻
📸 Plant Structure & Expression
• Smaller frame, but balanced structure
• Bud sites forming across the plant
• No wasted energy — everything is focused
👉 She didn’t win the height race…
👉 But she’s still in the quality game
⸻
🧠 What This Plant Teaches
Not every plant is a monster.
Some are:
• Stressed early
• Slower to adapt
• Smaller in size
But with stability and patience:
👉 They recover
👉 They produce
👉 They surprise you
This is grower discipline — not chasing perfection, but supporting the process.
⸻
🎒 Official Introduction — Mr. Baggy
He’s been around… now it’s official.
Mr. Baggy is part of the team.
From garden runs to studio sessions — always present.
A reminder that even in serious work…
👉 we keep it human
👉 we keep it fun
👉 we keep it ours
⸻
🔮 What to Expect Next Week (Week 6 Flower)
• Calyx swelling will accelerate
• Trichome production will increase visibly
• Pistils may begin slight color change in some areas
• Aroma profile will start developing deeper layers
⚠️ Key focus:
• Watch EC → avoid pushing too hard now
• Maintain airflow (density is coming)
• Stay consistent — no big changes
⸻
🤝 Gratitude
From grower to growers:
Big love to:
• The GrowDiaries community
• Everyone following — OGs & new
• Supporters, challengers, silent watchers
And to the people behind the tools:
• Plagron
• Zamnesia
• The lights above us
⸻
🌱 Closing
She started as the weakest in the room.
Now she’s a reminder:
👉 Growth isn’t always fast
👉 Progress isn’t always big
👉 But resilience… always shows
📡 DELETED @ 1K Please stay tuned.we never quit https://www.youtube.com/@TheDogDoctorOfficialNEW
🙏 Thank you for your patience and continued support.
FOR DISCOUNT CODES AND MORE JUST FOLLOW THE LINK https://website.beacons.ai/dogdoctorofficial
📲 Don’t forget to Subscribe and follow me on Instagram and YouTube @DogDoctorOfficial for exclusive content, real-time updates, and behind-the-scenes magic. We’ve got so much more coming, including transplanting and all the amazing techniques that go along with it. You won’t want to miss it.
GrowDiaries Journal: https://growdiaries.com/grower/dogdoctorofficial
Instagram: https://www.instagram.com/dogdoctorofficial/
YouTube: https://www.youtube.com/@dogdoctorofficial Deleted by Youtube
Vimeo : https://vimeo.com/dogdoctorofficial Under construction stay tuned ⸻
Explore the Gear that Powers My Grow
If you’re curious about the tech I’m using, check out these links:
🔆 Lighting & Environmental Control
• Future of Grow — Advanced LED lighting technology
https://www.futureofgrow.com/
DISCOUNT CODE: DOG20
• Lumiflora — Under-canopy LED lighting
https://lumiflorade.com/
• TrollMaster — Environmental controllers and automation gear (past collaboration)
⸻
Genetics
• Zamnesia Seeds — Genetics used in this project
https://www.zamnesia.com/
⸻
🌱 Soil, Substrates, Boosters & Root Support
• Plagron — Substrates, bio mixes, and supportive products
https://plagron.com/en/
⸻
🎒 Storage, Curing & Preservation
• Grove Bags — Curing and storage solutions
https://grovebags.com/
⸻
📸 Photography Equipment & Tools
(Not sponsors, but part of my creative toolkit)
• Sony A6700
• Sony full-frame macro lens + few more
• Stacking photography workflow - learning
• iPhone (for behind-the-scenes shots)
We’ve got much more coming as we move through the grow cycles. Trust me, you won’t want to miss the next steps, let’s push the boundaries of indoor horticulture together!
As always, this is shared for educational purposes, aiming to spread understanding and appreciation for this plant. Let’s celebrate it responsibly and continue to learn and grow together.
With true love comes happiness. Always believe in yourself, and always do things expecting nothing and with an open heart. Be a giver, and the universe will give back in ways you could never imagine.
💚 Growers love to all 💚
📸 P.S. – The Eye Behind the Lens
All photos in this diary (for now — except for the ones showing the camera, which I took with an iPhone) are taken with a Sony A6700 paired with a Sony full-frame macro lens and a few more.
Photography is part of the story — it’s how we share the fine textures, the glow, and the quiet details that words can’t always capture.
I’ve also started experimenting with photo stacking — a technique where multiple images, each taken at a slightly different focus point, are layered together to create one perfectly sharp image from front to back.
It’s not digital enhancement or AI; it’s pure photography — a way to reveal the plant’s beauty in microscopic depth, from trichome to petal.
You’ll even see a few shots of "ghost me" capturing the shots — camera, lens, setup — because every grow deserves not just to be cultivated, but documented like art.
FOR DISCOUNT CODES AND MORE JUST FOLLOW THE LINK https://website.beacons.ai/dogdoctorofficial
NEW DISCORD - Official Server Invite Link : https://discord.gg/ksjAkA5T74
Likes
6
Share


@Growers4life
Follow
Steady healthy growth ive found no spidermites so far. Very chrystaline very beautiful. Very good recovery from spidermite damage so far.very exited to see how this goes. Red diesel smells very sweet and fruity other ones smell very strong but more earthy.
Likes
6
Share


@Blangk
Follow
I have added 2 videos of the girls in addition to the photos!
I used LST and defoliation for the Cream caramel!
I am really excited :)


Likes
74
Share


@Mr_Maes
Follow
Nothing but colas on all 3 this is going to be a big harvest. Another 2 or 3 weeks max.


Likes
1
Share


@Vegetoo420
Follow
I made a defoliation on the top of the bud they started to growing fast

Likes
7
Share


@Darthblaza
Follow
So life got busy but here's the harvest pics she was and is a delicious strain I still have a mother and don't plan on getting rid of her anytime soon


Likes
53
Share

@valiotoro
Follow
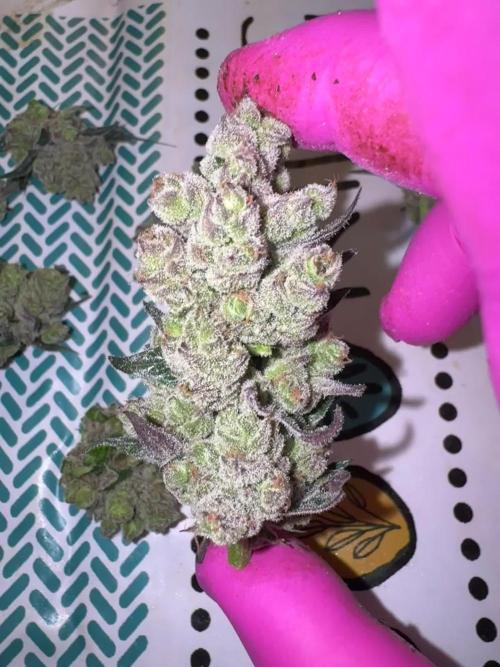
The buds were easy to trim, except they were super sticky but that’s always a good thing! I got two phenos: the first one with that garage-like aroma, and the second one, 100% Blue Cheese!

Likes
10
Share


@RFarm21
Follow
Semana 21 July - 27 July
22 July - feed day (only biobizz nutrition)
25 July - feed day bloombastic 0.5ml/l
27 July - feed day BioBizz


Likes
19
Share


@CookiesAndCake
Follow
Week 11
Day 71 (15/03/2021):
No time to take pics today ✌️
Day 72 (16/03/2021):
Looking good but more and more leaves are drying up or turning yellow. But at this point there is definitely no point in stressing the girls by removing them. Although the colours definitely look nice!
Day 73 (17/03/2021)💧:
Today will be the last watering for the girls so they have a few days to take up the last bits of moisture before harvest. I can’t believe how fast this grow went but I have definitely learned a lot from it.
Day 74 (18/03/2021):
They look so nice and colourful, definitely an interesting bunch of girls :D Can’t wait for the harvest and cure
Day 75 (19/03/2021):
No time to take pics today ✌️
Day 76 (20/03/2021):
No time to take pics today but harvest day tomorrow!!!!
Day 77 (21/03/2021):
HARVEST DAY! What a great journey it has been growing these girls. They were so resilient and only started showing symptoms of deficiency in the last few weeks. They are absolutely covered in trichomes and smell very pungent. I think they will be super hard hitters! And it still amazes me how different they all are. Echo is even completely purple! Can’t wait to trim and dry these girls and will definitely make some bubble hash from all the trichomes on the leaves too 🤤 Will follow up with a review soon! (after they’ve cured for a bit)
Likes
4
Share


@Ibgrowing
Follow
She is fully in flower now and starting to stretch.
She wasn't very thirsty, she only needed 2,4l of water this whole week. I again used 4ml of biobizz grow and bloom.
I also removed a few leaves to make sure that every budsite gets enough sunlight, other ones I just tucked away.