Likes
Comments
Share
@Caertner
Follow
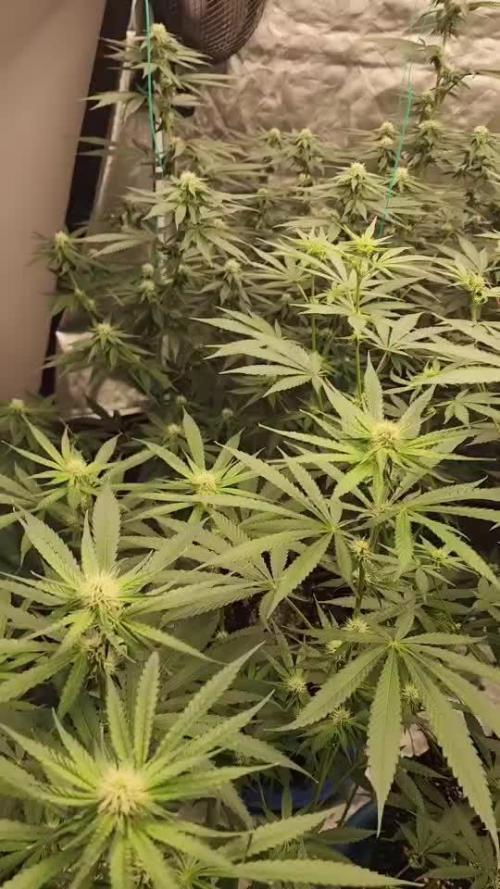
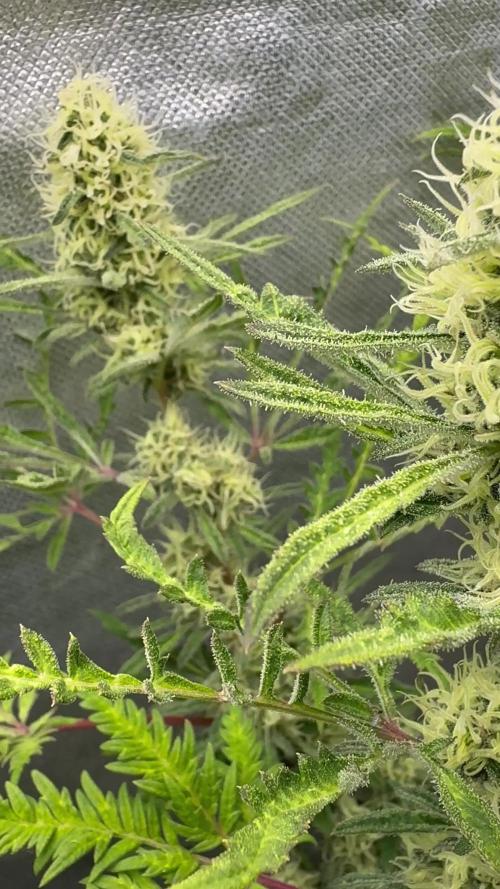
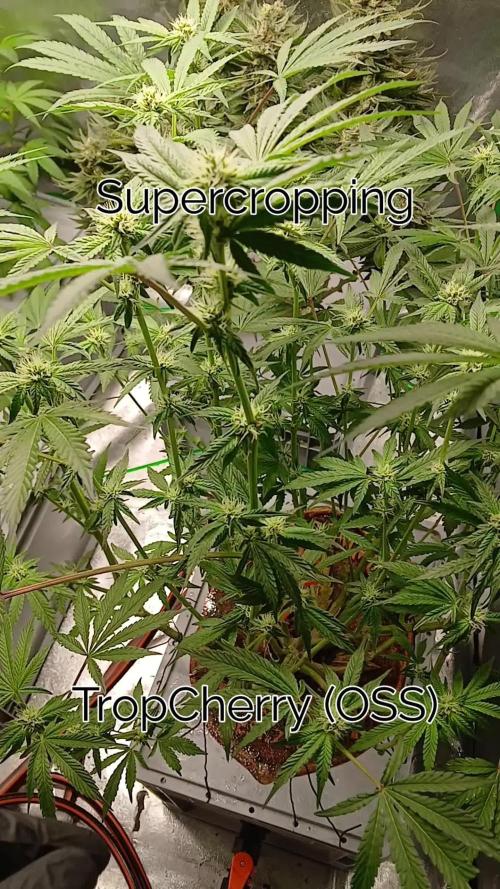
Immer ein wenig entlauben und die unteren Achseln ausgeizen (Lolipop). Ich hoffe bei dieser Dame auf etwas voller Blüten als bei der BlueSkunk. Wir werden sehen. Keine Mangelerscheinungen, keine Wachstumspausen. Die Dame sollte bald Pelz tragen. Update: Erster Schicht Puderzucker liegt auf... Wegen Nachfrage und Test wurde bei zwei Trieben mal "Supercropping" angewendet: Triebverstümmelung: Zwischen Daumen und Zeigefinger einquetschen und vorsichtig drücken oder rollen, bis die innere Struktur nachgibt, die Außenhaut aber intakt bleibt. Dann kann man den Trieb um 90 knicken, ohne ihn abzubrechen. In 7-10 Tagen ist die Knickstelle dann angeschwollen und geheilt. Trieb wird kräftiger und hat mehr Ertrag... so zumindest der Plan. Bilder folgen...
Likes
12
Share
@Mr420
Follow
Day 67 plant is stretching and very healthy. Branches are thick and strong. Day 68 nothing to report all good. Video for d68 didn't take pics. Day 69 refilled refill tank 920ppm ph'd 6.2 plant is so healthy and getting big. Day 70 plant is nice and green and healthy nothing new. Day 71 all is good. Day 72 plant will get defolited tomorrow nothing new today. Day 73 defolited plant seems to be doing great after defoliation looking and healthy and happy.
Likes
12
Share
WEEK 2 DAY 14 Since last week the babies have taken off! They didn’t have much light until yesterday when I added another 100w led and since then I’ve seen a huge difference ! They are looking super healthy the roots said fuck the pot and grew right through it I’m actually super interested in seeing how these grow up.. The 3 clones that were separate last week are now moved into one single pot to further develop the experiment. They are on the same feed as the mother with flora grow/micro/bloom and cal-mag . And In the last picture you can see my ghettos man way of cloning .. going to see which 2 out of 4 are better rooted and I will move those to a pot in about a week or so. If you guys have any questions or want to know where I got these exotic seeds message me!! Or comment below !
Likes
12
Share
@ELPIRATA
Follow
13/05/2020 Ha comenzado una nueva semana; día a día aprendiendo del proceso, analizando las condiciones del clima. +Se sigue apreciando el desarrollo lento de la #3AutoLemonKix, una diferencia notoria con sus hermanas, pero se seguira insistiendo 💪 *El día de hoy 18/05/2020 se han regado 3 plantas en macetas de 11 litros: X2 Semillas Auto Lemon Kix= 500 ml[2mlKnactive+2mlDeeperUnderground+1ml/L ATAGrowth-C] PH 6.0 / EC=1.15 Tº=22 + Riego foliar [2mlxlitroKnactive+0.5MlDeeperUnderground] X1 Semilla Auto Tutankhamon= 500 ml[2ml/LKnactive+2ml/LDeeperUnderground+1ml/L ATAGrowth-C] PH 6.0 / EC=1.15 Tº=22 + Riego foliar [2mlxlitroKnactive+0.5MlDeeperUnderground] *El día de hoy se han regado 1 planta en macetas de 7 litros: X1 Semillas Auto Lemon Kix = 250ml [2mlKnactive+2mlDeeperUnderground+1ml/L ATAGrowth-C] PH 6.0 / EC=1.15 Tº=22+ Riego foliar [2mlxlitroKnactive+0.5MlDeeperUnderground] (Hasta el momento se esta ocupando Intraccion Pasiva + ventilador Pinza (Temperatura Controlada) QUE LES PARECE ?
Likes
Comments
Share
This week I transplanted them from the AC Infinity Seed Starter to their 5 gal grow bag or their final pot! I like to make my own super soil out of Root Organics Formula 707, Coco Coir, Perlite, Vermiculite, and amendments. Then I placed a hole in the middle of the 5 gal grow bag, for the plant being transplanted, and placed the young seedling into the hole. Then I lightly covered around the base of the young seedling. Then I watered with 250mL of pH balanced H20! From there that's it just checking on it daily and watering as needed daily with plain pH balanced H20. Then I amended the soil with 4-4-4, 4-6-3, Blood Meal, Bone Meal, Alfalfa Meal, Kelp, and Earthworm Castings. Then I gave nutrients every other day. First General Hydroponics MaxiGrow then plain pH balanced H20 the next day. Then amended the soil as noted above. Then plain pH balanced H20 the next day. Then I would feed The Stash Blend and then plain pH balanced H20. Then the General Hydroponics MaxiGrow and then plain pH balanced H20. Then Real Growers Soil Recharge and finally plain pH balanced H20 to finish the week off. I always pH at 6.0 for nutrient solutions and 6.8 for my plain pH balanced H20. My temps for solutions were 72° and ppm was 800-850 with EC 1600-1700. I always use my oxygenated H20 that is monitored by a professional meter and so are it's levels! I have oxygenated H2O with a pump ready to go at all times! This way I can just scoop up the water and go on demand without having to worry! All and all they're growing well and gaining a ton daily!!
Likes
3
Share
Going into week 5. DIY Scrogg net made a huge difference. The girls have grown into gorgeous ladies. Very bushy. Had to perform roughly 30% defoliation today due to fan leaves covering all the important branches. Trying to get an even canopy is much harder than expected however daily changes make a big difference. Added 5ml Calmag solution to current feed & the results are looking amazing. Life is looking pretty good at this stage!! Unfortunately, the camera pictures don't agree.
Likes
2
Share
After 48h and putting the seeds on the top of my Sanlight with a black towel to get the heat, she popped out and 4 days later she came out of the soil. I really had to add heat to her because I was seeing no termination at 22c. Raising to 28c it hit the spot and the germination started. After her appearance from the soil she seems healthy and eager to grow.
Likes
15
Share
I started this week with lst to open the canopy. Also removing severl bud sights that will not be getting enough light and defoliated some as well. Next week she will be readu for flower.
Likes
25
Share
@m0use
Follow
This is it, the time is here to chop the plants. It looks like two of them could go a bit more, like a week or two, but if I do that then the other ones that are complete around 3-4 of them will be over ripe and they are already fox tailing a bit and not a huge fan of that. I have seen some clear winners in the tent for the self judged mini contest I have going on. Its going to take some time to judge them fully as I'll want a min 1month cure on some of thees strains. Found some weird growth inside the boom+ product on the last feed, dumped it out and then when removing the label for recycling it noticed there was a weird [A] under the label, I don't know what this means, the product was fine when I opened it so this was a my problem but the [A] is a mystery. Little photo and video flyby of the tent, tomorrow is chop and dry.
Likes
24
Share
Rock hard buds Miicrobialmass for the win and the new led is killer. The knobs like knots grow out of the sides of the buds are something to look at wow !!! Monkey berries is in flushing mode , slurricane won’t be far behind in the next week or 2 I’ll flush
Likes
28
Share
strong and healthy cannabis, buds are turning pink
Likes
9
Share
TRIPLE G by ROYAL QUEEN SEEDS WEEK #19 Overall Week #2 Flower This week she doing good and looking good dealing with the heat is been hot this summer ☀️!! Stay Growing!! ROYAL QUEEN SEEDS TRIPLE G
Likes
52
Share
Its time to prepare for war. *Blows bagpipe* FISH SH!T THE ORGANIC SOIL CONDITIONER (used twice before and always noticed instantly) Fish Shit is a living product! It provides a complex Microbial profile that includes thousands of different species of bacteria, fungi, and protozoa. This profile is closer to a natural ecosystem than anything you will find on the market. Fish Shit helps release essential oils and terpenes which contribute to the building of a myriad of flavonoids. Flavanoids play a key role in the development of the most potent aromas and tasteful flavors of a plant and its fruit. Fish Shit contains beneficial microorganisms that help plants maximize nutrient uptake. It does this by transforming nutrients into more usable forms and keeping these nutrients in the soil longer. During photosynthesis plants naturally produce exudates (chemicals that are secreted through their roots). Through these exudates, plants can attract the types of good bacteria that are beneficial to them at different points in their growing cycle. These good bacteria cover the roots and act as a barrier to the invasion of disease-causing organisms that may harm the plant. What Are Enzymes? Before we dive headfirst into how, exactly, enzymes can benefit cannabis plants, it helps to understand a little about what these microscopic proteins do. Essentially, enzymes facilitate chemical reactions. They do so by binding with a substrate and forming or breaking molecular bonds. In this context, the substrate is the molecule upon which an enzyme acts to boost the efficiency of a reaction. •substrate /sŭb′strāt″/ •noun •The material or substance on which an enzyme acts. A surface on which an organism grows or is attached. An underlying layer; a substratum. Enzymes are proteins with complex 3D shapes that feature regions called active sites. When the substrate binds to these active sites, it forms an enzyme-substrate complex that causes a chemical reaction to take place, temporarily changing the structure of the enzyme and ultimately causing molecules to either come together or break apart. As a result, molecular products are released, and the enzyme returns to its original shape. Specific enzymes are capable of binding with certain substrates, as the substrate fits into the active site more or less via a lock-and-key principle. Although, new research suggests a more accurate theory of "induced fit", in which enzymes and substrates undergo structural changes to facilitate the reaction. If you take the human body as an example, we have an abundance of enzymes in our saliva and digestive system. These molecules bind with substrates in these regions (food particles), working to break down the food we eat into usable parts before converting them to energy. Enzymes in cannabis work in a similar way to the example highlighted above. Typically, enzymes occur in soil naturally, but if your soil mix is lacking organic material, or you're growing hydroponically, then adding enzymes directly to the substrate is crucial. By using them in cannabis growing, enzymes not only help break down essential nutrients into smaller, more readily available pieces, but they also support the digestion of dead root cells, clearing a direct path for nutrients. Overall, enzymes make it easier for your cannabis plants to absorb all the elements they need to reach their full potential. For growers, a plant that reaches its full potential means a bucketload of juicy buds come harvest. This is essential if you want to reuse a pot with old systems left over like mine. Common plant enzymes include: •Cellulase •Xylanase •Beta-glucosidase •Hemicellulase •Amidase Amino acids are a crucial, yet basic unit of protein, and they contain an amino group and a carboxylic group. They play an extensive role in the gene expression process, which includes an adjustment of protein functions that facilitate messenger RNA Nitrogen, phosphorus, and potassium are the three main pillars of nutrient solutions and fertilizers, but there are countless other nutrients that your cannabis plants need to produce the best possible harvest. Amino acids are one of them. You may have noticed that amino acids get a lot of attention from bodybuilders and other athletes. That’s because they play a key role in the synthesis of protein, which, as you probably know, is super important for sports recovery and muscle growth. Amino acids are the building blocks of protein and the foundation of both plant and animal life. But what do amino acids do for cannabis? WHY IS PROTEIN IMPORTANT FOR CANNABIS? Just like proteins are important for the human body, they are equally important for the growth and development of plants. For example, proteins help plants: •Facilitate the growth of intracellular plant structures •Promote energy generation •Stimulate metabolic processes •Facilitate the absorption and transportation of nutrients So, where do plants get these vital proteins from? Well, unlike humans, plants can’t source proteins or amino acids from other organisms. Instead, they need to create their own amino acids, and then use these to build protein. That's why gardeners, much like athletes, go wild for amino acid supplements. Amino acids help plants by… • Increasing their production of chlorophyll, which ultimately improves their ability to photosynthesize • Serving as an easily absorbable form of nitrogen • Stimulating the synthesis of key vitamins • Improving their resistance to pests and diseases • Boosting the strength of their cells Amino acids also serve as the precursors to auxins, a group of plant hormones produced in the meristems—the apex of the stems where new leaves and stems are born. Auxins play a key role in the plant, activating genes for plant growth and development by triggering a multitude of vital plant functions. In other words, they determine what its size and architecture will look like. Auxins influence the development of branches, flowers, and roots, and even help to regulate the photoperiod response of the plant. Some amino acids, like cysteine, also work together with antioxidants like glutathione to help cannabis plants deal with oxidative stress, which can be caused by high-intensity lighting, some nutrient solutions, and high levels of CO₂. Unlike humans, plants can synthesize all the amino acids they need to survive and develop properly. Unfortunately, however, amino acid synthesis is a really high-energy process, and plants may struggle to produce enough amino acids when exposed to stress. WHAT FACTORS AFFECT A PLANT’S ABILITY TO SYNTHESISE AMINO ACIDS? Any kind of stress can affect a plant’s ability to produce enough amino acids. This includes: • Drought • Temperature extremes • Poor soil health • Pests • Diseases • Poor lighting • Lack of space • Poor root health WHAT DOES ALL OF THIS MEAN FOR WEED PLANTS? If you want to push your plants to their extreme in terms of floral growth and resin production, you should look into amino acid fertilizers. By making amino acids readily available to your plants, they’ll be able to use crucial energy to grow and bloom, rather than focusing on synthesizing amino acids themselves. Game of Inches, this is another Plants can absorb amino acids via their roots and leaves. They can also benefit from amino acids during both their vegetative and flowering phases. The fastest way for plants to absorb amino acids is via their leaves. The foliar application of amino acids is believed to improve the transportation of nutrients, increase transpiration, and boost photosynthesis. Hence, I recommend feeding your plants with foliar amino acid fertilizers. When doing so, however, carefully measure the amount of fertilizer you use, as—like with any nutrient—overfeeding can damage your plants. FOLIAR FEED AND SOIL SOAK • 1 crushed queen anne carrot • Add 2 tbsp of NPK Raw powdered water-soluble cane molasses • 20ml h2o2 • 1 crushed radish • 0.25 tsp NPK Enzymes • 0.25 tsp NPK Amino Acids • 50ml coconut water ( nature's own amniotic fluid packed with amino, enzymes ) + The sound of songbirds. Onto the predators 1250 -Green Lacewings Lacewings are extremely voracious predatory insects that feed on several pests. In adulthood, it feeds on pollen and nectar. In the larval stage, it feeds on aphids, thrips, and mealybugs at all stages of growth. It can also attack spider mites in moderate quantities. It is initially an aphid predator, but very effectively controls thrips and mealybugs infestations. It is so voracious that in the absence of prey, it will feed on its congeners. Lacewings are cannibalistic if there is no food available for them. It is therefore important to introduce them into an infestation situation, and not just preventively. •congener /kŏn′jə-nər/ •noun •A member of the same kind, class, or group. •An organism belonging to the same taxonomic genus as another organism. •A thing of the same kind as. or nearly allied to, another; specifically, in botany and zoology, a plant or an animal belonging to the same genus as another or to one nearly allied. Ideal temperature 20°C – 26°C Ideal humidity 60% – 70% Predatory stage life cycle 21 days Introduction rate 4 weeks Storage Refrigerator Use Immediately Are there any specific instructions on how to use this predator? Lacewings are available on small paper cards that you can hang to plant stems. On the cards are dozens of eggs ready to hatch. There are also sterile eggs they can feed on once they have hatched before they are ready to disperse in the foliage. It is important to use them quickly upon receipt to avoid cannibalism. If you don't use them right away, you can store the cards in the refrigerator for 24 to 48 hours to prevent the eggs from hatching too quickly. Avoid storing them for longer than this or you risk losing eggs. 1250 eggs are divided into 7.5 cards, 2500 eggs on 15 cards, and 5000 on 30 cards. The application rate is one card per square meter of growing surface. Is this predator best used for preventive or curative treatments? Lacewings are used as a curative solution. Anything else I should know? Lacewing eggs hatch approximately 24-72 hours after the cards are exposed to room temperature. When they emerge, the lacewings are just 1.5-2 mm long. They are very small so they are difficult to see. Once hatched, they will stay on the cards for a few hours and then disperse in the foliage. You quickly lose sight of them if you have not witnessed the hatching. They then live in the foliage for about 3 weeks. Often, you will see them towards the end of their larval cycle. After feeding for 3 weeks, they will triple and even quadruple in size. At that point, they are easier to see. But they remain very discreet insects, it is not abnormal not to see them. Egg carcasses left behind on the cards do not disappear after the hatching has happened. It's normal to see eggs still on the cards. Visually it is very similar before and after hatching. Also, on the boxes, there are sterile ephestia eggs which are used to feed the lacewings once hatched. Not all lacewing eggs are viable either. Only a certain percentage of lacewing eggs will hatch. Once hatched, the eggs are white. You can observe this using a magnifying glass. With, 5000 Stratiolaelaps Scimitus It is used to prevent or control thrips pupae, fungus gnats larvae, and root mealybugs in the soil. It can also be used for red mites in bird farms or hen houses. The adult is about 1 mm long and is medium brown with a beige triangle on its back. Another fun fact about them is they can survive without prey. They can eat algae and plant debris. This is why they can reproduce and stay in plants for long periods. Ideal temperature 15°C – 23°C Predatory stage life cycle 18 days Introduction rate 2 weeks Storage Room temperature Use Within one week Are there any specific instructions on how to use this predator? Sprinkle directly on the growing media. They can live in all types of substrates like potting soil, coconut fiber, rock wool, cedar mulch, etc. Stratiolaelaps establish easily so they are permanently fighting pests. One introduction is generally enough unless you have an infestation. In this case, introduce them at least twice at a 2-week interval for best results. If you grow your plants in a 100% mineral substrate, it will have to be released more often since there is less organic matter than in traditional soil. Do I need to take any specific precautions? Stratiolaelaps breed in the top layer of the soil. So it is important not to disturb them in the first days following their introduction. They don't like temperatures below 8 ° C. So be sure not to introduce them in a water-saturated or cold environment. Release them 24-48 hours after your last watering. They are very sensitive to chemical acaricides and diatomaceous earth. These methods are incompatible with their use.
Likes
14
Share
@Fre_84
Follow
The three plants are doing well. Fat Banana with topping has recovered strongly and continues to grow. Fat Banana without topping is unstoppable. A little defoliation applied. Northern Light is now a bonsai! :D Northern Light - Bloom status - 24/25 cm 08/17 * 08/21 30 cm * 08/24 36,5 cm * 08/27 40 cm Fat Banana with Topping - Bloom status: 15 cm 08/17 * 08/21 - 22 cm * 08/24 27,5 cm * 08/27 32 cm Fat Banana no topping Bloom status: 20 cm 08/17 * 08/21 - 30 cm * 08/24 - 35,5 cm (small defoliation) * 08/27 40,5 cm
Likes
6
Share
Estamos en la última semana para dos de las cuatro variedades, así que a partir de este momento, eliminamos Bio Flores. Añadiremos al bidón de riego Canna Flush, que nos va a ayudar a lavar bien nuestras raíces, eliminando restos de sales y nutrientes. Buscamos que las plantas gasten sus reservas de las hojas, que poco a poco veremos como pierden verdor, eliminando clorofila, sobre todo las más bajas. Canna Flush - 20ml por cada 10 litros de agua. Bajamos la potencia de nuestros balastros a 600w.
Likes
10
Share
@Do_it_Dan
Follow
Really nice plant to grow the high is nice and mellow, if I was to do this strainbagain I'd try go for the photoperiod to give her more potential but over all great grow and fantastic jar appeal.
Likes
4
Share
Hola a todos! Ya se acerca el final de este diario, y por las dudas esta semana fue la última en regar con flora booster, Regue con 2ml x litro de agua. De un día al otro han aparecido unas moscas muy pequeñas que leyendo un poco se tratan de pulgones, en la gran mayoría de cogollos estaban pegados .He quitado a la gran mayoría, y para prevenir que se sigan expandiendo prepare un remedio casero con jabón blanco, y realice una aplicación en toda la planta,(al menos lo que note es que no han aparecido más, pero a la planta les quedaron las hojas un poco blancas).
Likes
10
Share
@420pete
Follow
Chop day. Everything is looking and smelling incredible. The range of smells I've got so far are: floral, grape, blueberry, gas, burnt rubber, tangerine, funk. Everything appeared fully mature beside the Cambodian x Meat Breath and Pak Man so decided this was the best time to cut them down.
Likes
44
Share
@rudiak
Follow
Well not alot to report this week guys. The gals have been responding well to the 600w, the vertical height has stopped and we are just making some fat juicy buds. All the colas are really starting to develop. The very first few pistols are turning orange. Guessing we have around 3 weeks to go. The microscope is out and ready but trichomes still all glass like. Working on getting a camera with a good zoom hopefully I get one in time if not will be able to upload trichome pictures in future grows. Have been keeping the feeds at 2.7ml this week and will be 2.2ml next week until the flush period. I will upload the complete feed schedule I have done with these plants on the harvest week upload. Can see the leaves showing signs of deficiencies still but guess this is good at this stage and makes sense with the tapering off of nutes. Noticed the cool air was condensing on the intake tube and that is the reason our back right plant has a few burnt leaves etc, drops of water have been dropping on it and frying the leaf under the light. When you rub the flowers and smell your fingers get a lovely minty/chocolaty sweet kind of smell, its absolutely incredible and makes me want to smoke these juicy buds even more no... but good things come to those who wait they say! Enjoy the pics and as always feel free to give your comments and recommendations below, this is my first grow so mistakes have and will be made.