


Likes
Comments
Share

@LST420
Follow
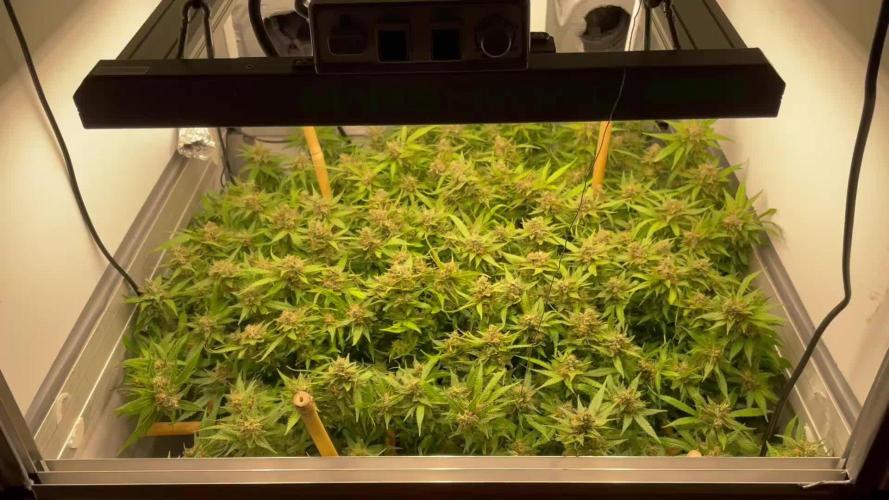
Week 21
I've removed the most recent added Biotab because it's almost time to harvest. Because I wrapped a wire around it I could easily pull it out, see photo.
I might've removed it earlier because common practice says it's better not to have excess Nitrogen in the late stage of flowering. But I like to experiment and also hope that the healthier the plant is the more resilient it is to heat stress and mold.
Her scent is lovely a bit spicy, sweet, fruity and strawberry gum.

Likes
34
Share


@ScotlandHaze
Follow
Overall very happy with the grow. Got 24oz of very dense nugs! I also managed to get 2oz of less dense but still pretty bag-appeal, and a shit ton of trim which I made into tidy ass brownies, which have made typing this incredibly difficult😂! Both of these strains are definitely bed time strains. The Critical kush is has the usual overwhelming kush taste, however the peyote(purple nugs) have a very sweet / flowery taste and smell. Disappointed I only done 1 peyote but more than happy with the critical. Would definitely grow both these strains again!

Likes
23
Share


@pifflestikkz
Follow
Day 175
04/04/25 Friday!!
So she now enters her 24hrs dark period.
Day 176
05/04/25 Saturday
Harvest time


Likes
4
Share


@TheGreenGroomer
Follow
Day 58 of flower, and I've officially started the flush! Overall, I'm really happy with how things are looking, but I’m a bit gutted about all the larf below that isn’t getting good light. A lot of the lower growth is going to end up as cookies, but it’s a lesson learned! Next time, I’ll be more aggressive with removing small, weak branches and focusing on the main colas. I’m also planning to flip around day 40 of veg while they’re still small since this Gorilla Glue stretches like crazy once it hits flower, Excited to see how these buds ripen over the next week and the colors they bring!
Likes
28
Share


@BB_UK
Follow
Started the flush for these 2 now! They’re frosting over with so much trichromes and smells quite like citrus haze and sherbet on Aroma! Very interested to see how these buds fatten up! Stay tuned. Hopefully get some decent fades

Likes
6
Share


@Alienrdwc1
Follow
Not happy with amount of roots..so dropped b52 for 3 days and upped dosage of voodoo juice. Running ro water 780liter system. 3L A &B ec at 1.6 trying to push them this week..

Likes
15
Share


@Roope
Follow
Now at this week im have LST those loosely and just direct natural tilting now let these grow and i first think im FIM these chicas but now not sure,
Time will show what is the Final act.
And im get nutrients higher but not yet full dosege that im raise next filling but overall im fukin love these its so much easyer faster and im get exited every time i chek if all good and somethin has allways happend!
ReggeaOkkey peace out!

Processing
Likes
13
Share


@GrowGuy97
Follow
1 of the bubba kush & 2 of the gorilla zkittlez are a little behind but over all everything seems to be going good so far!
Day 10 update transplanted all the ones in smaller pots to 5 gallon pots except 1 of the bubba Kush it still needs a few more days! Everything else seems to be going great!


Likes
11
Share


@Sejnik
Follow
Nové větve hezky vyrostly. Dám jim ještě 2 týdny a potom bych rád přepnul světlo na 12/12
Na rostlinách se objevují lehké náznaky popálení živinami. Některé listy mají hnědé konečky ale opravdu jen v malé míře
D51 Pondělí:
Použil jsme LST abych udržel rostliny v jedné výšce.
Během LST mi z 50% praskla 2 větve u HazeBerry 2 ve spoji po posledním zastřižení . Jedna větev je v pořádku. Druhá po 3 dnech vypadá že přežije i když vypadala velmi špatně.
Holky dostaly 1L vody s 0,5ml/1l RQS Booster Bigger Flowers.
D54 Čtvrtek:
Poslední velké LST a Defoliace, kdy jsem z každé rostliny odstranil celkem 16 spodních listů
D55 Pátek:
Dostaly 1,5L vody s vypsanými živinami
Holky jsem postříkal výluhem z hmyzího trusu, který má repelentní účinky téměř na vše.


Likes
142
Share


@MadeInGermany
Follow
Hey everyone 🤗.
This week was harvested properly 😍.
All of them are harvested, except for the two Tropicanna Banana (they will be on tomorrow).
All finished crop images follow little by little as soon as they have dried enough and have got their actual bud structure 😃.
I wish you much fun with the diary, stay healthy Ges and let it grow 🌱


Likes
12
Share


@L_Choppa
Follow
This girl is about finished here sister came out to about a 1 1/2 ounce hopefully this big girl is more overall good experience I don't have to say I will be doing these again because I already have 2nd and 3rd generation clones who am I tho I. Just a newbie 😌 lol

Likes
30
Share

@DogDoctorOfficial
Follow
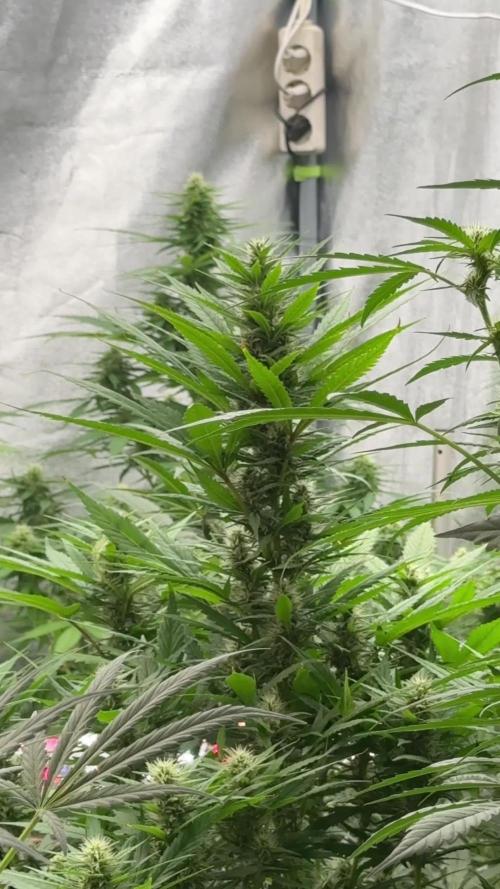
🌸 WEEK 5 FLOWER – “Aiming for the Moon”
Hello, beautiful people! It’s been a busy stretch, but I’m finally back with another exciting update from our Permanent Marker girls — and wow, what a sight they are right now.
Both phenos are truly stunning in their own unique ways.
• Pheno #1 is aiming for the moon — nearly 2 meters tall, stretching with grace, and starting to show her first flashes of color. The top buds are swelling, pistils glowing bright white, and the early hues are giving us a glimpse of what’s to come.
• Pheno #2 stays more compact around 120 cm, with equally gorgeous bud formation — dense, balanced, and full of life.
We did a light defoliation this week to open the canopy, helping airflow and light penetration reach deeper into the structure. The goal is simple: give the photons space to dance and the air room to breathe. The results are already visible — the girls look happier, more open, and vibrant.
🌿 Environment & Feeding
Conditions are stable now that the AC is up and running (finally!). Temperatures have dropped to a comfortable range, and both phenos seem to love it. We continue with our Aptus Holland organic program, using:
• Regulator
• Top Booster
• CalMag Boost
The pellets in the soil are still doing their silent magic, slowly releasing nutrients and keeping the system balanced.
💫 Bud Development
This week, trichomes are starting to form more visibly, and the white hairs are shining under the lights. The buds are stacking up beautifully, especially on Pheno #1 — her size and structure promise something truly special. The aroma is beginning to intensify, that sweet, deep tone of the Permanent Marker genetics revealing itself layer by layer.
🌍 A Quick Recap
From germination in the CannaKan, through the lush veg powered by Aptus nutrition, under the ThinkGrow and Future of Grow LEDs, this grow has been a journey of precision, patience, and passion. Now, at week 5 flower, we’re officially entering the heavy bloom phase — where the artistry of the genetics truly begins to express itself.
🏆 Dognabis Cup Update
The Dognabis Cup is officially in full bloom too! The welcome boxes have reached growers worldwide, and we’re seeing the first unboxings and diaries popping up — what a beautiful sight!
To all participants: good luck and have fun! Remember, the more detailed and complete your diary, the better your chances of winning. This Cup is about sharing, learning, and growing together — and I’m so proud to see it finally taking shape.
🌱 What’s Next
Next week, we’ll be looking for more color expression, denser stacking, and the early glisten of trichome frost. I’ll also be keeping a close eye on the temperature balance as the buds pack on size.
Huge thanks to everyone who follows this journey — the sponsors, the community, the growers, the dreamers, the haters, the lovers — every one of you makes this space alive.
Until next week, stay lifted and stay curious. 🌿✨
To grow is to share, to bloom is to connect — and through every cup, seed, and story, we keep the garden alive.
**THE DOGNABIS CUP OFFICIALLY STARTED** ⏰ @everyone
**The Dognabis Cup** is an independent, community-driven virtual competition designed to bring people together, celebrate and share the passion for cultivation. This competition is organized by DogDoctorOfficial and is not affiliated with any of other third-party platforms.
More than 30 contenders will have to grow with the same genetics and using one of our Aptus Pograms (Premium, Clean, Super Soil).
We can follow weekly updates
***(list will be updated all the time as more growers join)***:
🌱 **Dognabis#09P** (**P**hotoperiod)
https://growdiaries.com/diaries/285981-grow-journal-by-sadhus
🌱 **Dognabis#09A** (**A**utoflower)
https://growdiaries.com/diaries/286091-grow-journal-by-sadhus
🌱 **Dognabis #16P**
https://growdiaries.com/diaries/285519-grow-journal-by-fabisfinest
🌱 **Dognabis #017P**
https://growdiaries.com/diaries/285851-grow-journal-by-highgrower0711
🌱 **Dognabis #18P **(**P**hotoperiod)
https://growdiaries.com/diaries/265751-grow-journal-by-develgrow
🌱 **Dognabis #18A **(**A**utoflower)
https://growdiaries.com/diaries/285549-grow-journal-by-develgrow
🌱 **Dognabis #21P**
https://growdiaries.com/diaries/285531-grow-journal-by-mrs-larimar
🌱 **Dognabis#22A https://growdiaries.com/diaries/287996-grow-journal-by-daves-garden710
🌱 **Dognabis #22P https://growdiaries.com/diaries/287990-grow-journal-by-daves-garden710
🌱 **Dognabis #811A Jealousy Diesel Auto https://growdiaries.com/diaries/287216-grow-journal-by-philhsy
🌱 **Dognabis 19A https://growdiaries.com/diaries/289566-grow-journal-by-marijuanaut?lnk=2066296
***Here are some other useful links:***
*Dognabis Cup on Instagram:*
https://www.instagram.com/dognabiscup/
*Explore Aptus Premium Programs:*
https://aptus-holland.com/premium-programs/
*Explore Aptus Clean Programs:*
https://aptus-holland.com/clean-programs/
*Explore Aptus Super Soil Programs:*
https://aptus-holland.com/super-soil-programs/
Happy growing everyone 💚
⸻
📲 Don’t forget to Subscribe and follow me on Instagram and YouTube @DogDoctorOfficial for exclusive content, real-time updates, and behind-the-scenes magic. We’ve got so much more coming, including transplanting and all the amazing techniques that go along with it. You won’t want to miss it.
• GrowDiaries Journal: https://growdiaries.com/grower/dogdoctorofficial
• Instagram: https://www.instagram.com/dogdoctorofficial/
• YouTube: https://www.youtube.com/@dogdoctorofficial
⸻
Explore the Gear that Powers My Grow
If you’re curious about the tech I’m using, check out these links:
• Genetics, gear, nutrients, and more – Zamnesia: https://www.zamnesia.com/
• Environmental control & automation – TrolMaster: https://www.trolmaster.eu/
• Advanced LED lighting – Future of Grow: https://www.futureofgrow.com/
• Root and growth nutrition – Aptus Holland: https://aptus-holland.com/
• Soil & substrate excellence – PRO-MIX BX: https://www.pthorticulture.com/en-us/products/pro-mix-bx-mycorrhizae
• Curing and storage – Grove Bags: https://grovebags.com/
⸻
We’ve got much more coming as we move through the grow cycles. Trust me, you won’t want to miss the next steps, let’s push the boundaries of indoor horticulture together!
As always, this is shared for educational purposes, aiming to spread understanding and appreciation for this plant. Let’s celebrate it responsibly and continue to learn and grow together.
With true love comes happiness. Always believe in yourself, and always do things expecting nothing and with an open heart. Be a giver, and the universe will give back in ways you could never imagine.
💚 Growers love to all 💚

Likes
16
Share


@MaltaHerbman
Follow
They are more happy than before as they are in my Anesia tent 💜.
For more videos and photos pls visit my social media

Likes
12
Share


@ZzTooRightOGzZ
Follow
First feeding.
Going well so far fist day of last.
Lst going well.


Likes
49
Share


@masterofsmeagol
Follow
MAY 17th I'll water the 10th planet again tomorrow. Things are going amazing! I topped one of the blueberry cheeses and fimmed another. I'm not seeing any stress. If they seem good I'll hst some of the others. This doing ONE thing at a time helps figure out problems. It's 75 right now but it was 39 this morning.
UPDATE: IT STARTED FUCKING SNOWING TODAY. Forecast looks good and others are putting plants out. I'll hold off. They'll go to the garage soon for hardening off. Looking at other diaries I had much bigger "clones" but they always come full of problems (see last year). These plants are the healthiest ivecever grown. I'd rather have a healthy plant half the size than a clone with a bunch of issues. Tomorrow I'm planning to wash my stakes and grow bags. I'll get the palletts in position and move my cage. I also am considering either putting a small pvc cover on my cage or finding a way to attack something to the trellis system for heavy rains. If anybody has ideas I'm all ears.
5/18 DIDN'T WATER TODAY. Soil was dry but the pots were heavy. I could feel some moisture through the drain holes. I think it would've been alright either way but I'm erring on the side of caution. I'll check again later in the day. I topped one and fimmed anotger of the blueberry cheese. The purple punch is quickly catching g up to her sisters. I HAD to add a small ring around one of the purple pounce plants as it was WAAAAY lighter than the others. It's possible it could've gotten less water than the others last time due to its positioning. I'm also considering adding silica next feeding. So much left to do before they go outside. Oh and it was fucking snowing here yesterday! May 17 and it was snowing middle of the day. Morning temp wad 31 this morning so I'm staying cautious and making sure I have all my ducks I'm a row before I go outside. I'm also weighing options to either add a pvc hoop on top of my cage or look into protecting plants individually come late fall with our horrible weather. I'm leaning towards the pvc top. I think that would greatly help things.
UPDATE: Went back over at four and everything's looked great. Leaves praying to the sun. Topsoil is dry as fuck but I can still feel a little bit of moisture through the drain holes plus they have a little heft left to them. I plan on watering tomorrow and see how that goes. I wanted to add silica but I'm afraid of changing to much or raising the ph of the soil.
5/19 Found out that my scale will actually weigh the three gallon pots! I don't have an empty one to fill with dry soil to compare though. WATERED everything today. Topsoil was totally dry. Some plants had some heft to them. However I last watered on the 15th so I decided to cut back on the amount of water and see how that goes. Instead of the full 28oz powerade bottle I gave them a little over half. I tried for approx 16fl Oz per plant. Everything is looking great. Other than the little runt. I don't know whatcthecdeal is with that one bit it may get given away or culled. I also FIMed a purple punch.
UPDATE: Went back over around 11 and boy weren't the plants looking good. I'm moving my cage and sanitizing my pallets tomorrow. I sanitized my grow bags. I vleaned them with the baking soda and water and a scrub brush but since I had that problem with fusarium last year I then soaked them in a h2o2 solution for 20 mins before rinsing them off and letting them dry. I am so stoked for this season. Wondering about the pvc top and whether it's necessary 🤔. I have TONS of heavy equipment (well dad does) but the smallest thing we have is a backhoe and a bulldozer neither which I'm to inclined to use to move big plants. I thought that since the door to that garage is large enough to drive a front end loader in than if I could find a way to make my pallets mobile I could bring them in if storms are coming. I worry to much. I also got rid of anything that could gave spires on it. Ilk need to wash my plastic trellis netting and the bamboo as well but better safe than sorry.
5/20 Plants are still growing like weeds and are the ones I HST are recovering nicely. Soon they'll go out to the garage and spend their days outside in the sunshine and their nights inside the garage while I harden them off. Having trouble uploading stuff right now.
5/21 Topped two blueberry cheese and one purple punch. Plants are still doing great. We are getting close to go8ng outside in tye forever homes in smart pots ranging from 10gal to 50 gals. I still need to sanitize the pallets but this week I plan on hardening these girls off fully.
5/22 I weighed a couple of the plants and they were different. I think I got a couple 7lbs one that was 6 something and a heavier one that was 8. Looks like I've found the right amount. I plan to water tomorrow. They'll be moved in the next couple days to the garage and I'll let them fill the 3's before they go in their final homes. Plants are recovering from HST great. Still getting cold nights here. Honestly if I didn't have a major life event happen they'd be outside hardening off now
5/23 Watered everything with approximately 18oz of water. I am either going to move plants outside today to indirect sun (even though they've handled full sunlight from an open window) in the garage and keep the light going for a little longer. They need to fill their pots before they go in their forever homes. I've got some work to do but it will pay off.
EDIT: Cage has been moved to its new home. A huge pallet takes up most of it but I have littler ones that will fit in. I just haven't had a chance to disinfect these. I'm probably going overboard but I'm not fucking around with that fusarium or other any pathogens this year. I'm going to use the systemic organocide once I go outside. It's going to rain tomorrow amd might be cold but I still move the plants to the garage in the morning.
Likes
7
Share


Likes
26
Share


@DreamIT
Follow
Sponsored by:
🏡GANJA FARMER SEEDS🏡-💡VIPARSPECTRA💡-💐GREEN BUZZ LIQUIDS💐-🛠️WEDRYER🛠️
29/9 it was a tough month for me but I'm back in charge. We are almost at the end of the cycle and the flowers begin to be large and the pistils begin to color.
__________________________________________
Personal advertising (contains affiliate links)
__________________________________________
🦄 Huge collection of exquisite genetics since 2009! Anonymous shipping!
✅https: //bit.ly/Ganjafarmer
__________________________________________
Did you know that Green Buzz Liquids fertilizers are 100% vegan? A complete line of products ready to give the best to each of your plants! Visit the site and see my journals to see how they work 🦄
🤯 And with the code "dreami t" you will immediately receive a 15% discount on your purchases
✅https: //bit.ly/GreenBuzzLiquidsPro
__________________________________________
👀 Are you looking for a good lamp to start with? 👀
🌞Viparspectra has something more than the others, take a look at their site.
⏩ Use "GDVIP" for an extra discount or "DREAMIT3" for an extra 5 %% discount
👀 Search for it on Amazon
✅Amazon USA: https://amzn.to/30xSTVq
✅Amazon Canada: https://amzn.to/38udUVe
✅Viparspectra UE: bit.ly/ViparspectraUE
✅Viparspectra USA: bit.ly/ViparspectraUS
______________________________________________
🌈 Tired of blowing on your weed hoping it dries quickly? Check out the Wedryer website! You will find a well-made accessory that will help your weed dry in just 8-10 days without the annoying risk of finding mold or other annoyances! (no affiliate links)
✅https: //bit.ly/Wedryer_
______________________________________________
📷🥇Follow the best photos on Instagram 🥇📷
https://www.instagram.com/dreamit420/
Backup
https://www.instagram.com/dreamit4200/
🔻🔻Leave a comment with your opinion if you pass by here🔻🔻
🤟🦄💚 Thank you and good growth 💚🦄🤟

Likes
5
Share


@mobbly
Follow
Week 3: Since this is my first grow, I love to see how quickly the cannabis plant grows, and it's accelerating rapidly. They are thriving and healthy. This week, I used fertilizer for the first time, starting with half the amount recommended in the feeding schedule. 0,5/ml per liter.